Gestire le dimensioni delle etichette di sistema nel portale
- Iniziare
- Dispositivi
- App
-
Portale
Gruppi Panoramica del portale Categorie Profili stampante Voci del menu Sonda di temperatura Elenco di preparazione Etichette rapide Controllo del prodotto Biblioteca multimediale Scala Stampa cronologia Posizioni La posizione esegue l'override Importazione ed esportazione di massa Impostazioni Elenchi Utenti Supporto
- Accessori
- Etichette
- Riparazioni
Gli amministratori del portale possono utilizzare le dimensioni delle etichette di sistema per impostare una dimensione predefinita per le etichette nel portale .
Le dimensioni delle etichette di sistema possono essere impostate solo per i dispositivi modello X.
È necessario attivare l'impostazione del portale per le dimensioni delle etichette di sistema, vedere Impostazione delle dimensioni delle etichette di sistema .
Esistono due modi per impostare le dimensioni delle etichette di sistema:
1. Impostare più stampanti
1. Accedi al portale su www.datecodegenie.com utilizzando il browser consigliato. Consulta Quale browser Internet dovrei usare per accedere al mio portale DateCodeGenie®?
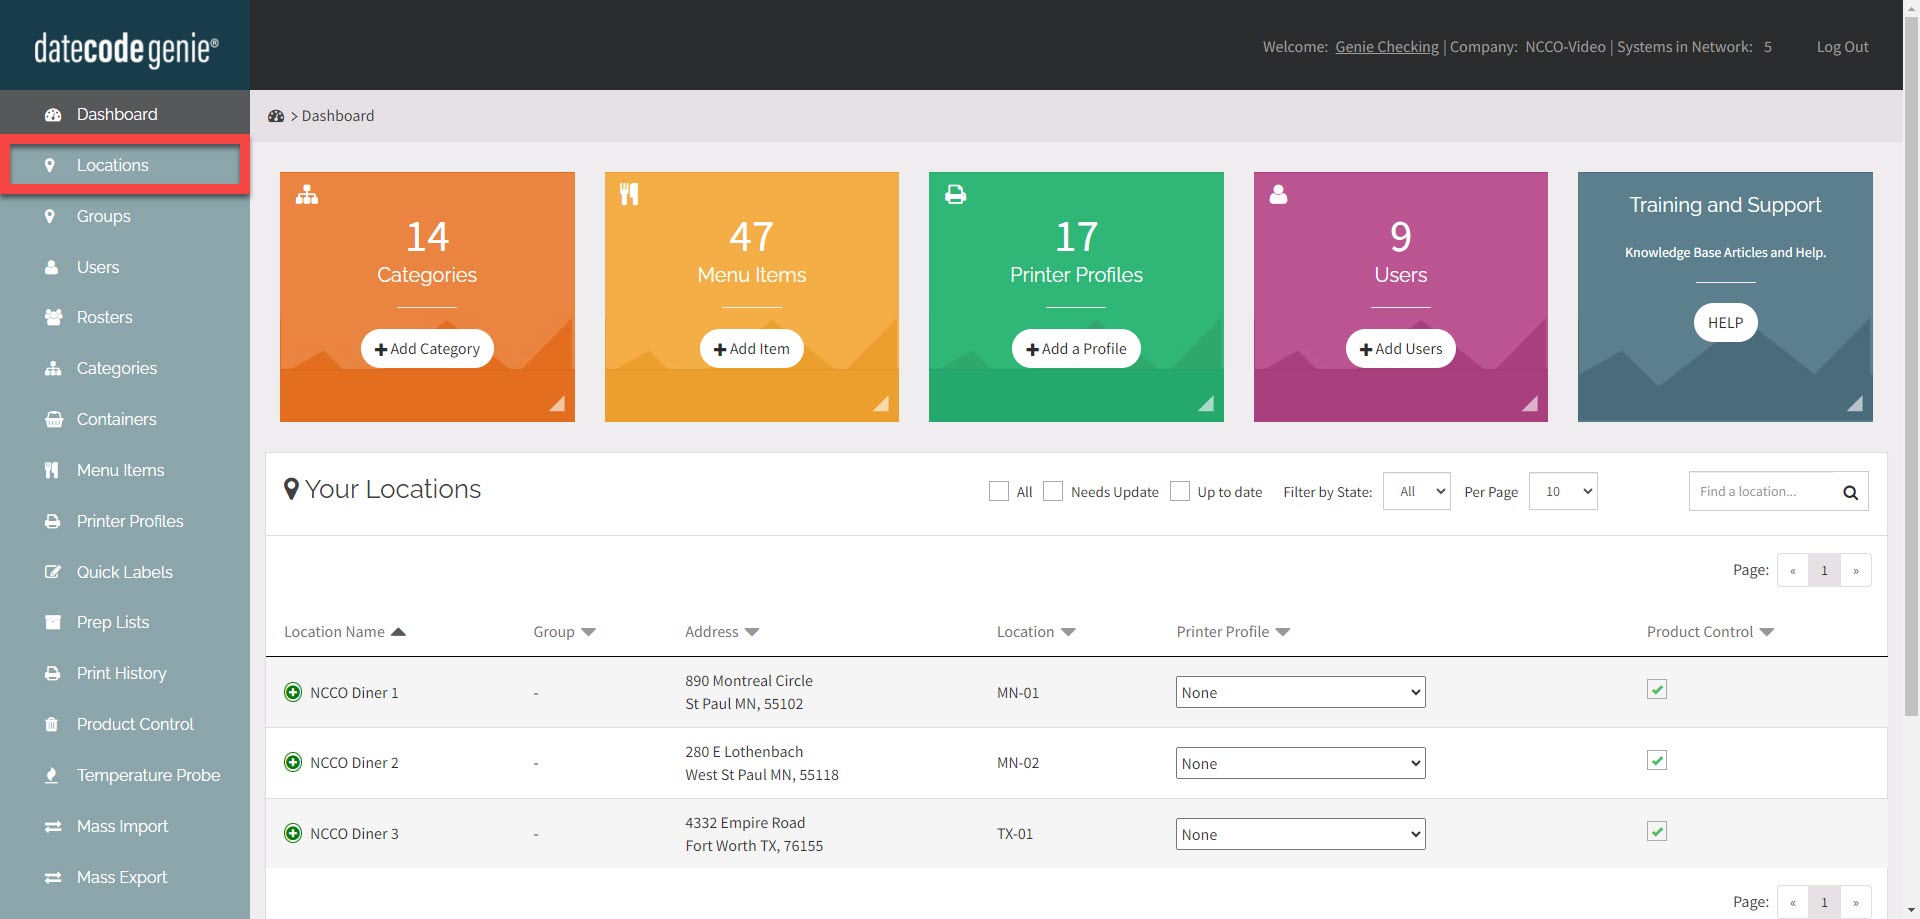
2. Fare clic su Posizioni scheda sulla barra laterale.
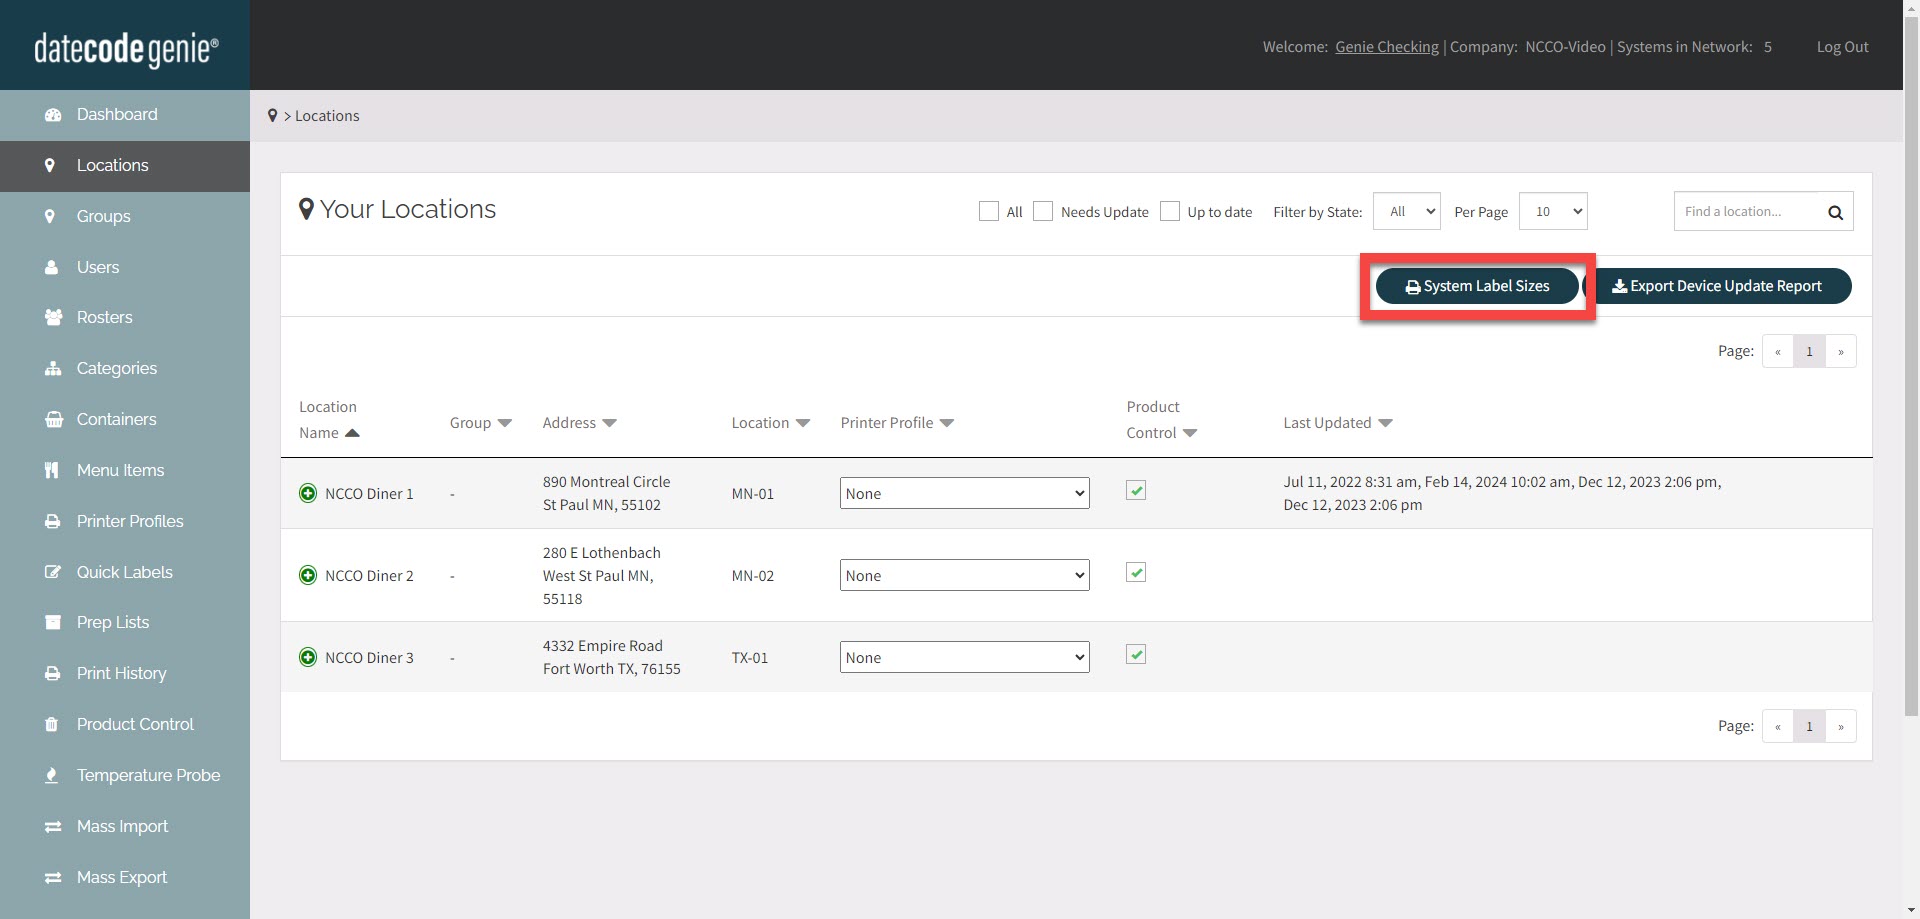
3. Fare clic sul pulsante Dimensioni etichette di sistema .
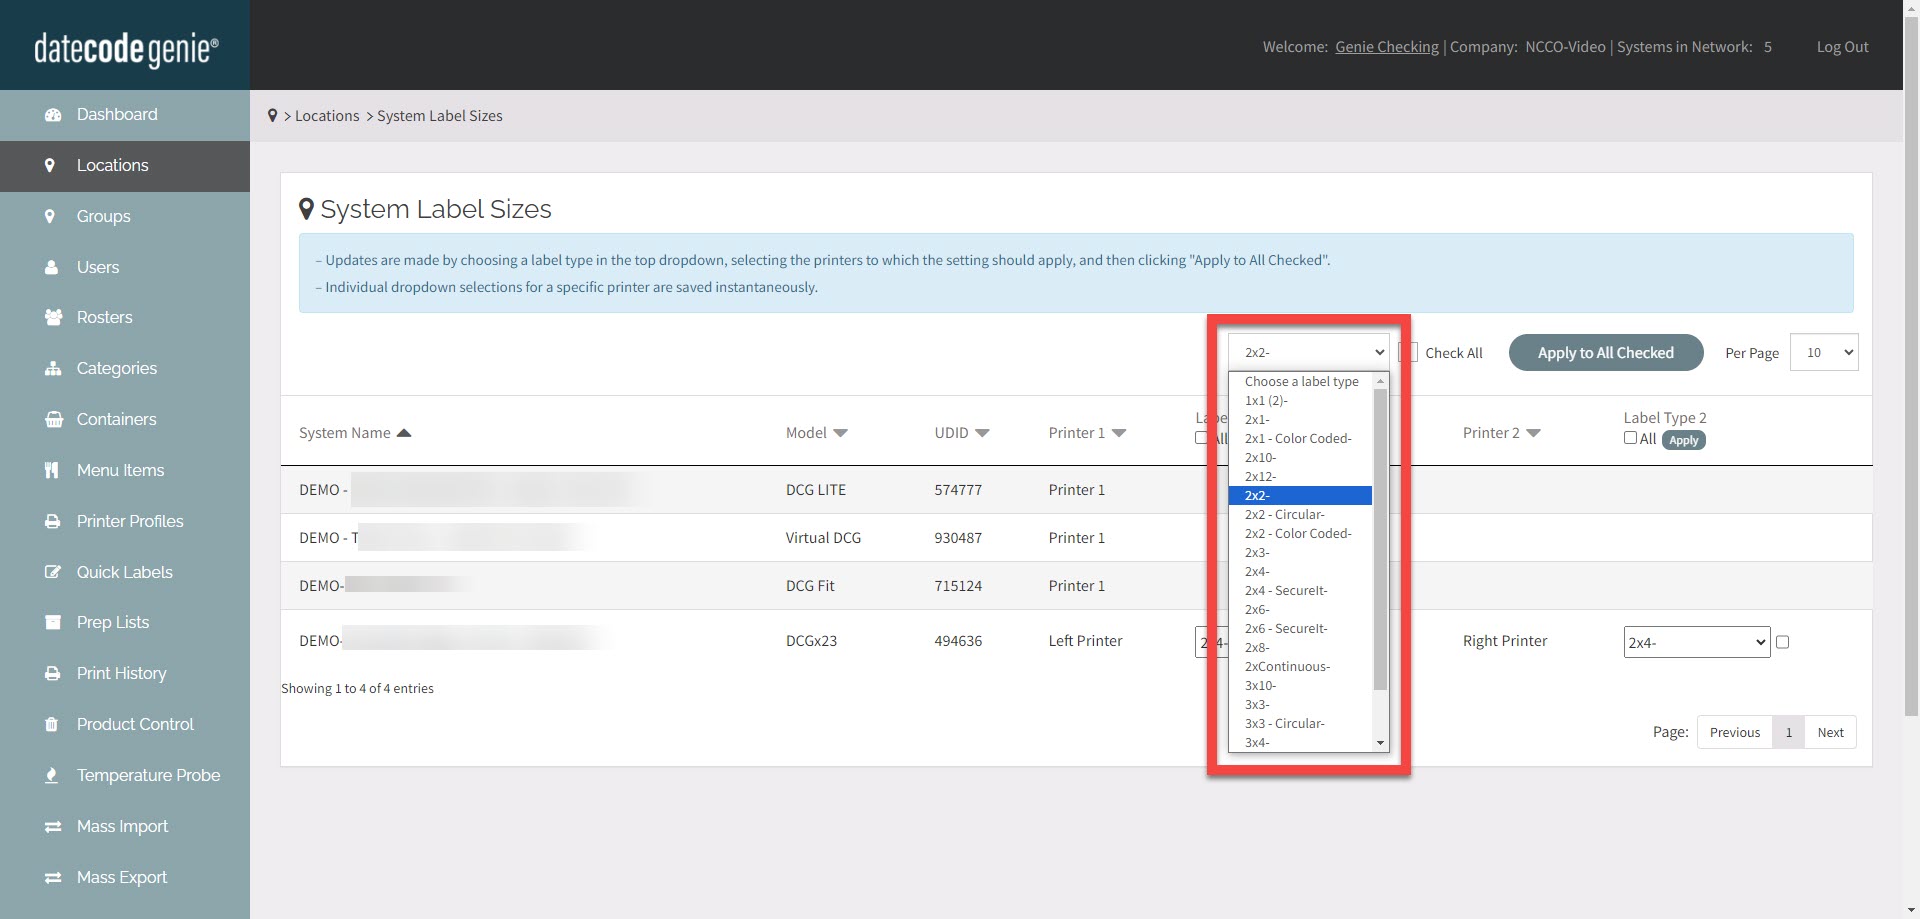
4. Selezionare il tipo di etichetta dal menu a discesa Scegli un tipo di etichetta .
5. Fare clic sulle caselle di controllo che si desidera modificare per impostare quel tipo di etichetta.
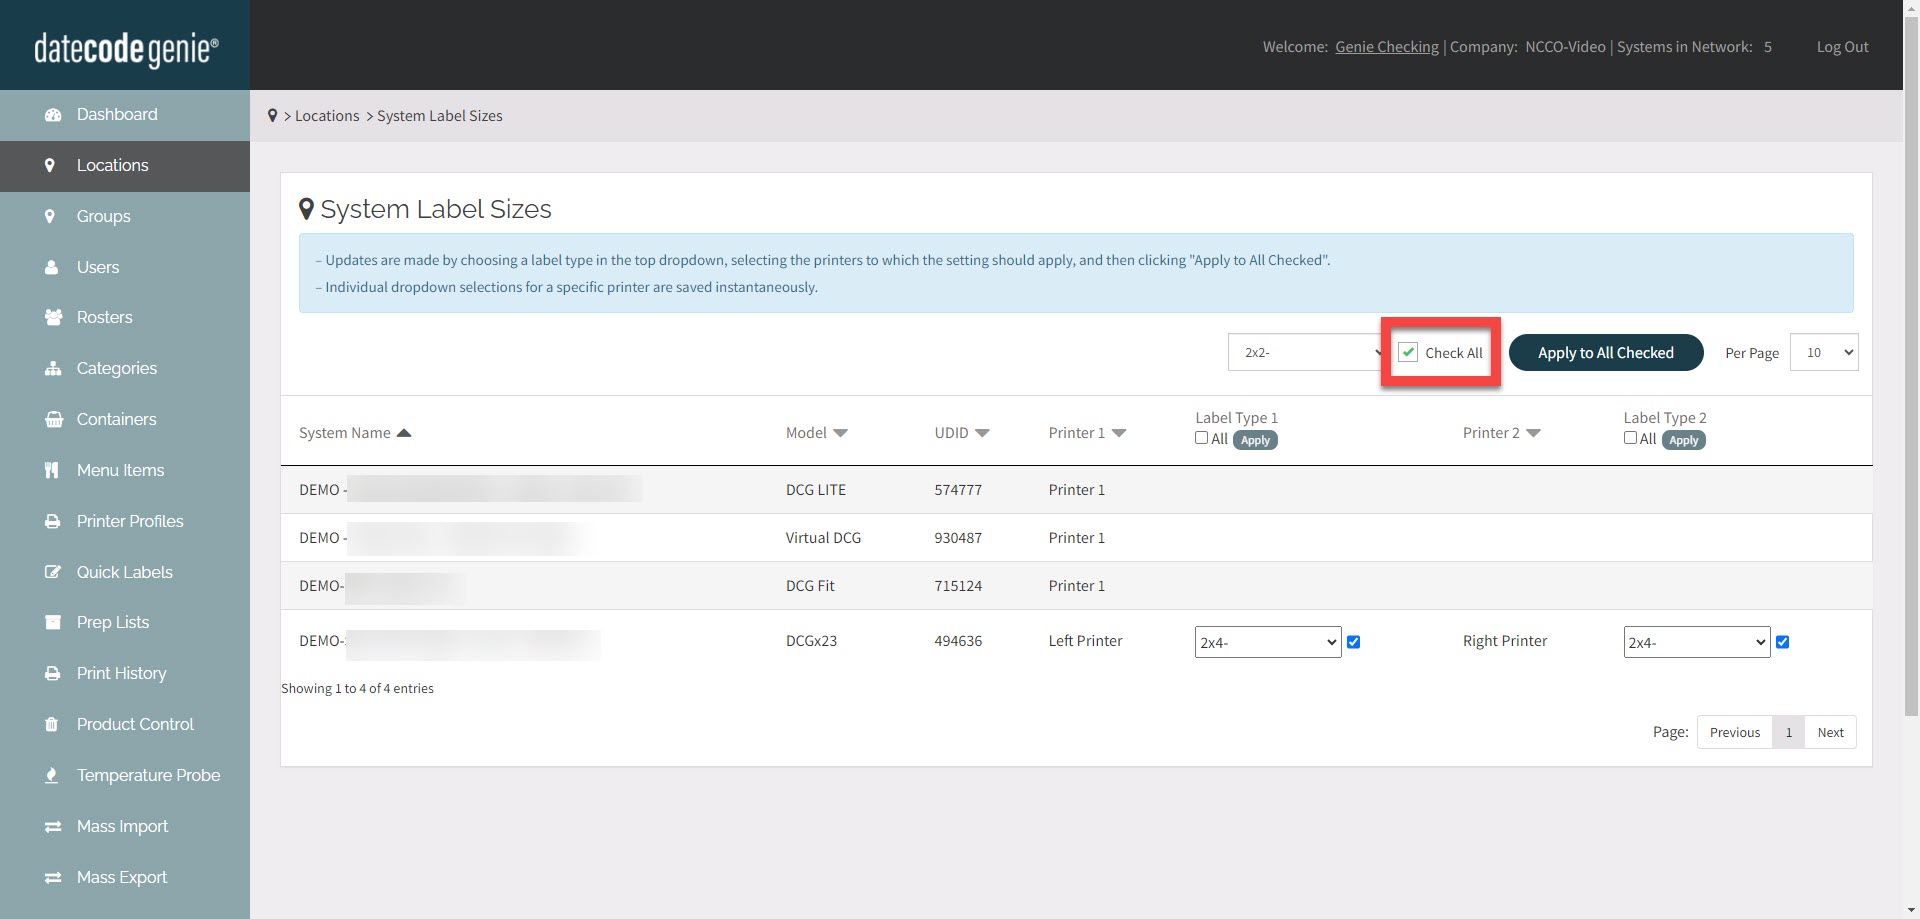
a. Fare clic sulla casella Seleziona tutto per selezionare tutte le stampanti.
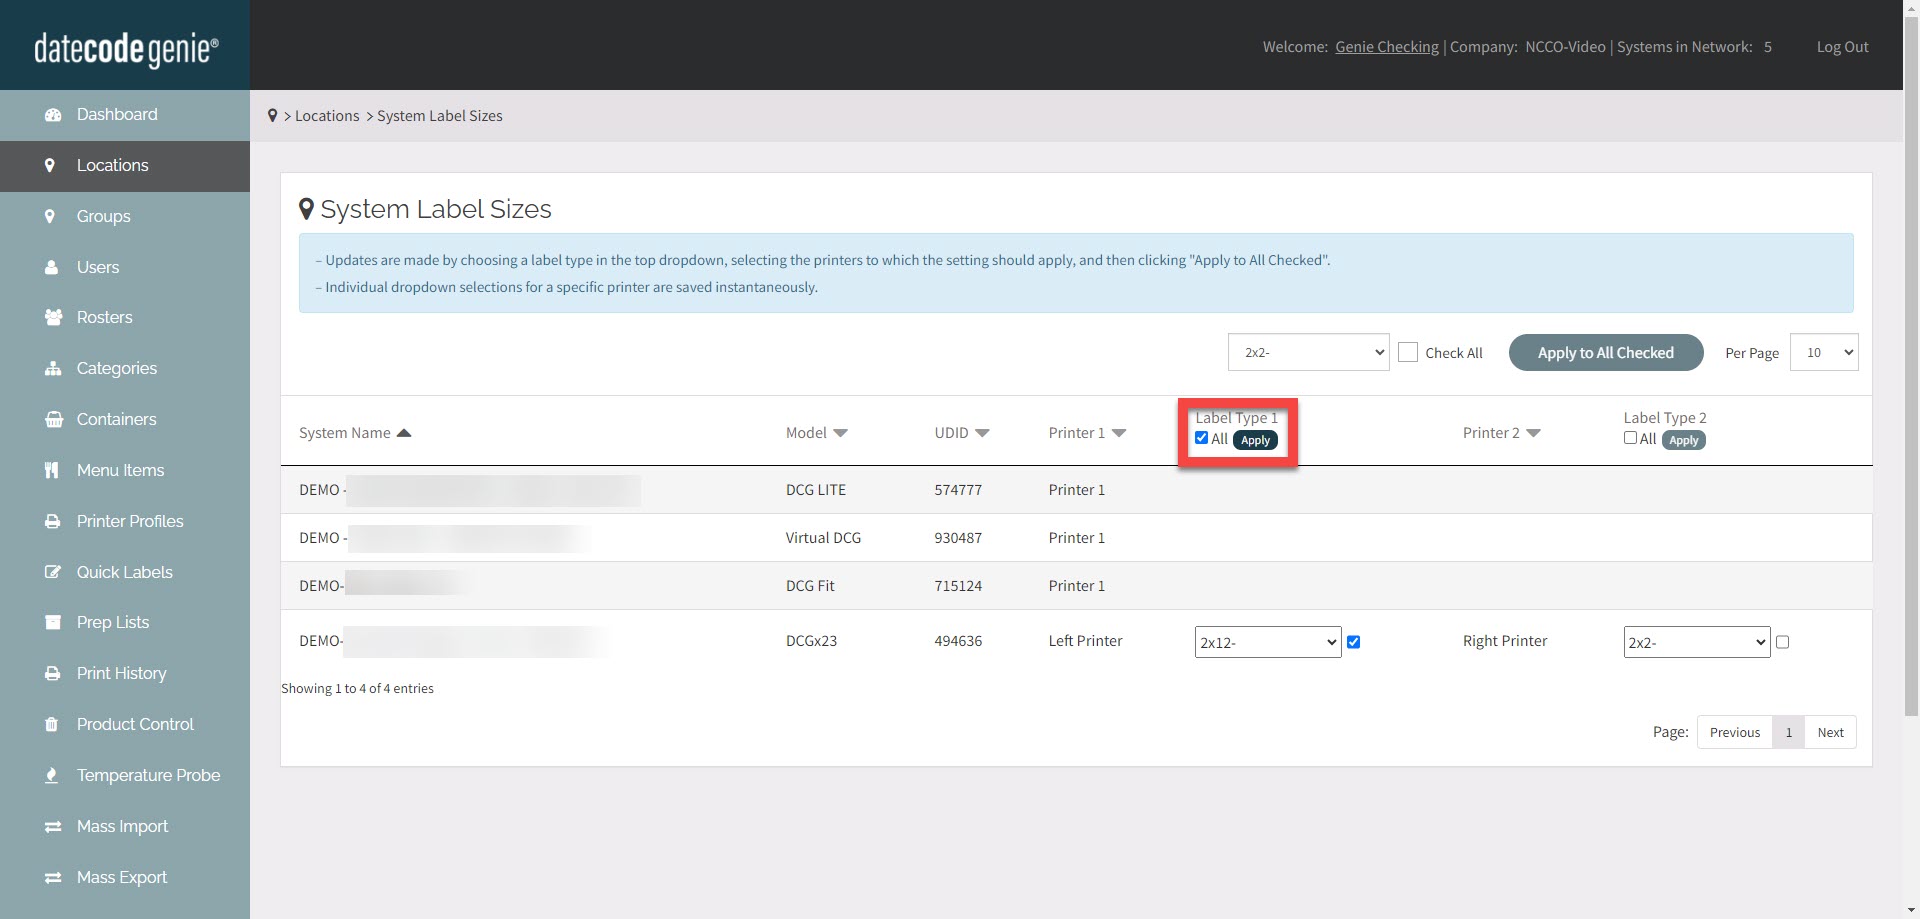
b. Fare clic sulla casella Tutto nella parte superiore della colonna per selezionare tutte le stampanti di sinistra o di destra.
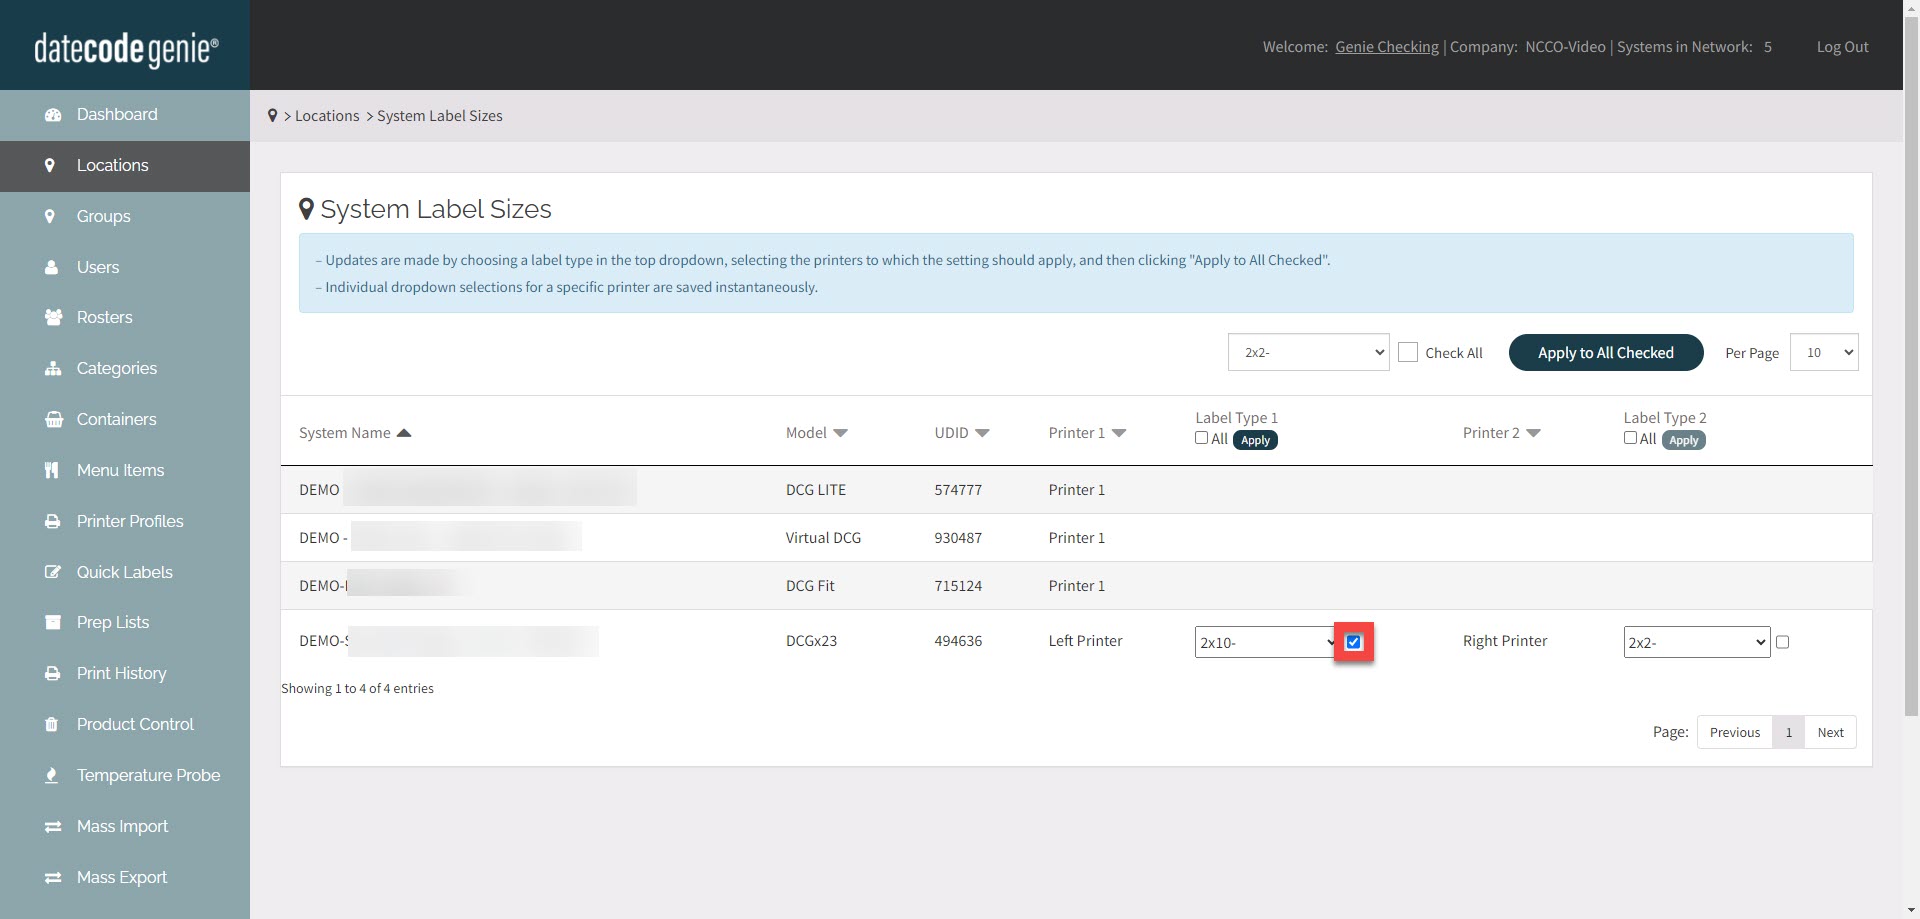
c. Fare clic sulla casella accanto a una singola stampante per selezionare le singole stampanti.
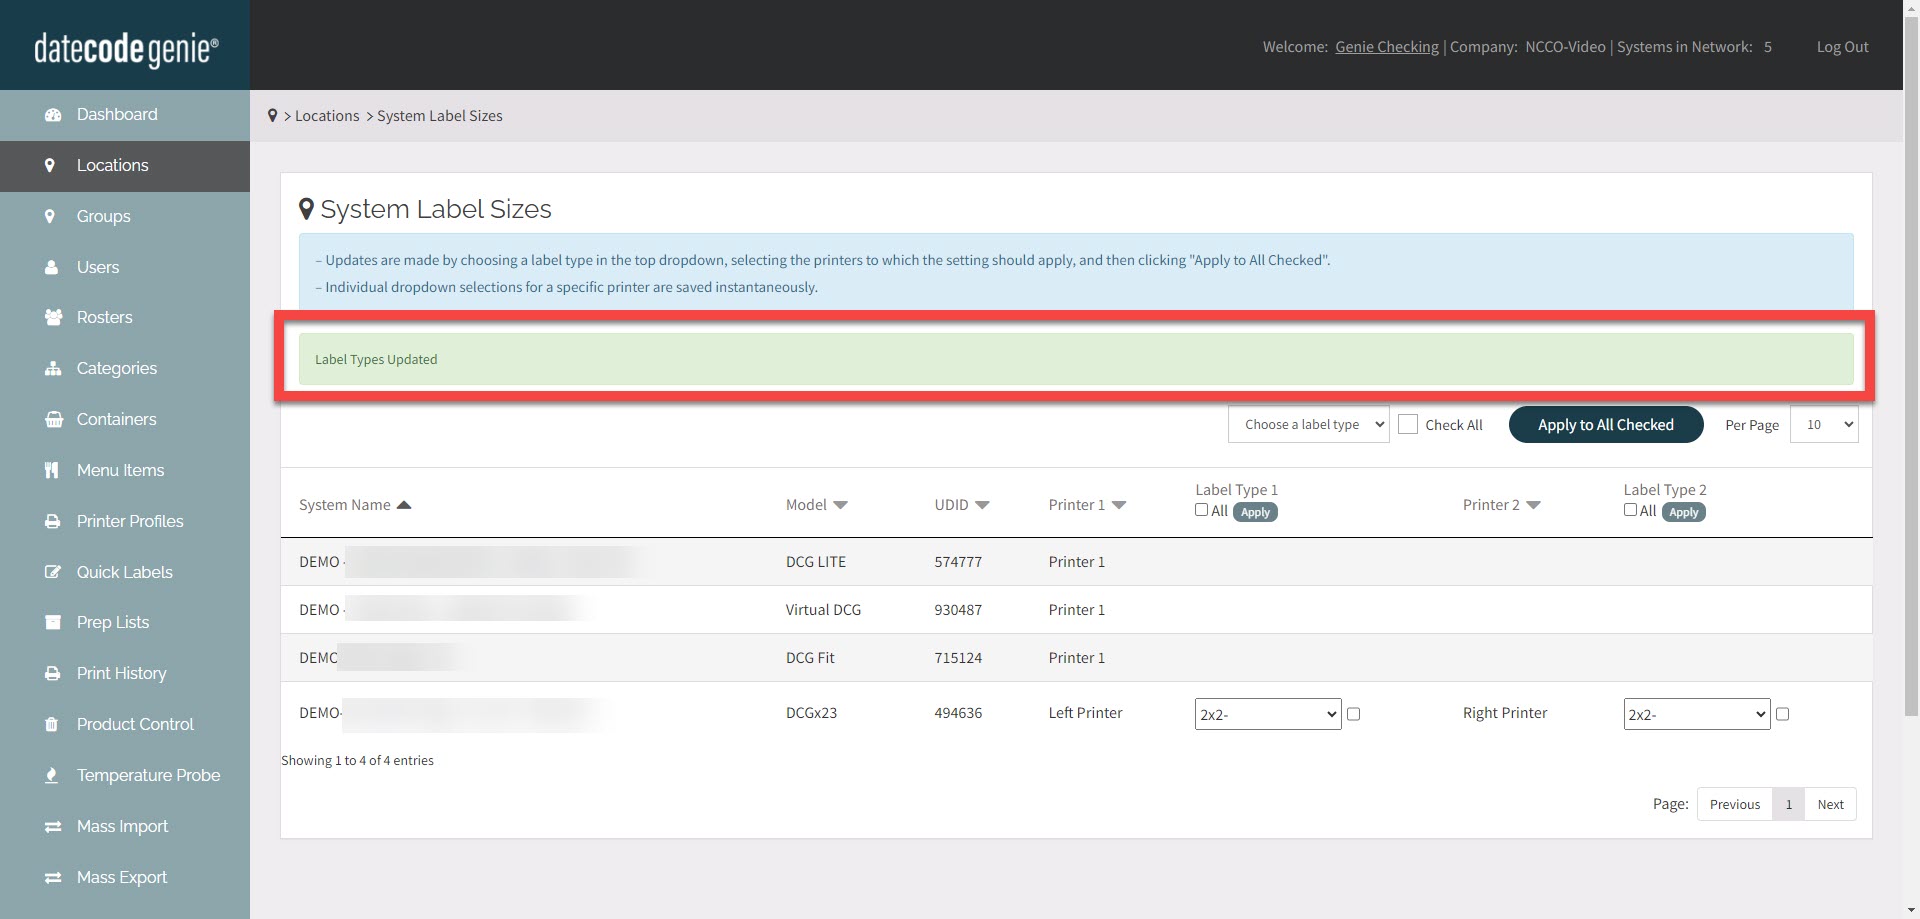
6. Fare clic sul pulsante Applica a tutte le stampanti selezionate per aggiornare tutte le stampanti selezionate.
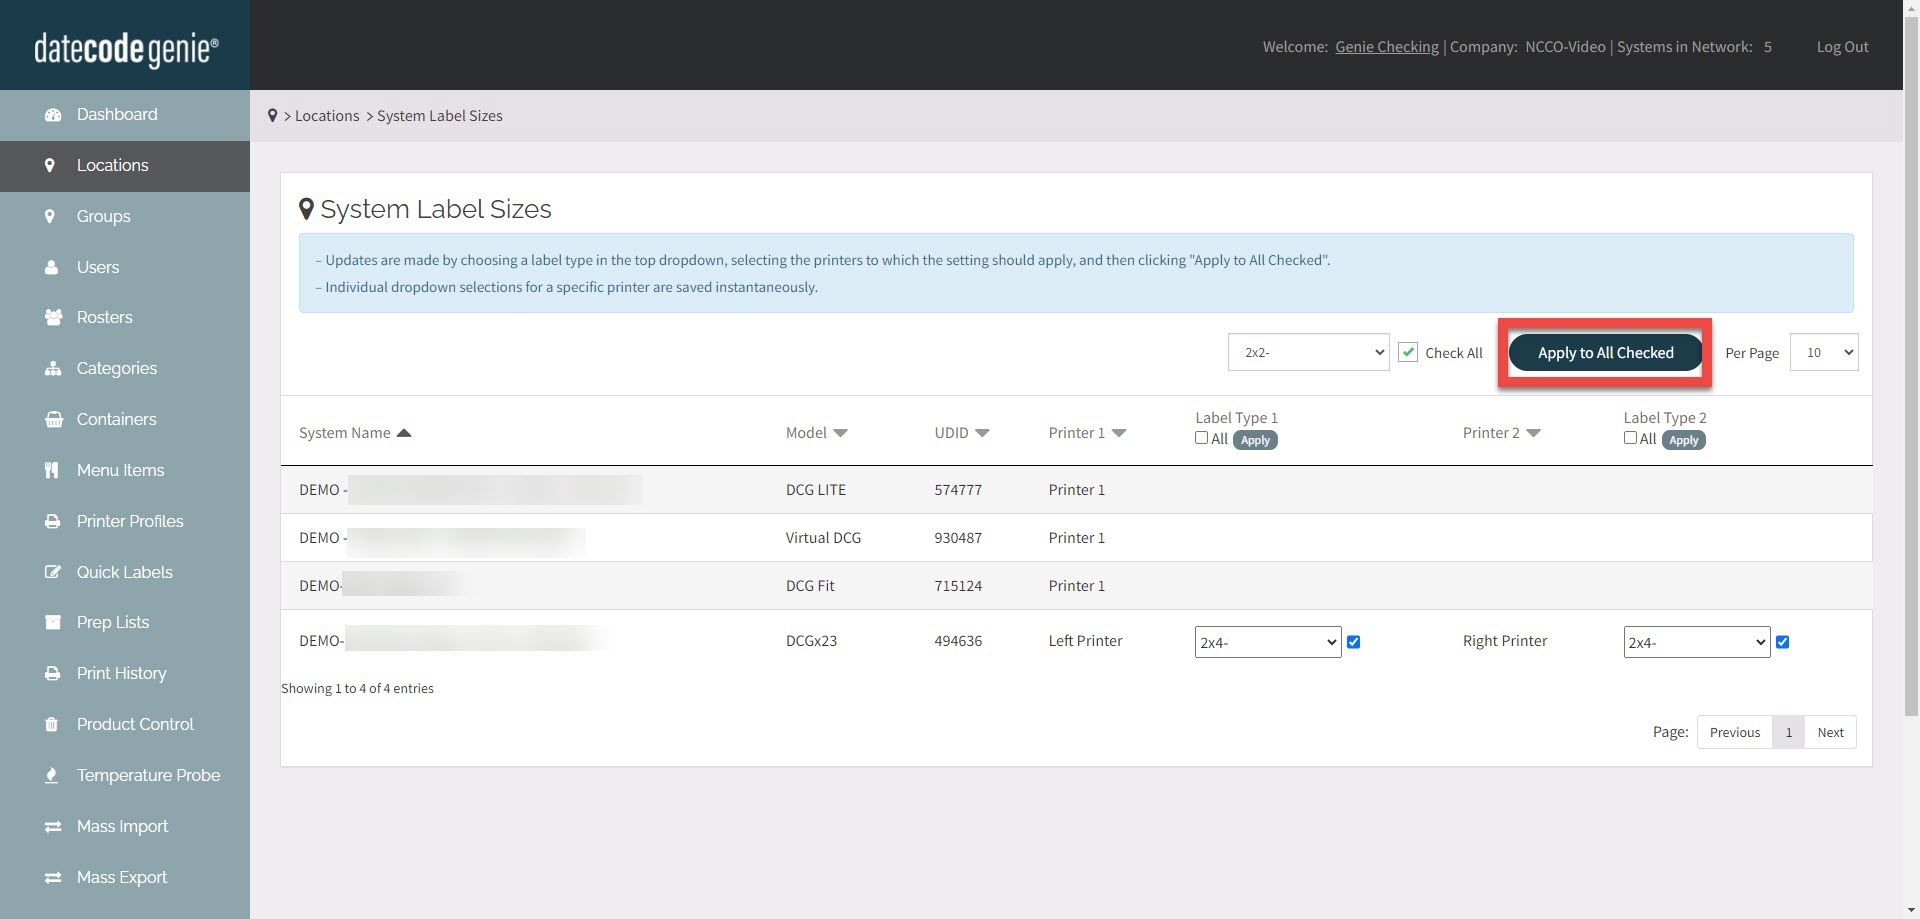
7. Verrà visualizzato il messaggio Tipi di etichetta aggiornati .
2. Impostare le singole stampanti
1. Accedi al portale su www.datecodegenie.com utilizzando il browser consigliato. Consulta Quale browser Internet dovrei usare per accedere al mio portale DateCodeGenie®?
2. Fare clic su Posizioni scheda sulla barra laterale.

3. Fare clic sul pulsante Dimensioni etichette di sistema .

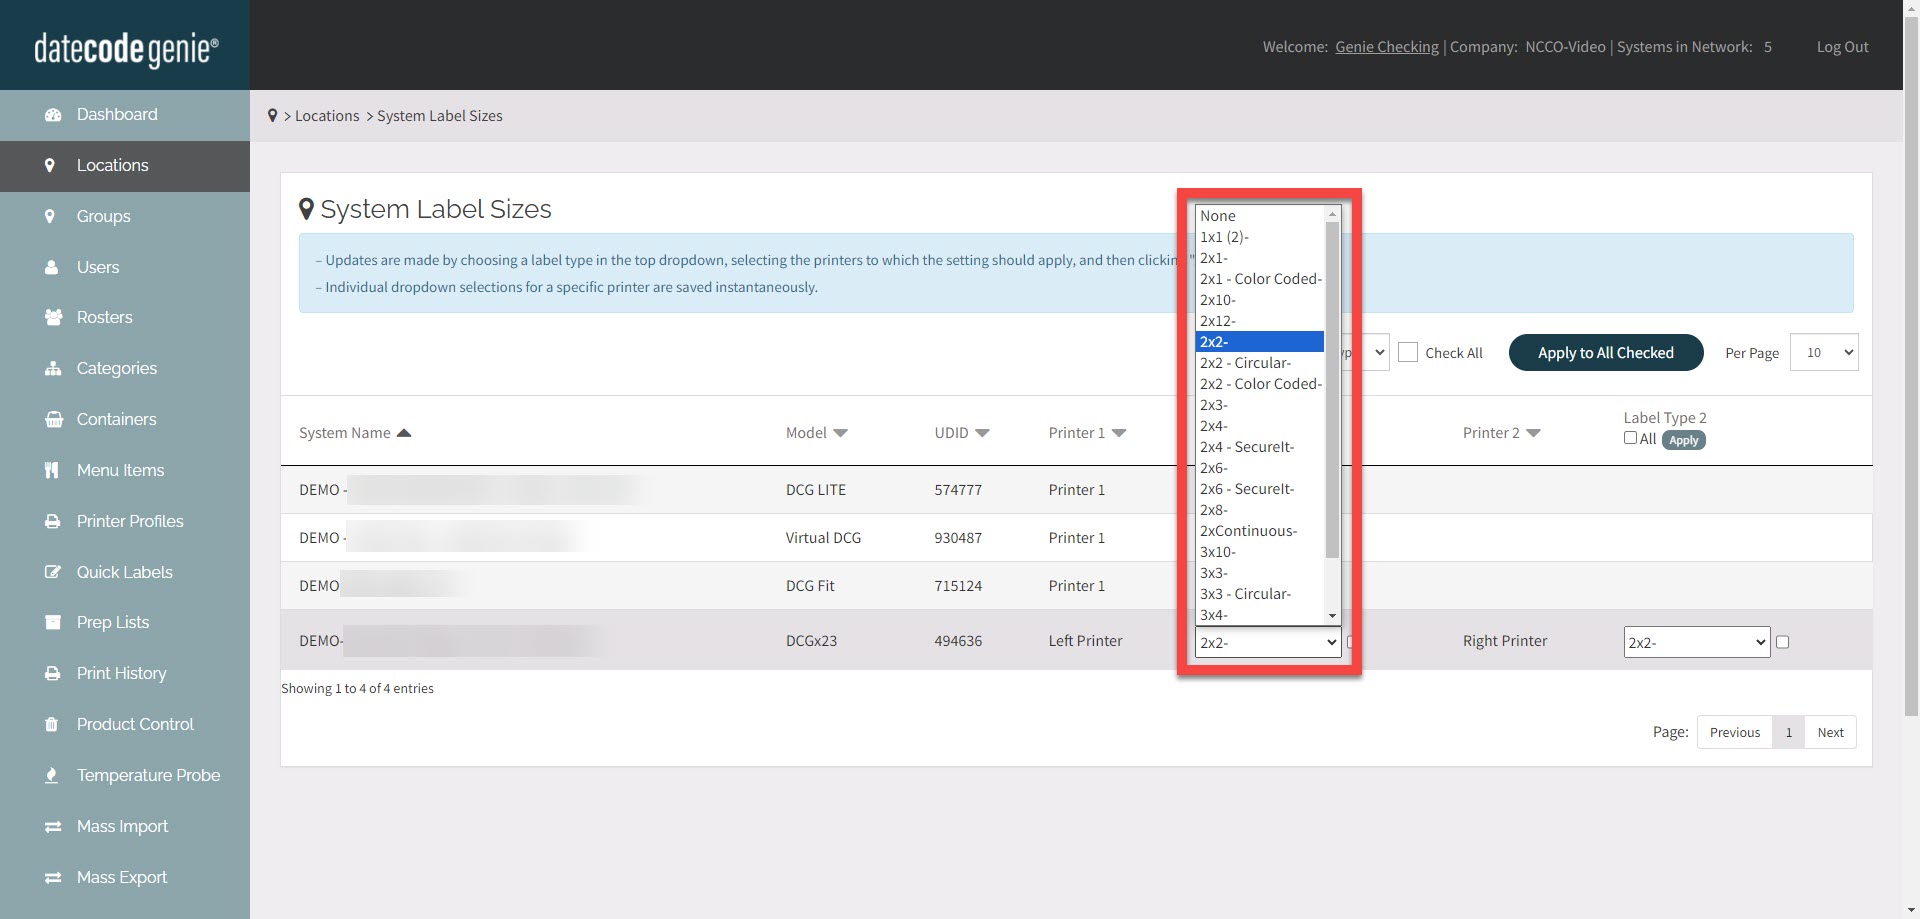
4. Selezionare il tipo di etichetta dal menu a discesa accanto alla stampante che si desidera modificare.
