
Manage System Label Sizes in the Portal
Portal administrators can use system label sizes to set a label size default in the portal.
System label sizes can be set for X Model devices only.
The system label sizes portal setting must be turned on, see System Label Sizes Setting.
There are two ways to set system label sizes:
1. Set multiple printers
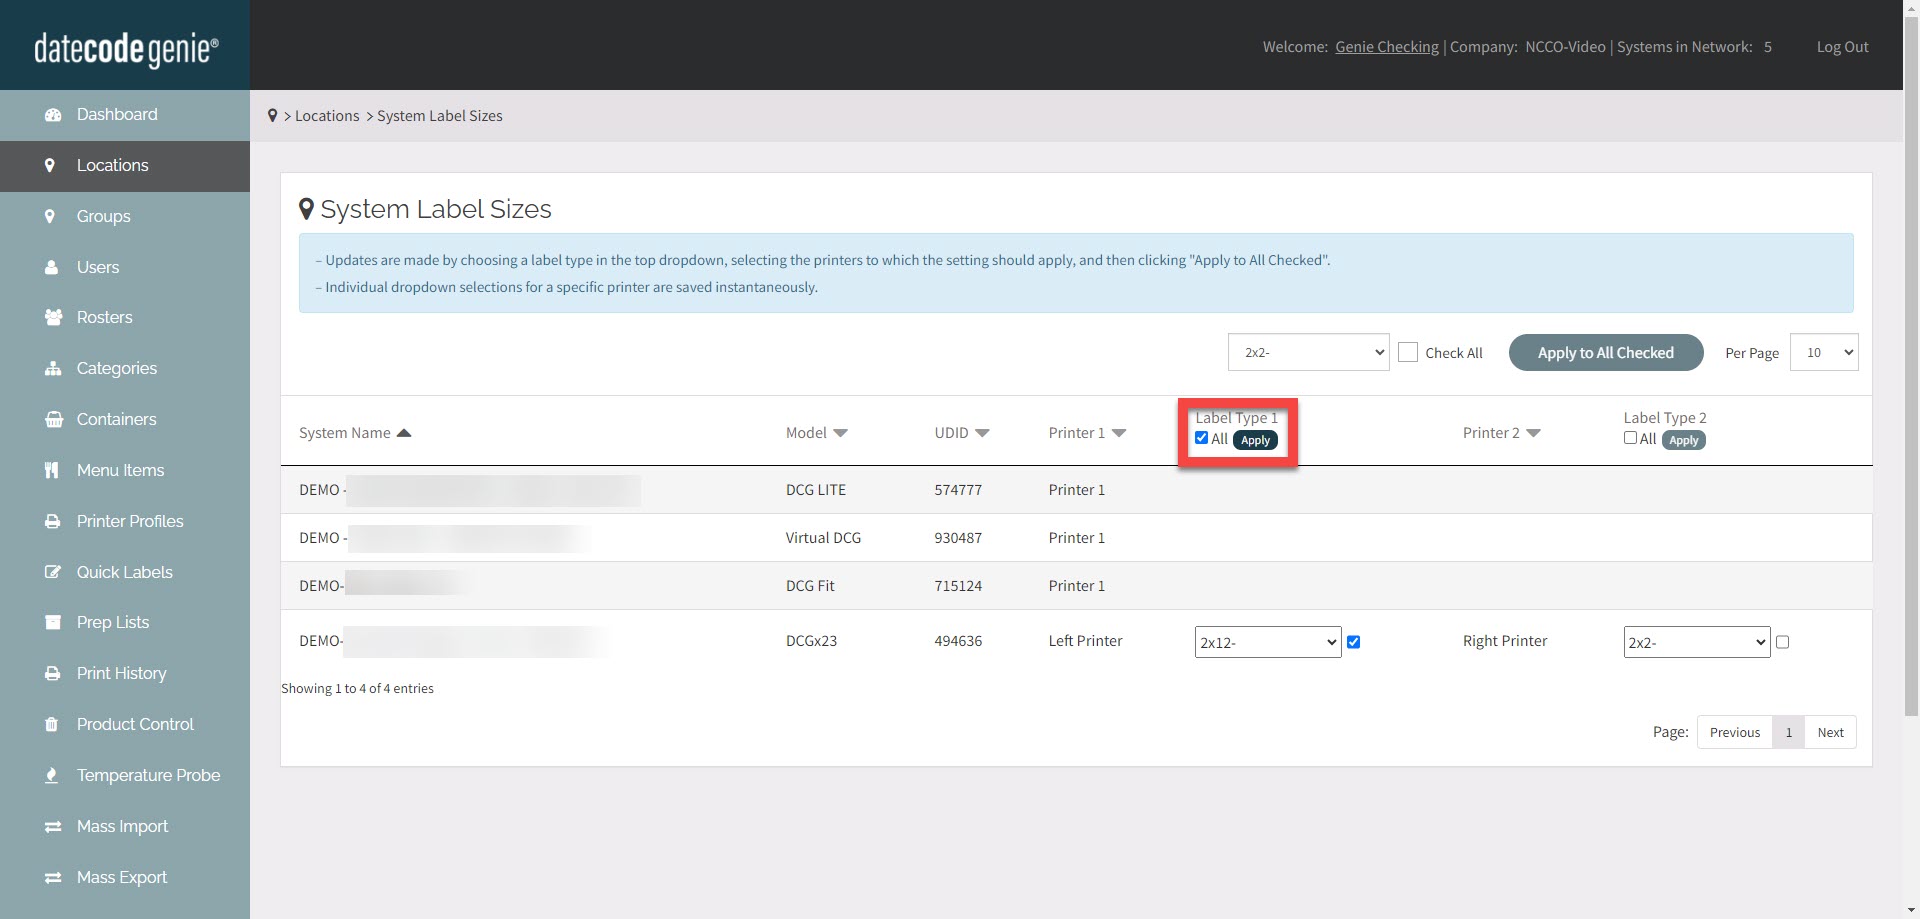
1. Log in to the portal at www.datecodegenie.com using the recommended browser. See What Internet Browser Should I Use To Access My DateCodeGenie® Portal?
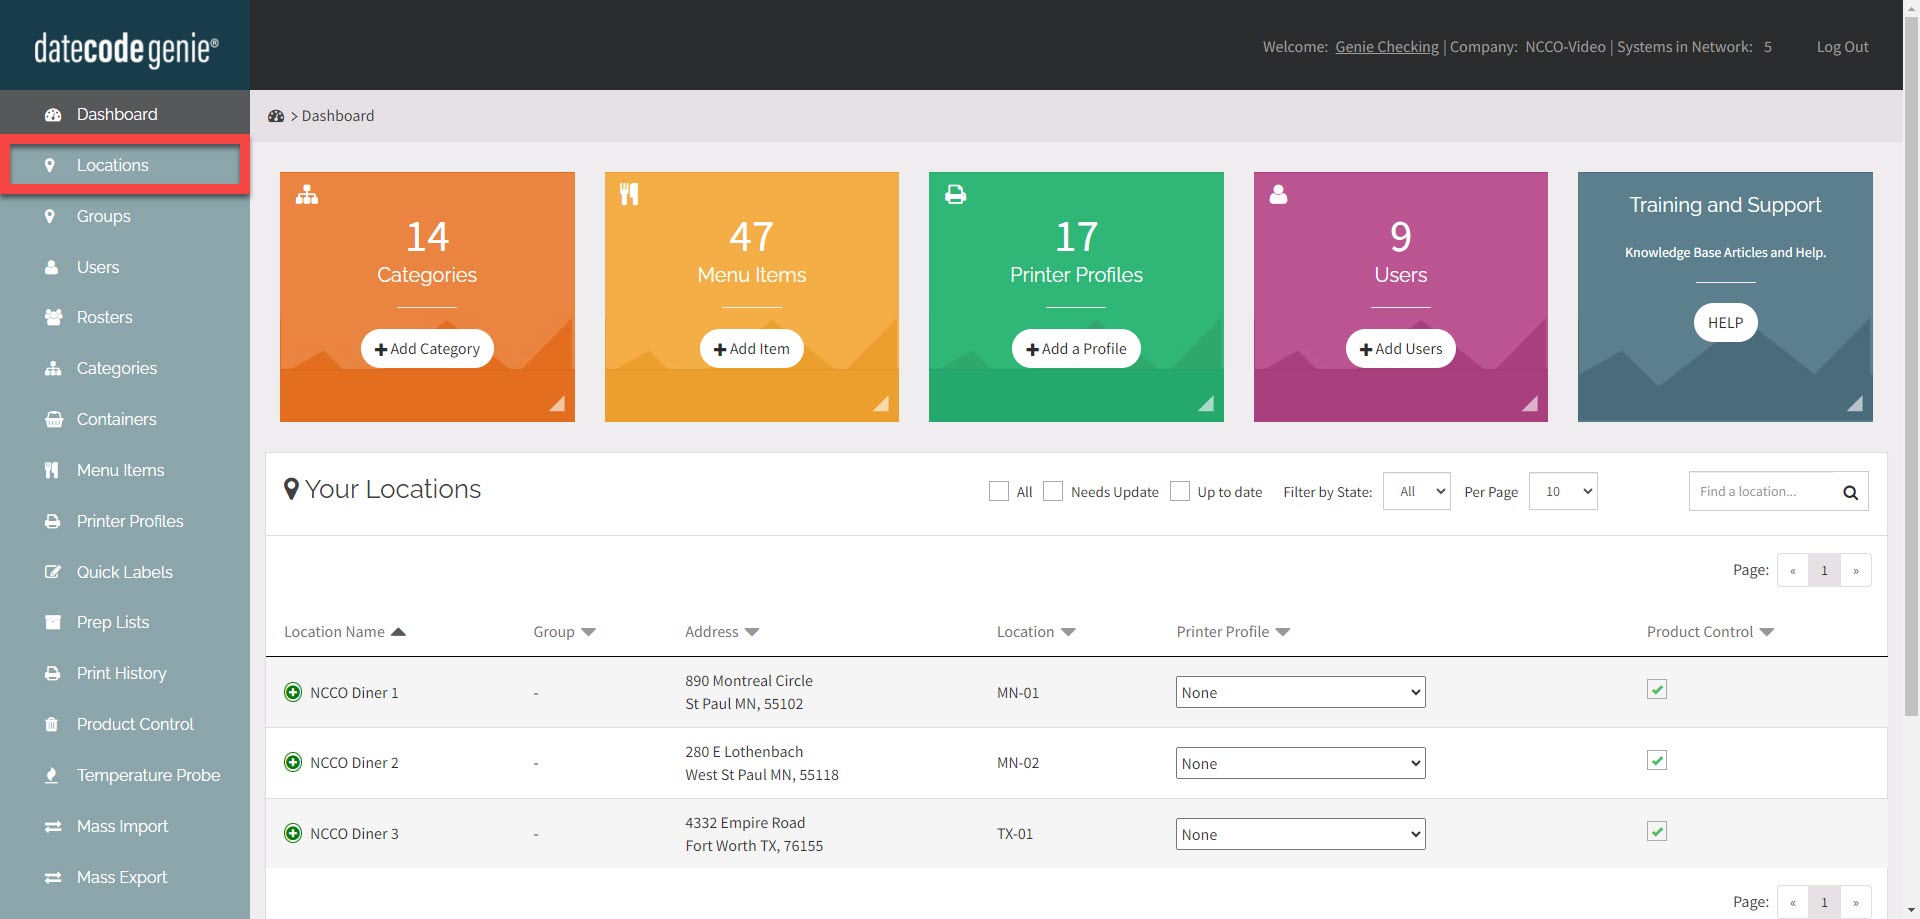
2. Click on the Locations tab on the side bar.
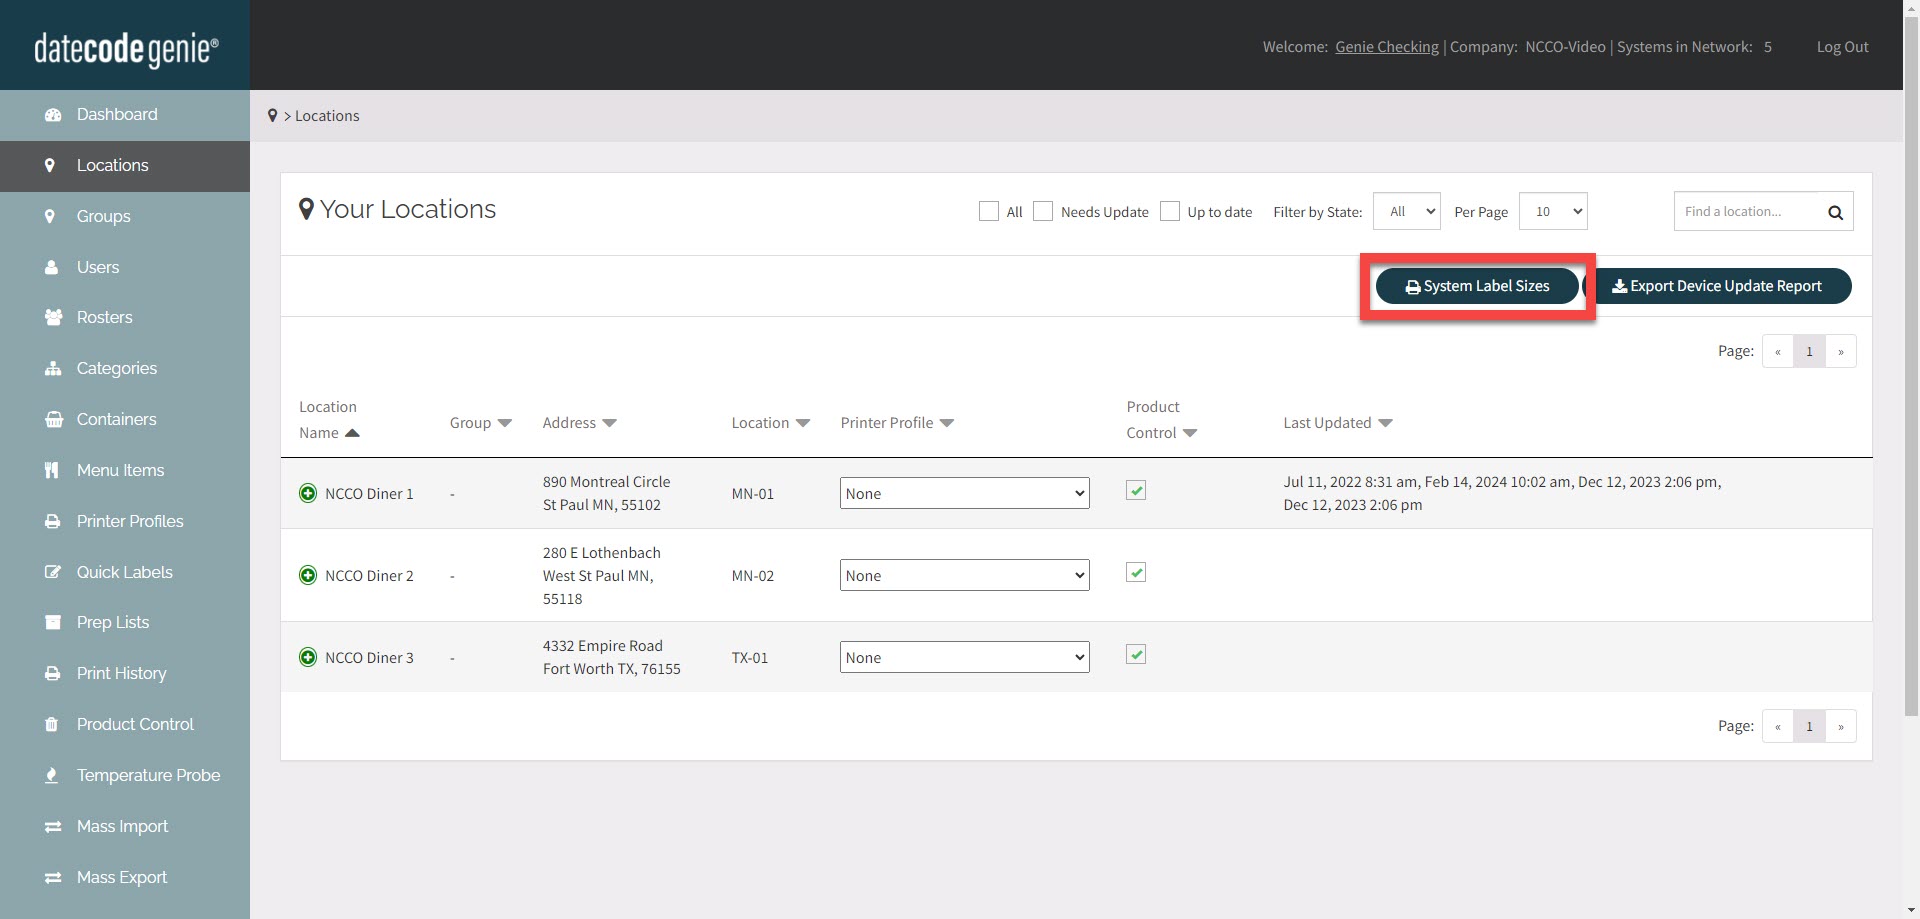
3. Click the System Label Sizes button.
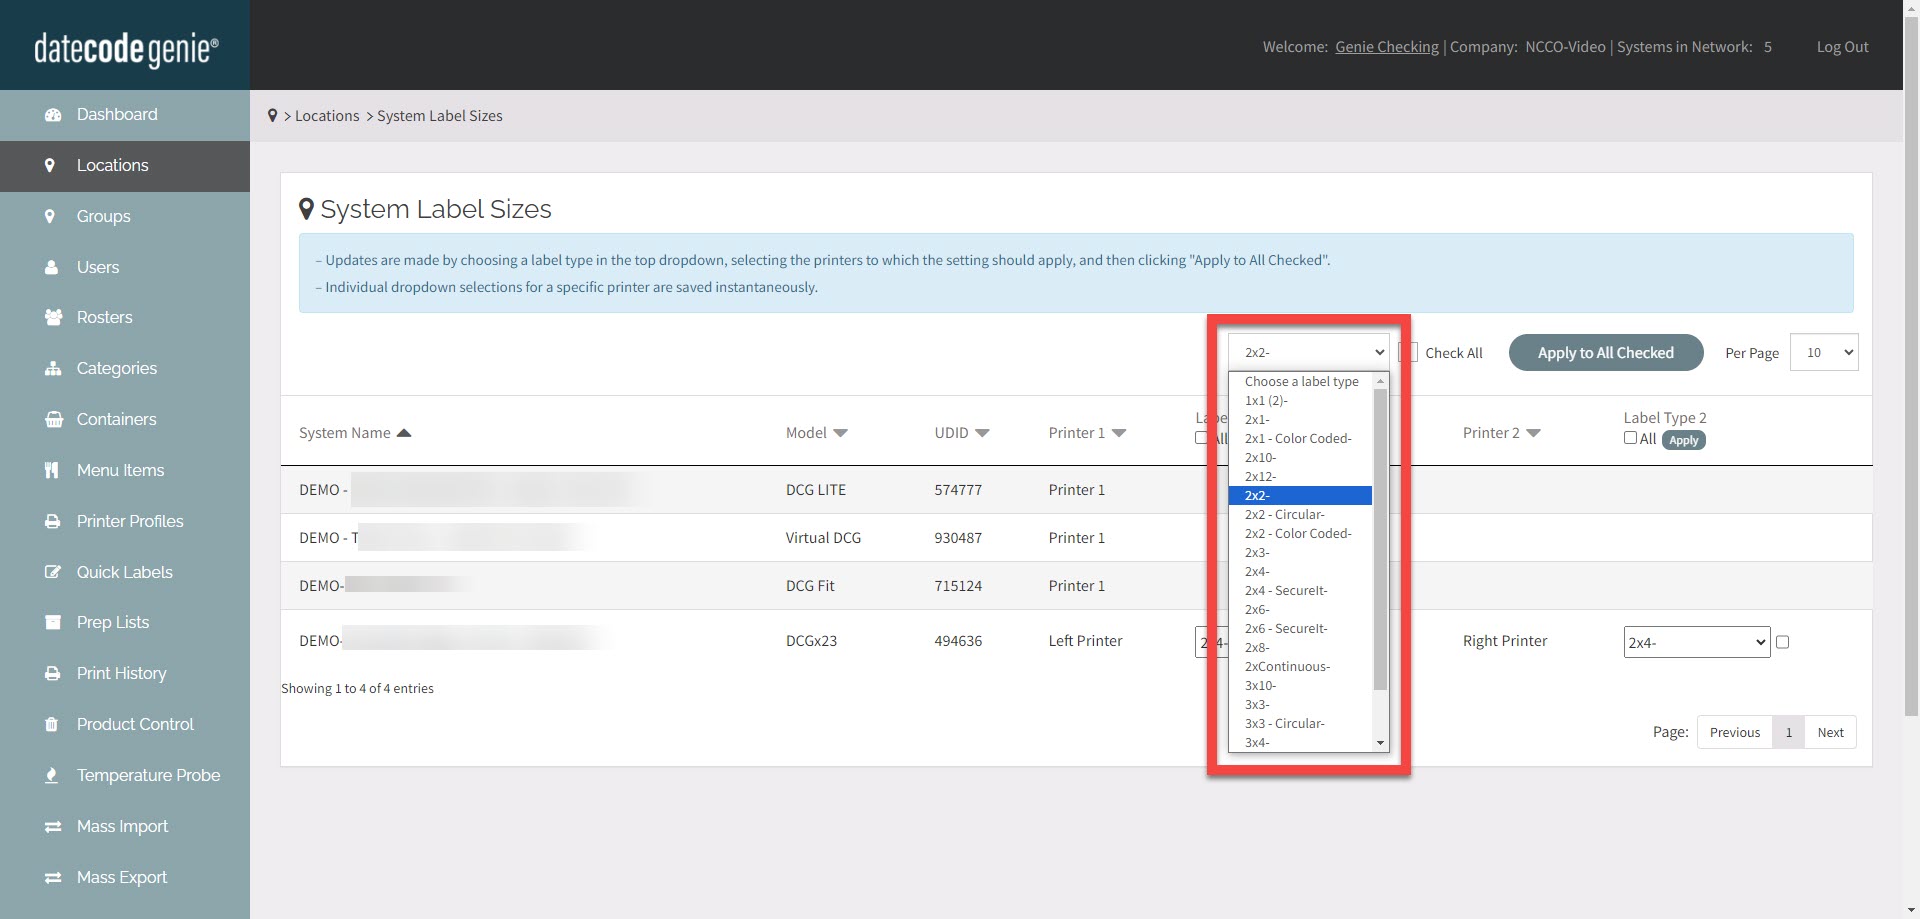
4. Select label type from the Choose a label type dropdown.
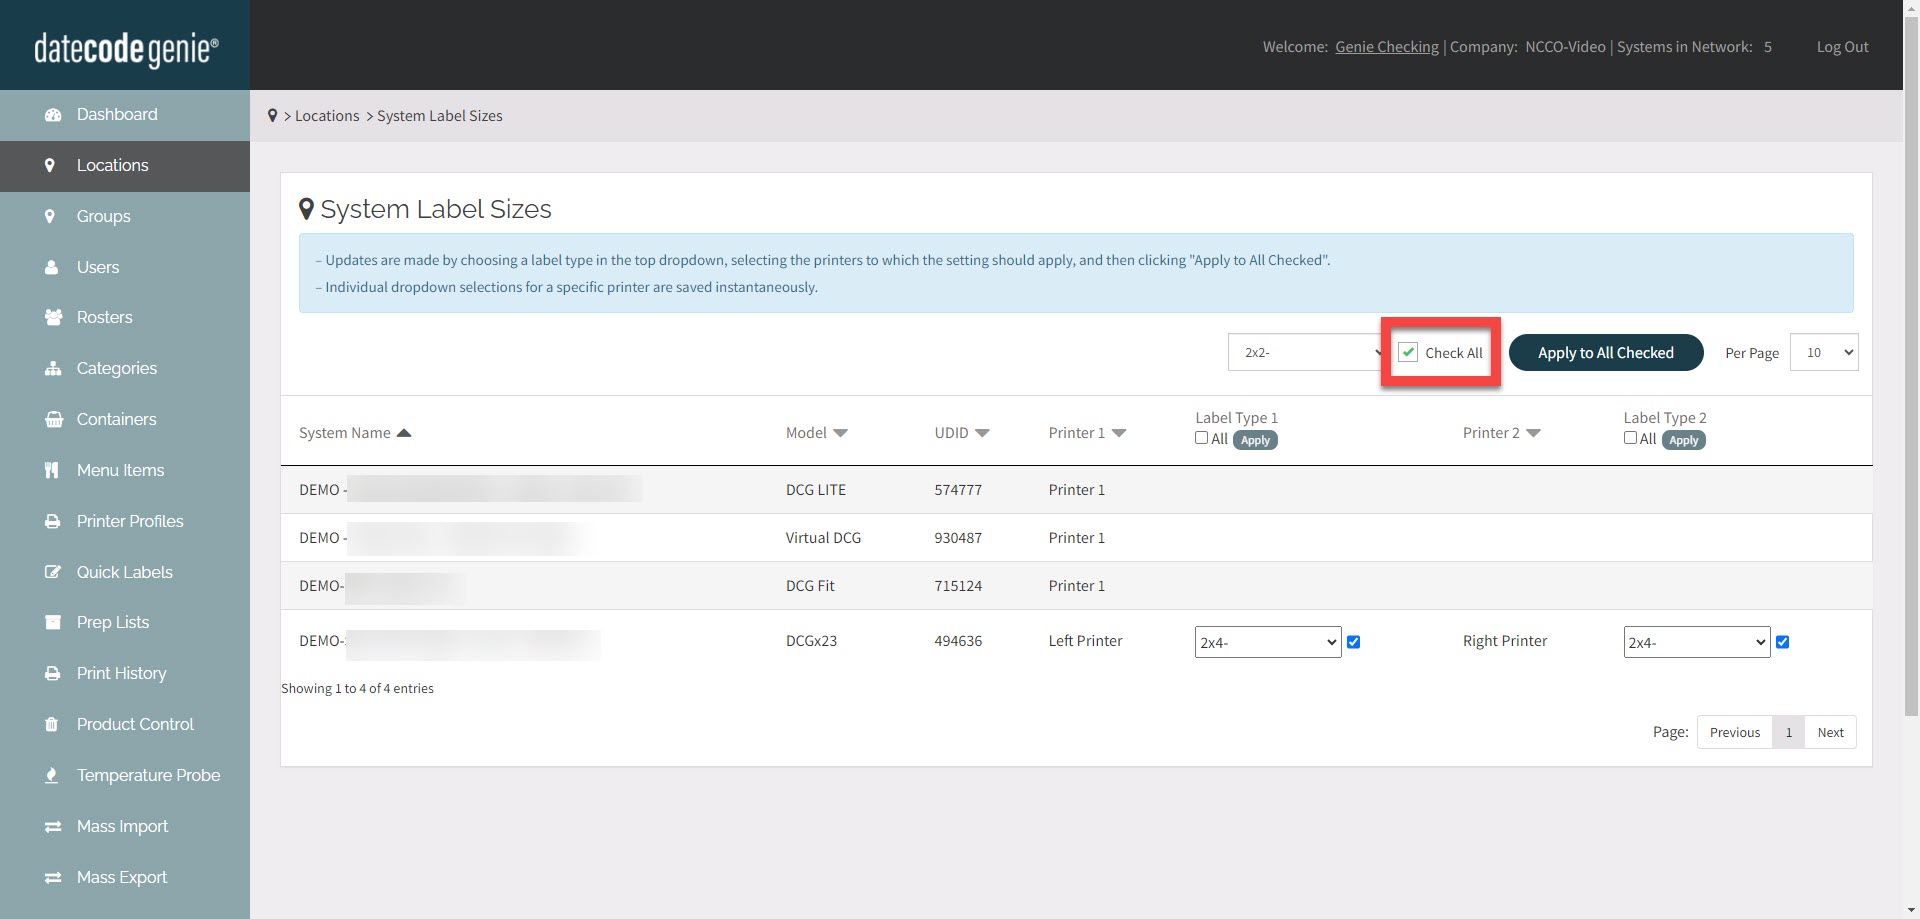
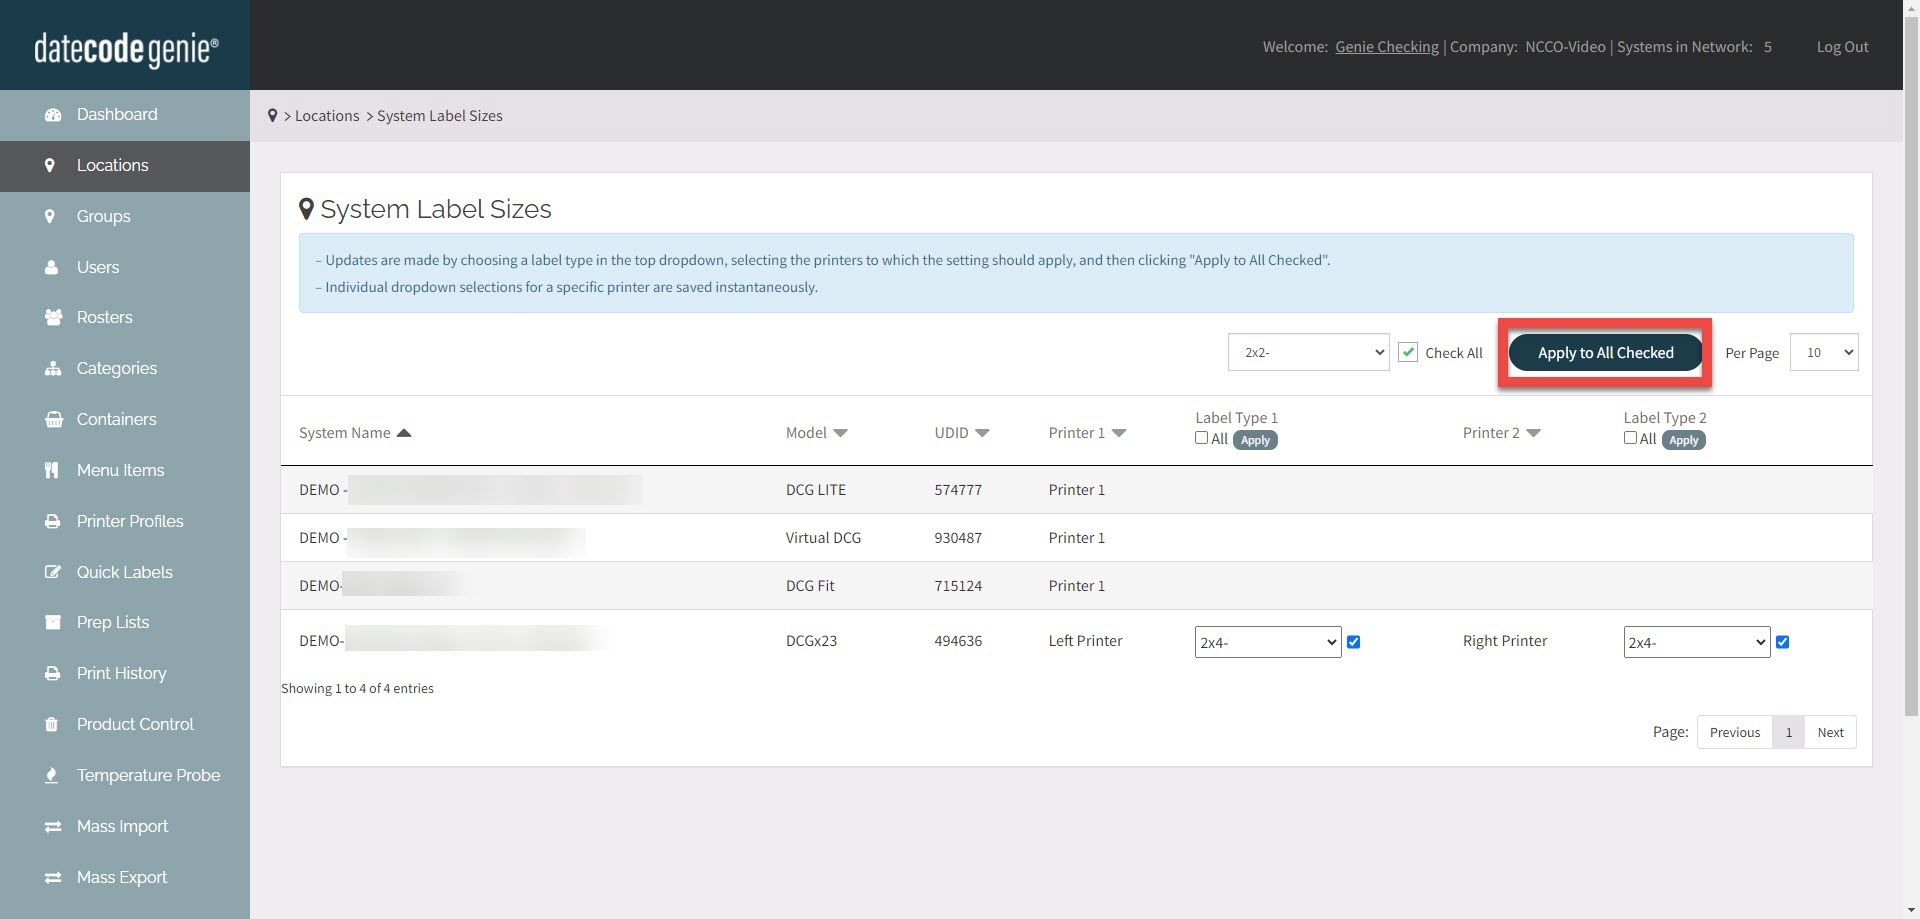
5. Click check boxes you want to change to that label type.
a. Click the Check All box to select all printers.
b. Click the All box at the top of the column to select either all left or right printers.
c. Click the box next to an individual printer to select individual printers.
6. Click Apply to All Checked button to update all checked printers.
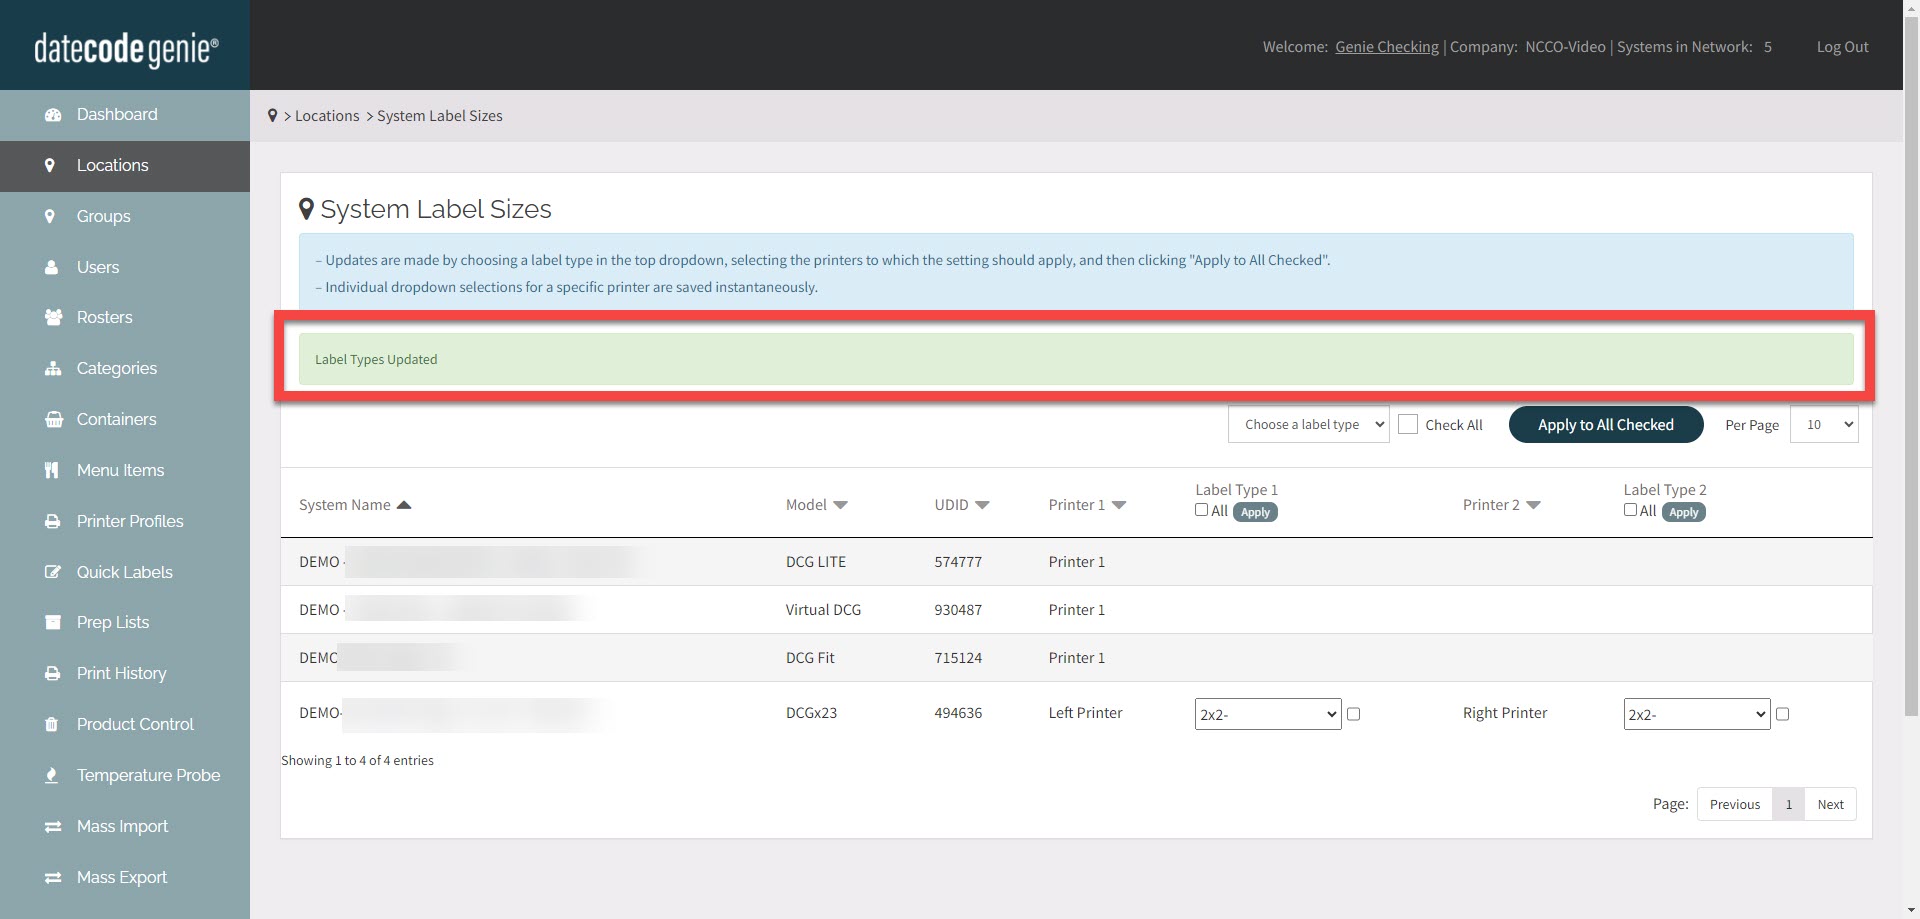
7. Label Types Updated message will display.
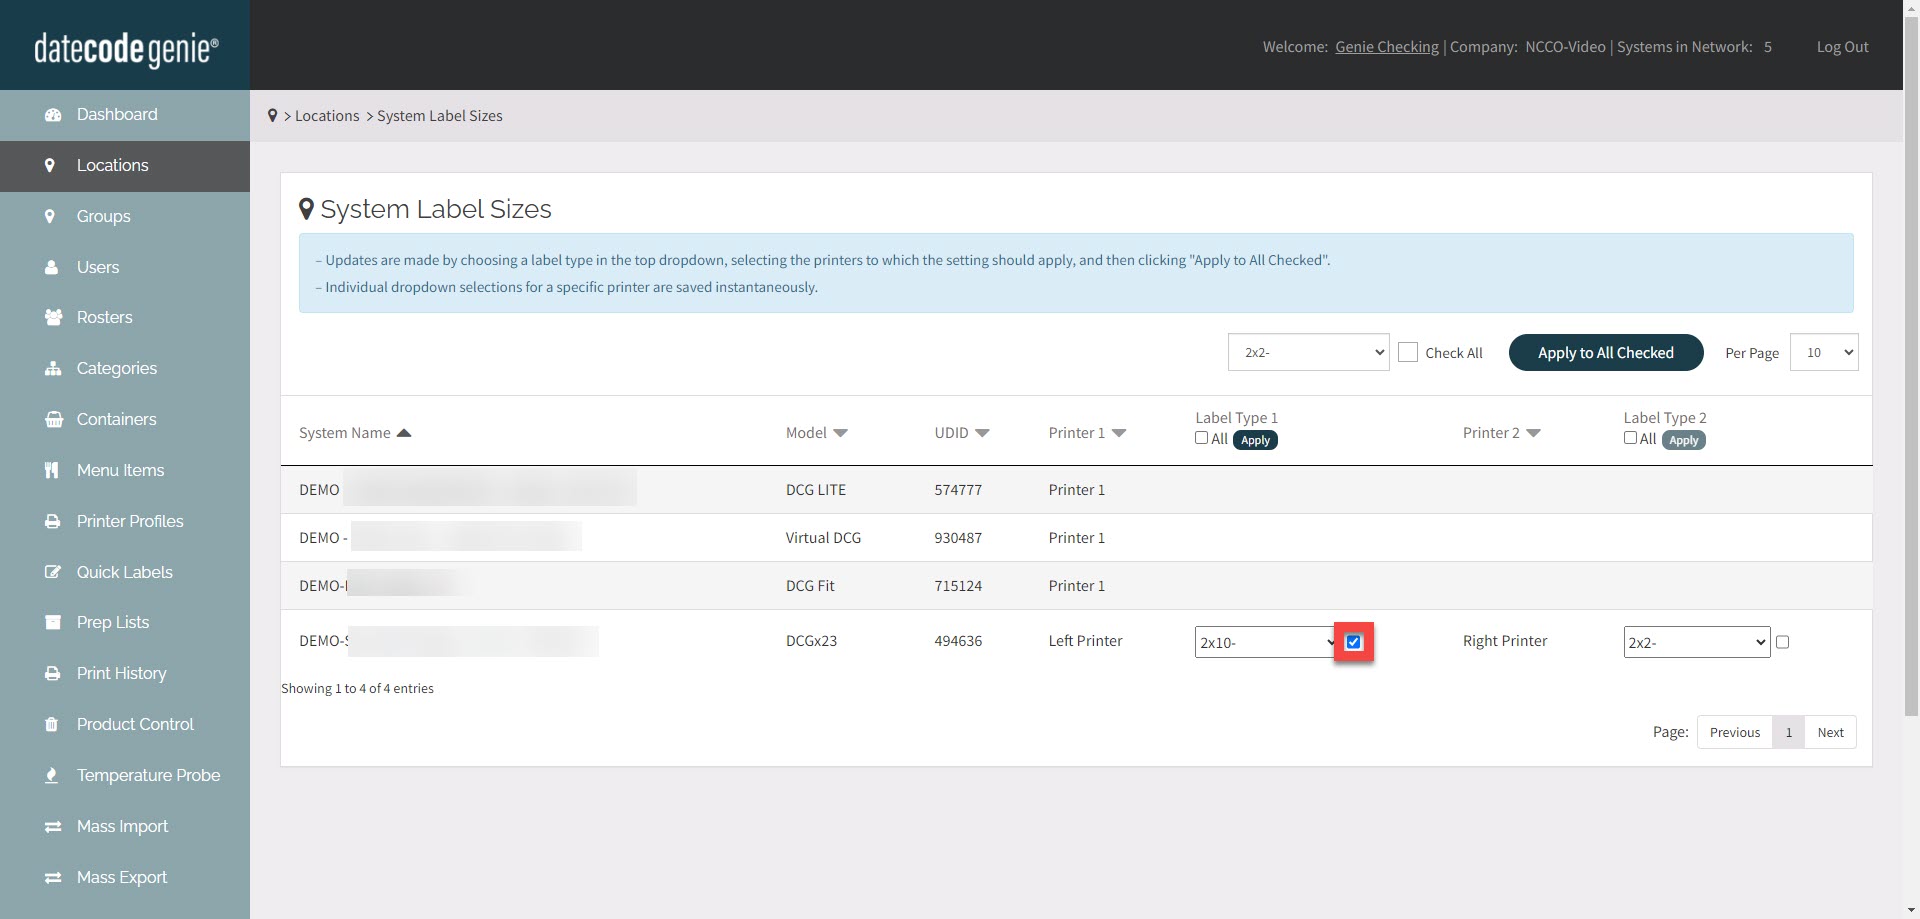
2. Set individual printers
1. Log in to the portal at www.datecodegenie.com using the recommended browser. See What Internet Browser Should I Use To Access My DateCodeGenie® Portal?
2. Click on the Locations tab on the side bar.
3. Click System Label Sizes button.
4. Select label type from the dropdown next to the printer you want to change.

