US English (US)
FR French
DE German
ES Spanish
IT Italian
NL Dutch
menu

Contact Us

No results found. Still need help? Contact us

  • Scheduled Assistance
  • Contact Us
English (US)
US English (US)
FR French
DE German
ES Spanish
IT Italian
NL Dutch
arrow_back
  • Getting Started
  • Devices
  • App
  • Portal
  • Admin Settings
  • Accessories
  • Labels
  • Repairs
  • APIs
  • Task Manager
  • RightBytes
  • Scheduled Assistance
  • Contact Us

Adjust Stock Levels in StockSmart

Contact Us

If you still have questions or prefer to get help directly from an agent, please submit a request.
We’ll get back to you as soon as possible.

  • Getting Started
    Getting Started Guides Set Up Training
  • Devices
    Troubleshooting Device Overview 2.0 Model X Series Model Fit Model Lite Model mC-Label3 Printer Device Tablet Internet Connection Warranty & Support CL-S700III Printer
  • App
    Error Codes Troubleshooting App Overview Mobile App Subscription Prep Lists Product Control Rosters Scale Temperature Probe Print History Settings Language Location Overrides
  • Portal
    Portal Overview Locations Categories Menu Items Printer Profiles Users Settings Quick Labels Prep List Print History Mass Import and Export Media Library Location Overrides Product Control Rosters Scale Temperature Probe Groups
  • Admin Settings
    Start with Admin Settings Admin Settings Overview Locations Devices and Licenses
  • Accessories
    Bluetooth Scanner USB Scanner Temperature Probe Scale Label Rewinder Fit Printer Shelf Warranty
  • Labels
    Overview Troubleshooting
  • Repairs
    2.0 Model X Series Model Lite Model DateCodeGenie® Tablet
  • APIs
    Inbound APIs Outbound APIs
  • Task Manager
    Task Manager Overview Venues Forms Approvals Users Resources Task Manager App Task Manager Hardware Troubleshooting
  • RightBytes
    StockSmart
+ More
  • Home
  • RightBytes
  • StockSmart
  • Stock Management

Table of Contents

1. Scan the product QR code 2. Use the search bar

You can adjust product quantities under the Stock Management tab.

Steps:

1. Go to https://stocksmart.rightbytes.com/login

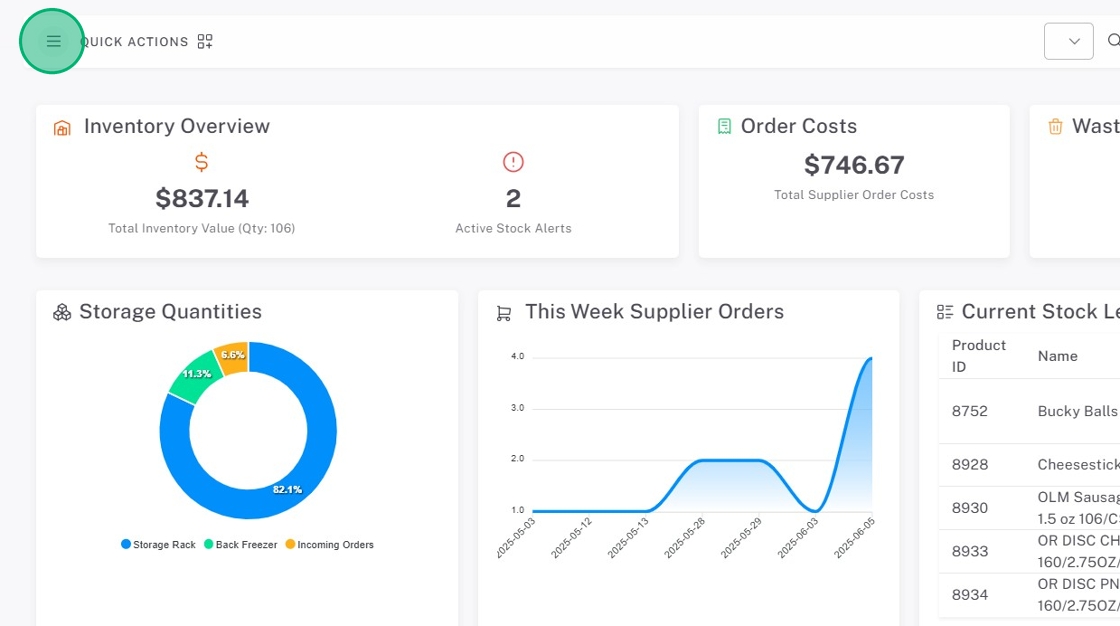
2. Click the menu button (three-line icon).

3. Click Stock Management, then Adjust Stock Levels.

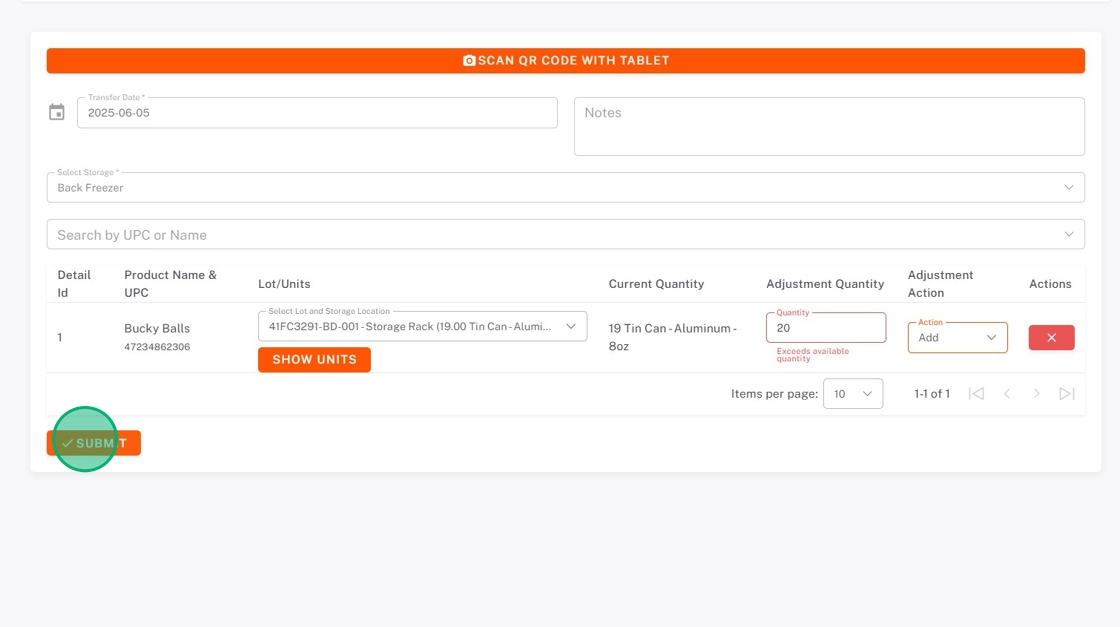
4. Find the product you are adjusting. 

There are two ways to find products:

1. Scan the product QR code

Click SCAN QR CODE WITH TABLET to pull up camera to scan.


2. Use the search bar

a. Select Storage location from the dropdown.

b. Search for the product and select.


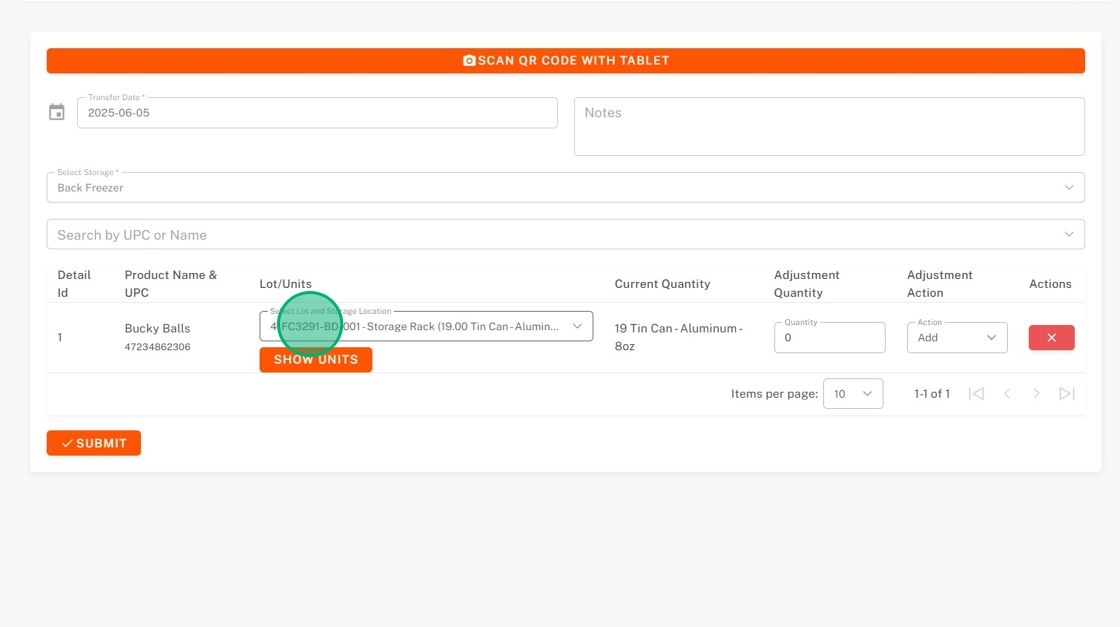
5. If using lot tracking, check that you are adjusting product from the right lot code and storage location.

Use the Select Lot and Storage Location dropdown and select, or if from multiple lots, click Show Units and check the lot codes.

Lot Code Dropdown Show units, then check boxes


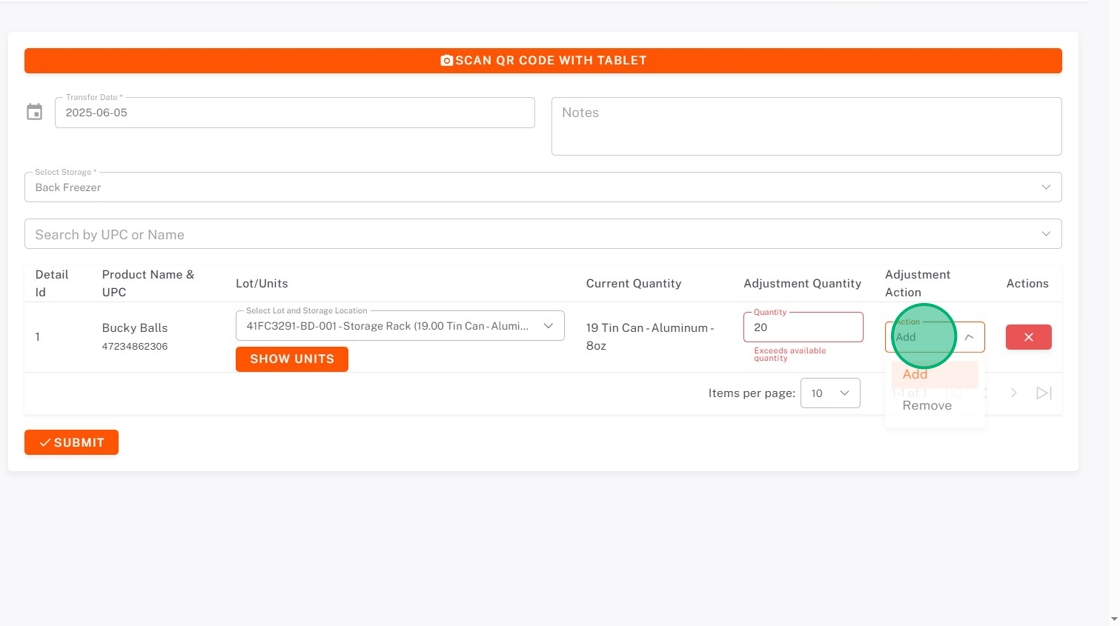
6. Type the Adjustment Quantity.

7. Click the Adjustment Action dropdown and select if the product is being added or removed.

8. Click SUBMIT.

Related Articles

  • Initial Product Import in StockSmart
  • Transfer Stock in StockSmart

Was this article helpful?

Yes
No
Give feedback about this article

Related Articles

  • Initial Product Import in StockSmart
  • Transfer Stock in StockSmart
© 2025 DateCodeGenie

899 Montreal Circle, St. Paul, MN 55102

Privacy Policy

contact us
About NCCO

Knowledge Base Software powered by Helpjuice

Expand