US English (US)
FR French
DE German
ES Spanish
IT Italian
NL Dutch
menu

Contact Us

No results found. Still need help? Contact us

  • Scheduled Assistance
  • Contact Us
English (US)
US English (US)
FR French
DE German
ES Spanish
IT Italian
NL Dutch
arrow_back
  • Getting Started
  • Devices
  • App
  • Portal
  • Admin Settings
  • Accessories
  • Labels
  • Repairs
  • APIs
  • Task Manager
  • RightBytes
  • Scheduled Assistance
  • Contact Us

Initial Product Import in StockSmart

Contact Us

If you still have questions or prefer to get help directly from an agent, please submit a request.
We’ll get back to you as soon as possible.

  • Getting Started
    Getting Started Guides Set Up Training
  • Devices
    Troubleshooting Device Overview 2.0 Model X Series Model Fit Model Lite Model mC-Label3 Printer Device Tablet Internet Connection Warranty & Support CL-S700III Printer
  • App
    Error Codes Troubleshooting App Overview Mobile App Subscription Prep Lists Product Control Rosters Scale Temperature Probe Print History Settings Language Location Overrides
  • Portal
    Portal Overview Locations Categories Menu Items Printer Profiles Users Settings Quick Labels Prep List Print History Mass Import and Export Media Library Location Overrides Product Control Rosters Scale Temperature Probe Groups
  • Admin Settings
    Start with Admin Settings Admin Settings Overview Locations Devices and Licenses
  • Accessories
    Bluetooth Scanner USB Scanner Temperature Probe Scale Label Rewinder Fit Printer Shelf Warranty
  • Labels
    Overview Troubleshooting
  • Repairs
    2.0 Model X Series Model Lite Model DateCodeGenie® Tablet
  • APIs
    Inbound APIs Outbound APIs
  • Task Manager
    Task Manager Overview Venues Forms Approvals Users Resources Task Manager App Task Manager Hardware Troubleshooting
  • RightBytes
    StockSmart
+ More
  • Home
  • RightBytes
  • StockSmart
  • Stock Management

The initial product import lets you pull in your existing products and quantities to get you started with StockSmart.

You need a supplier connection to use the initial product import. To set up a supplier connection, contact the RightBytes team, see Contact & Support.

Steps:

1. Go to https://stocksmart.rightbytes.com/login and log in.

2. Click the menu button (three-line icon).

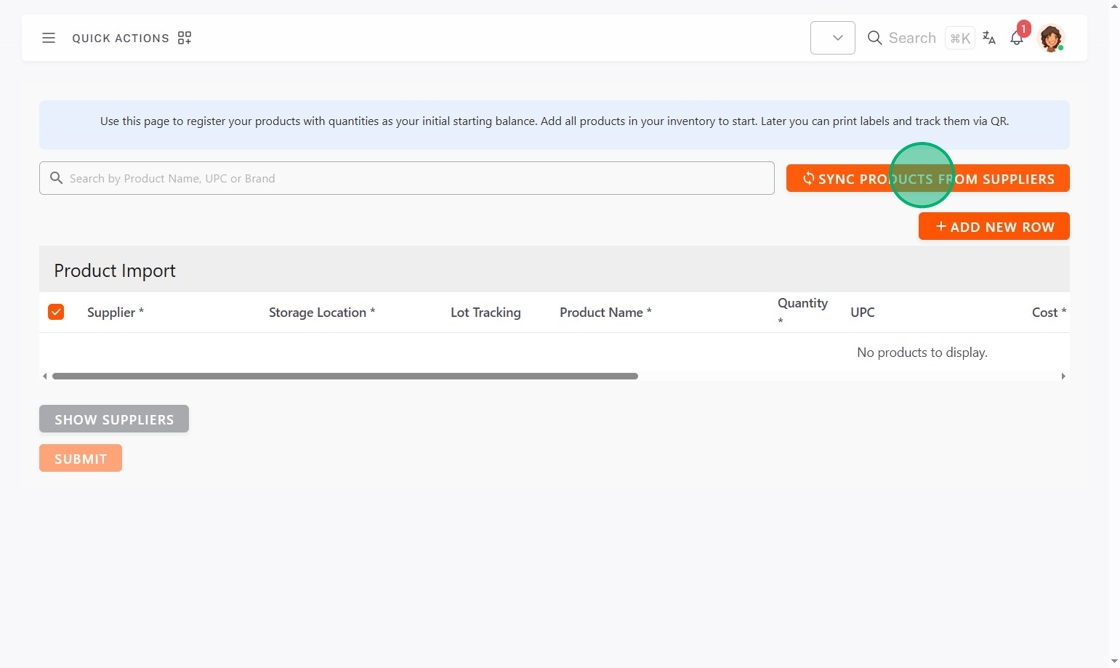
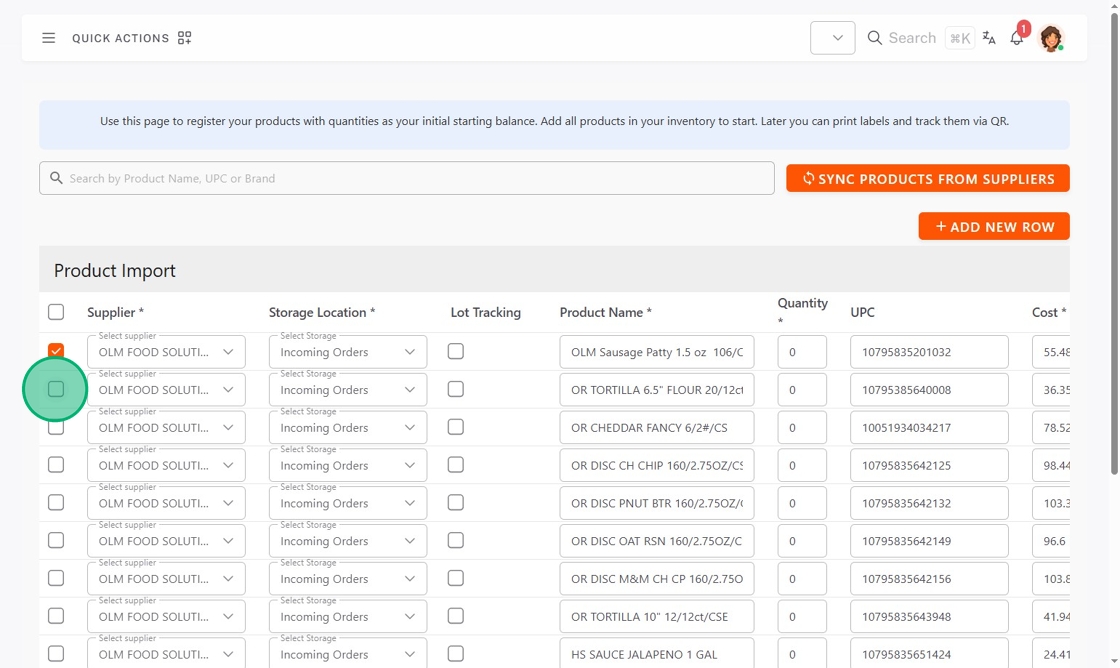
3. Click Stock Management, then Initial Product Upload.

4. Click Sync Products from Suppliers.

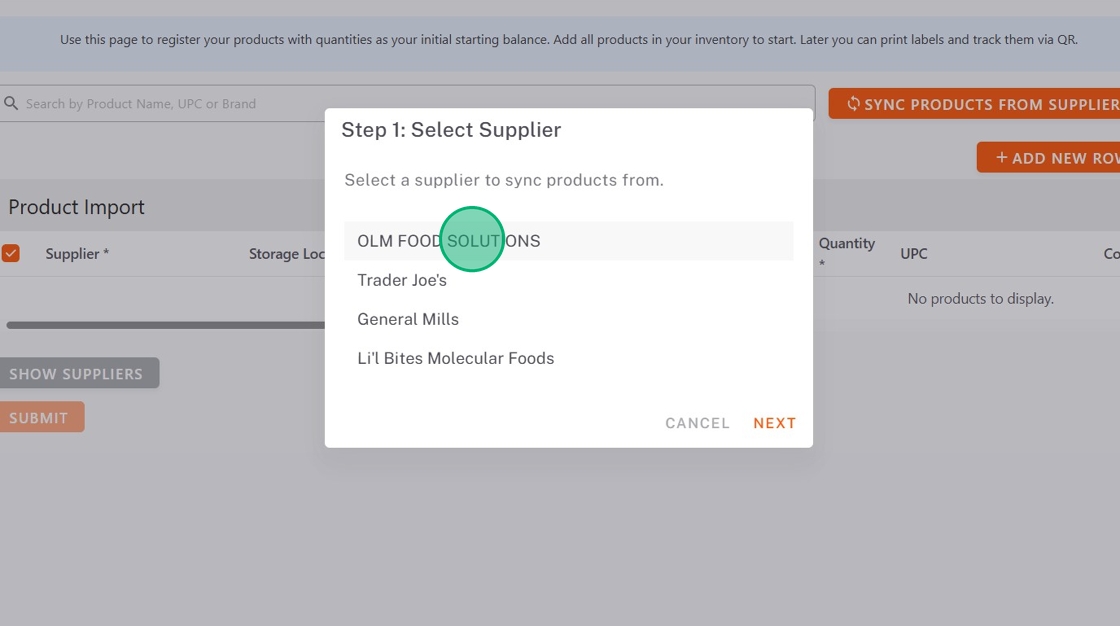
5. Click the supplier, then click Next.

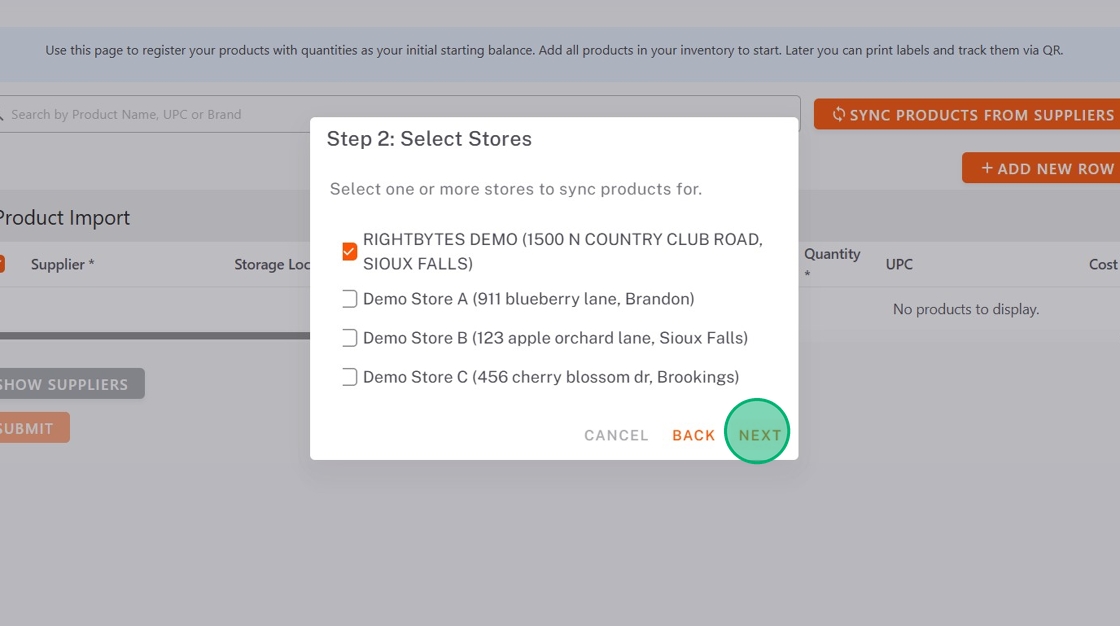
6. Select the stores you are syncing products for, then click Next.

7. Click the date range for how far back you want to get products from, then click Submit.

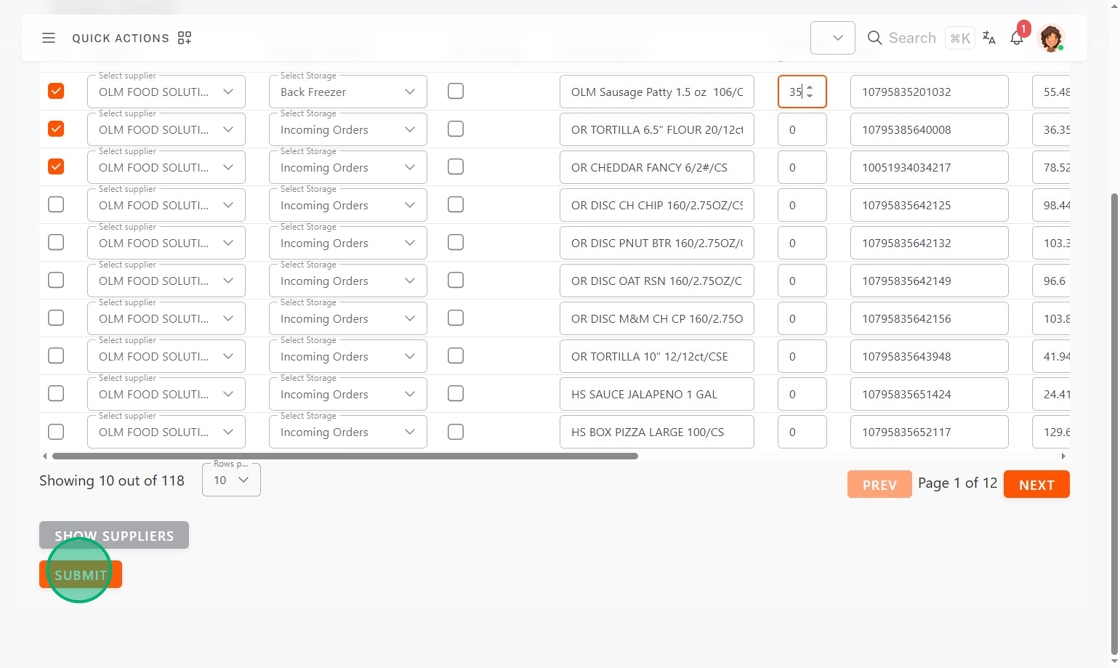
8. Check any products to transfer over.

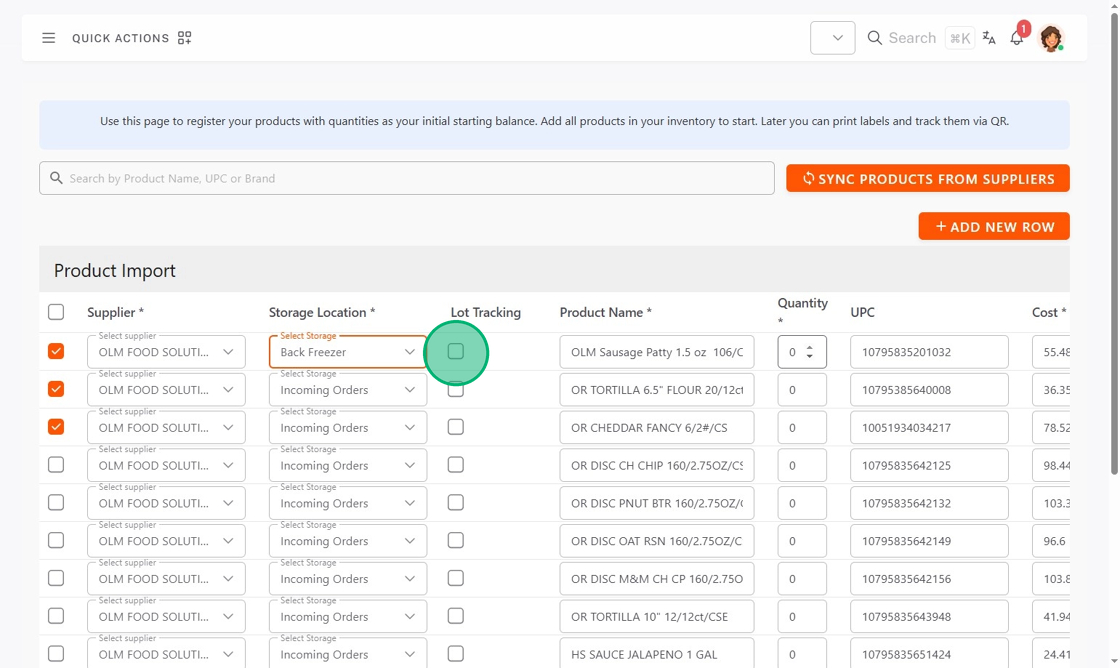
9. Click the Storage Location dropdown and select.

10. OPTIONAL: Check the box to turn on Lot Tracking.

11. Type the Quantity of product you have.
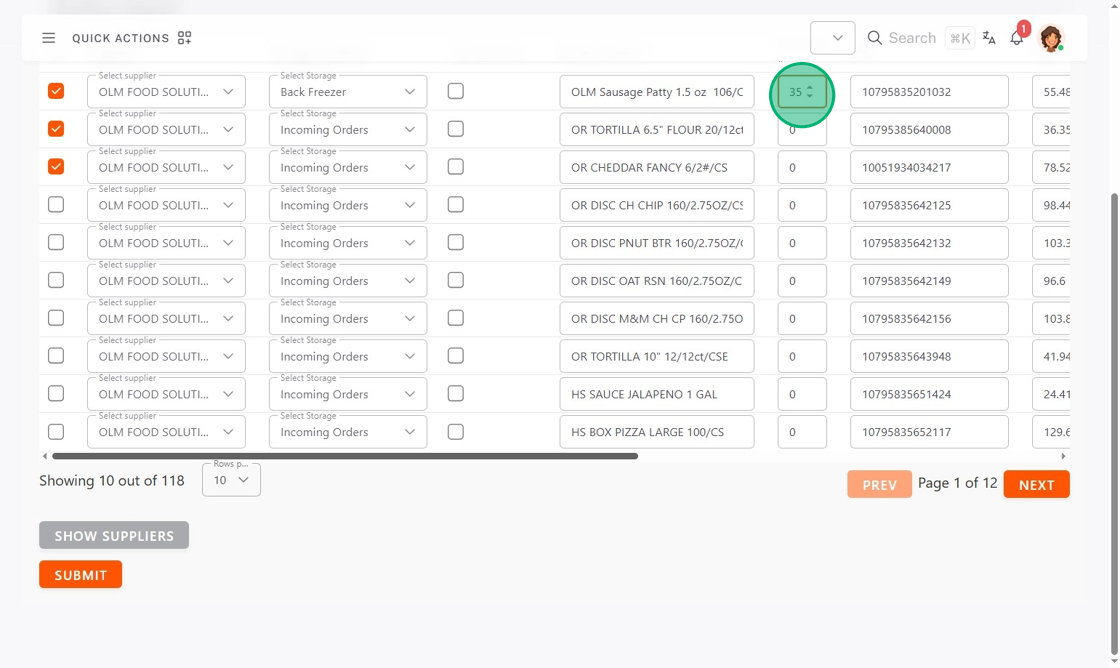
12. Click Submit.

Related Articles

  • Adjust Stock Levels in StockSmart
  • Transfer Stock in StockSmart

Was this article helpful?

Yes
No
Give feedback about this article

Related Articles

  • Adjust Stock Levels in StockSmart
  • Transfer Stock in StockSmart
© 2025 DateCodeGenie

899 Montreal Circle, St. Paul, MN 55102

Privacy Policy

contact us
About NCCO

Knowledge Base Software powered by Helpjuice

Expand