Device Placement and Care
Proper placement, upkeep, and routine cleaning of your DateCodeGenie® device is a simple and effective way to maintain your device.
Device Care
Placement
- Room temperature environment only
- Place on a flat, stable surface or mount to a secure wall or shelf, away from vibrations, moisture, and liquids of any kind
Upkeep
All models
- Device can remain plugged into power with the tablet turned on to maintain the battery's charge
- Ensure rubber feet on certain models are attached to keep device in place
2.0 model
- Ensure liquid protection seal (black rubber flap) is in place on the 2.0 model device to protect from moisture and liquid
Fit model
- Ensure the splash cover is in place on the Fit model device to protect from moisture and liquid
Lite model
- Ensure the tablet silicone cover is in place on the Lite tablet to protect from accidental damage
Cleaning
Stainless Steel Housing
Cleaning Supplies Needed
- Lint-free or microfiber cloth
- Foaming degreaser
- Wipe down the stainless steel using a lint-free or microfiber cloth.
WARNING
- Never use abrasive cleaning pads, this will cause scratches and discoloration.
- Be sure the tablet is powered off and the device is unplugged from
the wall outlet before any cleaning.
- For a deeper clean, apply a small amount of foaming degreaser directly on the stainless steel and wipe immediately.
NOTE
Wipe any overspray from the tablet right away.
Tablet
Cleaning Supplies Needed
- Lint-free or microfiber cloth
- Alcohol-based glass cleaner
- Spray a soft, lint-free cloth with an alcohol-based glass cleaner and gently wipe the touchscreen.
WARNING
Never use an abrasive pad or spray directly on the touchscreen as this may damage the screen.
- Repeat if needed.
Printer
Cleaning Supplies Needed
- Isopropyl Alcohol
- Cotton swabs, soft clothes, or adhesive tape
- Canned air
WARNINGS
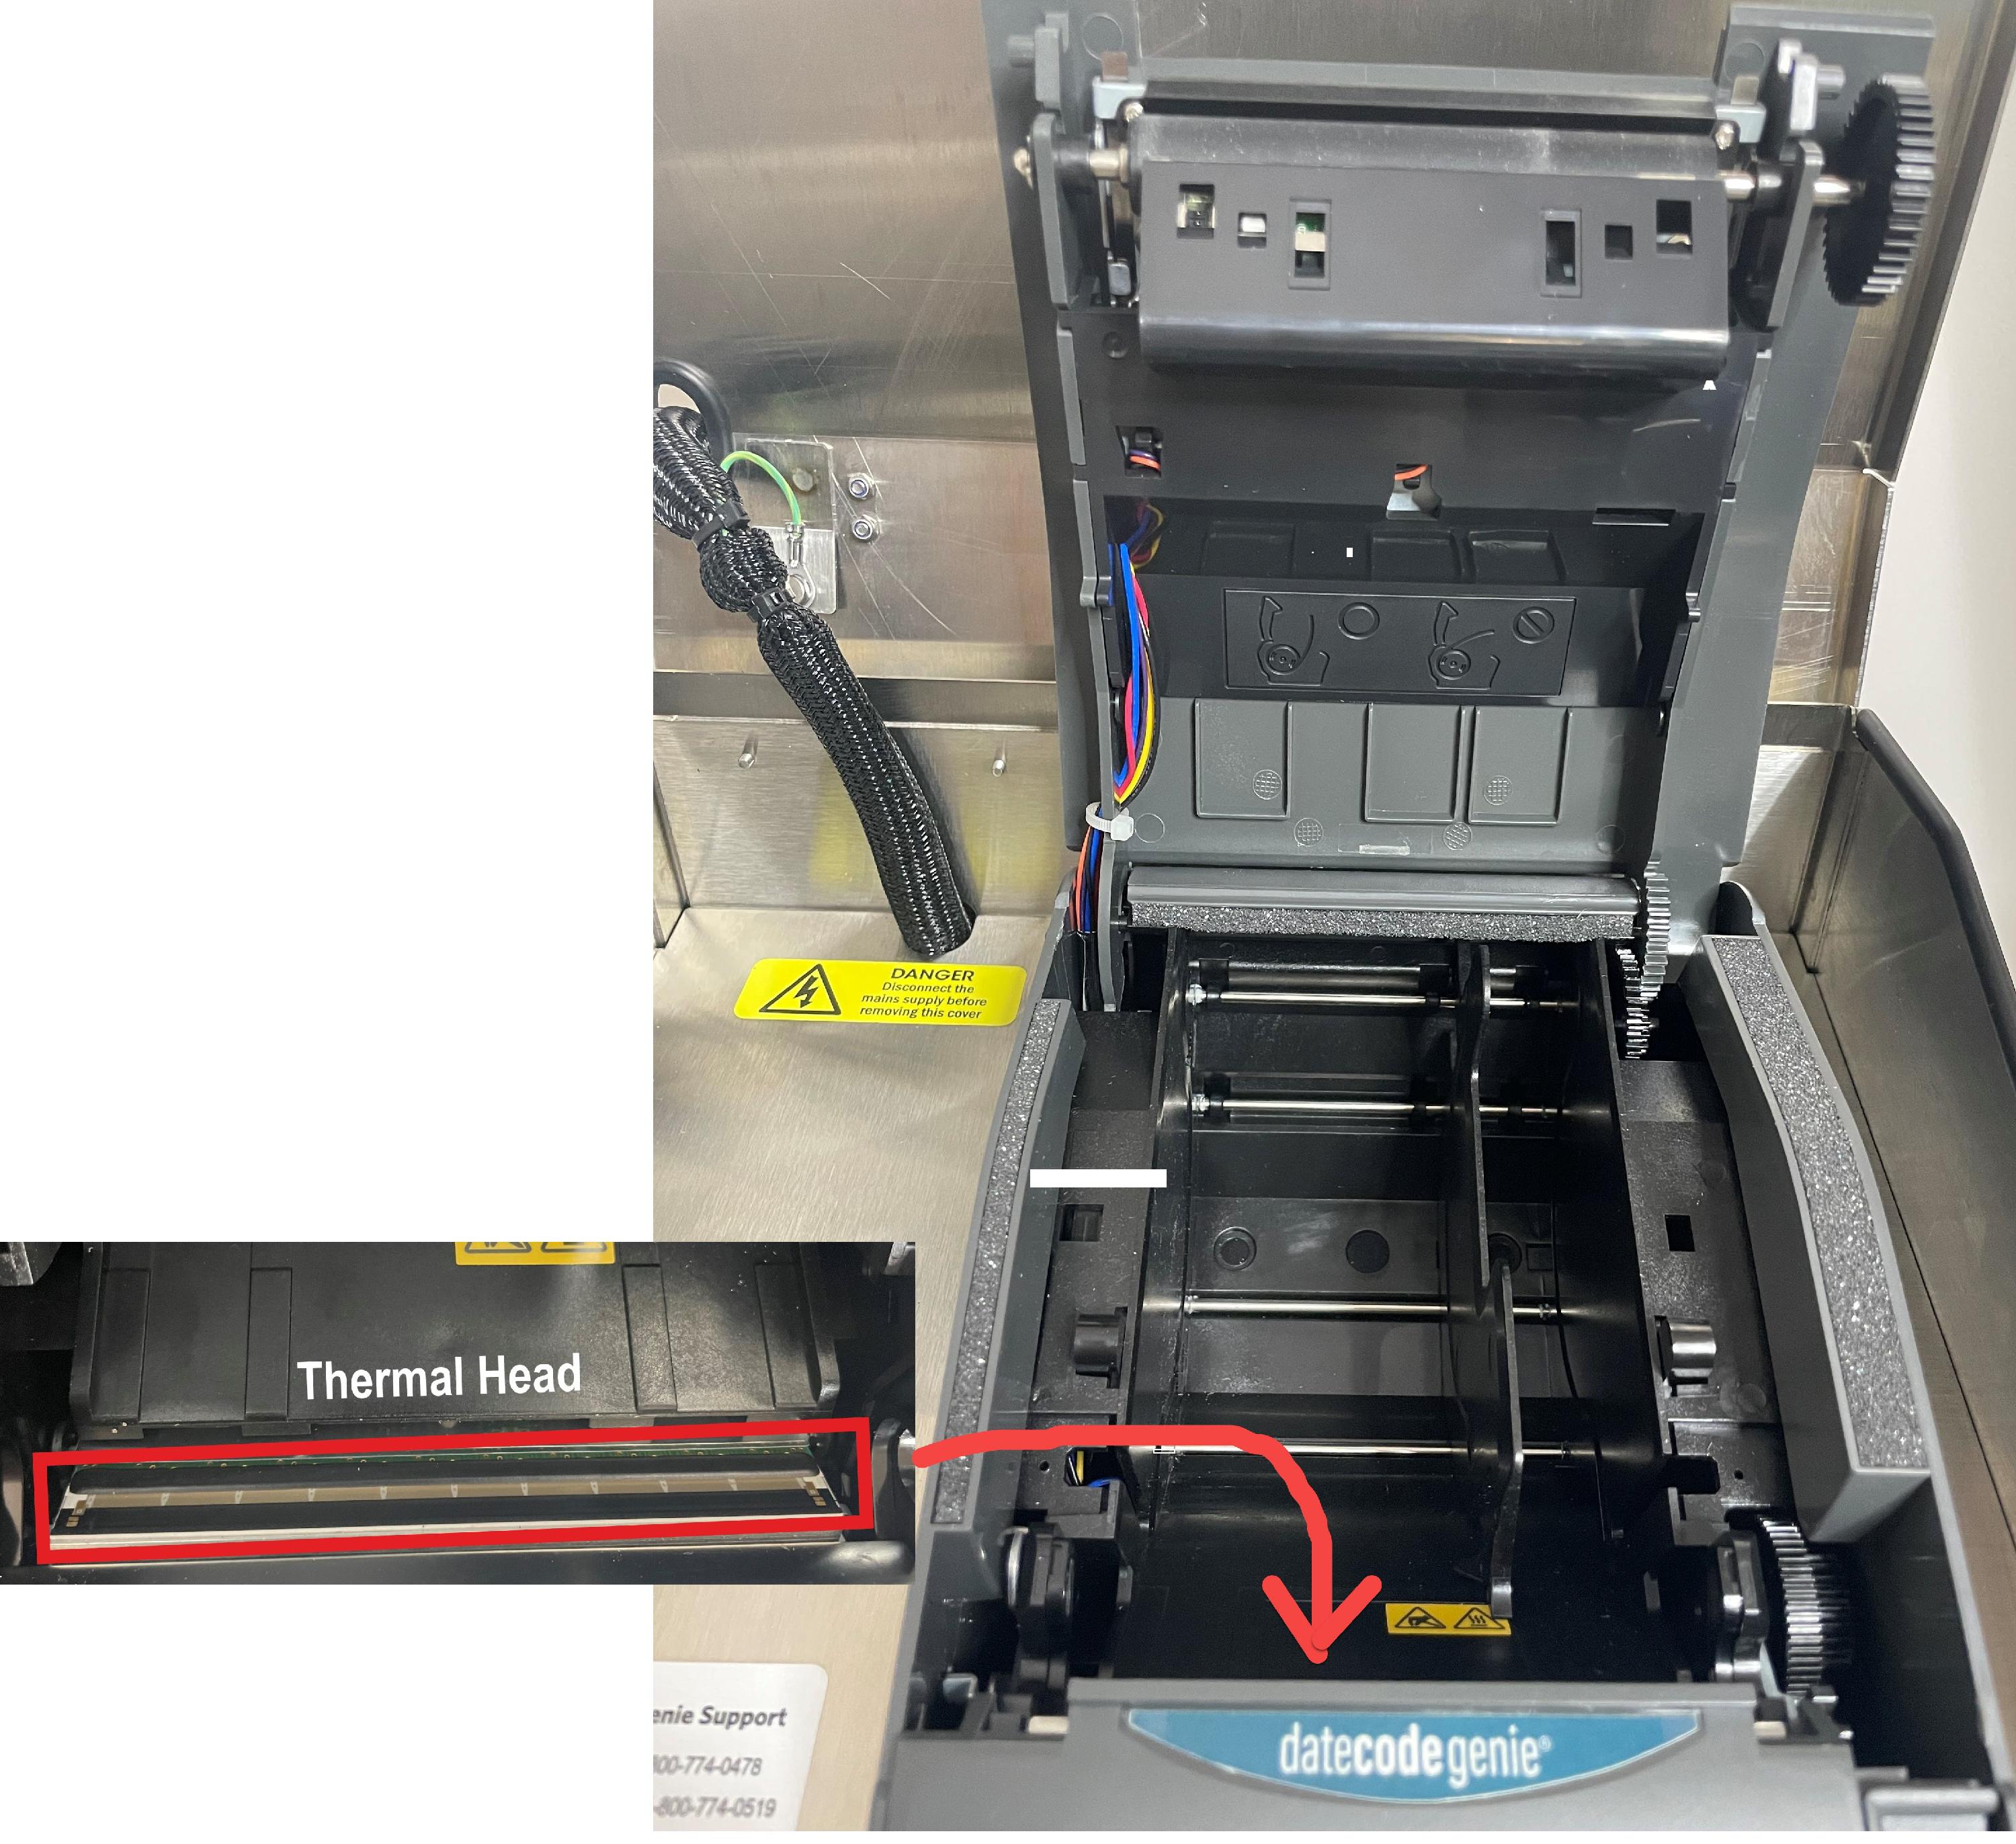
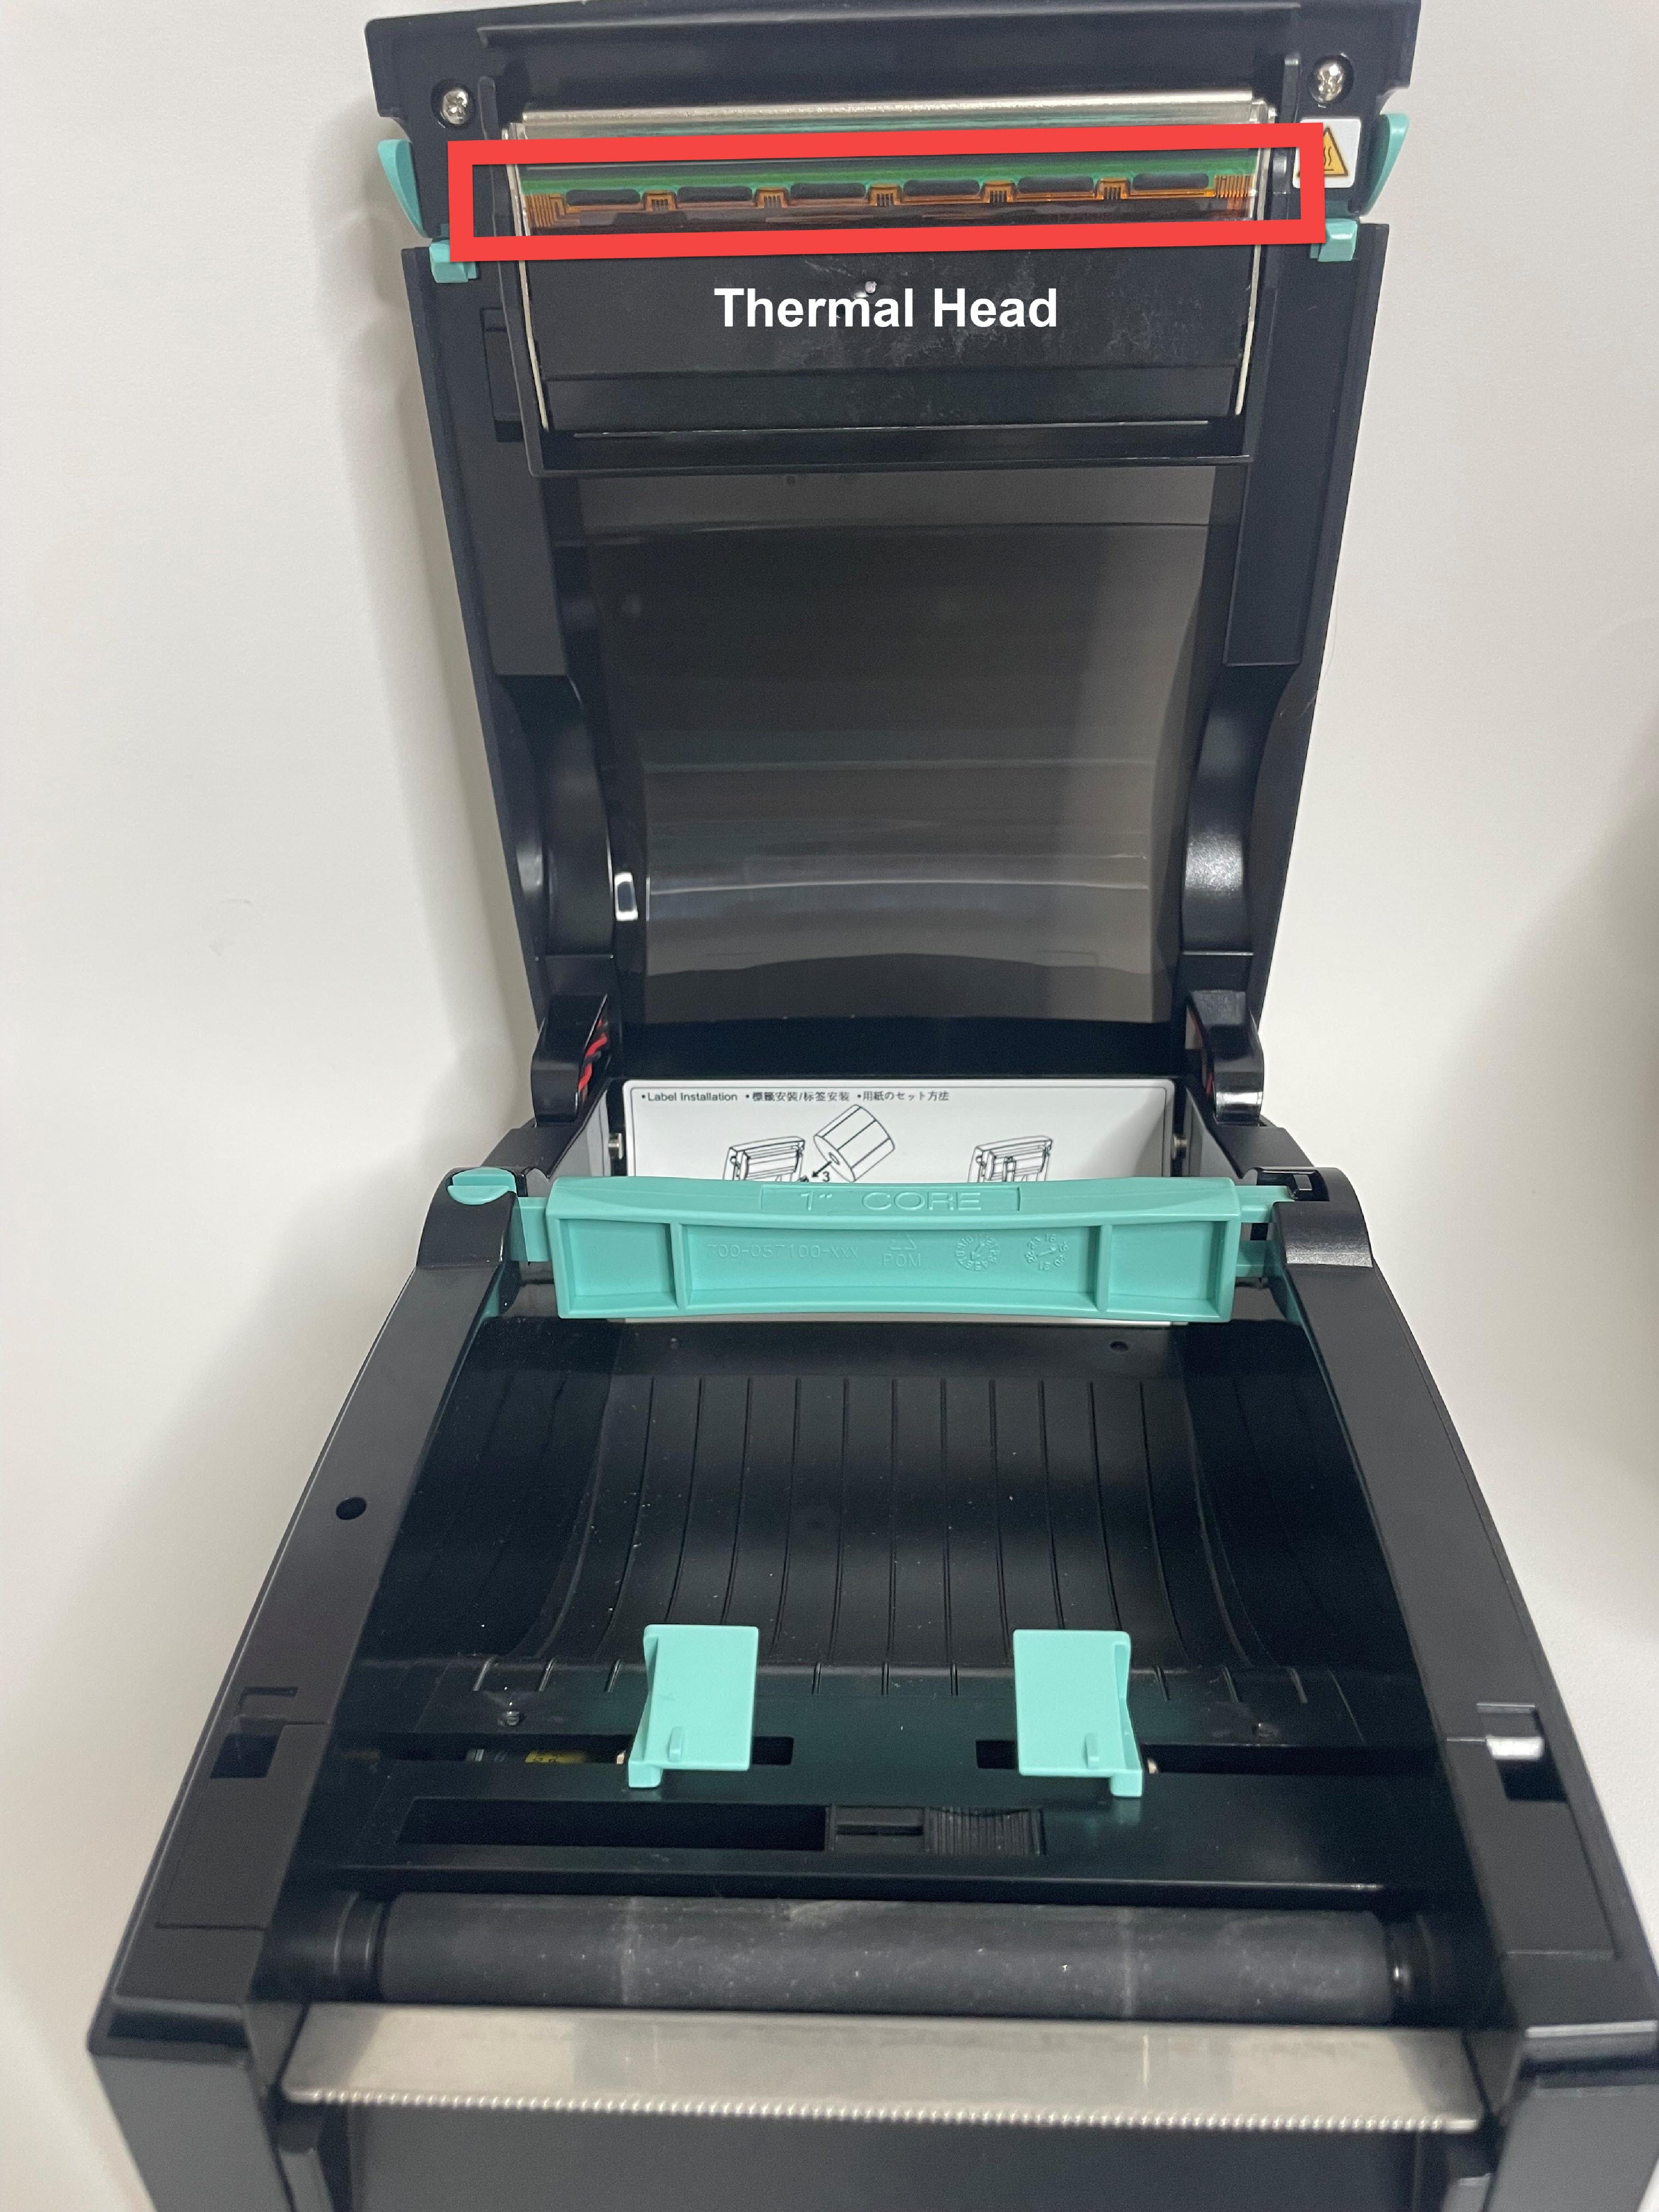
- Never clean the printer immediately after printing. Wait until the printer has cooled to avoid damage to the thermal head.
- Avoid scratching and exposing the thermal head to static electricity.
- Remove the label roll and any stuck labels inside the printer.
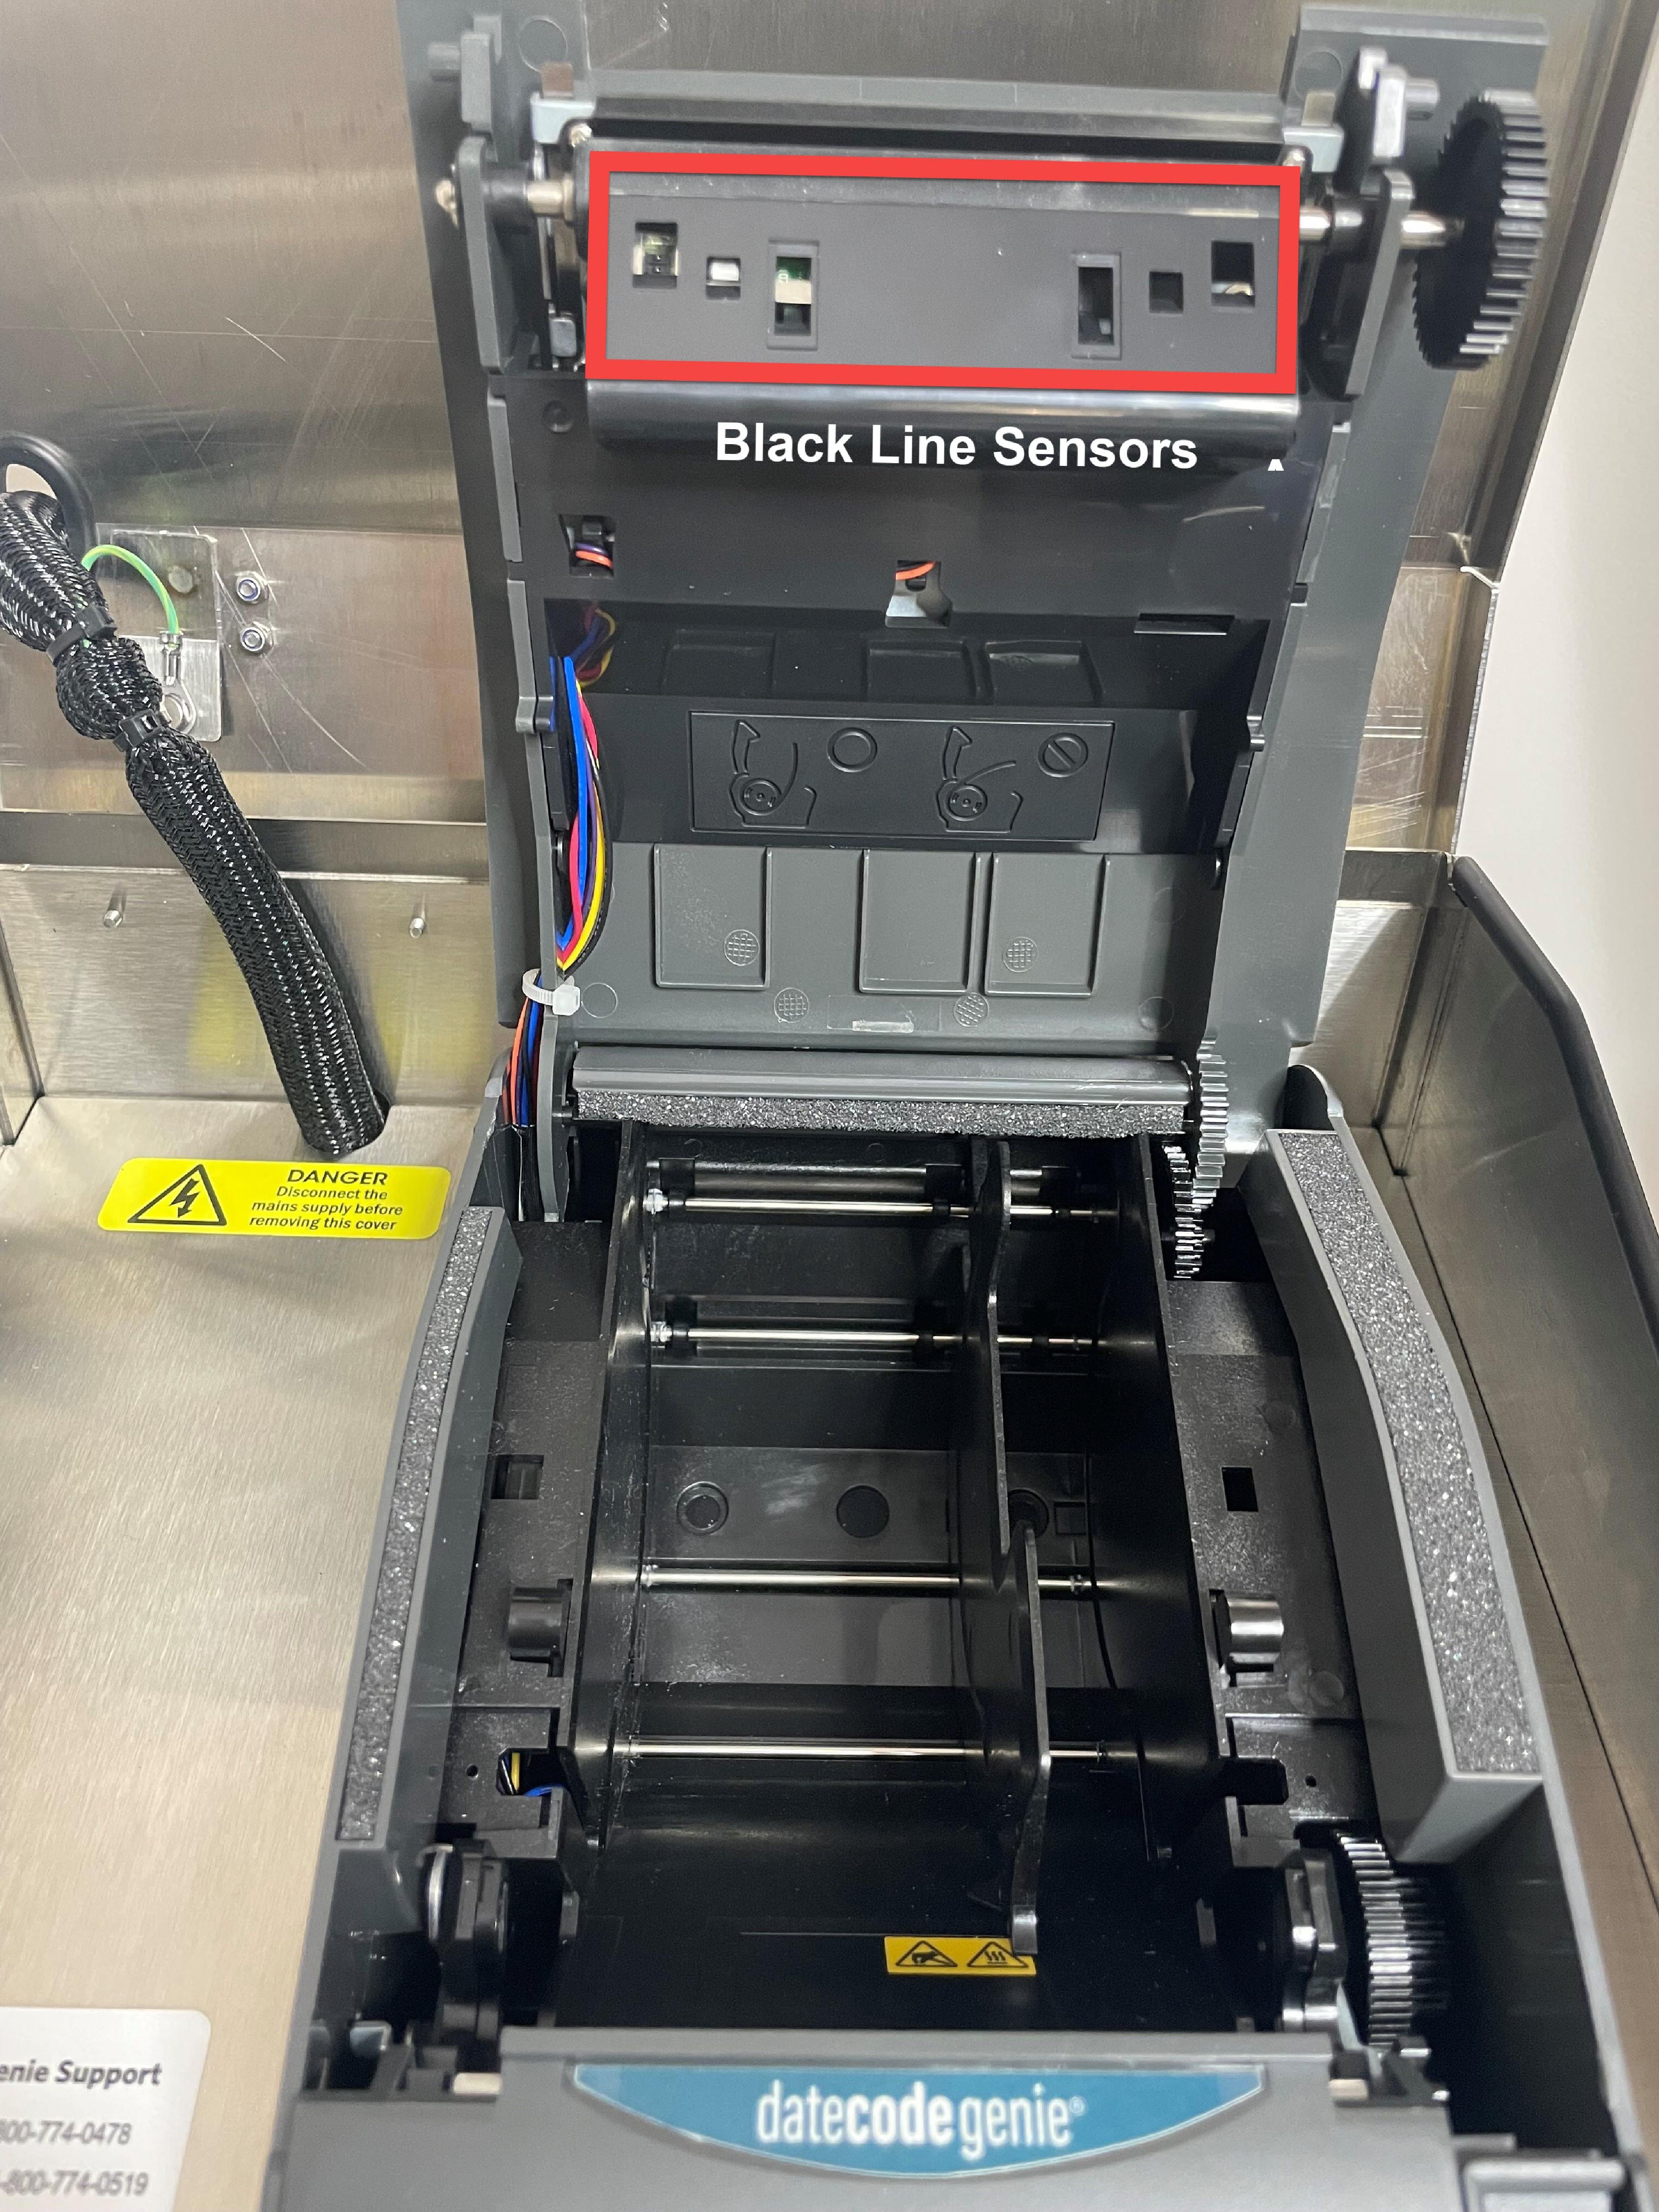
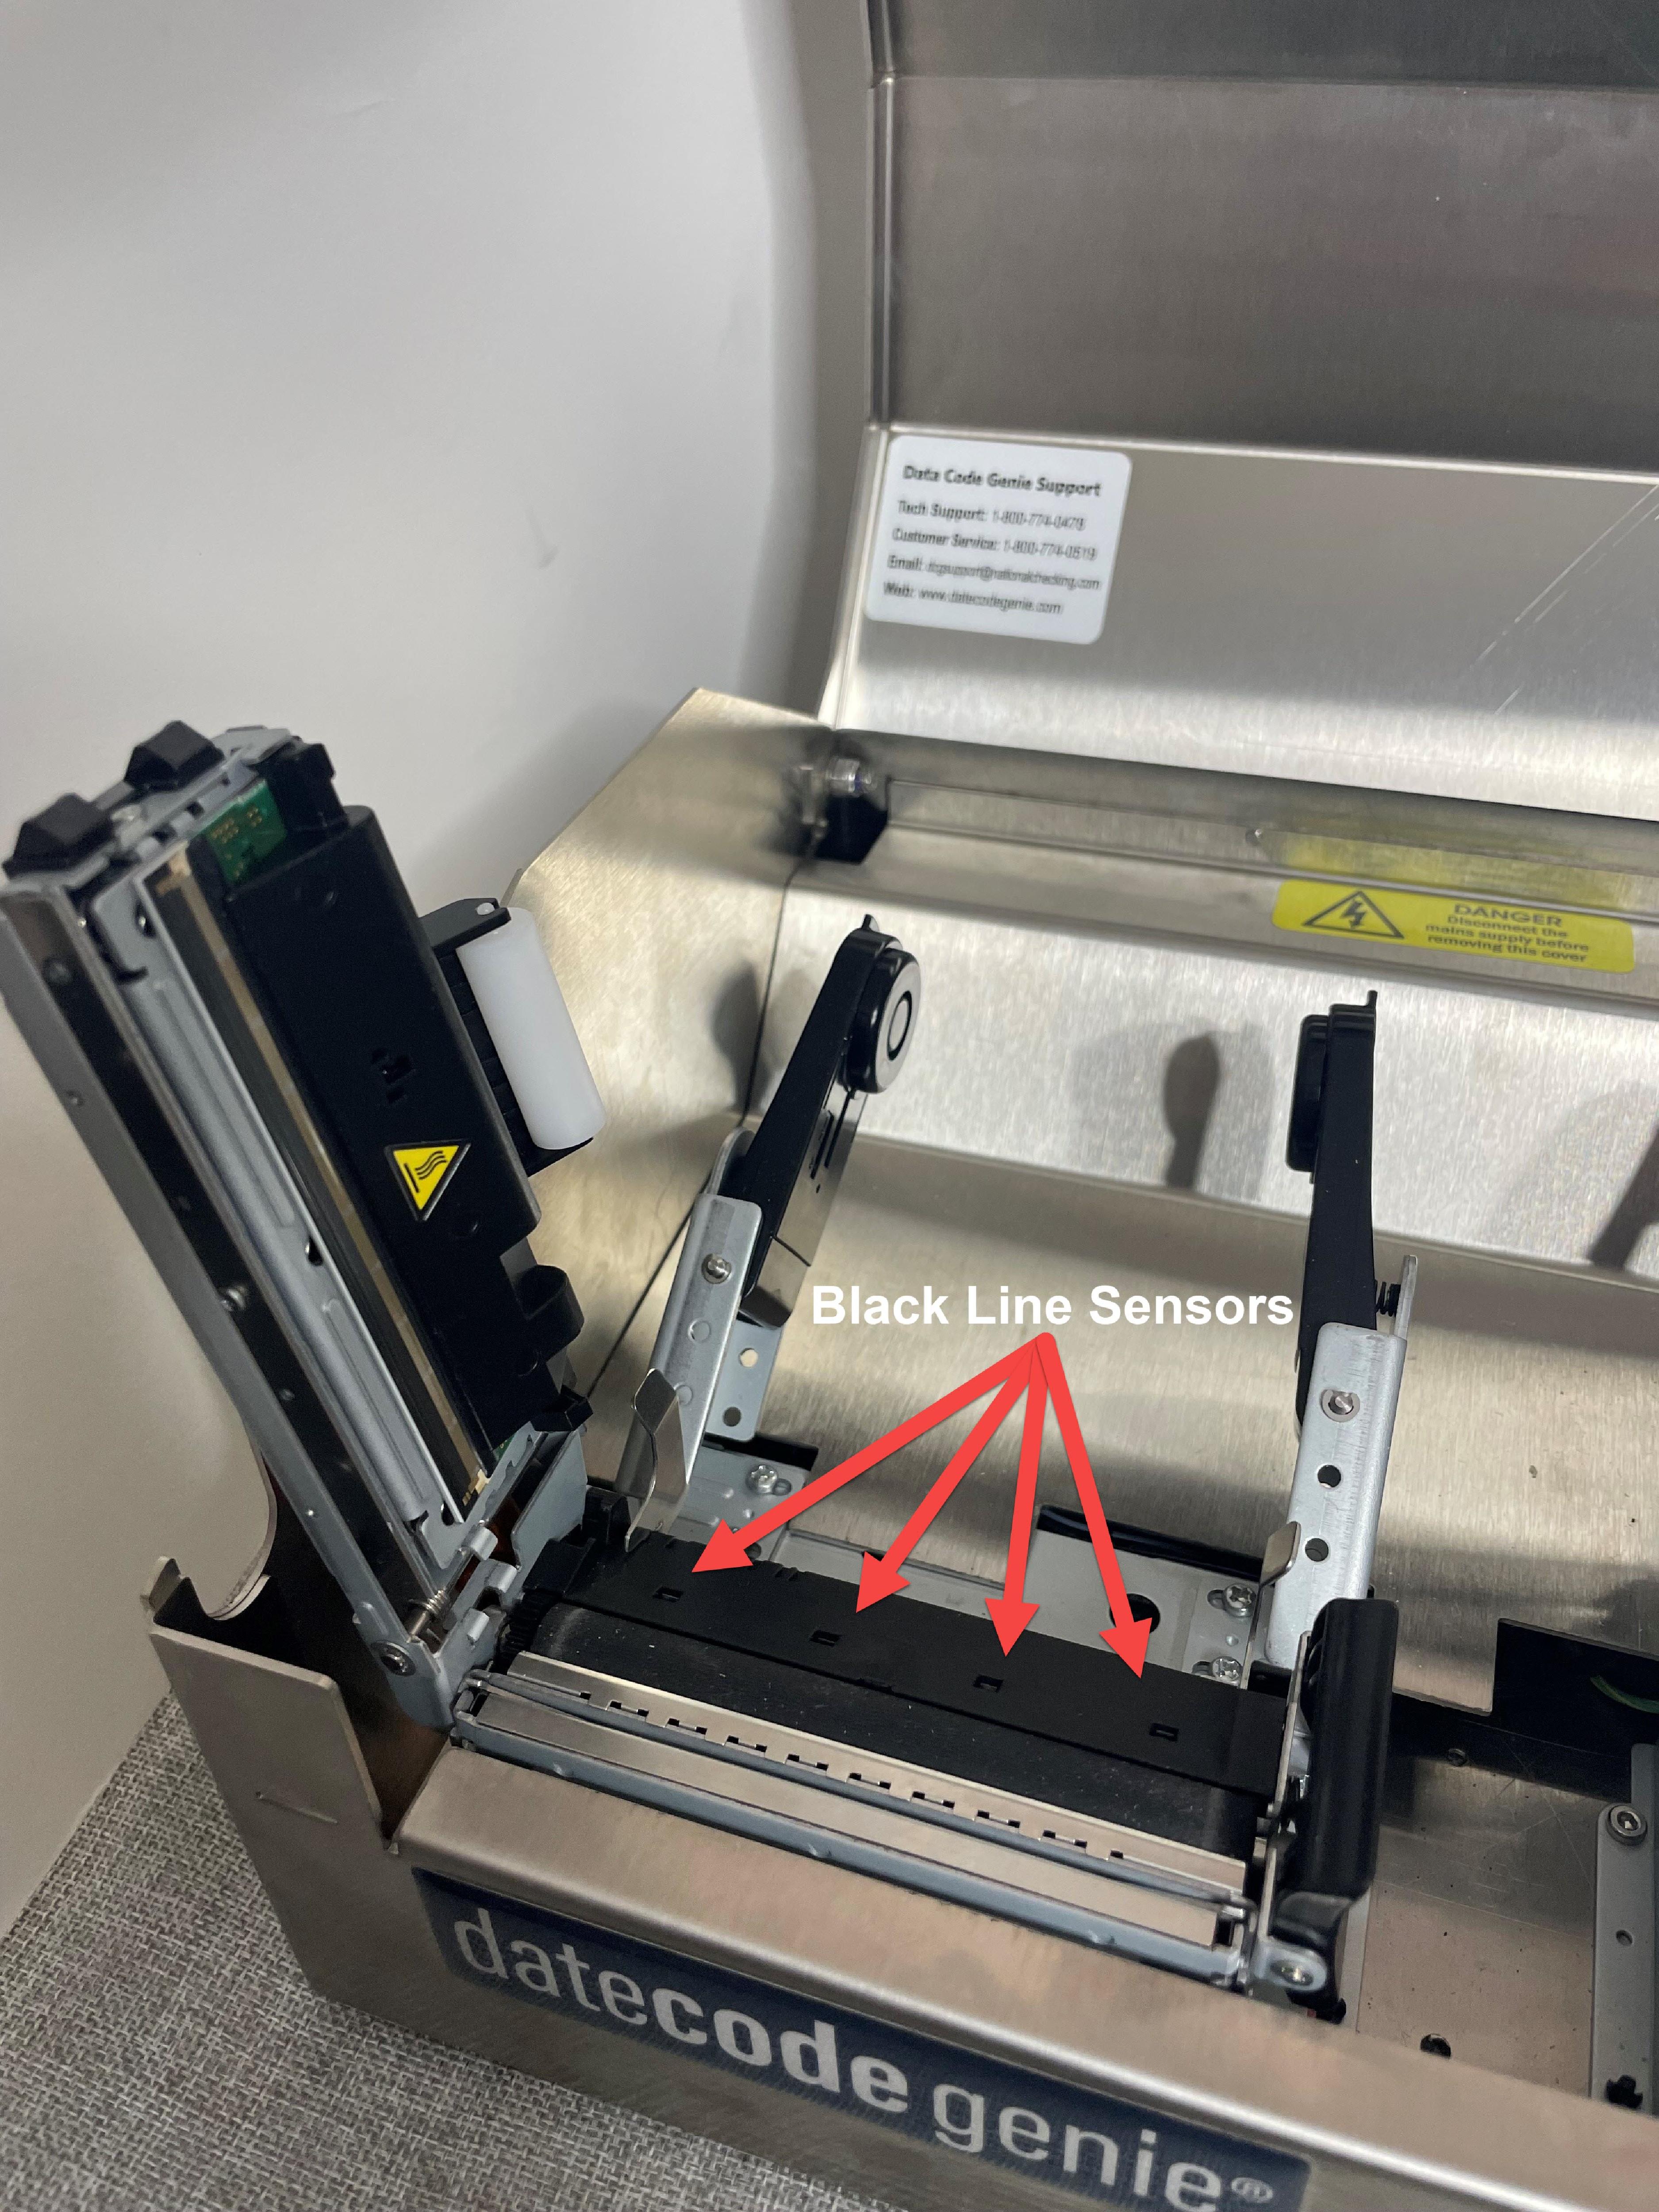
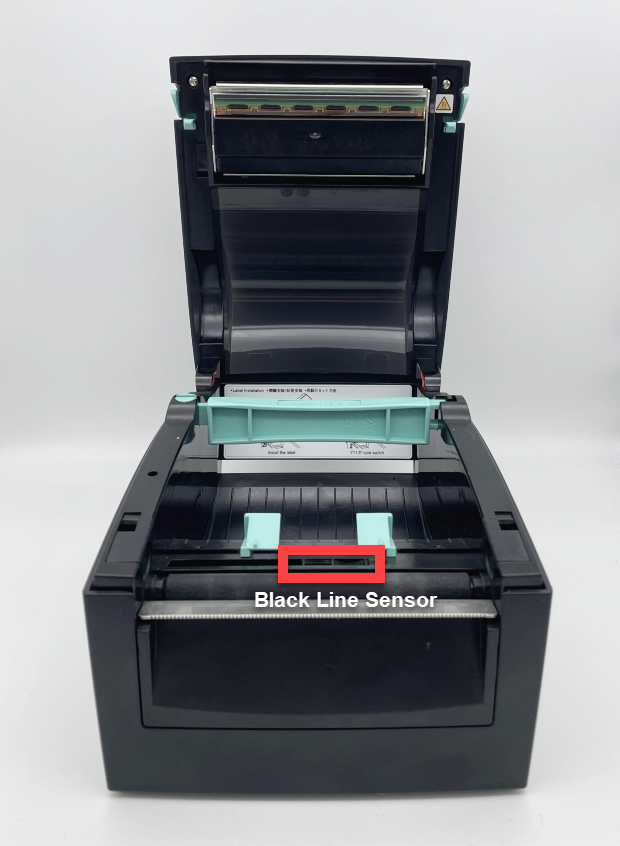
- Spray the canned air to clear any debris from inside the printer opening including the black line sensors.
NOTE
Do not tilt the canned air to avoid blowing liquid into the printer.
| 2.0 and Fit Model | X Model | Lite Model |
|---|---|---|
 |
 |
 |
- Use a cotton swab and soft cloth, lightly damp with isopropyl alcohol, and wipe or use adhesive tape to lightly press on the roller and thermal head to remove any residue.
| 2.0 and Fit Model | X Model | Lite Model |
|---|---|---|
 |
 |
 |
- Repeat until cotton swab and soft cloth remain white or adhesive tape has removed any residue.
- Load label roll after thermal head is completely dry and clean of residue.
WARNING
Printing labels with a damp thermal head will damage the printer.