US English (US)
FR French
DE German
ES Spanish
IT Italian
NL Dutch
menu

Contact Us

No results found. Still need help? Contact us

  • Scheduled Assistance
  • Contact Us
English (US)
US English (US)
FR French
DE German
ES Spanish
IT Italian
NL Dutch
arrow_back
  • Getting Started
  • Devices
  • App
  • Portal
  • Admin Settings
  • Accessories
  • Labels
  • Repairs
  • APIs
  • Task Manager
  • Scheduled Assistance
  • Contact Us

Clear Buffer for DCG X Series

Contact Us

If you still have questions or prefer to get help directly from an agent, please submit a request.
We’ll get back to you as soon as possible.

  • Getting Started
    Getting Started Guides Set Up Training
  • Devices
    Troubleshooting Device Overview 2.0 Model X Series Model Fit Model Lite Model mC-Label3 Printer Device Tablet Internet Connection Warranty & Support
  • App
    Error Codes Troubleshooting App Overview Mobile App Subscription Prep Lists Product Control Rosters Scale Temperature Probe Print History Settings Language Location Overrides
  • Portal
    Portal Overview Locations Categories Menu Items Printer Profiles Users Settings Quick Labels Prep List Print History Mass Import and Export Media Library Location Overrides Product Control Rosters Scale Temperature Probe Groups
  • Admin Settings
    Start with Admin Settings Admin Settings Overview Locations Devices and Licenses
  • Accessories
    Bluetooth Scanner USB Scanner Temperature Probe Scale Label Rewinder Fit Printer Shelf Warranty
  • Labels
    Overview Troubleshooting
  • Repairs
    2.0 Model X Series Model Lite Model DateCodeGenie® Tablet
  • APIs
    Inbound APIs Outbound APIs
  • Task Manager
    Task Manager Overview Venues Forms Users Resources Task Manager App
+ More
  • Home
  • Devices
  • X Series Model

If a DCG X Series Printer is skipping labels, it may be necessary to clear the printer buffer. These steps are for the instruction to clear the buffer for your DCG X Series (X2, X22, X23) model printer.

Steps:

1. Tap the square on the bottom of the tablet screen.

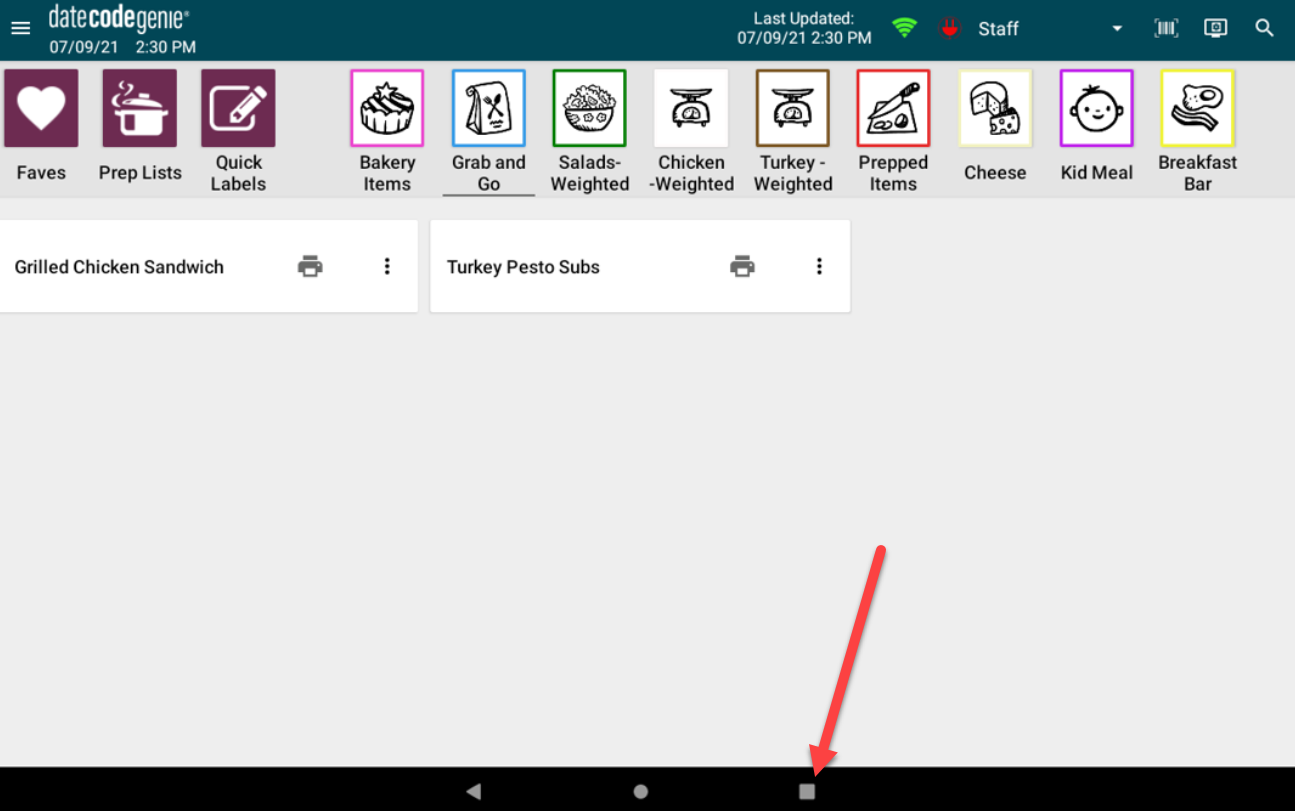
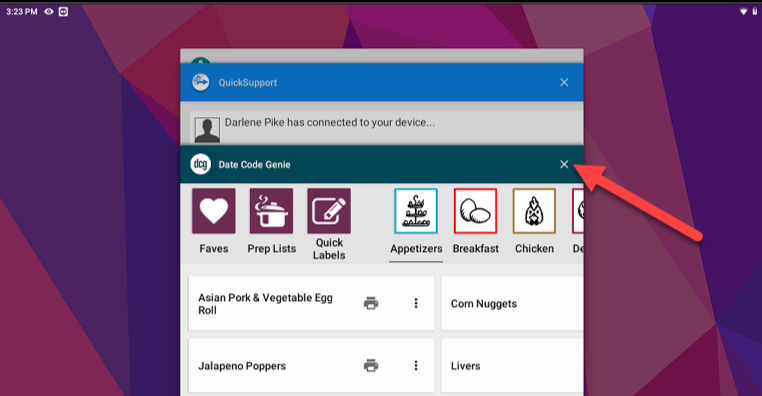
2. Locate the DateCodeGenie app and tap x or swipe left to close.

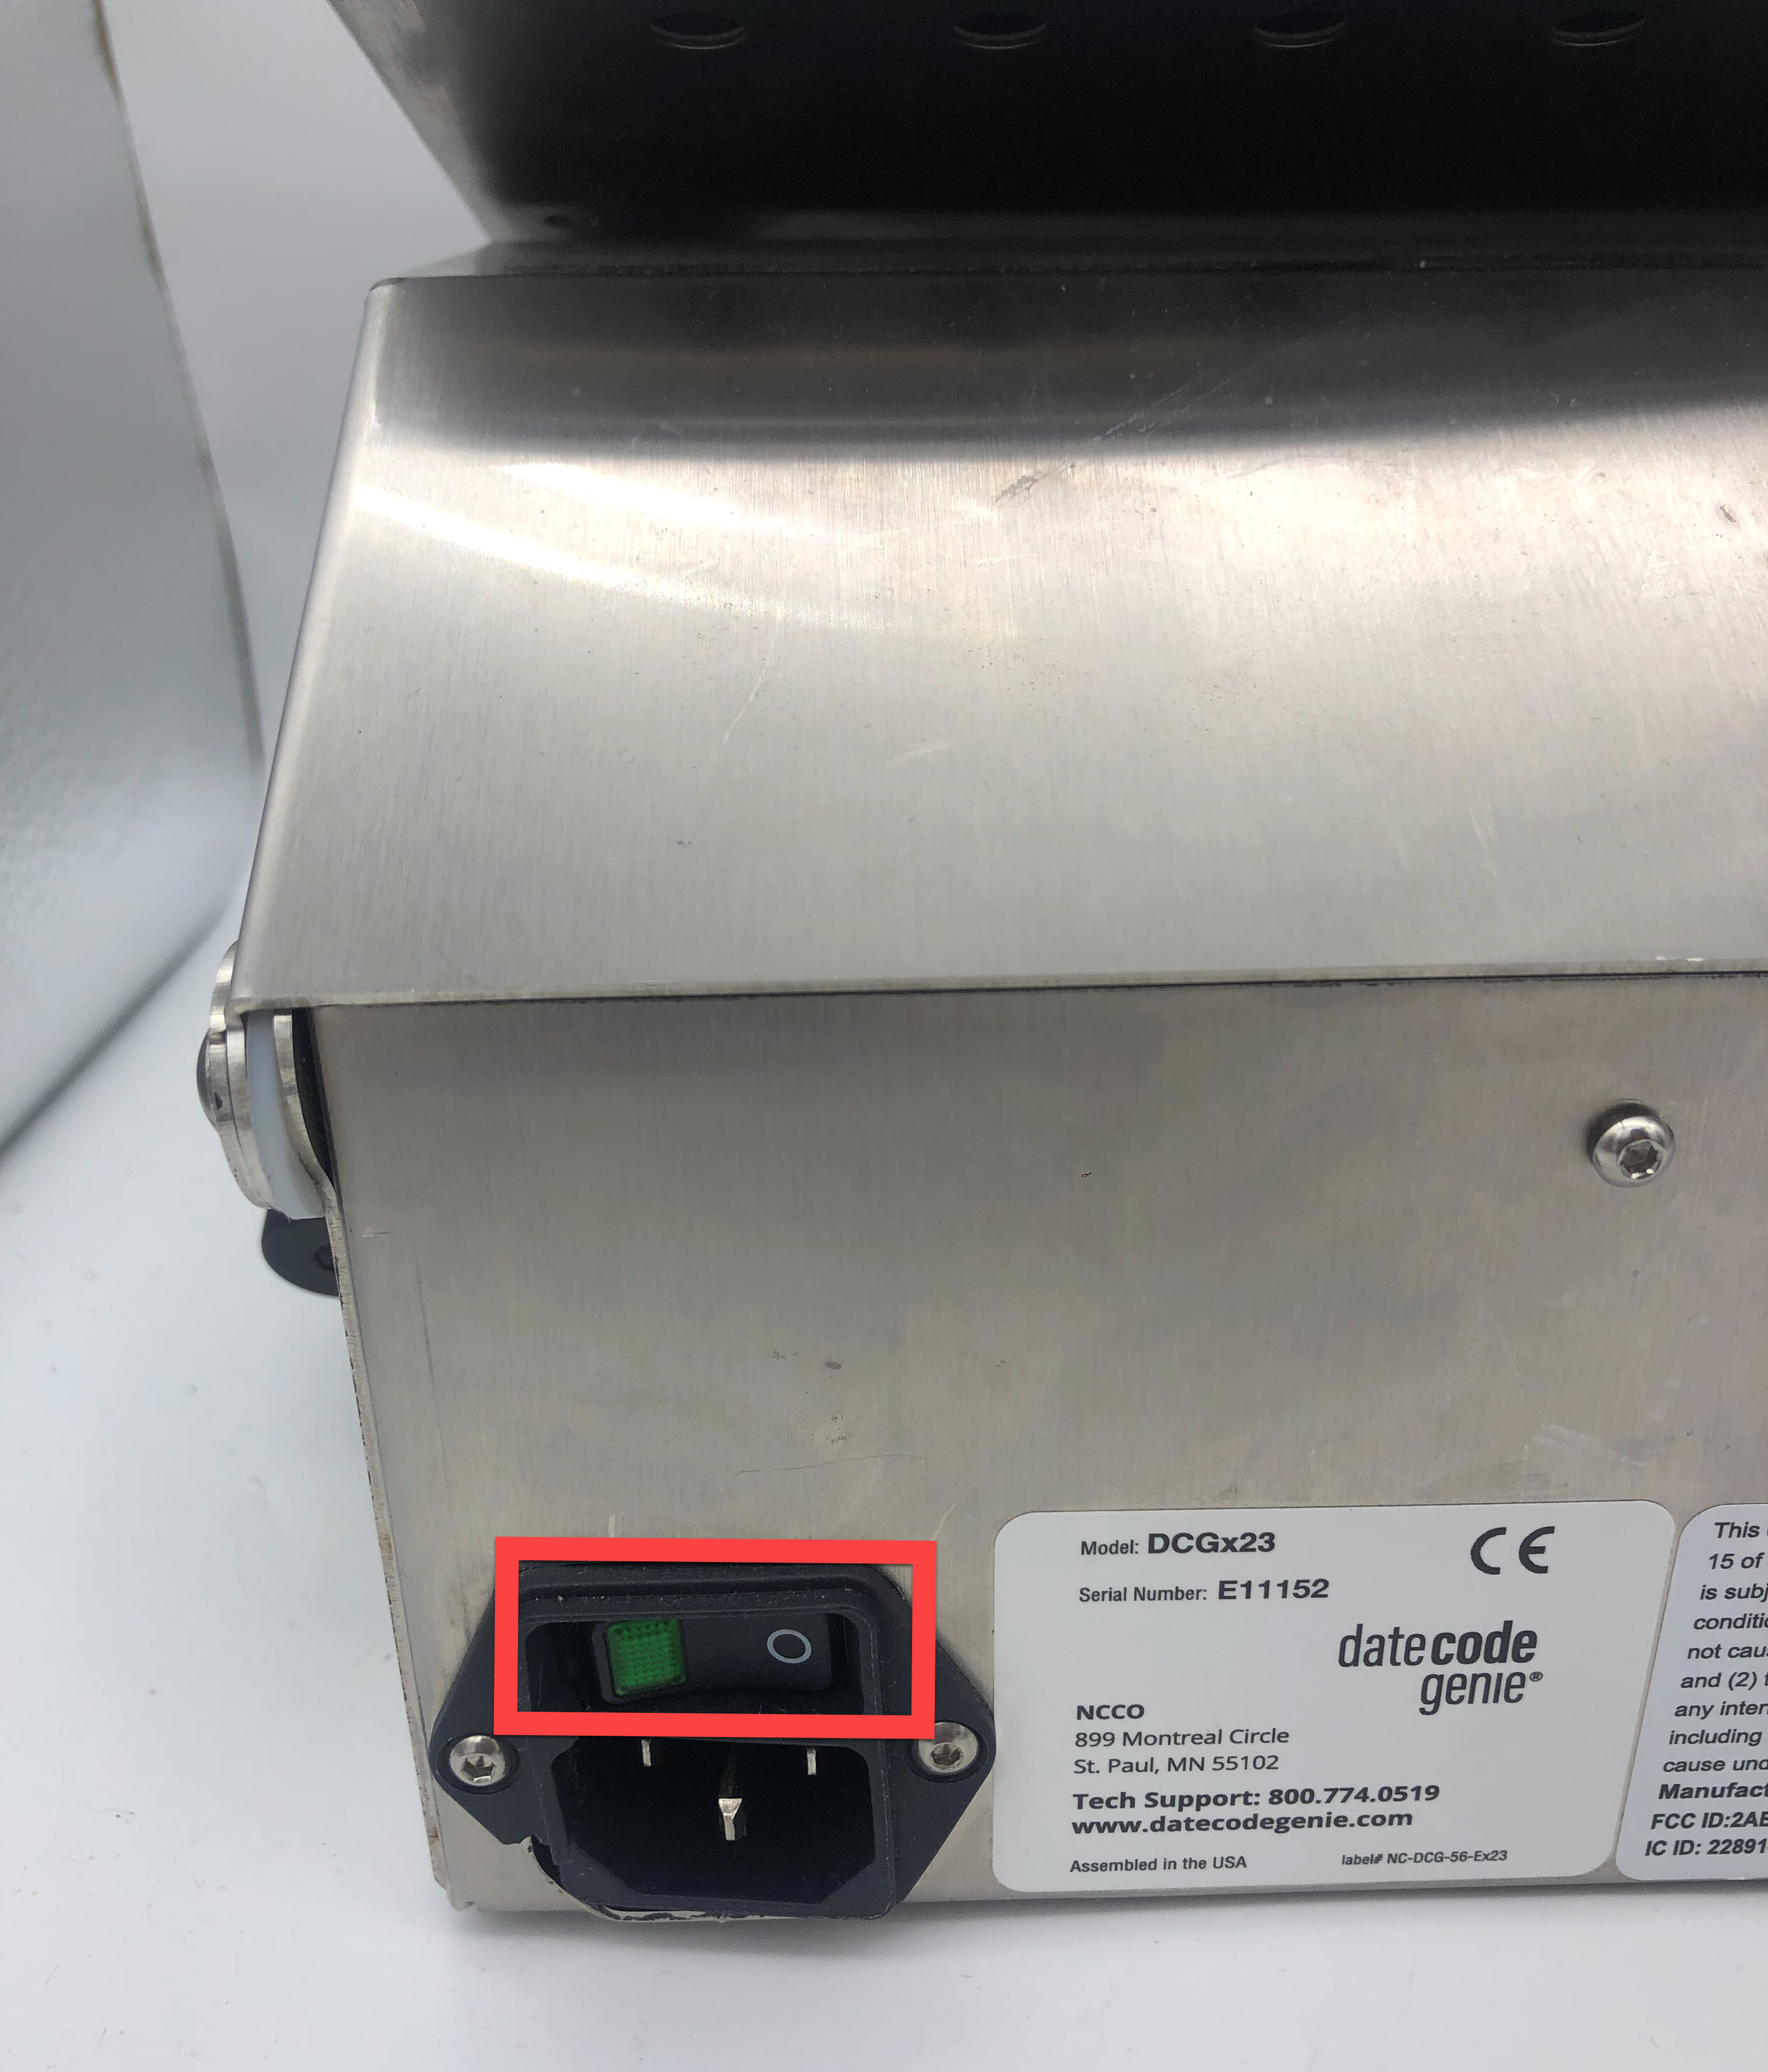
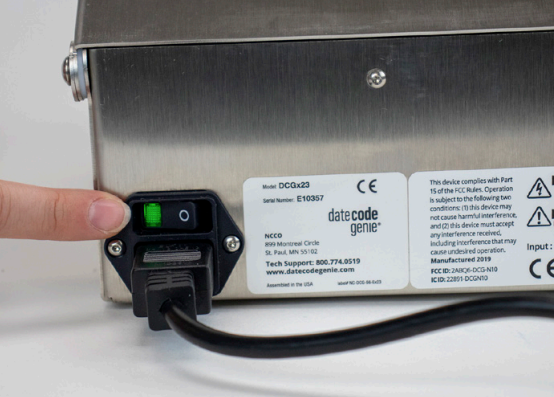
3. Set master power switch on the back of the device to the “O” position.

NOTE

If toggle switch is not available, power off by removing the power cable located on the back of device from the wall.
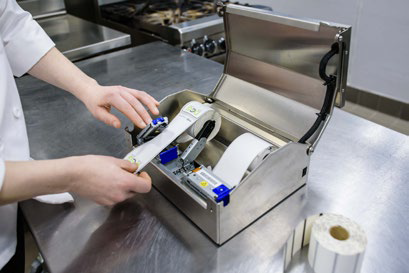
 

4. Open case cover.

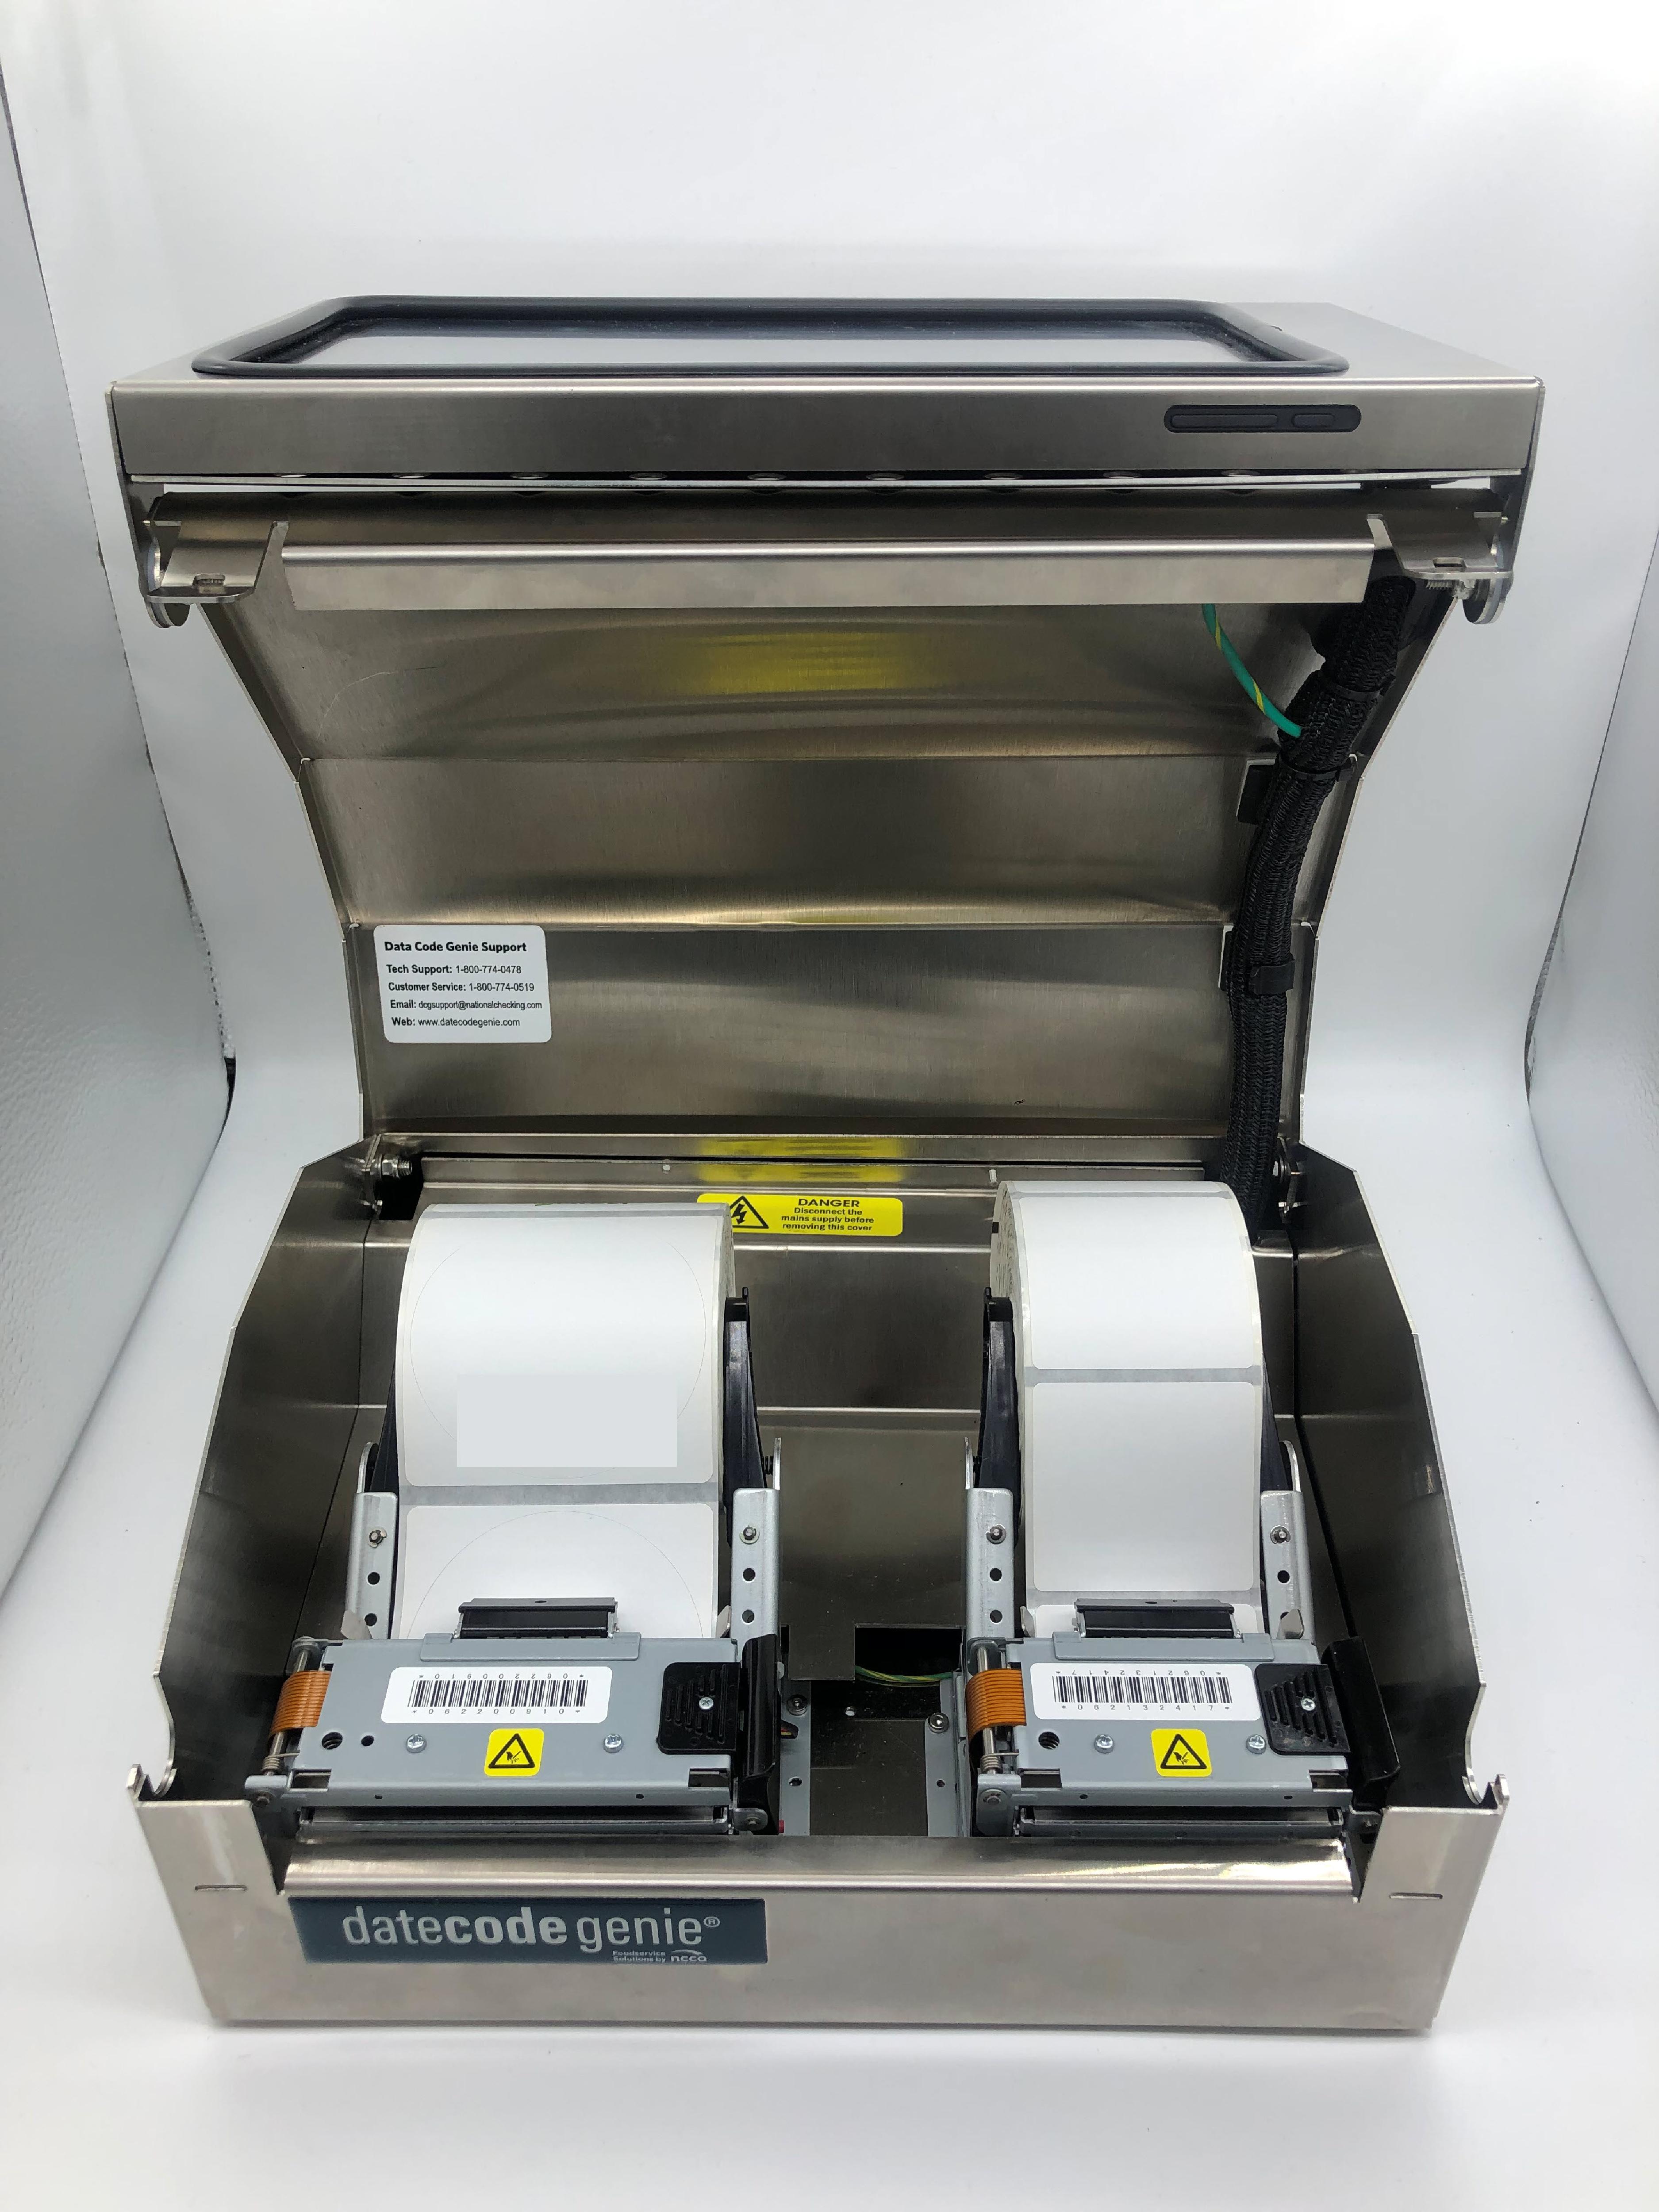
5. Gently separate the two black arms.

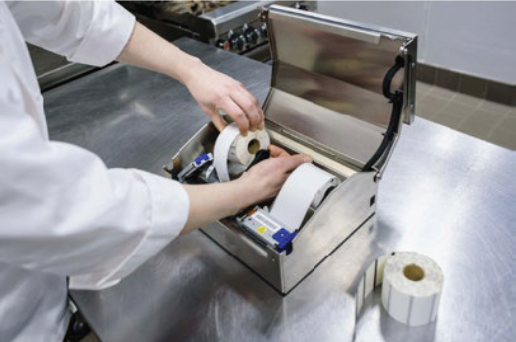
6. Verify that labels are loaded correctly, see How to Load Labels in the X Model Device.

NOTE

Labels should be facing up with the the black lines facing down towards the printer.


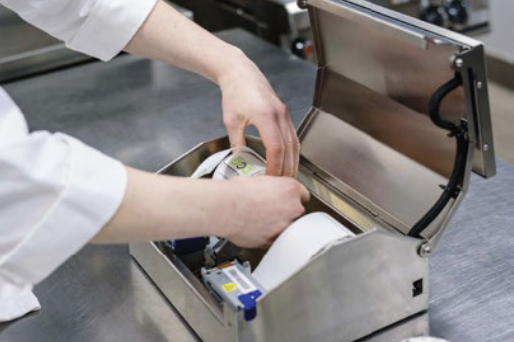
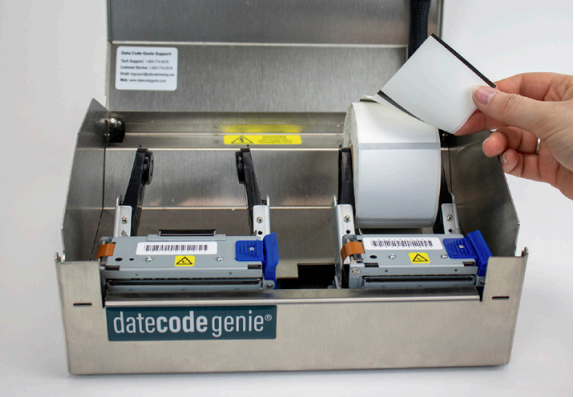
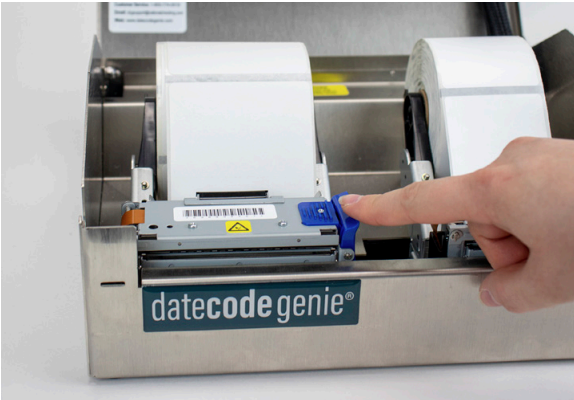
7. Press the blue/black tab to release the lever of printer. Extend the labels over the edge of the opening and close lever to snap in place.

8. Remove major debris if present.

9. Toggle master power switch to illuminate green.

10. Pull half a label out of the printer and close the lid. The printer should advance and cut in between two labels on a black line.

11. Open the DateCodeGenie app and test print.

For additional assistance see Contact & Support

Related Articles

  • DateCodeGenie® X Series Overview
  • X Series Printer Pops Open After Printing
  • Printer Calibration (X Series)
  • Load Labels in the X Model Device

Was this article helpful?

Yes
No
Give feedback about this article

Related Articles

  • DateCodeGenie® X Series Overview
  • X Series Printer Pops Open After Printing
  • Printer Calibration (X Series)
  • Load Labels in the X Model Device
© 2025 DateCodeGenie

899 Montreal Circle, St. Paul, MN 55102

Privacy Policy

contact us
About NCCO

Knowledge Base Software powered by Helpjuice

Expand