Impresora que avanza varias etiquetas
La impresora no imprime etiquetas ni corta y avanza varias etiquetas. La impresora puede imprimir una etiqueta y luego omitir varias etiquetas, lo que provoca un error de impresora fuera de línea.
Solucionar problemas de la impresora al hacer avanzar varias etiquetas
Selecciona tu modelo.
Verifique que las etiquetas estén cargadas correctamente en la impresora.
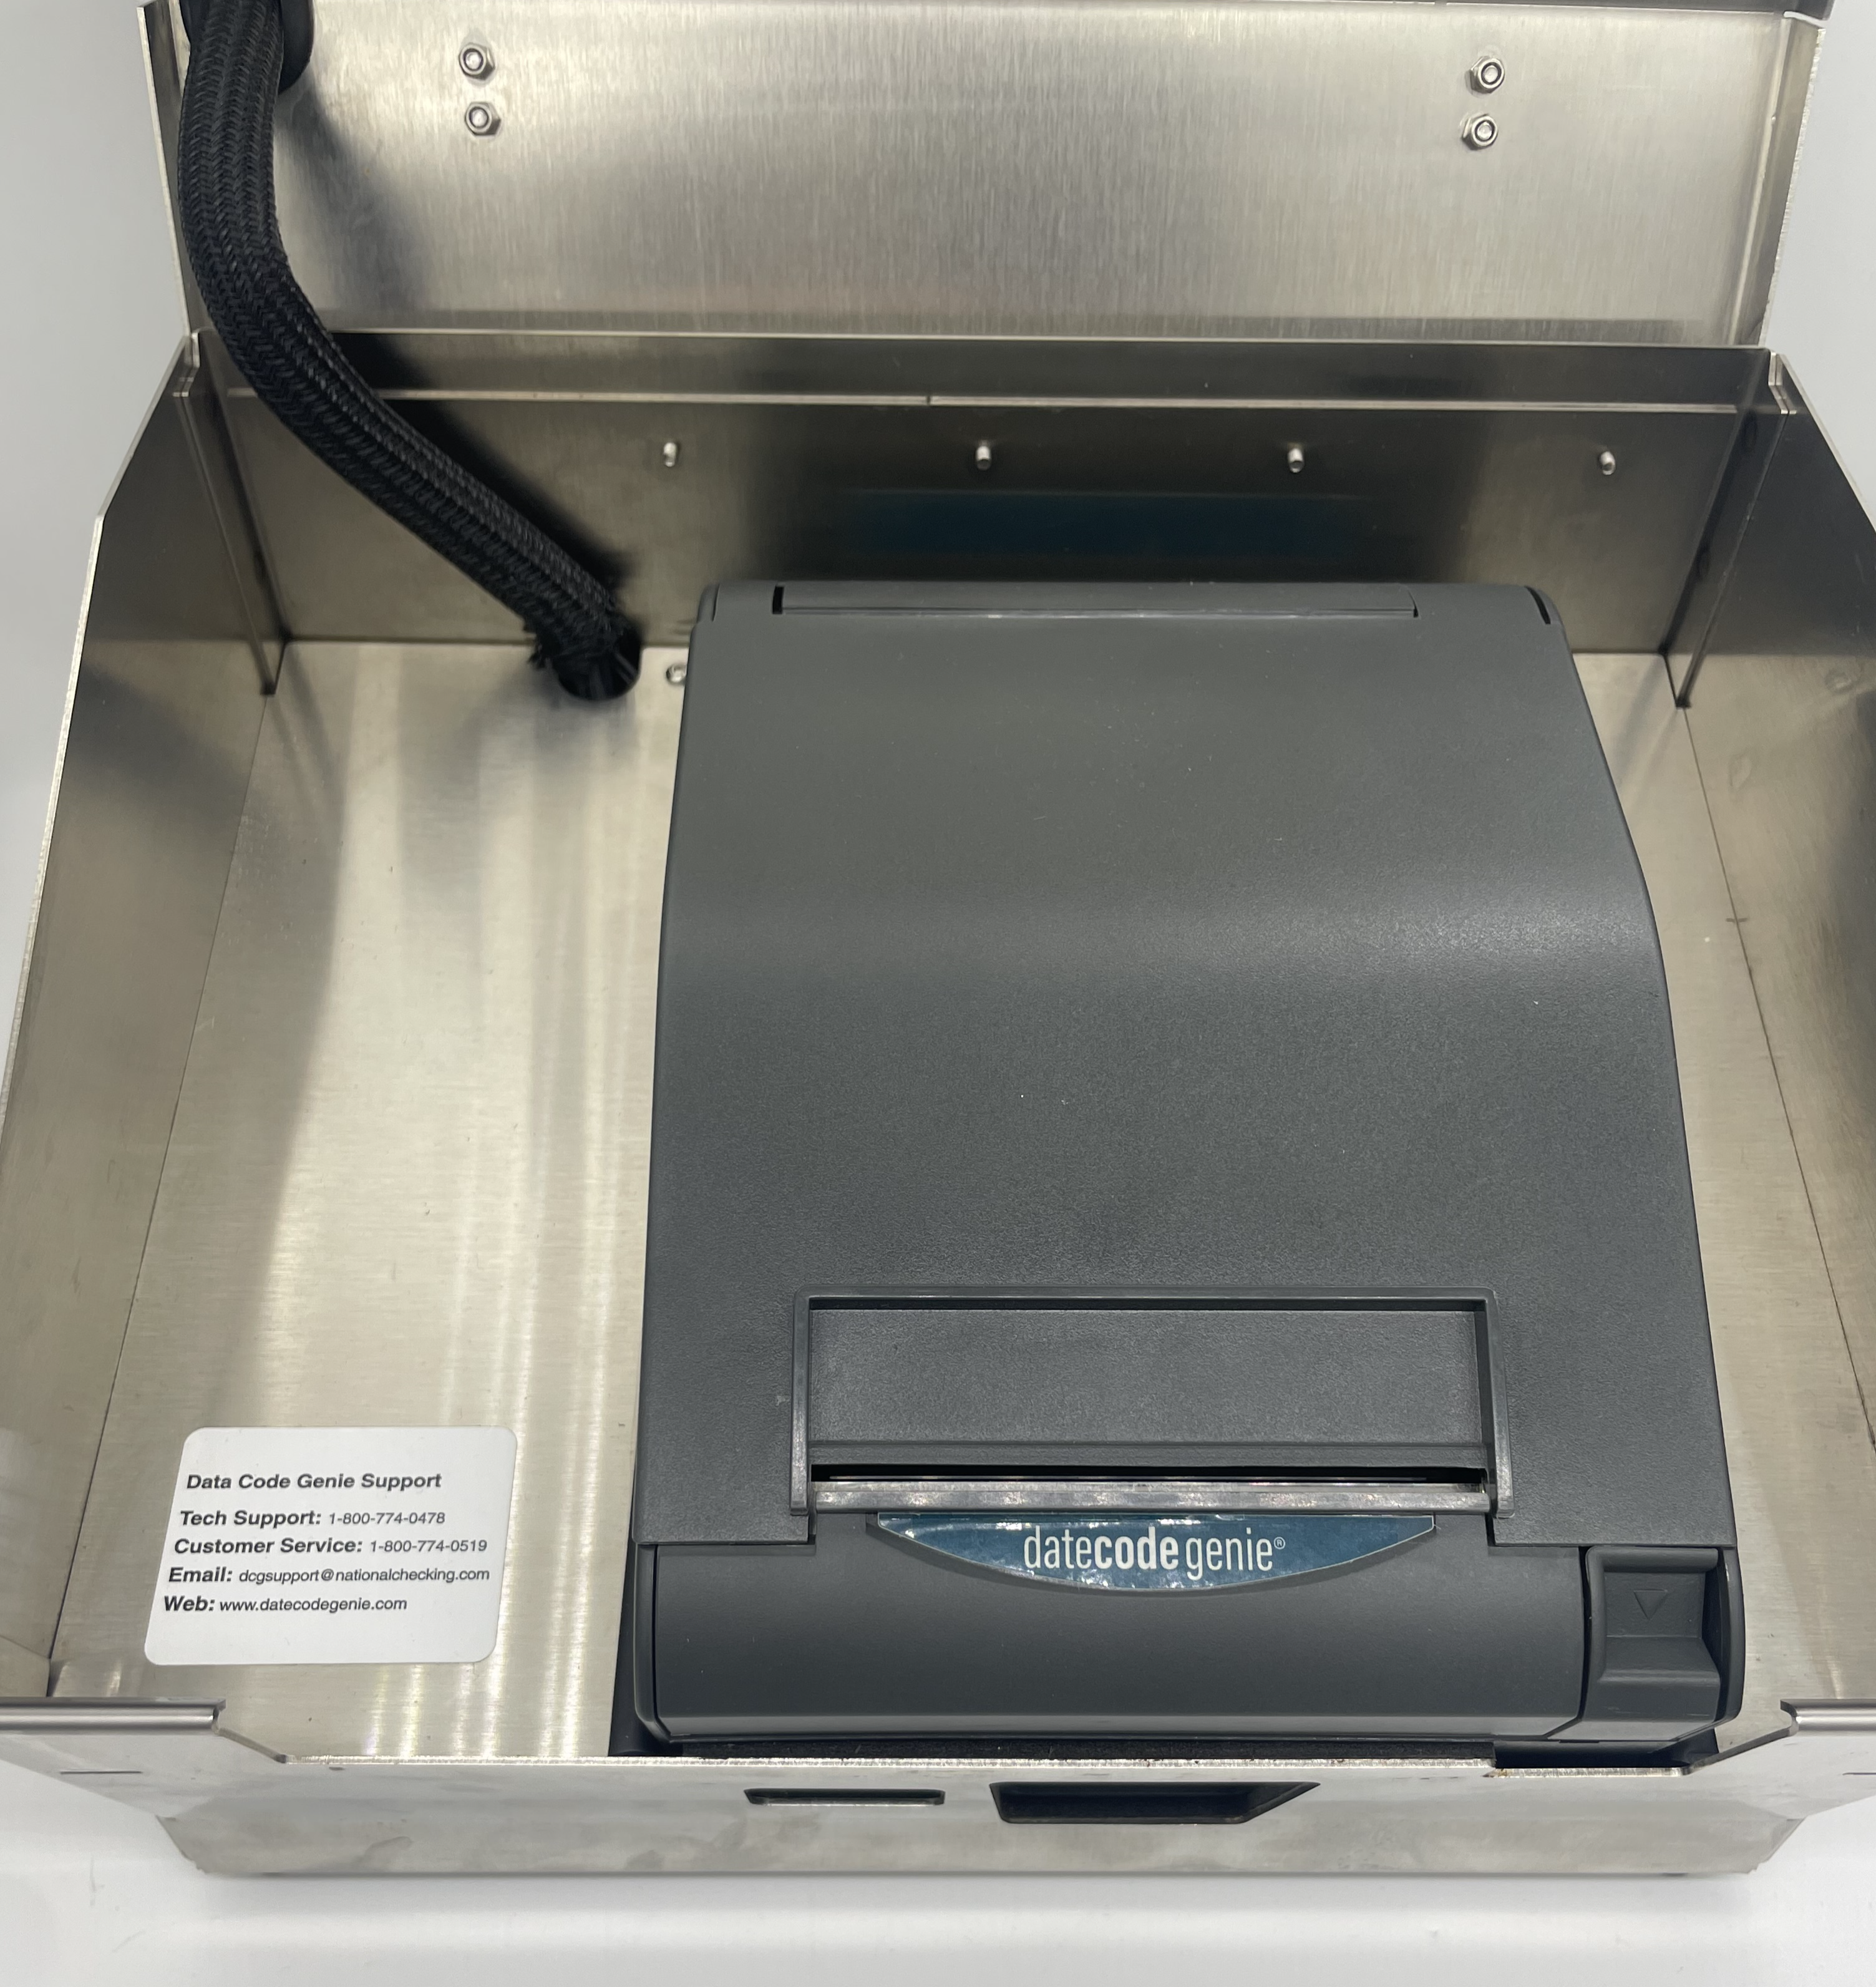
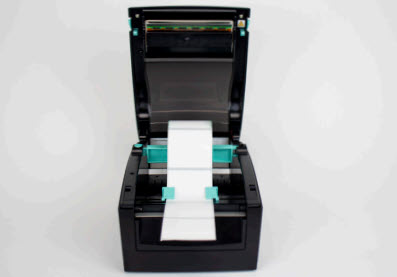
How to Load Labels in the 2.0 and Fit Model Devices
Model discontinued.
Load labels in the 2.0 and Fit model devices.
Steps:
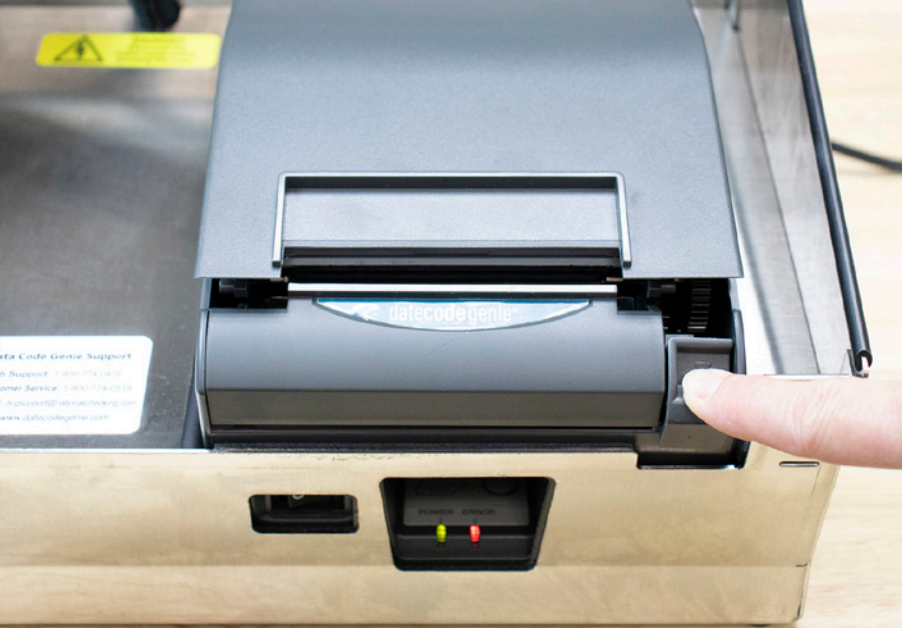
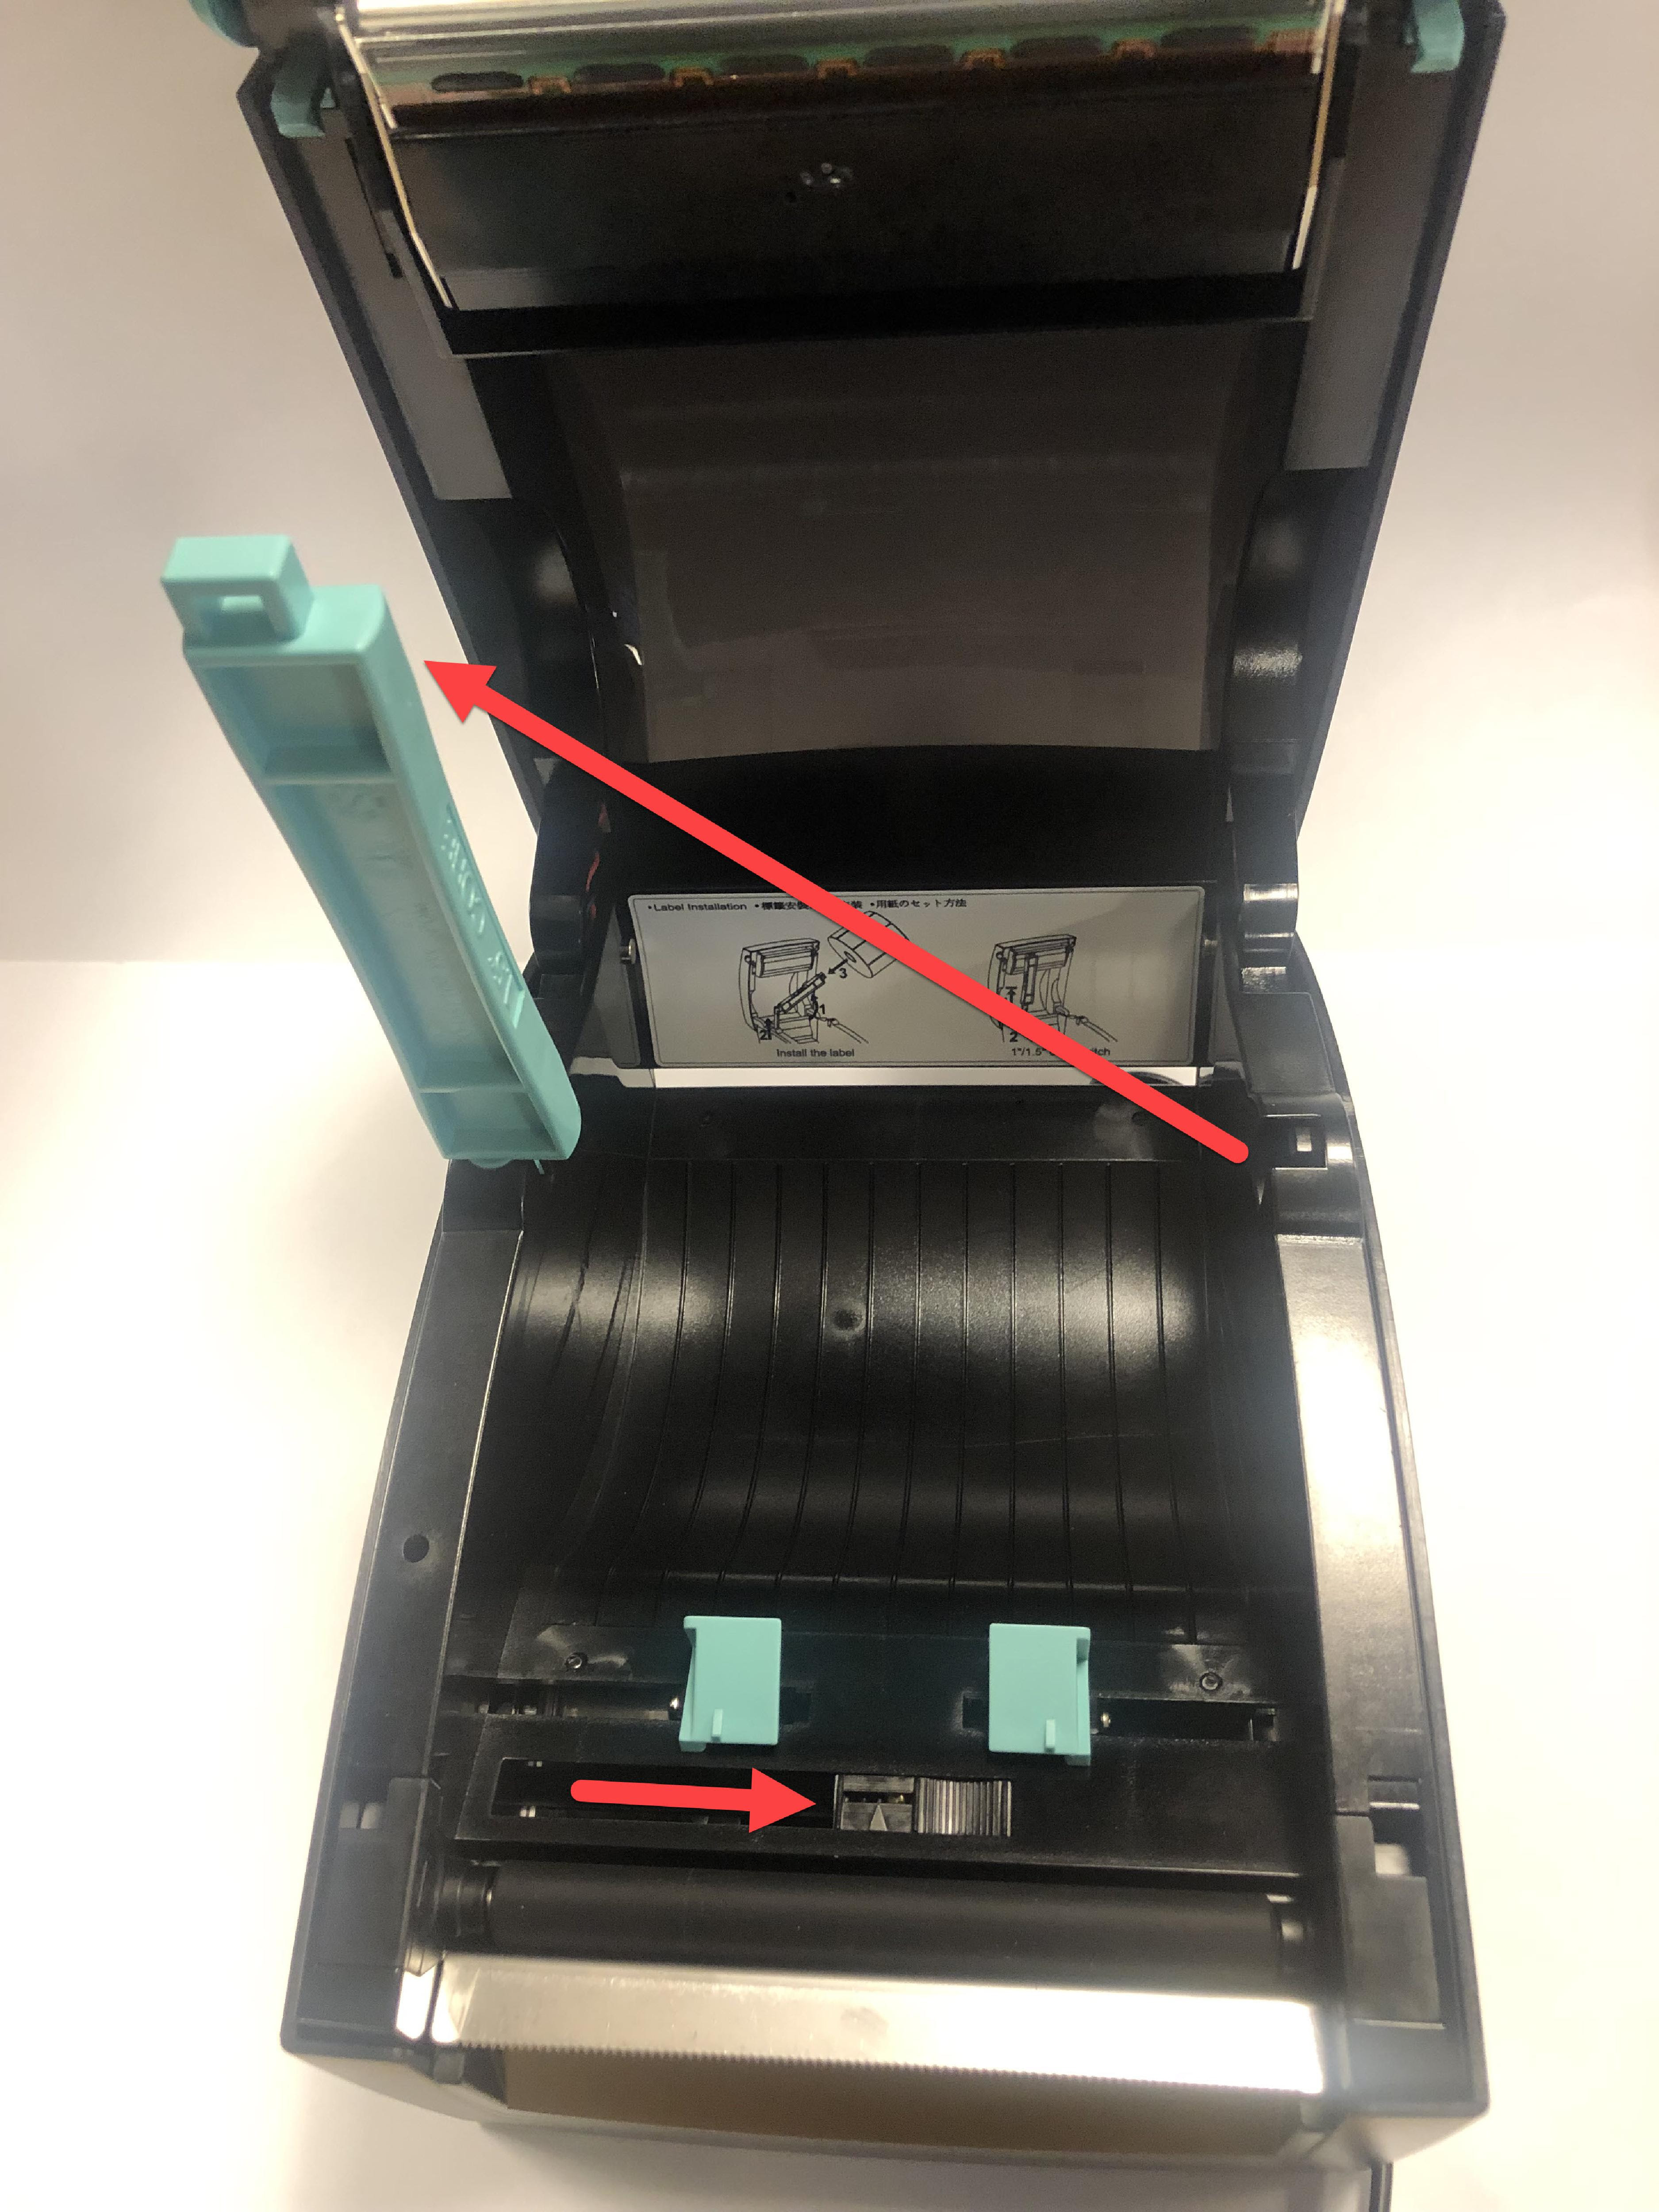
1. Open the case cover if using a 2.0 device.
2. Press the printer release button to open.
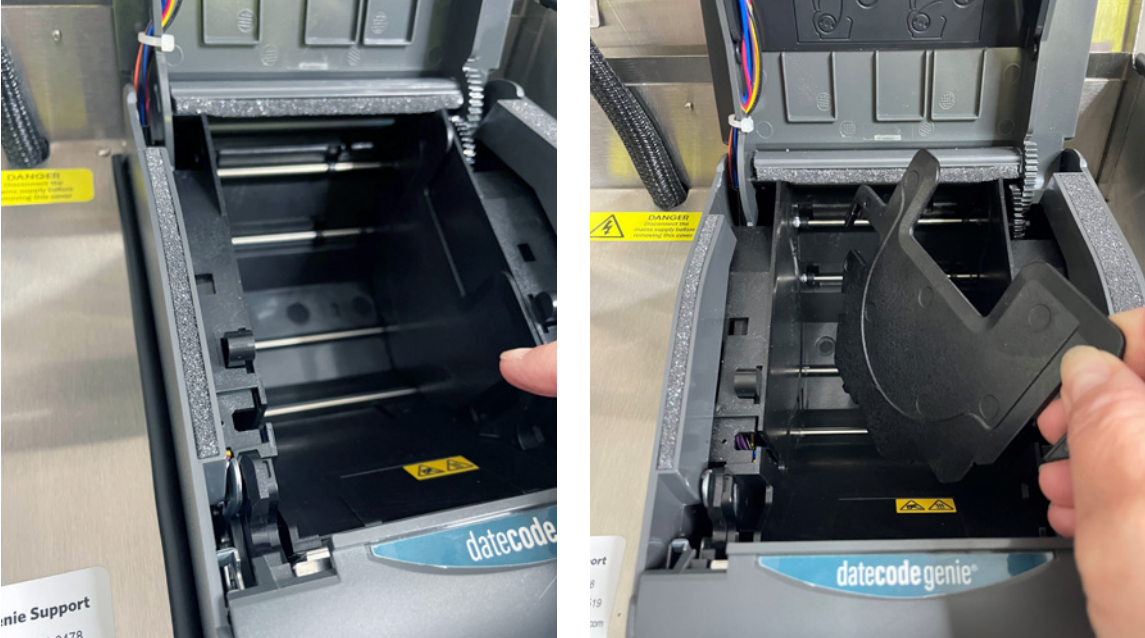
3. Locate roll guide on the right side of the opening and lift to remove.
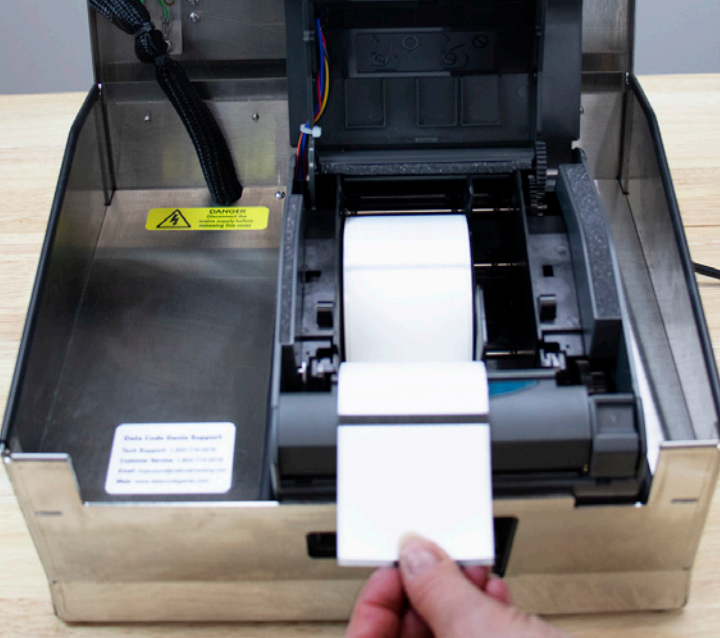
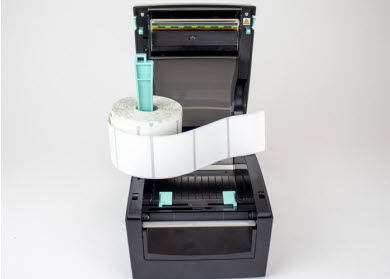
4. Take the label roll unrolling from the bottom with the black lines facing up and place in the left side of the opening. Extend the labels over the edge of the printer.
5. Place the roll guide on the right side of the label roll to hold in place.

6. Close the printer lid and the labels will automatically advance and cut to calibrate.
7. Close the case cover. Printer is ready to print.
For additional assistance see Contact & Support
Verifique que las líneas negras correctas sean visibles en la parte posterior de su etiqueta. Consulte las etiquetas DateCodeGenie® como referencia.
Si las líneas son incorrectas, reemplácelas con un rollo de etiquetas con líneas negras correctas e intente imprimir nuevamente.
Para obtener ayuda adicional, consulte Contacto y soporte
Verifique que las etiquetas estén cargadas correctamente en la impresora.
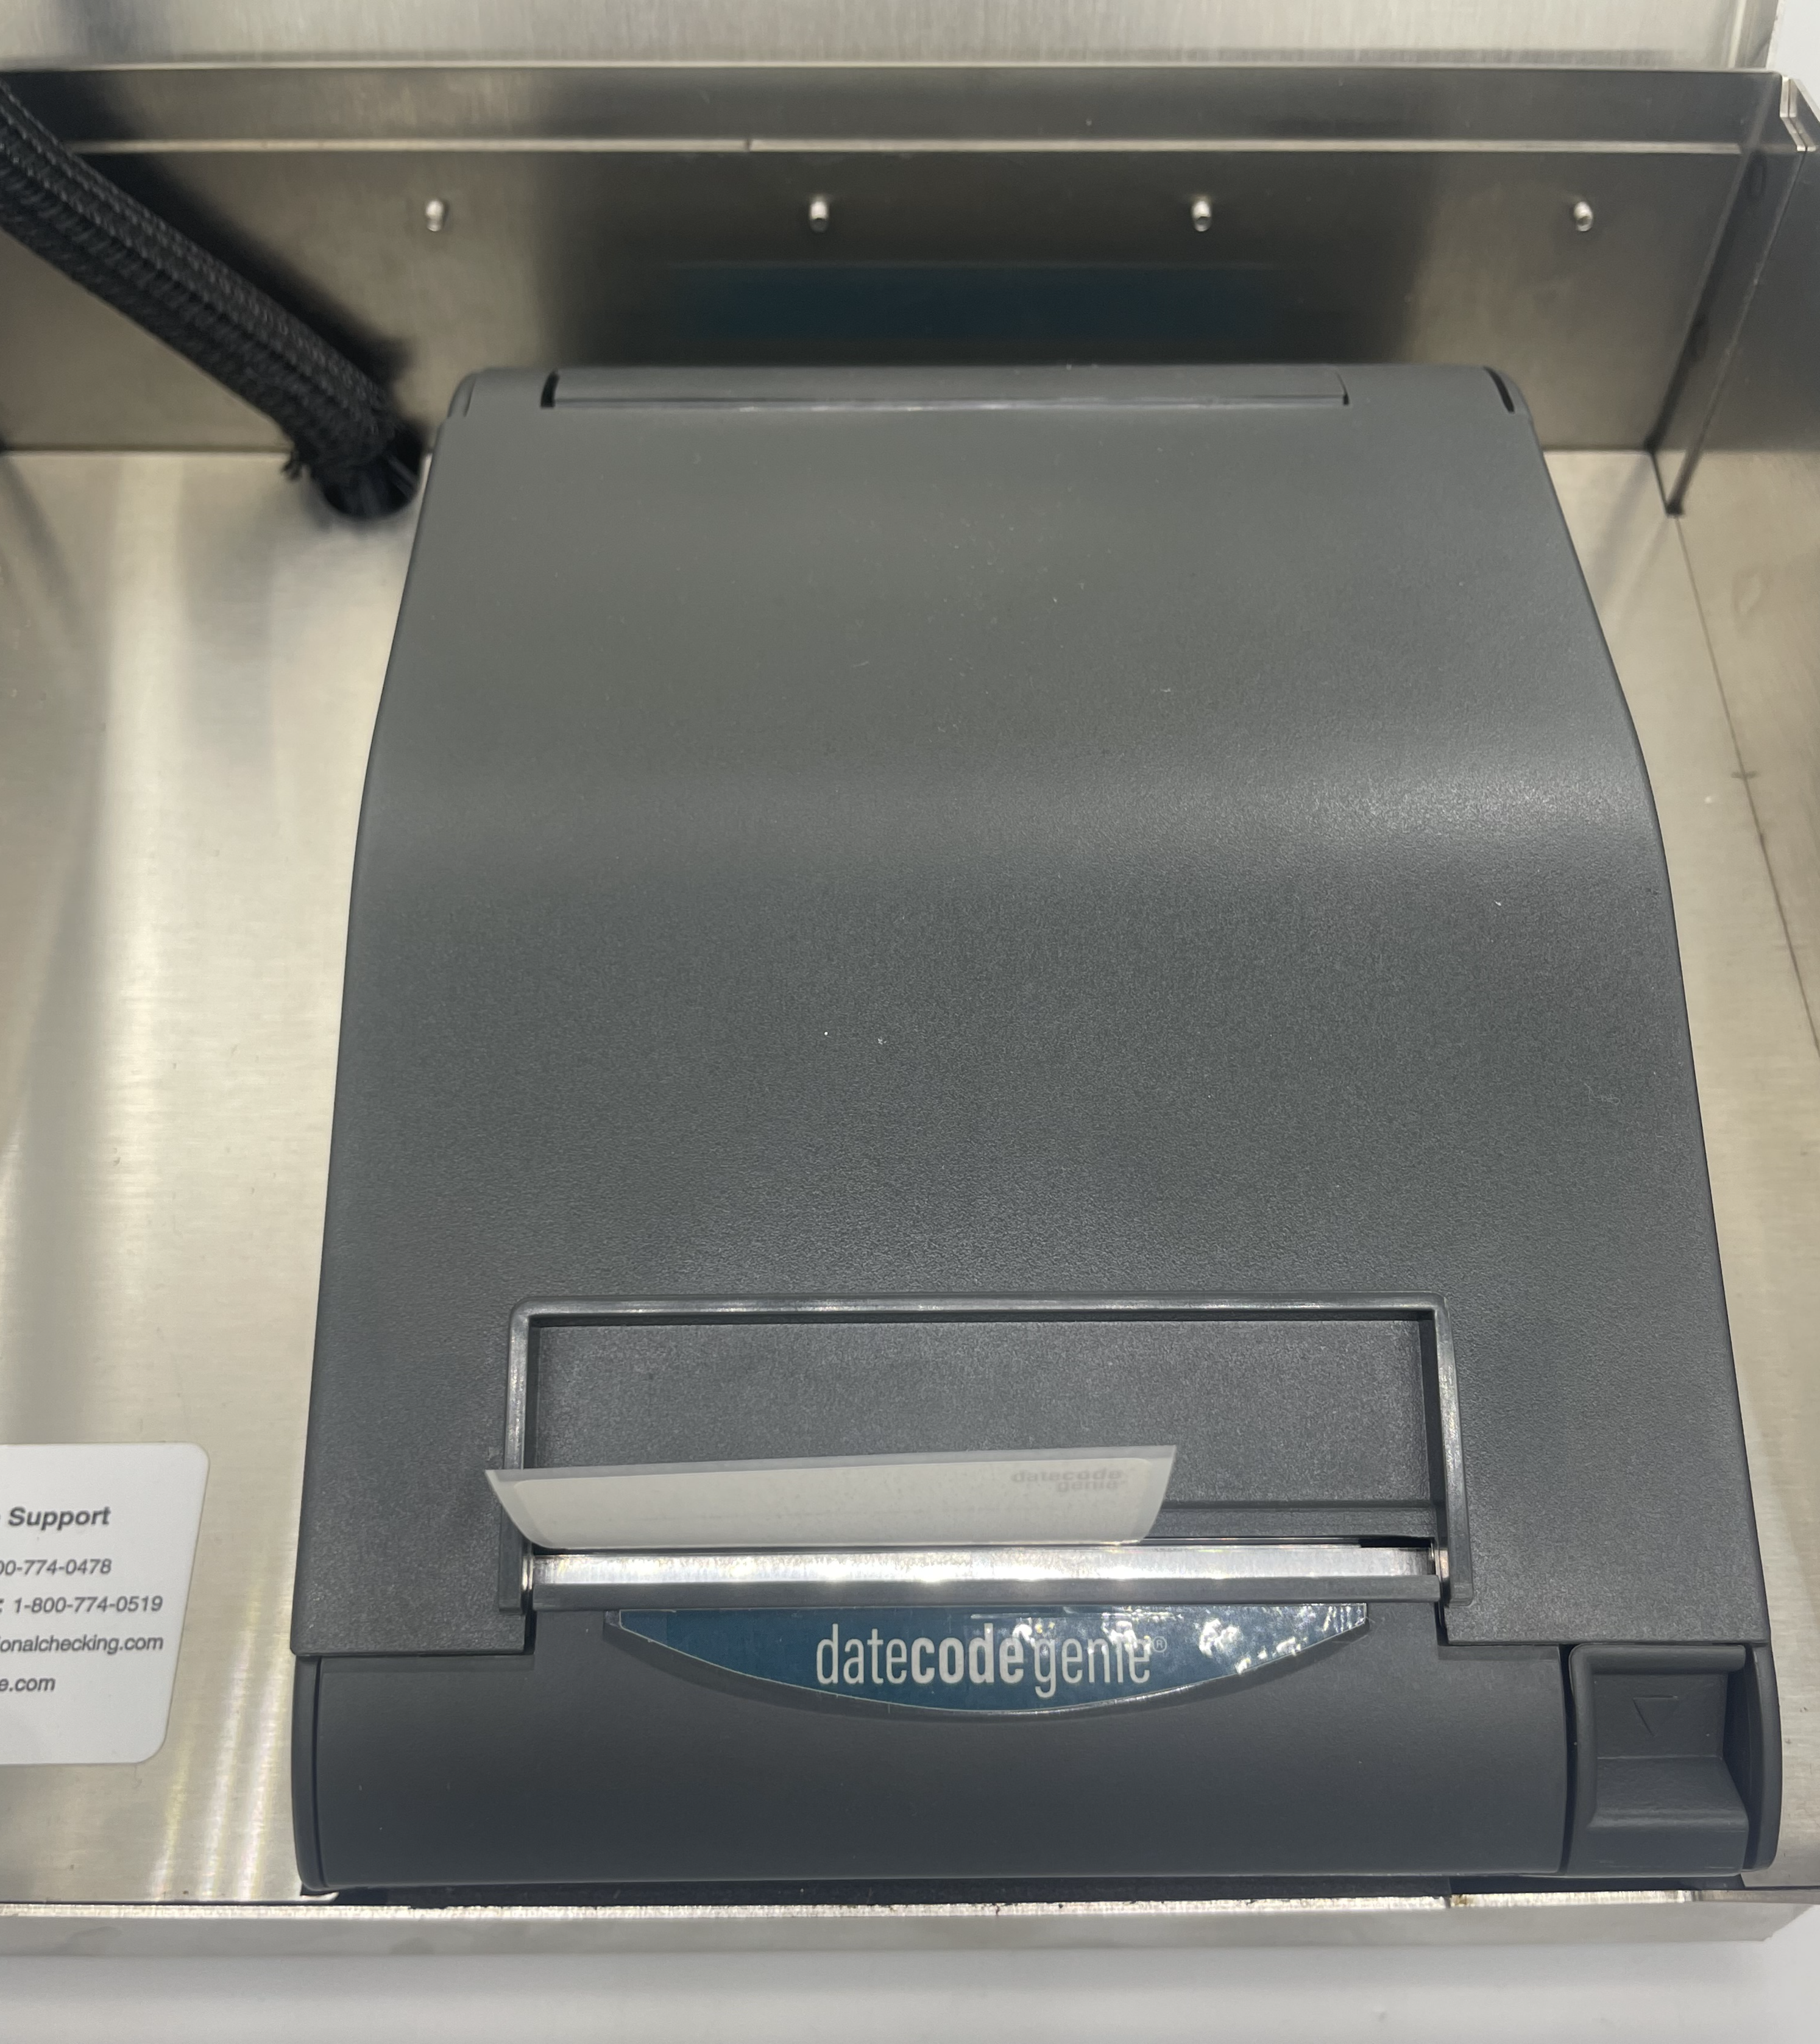
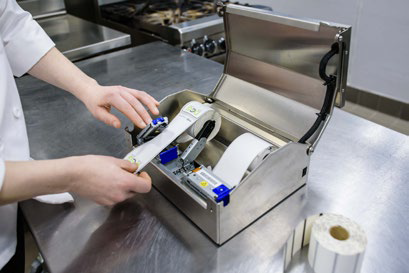
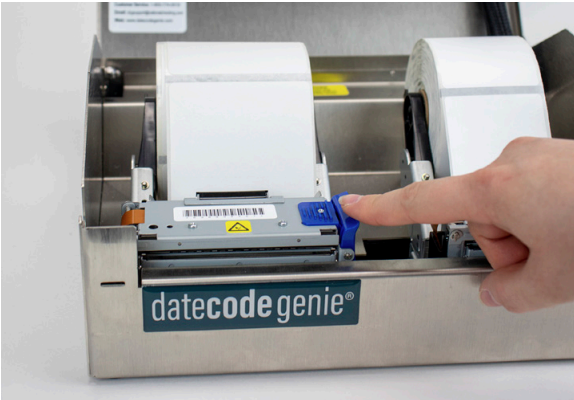
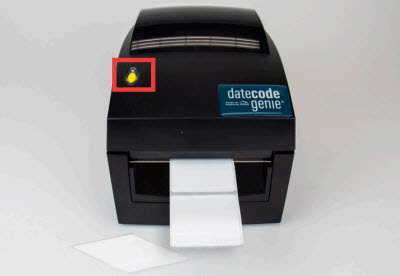
How to Load Labels in the X Model Device
Loading labels in an X model device is easy. Follow the steps below or watch the video for assistance.
Steps:
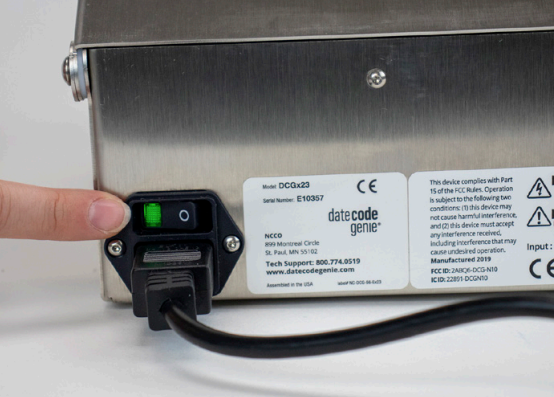
1. Confirm the power cord is plugged into a working outlet and the master power switch on the back of the device is illuminated green.
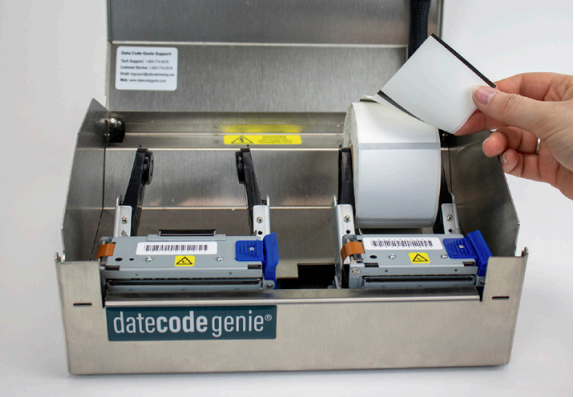
2. Open the case cover, separate the two black arms, and insert the label roll unrolling from the top with black lines facing down.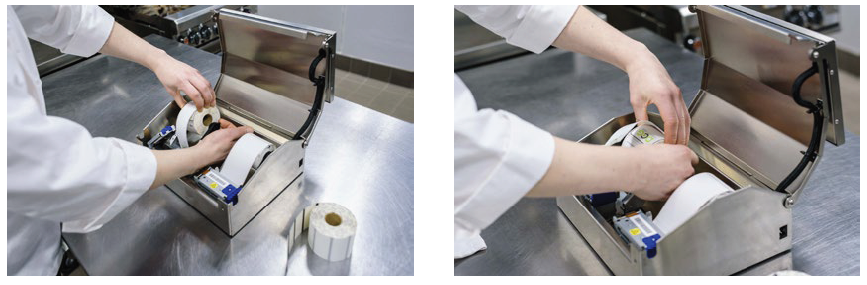
3. Press the blue/black tab to release the lever, extend labels over the edge of the opening, and close lever to snap in place.
 |
 |
4. Labels will automatically advance and cut to calibrate the printer. Repeat for second printer (if applicable).
5. Close case cover and begin printing.
For additional assistance see Contact & Support
Verifique que las líneas negras correctas sean visibles en la parte posterior de su etiqueta. Consulte las etiquetas DateCodeGenie® como referencia.
Si las líneas son incorrectas, reemplácelas con un rollo de etiquetas con líneas negras correctas e intente imprimir nuevamente.
Para obtener ayuda adicional, consulte Contacto y soporte
Verifique que las etiquetas estén cargadas correctamente en la impresora.
How to Load Labels in the Lite Model Device
Loading labels in a Lite model device is easy. Follow the steps below or watch the video for assistance.
Steps:
1. Gently pull the blue/green core bar from the right side and extend straight up. Slide the black line sensor to the far right of the opening
2. Slide the label roll on core bar with labels facing forward and unrolling from left. Snap the core bar closed.
3. Feed labels through the blue/ green guides and extend over edge of printer. Adjust guides to label width and snap printer lid closed.
4. Press the yellow feed button, as needed, to align on black line. Pull down to tear label.
For additional assistance see Contact & Support
Verifique que las líneas negras correctas sean visibles en la parte posterior de su etiqueta. Consulte las etiquetas DateCodeGenie® como referencia.
Si las líneas son incorrectas, reemplácelas con un rollo de etiquetas con líneas negras correctas e intente imprimir nuevamente.
Para obtener ayuda adicional, consulte Contacto y soporte
Para obtener ayuda adicional, consulte Contacto y soporte