
Drucker schiebt mehrere Etiketten vor
Table of Contents
Der Drucker druckt oder schneidet keine Etiketten und führt mehrere Etiketten weiter. Der Drucker druckt möglicherweise ein Etikett und überspringt dann mehrere Etiketten, was zu einem Offline-Fehler des Druckers führt.
Fehlerbehebung beim Weiterleiten mehrerer Etiketten durch den Drucker
Wählen Sie Ihr Modell oder Ihren Drucker aus.
Überprüfen Sie, ob die Etiketten richtig in den Drucker eingelegt sind.
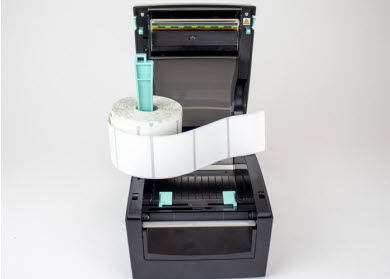
Beschriftungen in 2.0 laden und Modellgeräte anpassen
Das Modell 2.0 wird nicht mehr hergestellt.
Laden Sie Etiketten in die Geräte der Modelle 2.0 und Fit.
Schritte:
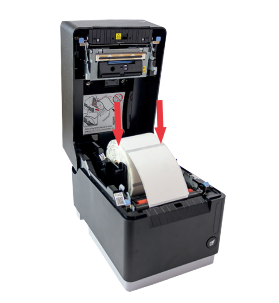
1. Öffnen Sie die Gehäuseabdeckung, wenn Sie ein 2.0-Gerät verwenden.
2. Zum Öffnen die Entriegelungstaste des Druckers drücken.
3. Suchen Sie die Rollenführung auf der rechten Seite der Öffnung und heben Sie sie an, um sie zu entfernen.
4. Nehmen Sie die Etikettenrolle, indem Sie sie von unten abrollen, mit den schwarzen Linien nach oben und legen Sie sie in die linke Seite der Öffnung. Lassen Sie die Etiketten über den Rand des Druckers hinausragen.
5. Platzieren Sie die Rollenführung auf der rechten Seite der Etikettenrolle, um sie an Ort und Stelle zu halten.

6. Schließen Sie den Druckerdeckel. Die Etiketten werden automatisch vorgeschoben und zum Kalibrieren abgeschnitten.
7. Schließen Sie die Gehäuseabdeckung. Der Drucker ist druckbereit.
Überprüfen Sie, ob auf der Rückseite Ihres Etiketts die korrekten schwarzen Linien sichtbar sind. Siehe DateCodeGenie®-Etiketten als Referenz.
Wenn die Linien nicht korrekt sind, ersetzen Sie die Etikettenrolle durch eine mit korrekten schwarzen Linien und versuchen Sie den Druckvorgang erneut.
Weitere Hilfe finden Sie unter „Kontakt und Support“.
Überprüfen Sie, ob die Etiketten richtig in den Drucker eingelegt sind.
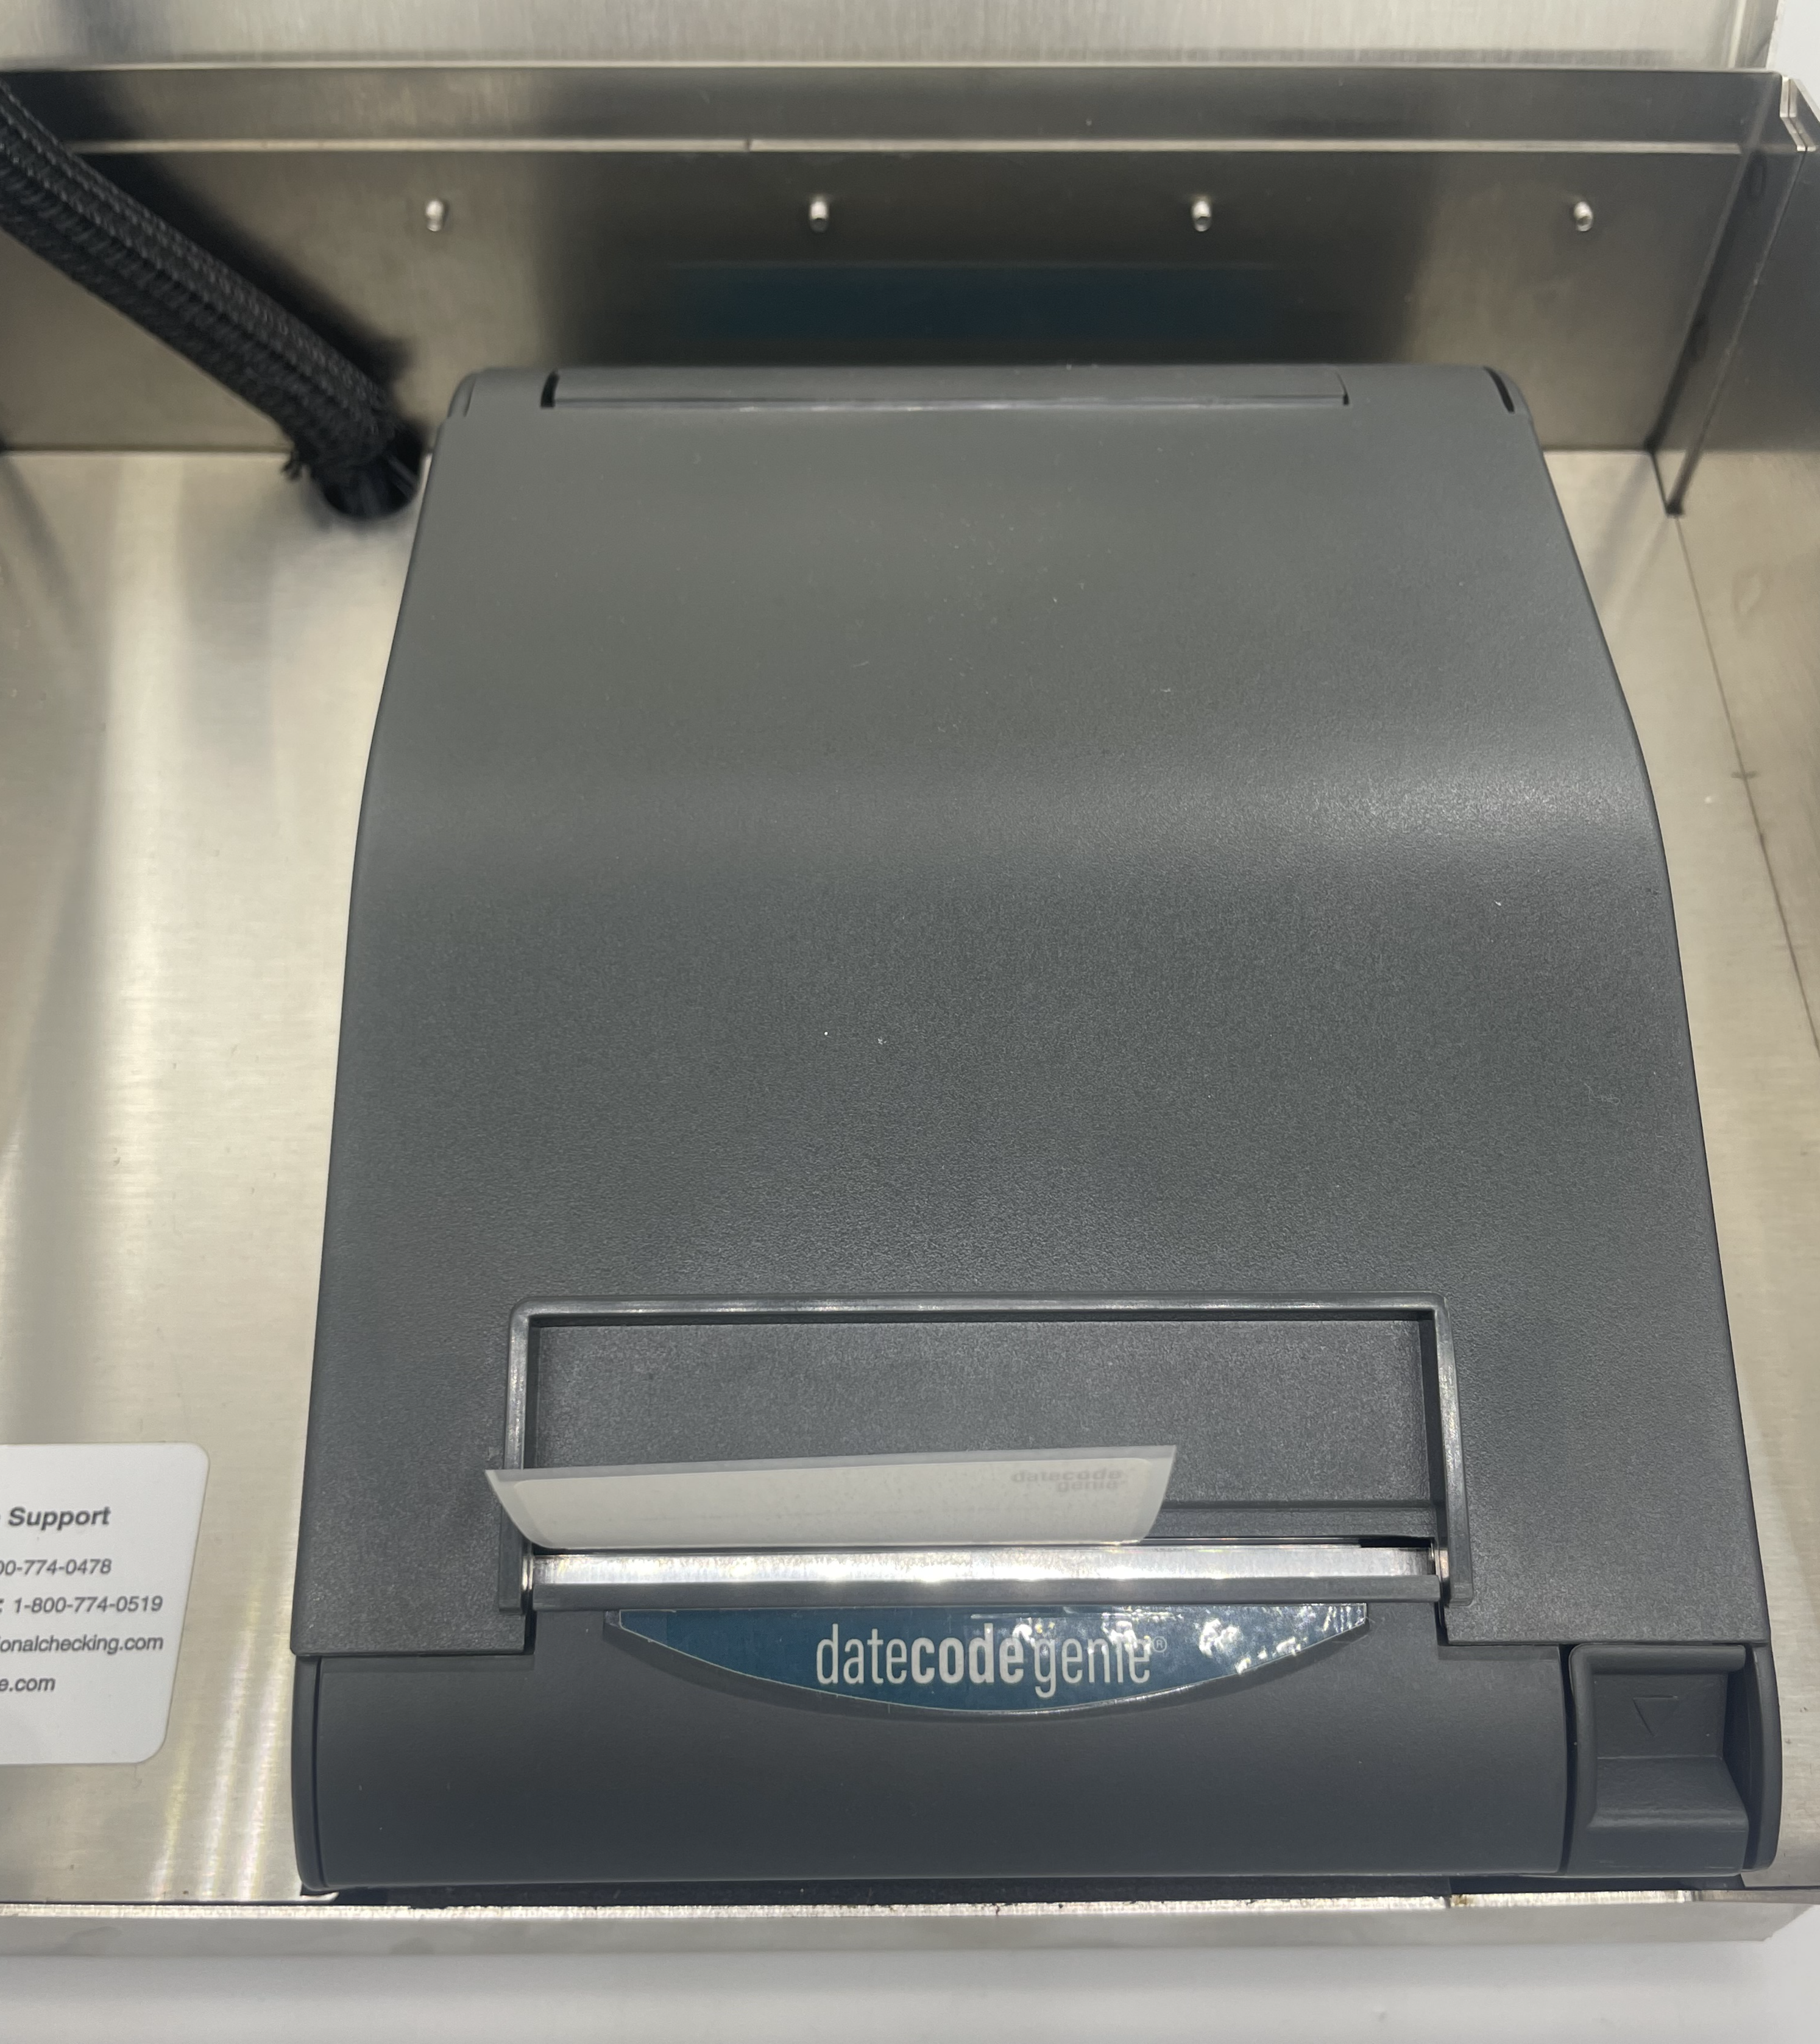
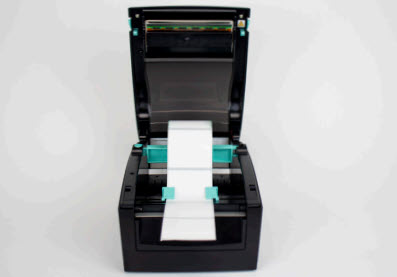
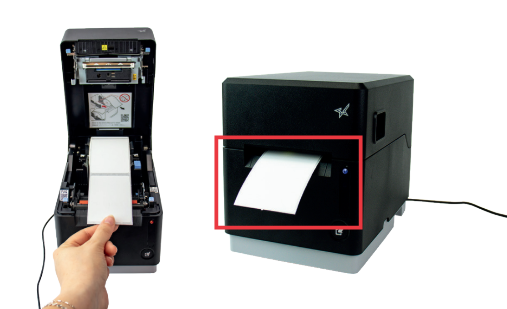
Etiketten in das Gerät des Modells X laden
Das Einlegen von Etiketten in ein Gerät des Modells X ist ganz einfach. Befolgen Sie die nachstehenden Schritte oder sehen Sie sich das Video zur Hilfe an.
Schritte:
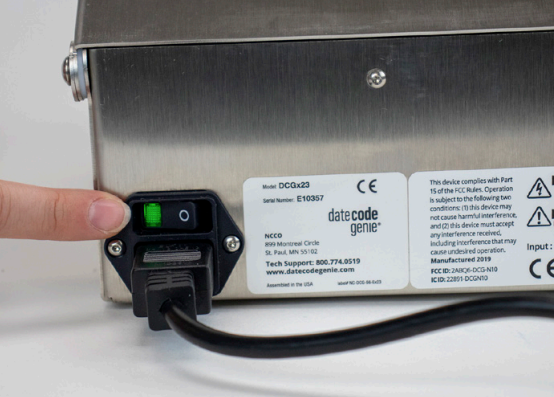
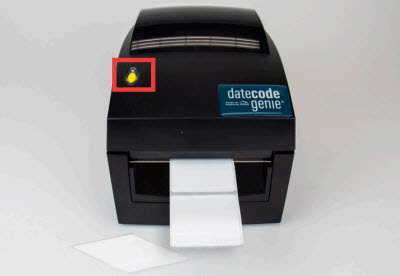
1. Vergewissern Sie sich, dass das Netzkabel in eine funktionierende Steckdose eingesteckt ist und der Hauptnetzschalter auf der Rückseite des Geräts grün leuchtet.
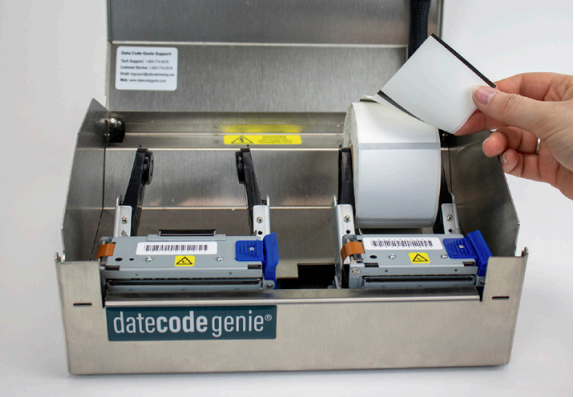
2. Öffnen Sie den Gehäusedeckel, trennen Sie die beiden schwarzen Arme und legen Sie die Etikettenrolle ein, indem Sie sie von oben abrollen, wobei die schwarzen Linien nach unten zeigen. 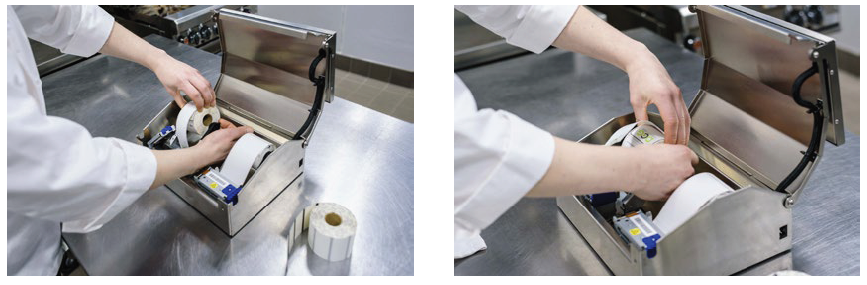
3. Drücken Sie auf die blau/schwarze Lasche, um den Hebel zu lösen, die Etiketten über den Rand der Öffnung zu ziehen und den Hebel zu schließen, bis er einrastet.
 |
 |
4. Etiketten werden automatisch vorgeschoben und abgeschnitten, um den Drucker zu kalibrieren. Wiederholen Sie dies für den zweiten Drucker (falls zutreffend).
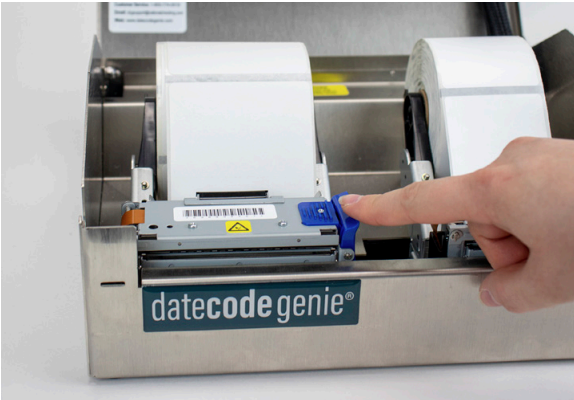
5. Gehäusedeckel schließen und mit dem Drucken beginnen.
Überprüfen Sie, ob auf der Rückseite Ihres Etiketts die korrekten schwarzen Linien sichtbar sind. Siehe DateCodeGenie®-Etiketten als Referenz.
Wenn die Linien nicht korrekt sind, ersetzen Sie die Etikettenrolle durch eine mit korrekten schwarzen Linien und versuchen Sie den Druckvorgang erneut.
Weitere Hilfe finden Sie unter „Kontakt und Support“.
Überprüfen Sie, ob die Etiketten richtig in den Drucker eingelegt sind.
Laden von Etiketten in das Lite-Modell-Gerät
Das Laden von Etiketten in ein Gerät des Modells Lite ist ganz einfach. Befolgen Sie die nachstehenden Schritte oder sehen Sie sich das Video zur Hilfe an.
Schritte:
1. Ziehen Sie den blau/grünen Kernstab vorsichtig von der rechten Seite und ziehen Sie ihn gerade nach oben. Schieben Sie den schwarzen Liniensensor ganz nach rechts in die Öffnung
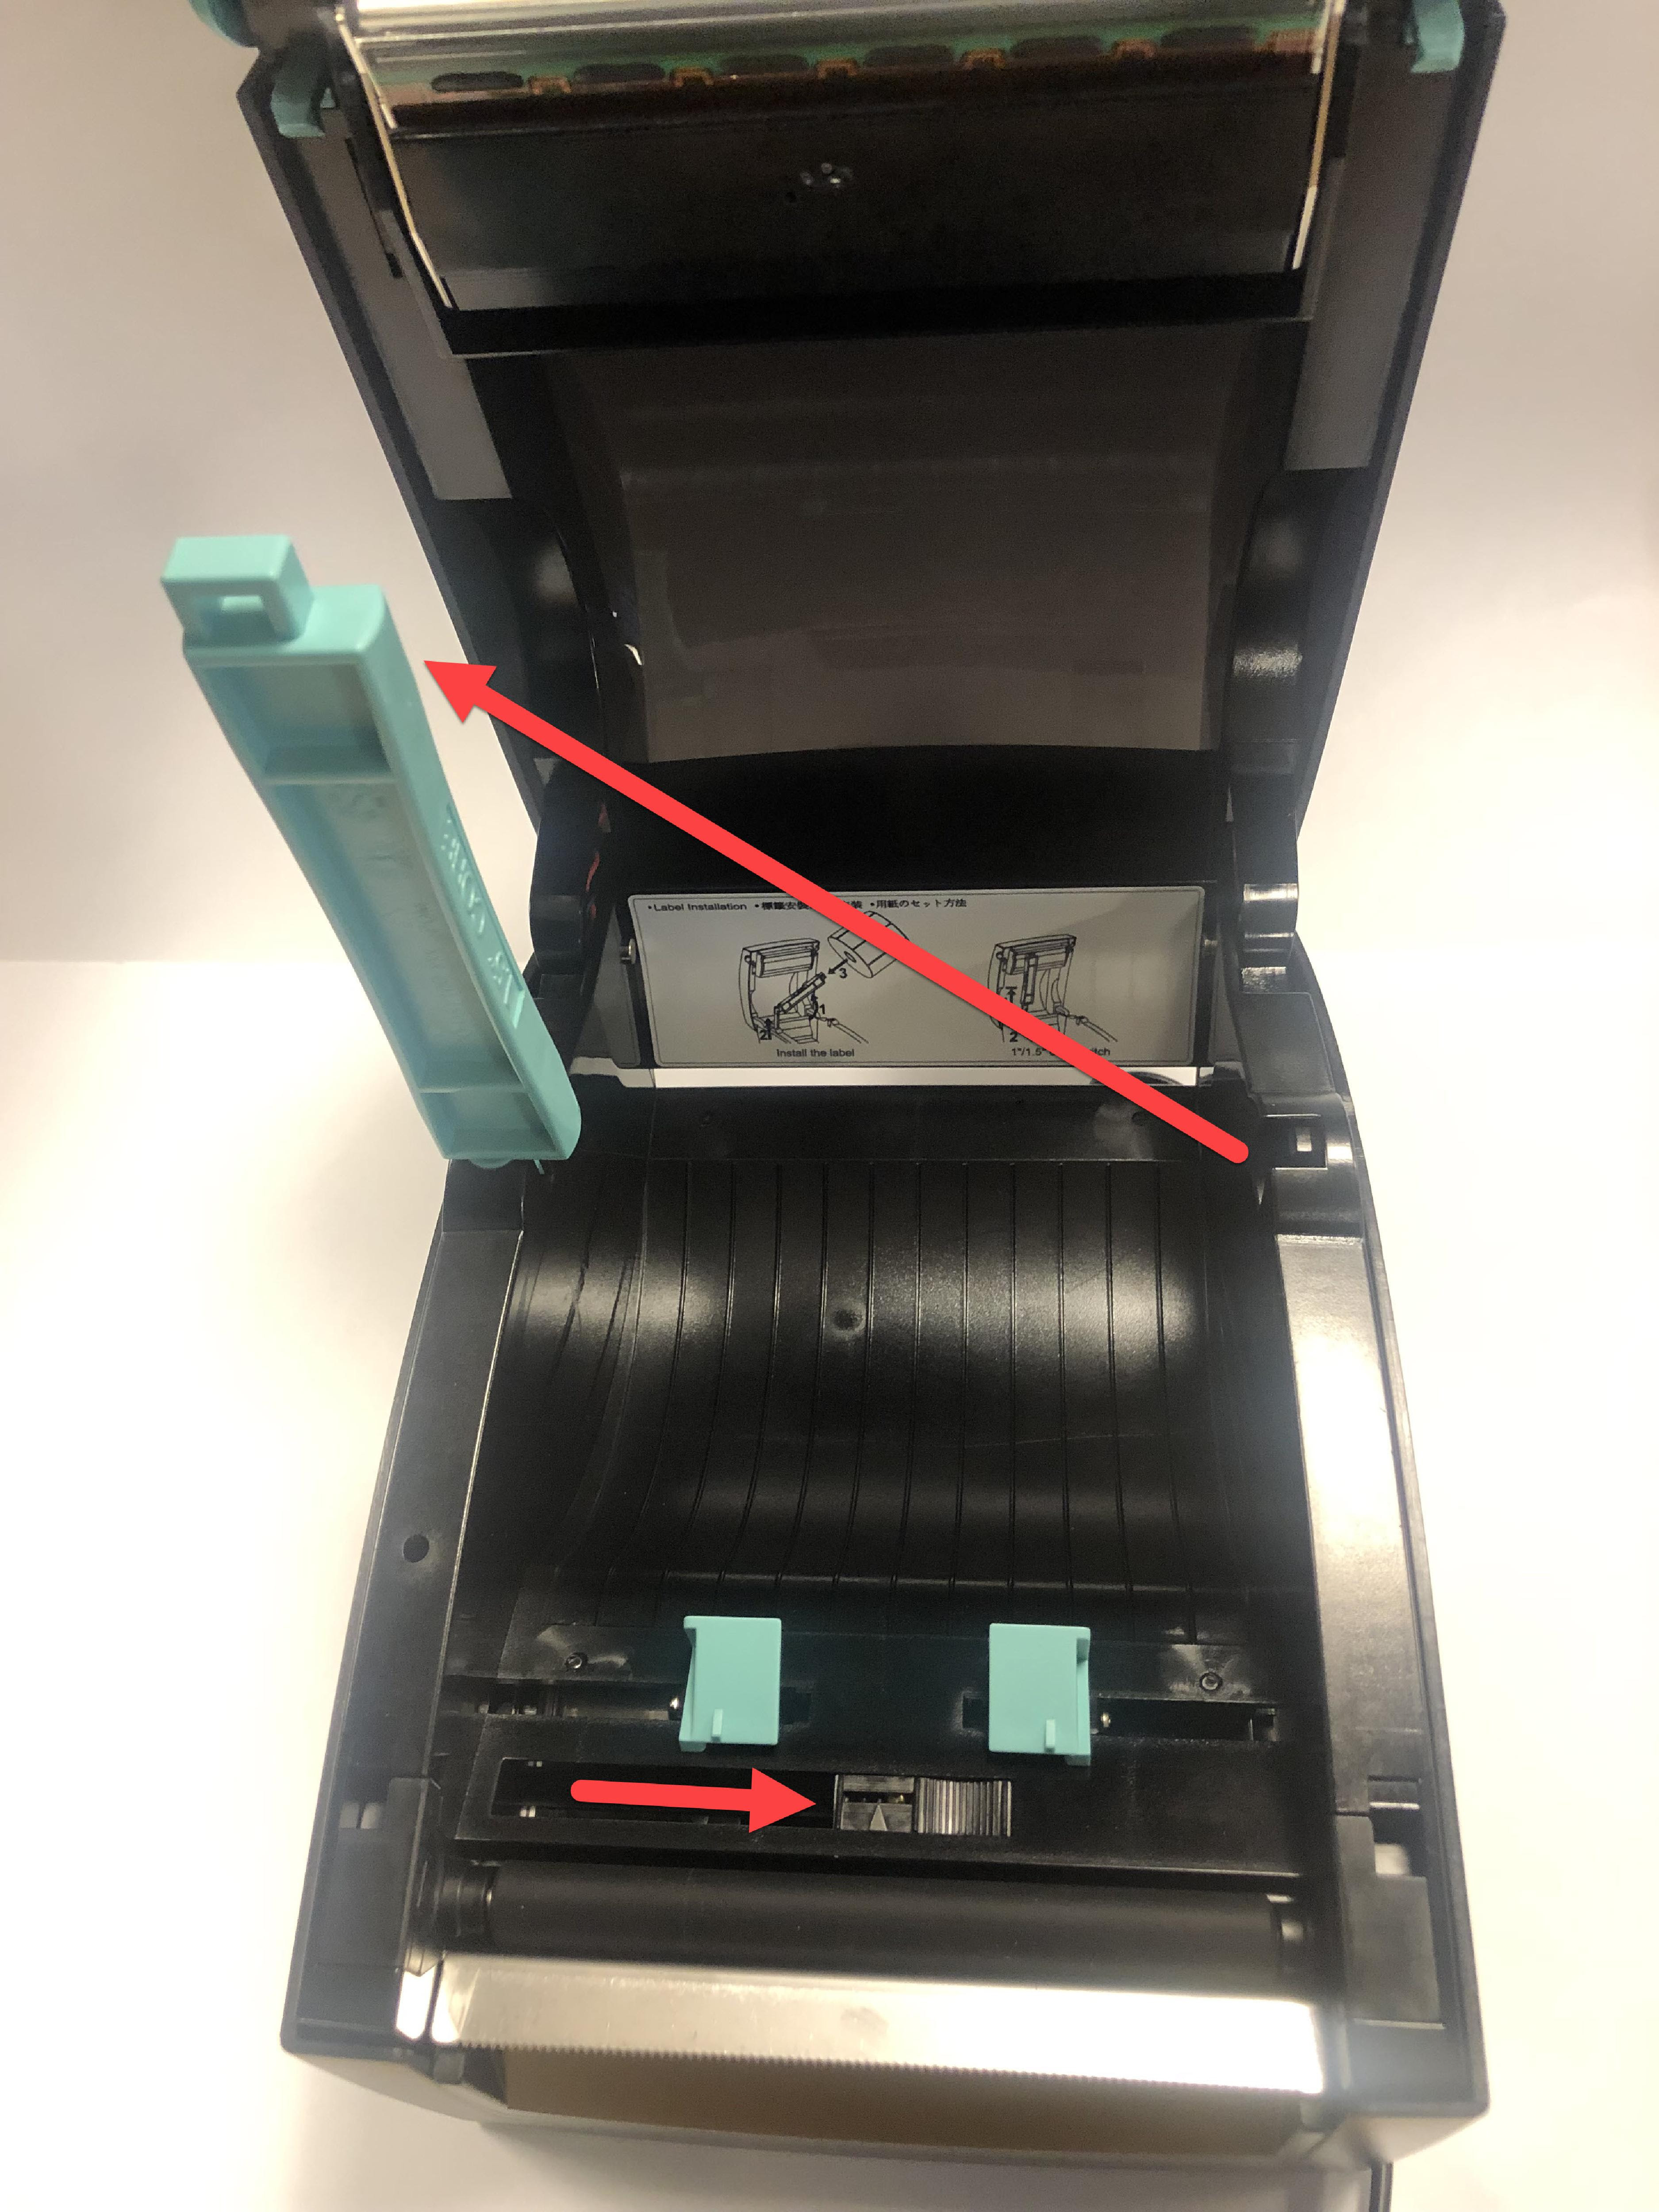
2. Schieben Sie die Etikettenrolle mit den Etiketten nach vorne auf die Kernleiste und rollen Sie sie von links ab. Lassen Sie die Kernleiste einrasten.
3. Führen Sie die Etiketten durch die blau/grünen Führungen und ziehen Sie sie über den Rand des Druckers. Passen Sie die Führungen an die Etikettenbreite an und schließen Sie den Druckerdeckel.
4. Drücken Sie bei Bedarf die gelbe Vorschubtaste, um das Etikett an der schwarzen Linie auszurichten. Ziehen Sie es nach unten, um es abzureißen.
Überprüfen Sie, ob auf der Rückseite Ihres Etiketts die korrekten schwarzen Linien sichtbar sind. Siehe DateCodeGenie®-Etiketten als Referenz.
Wenn die Linien nicht korrekt sind, ersetzen Sie die Etikettenrolle durch eine mit korrekten schwarzen Linien und versuchen Sie den Druckvorgang erneut.
Weitere Hilfe finden Sie unter „Kontakt und Support“.
Überprüfen Sie, ob die Etiketten richtig in den Drucker eingelegt sind.
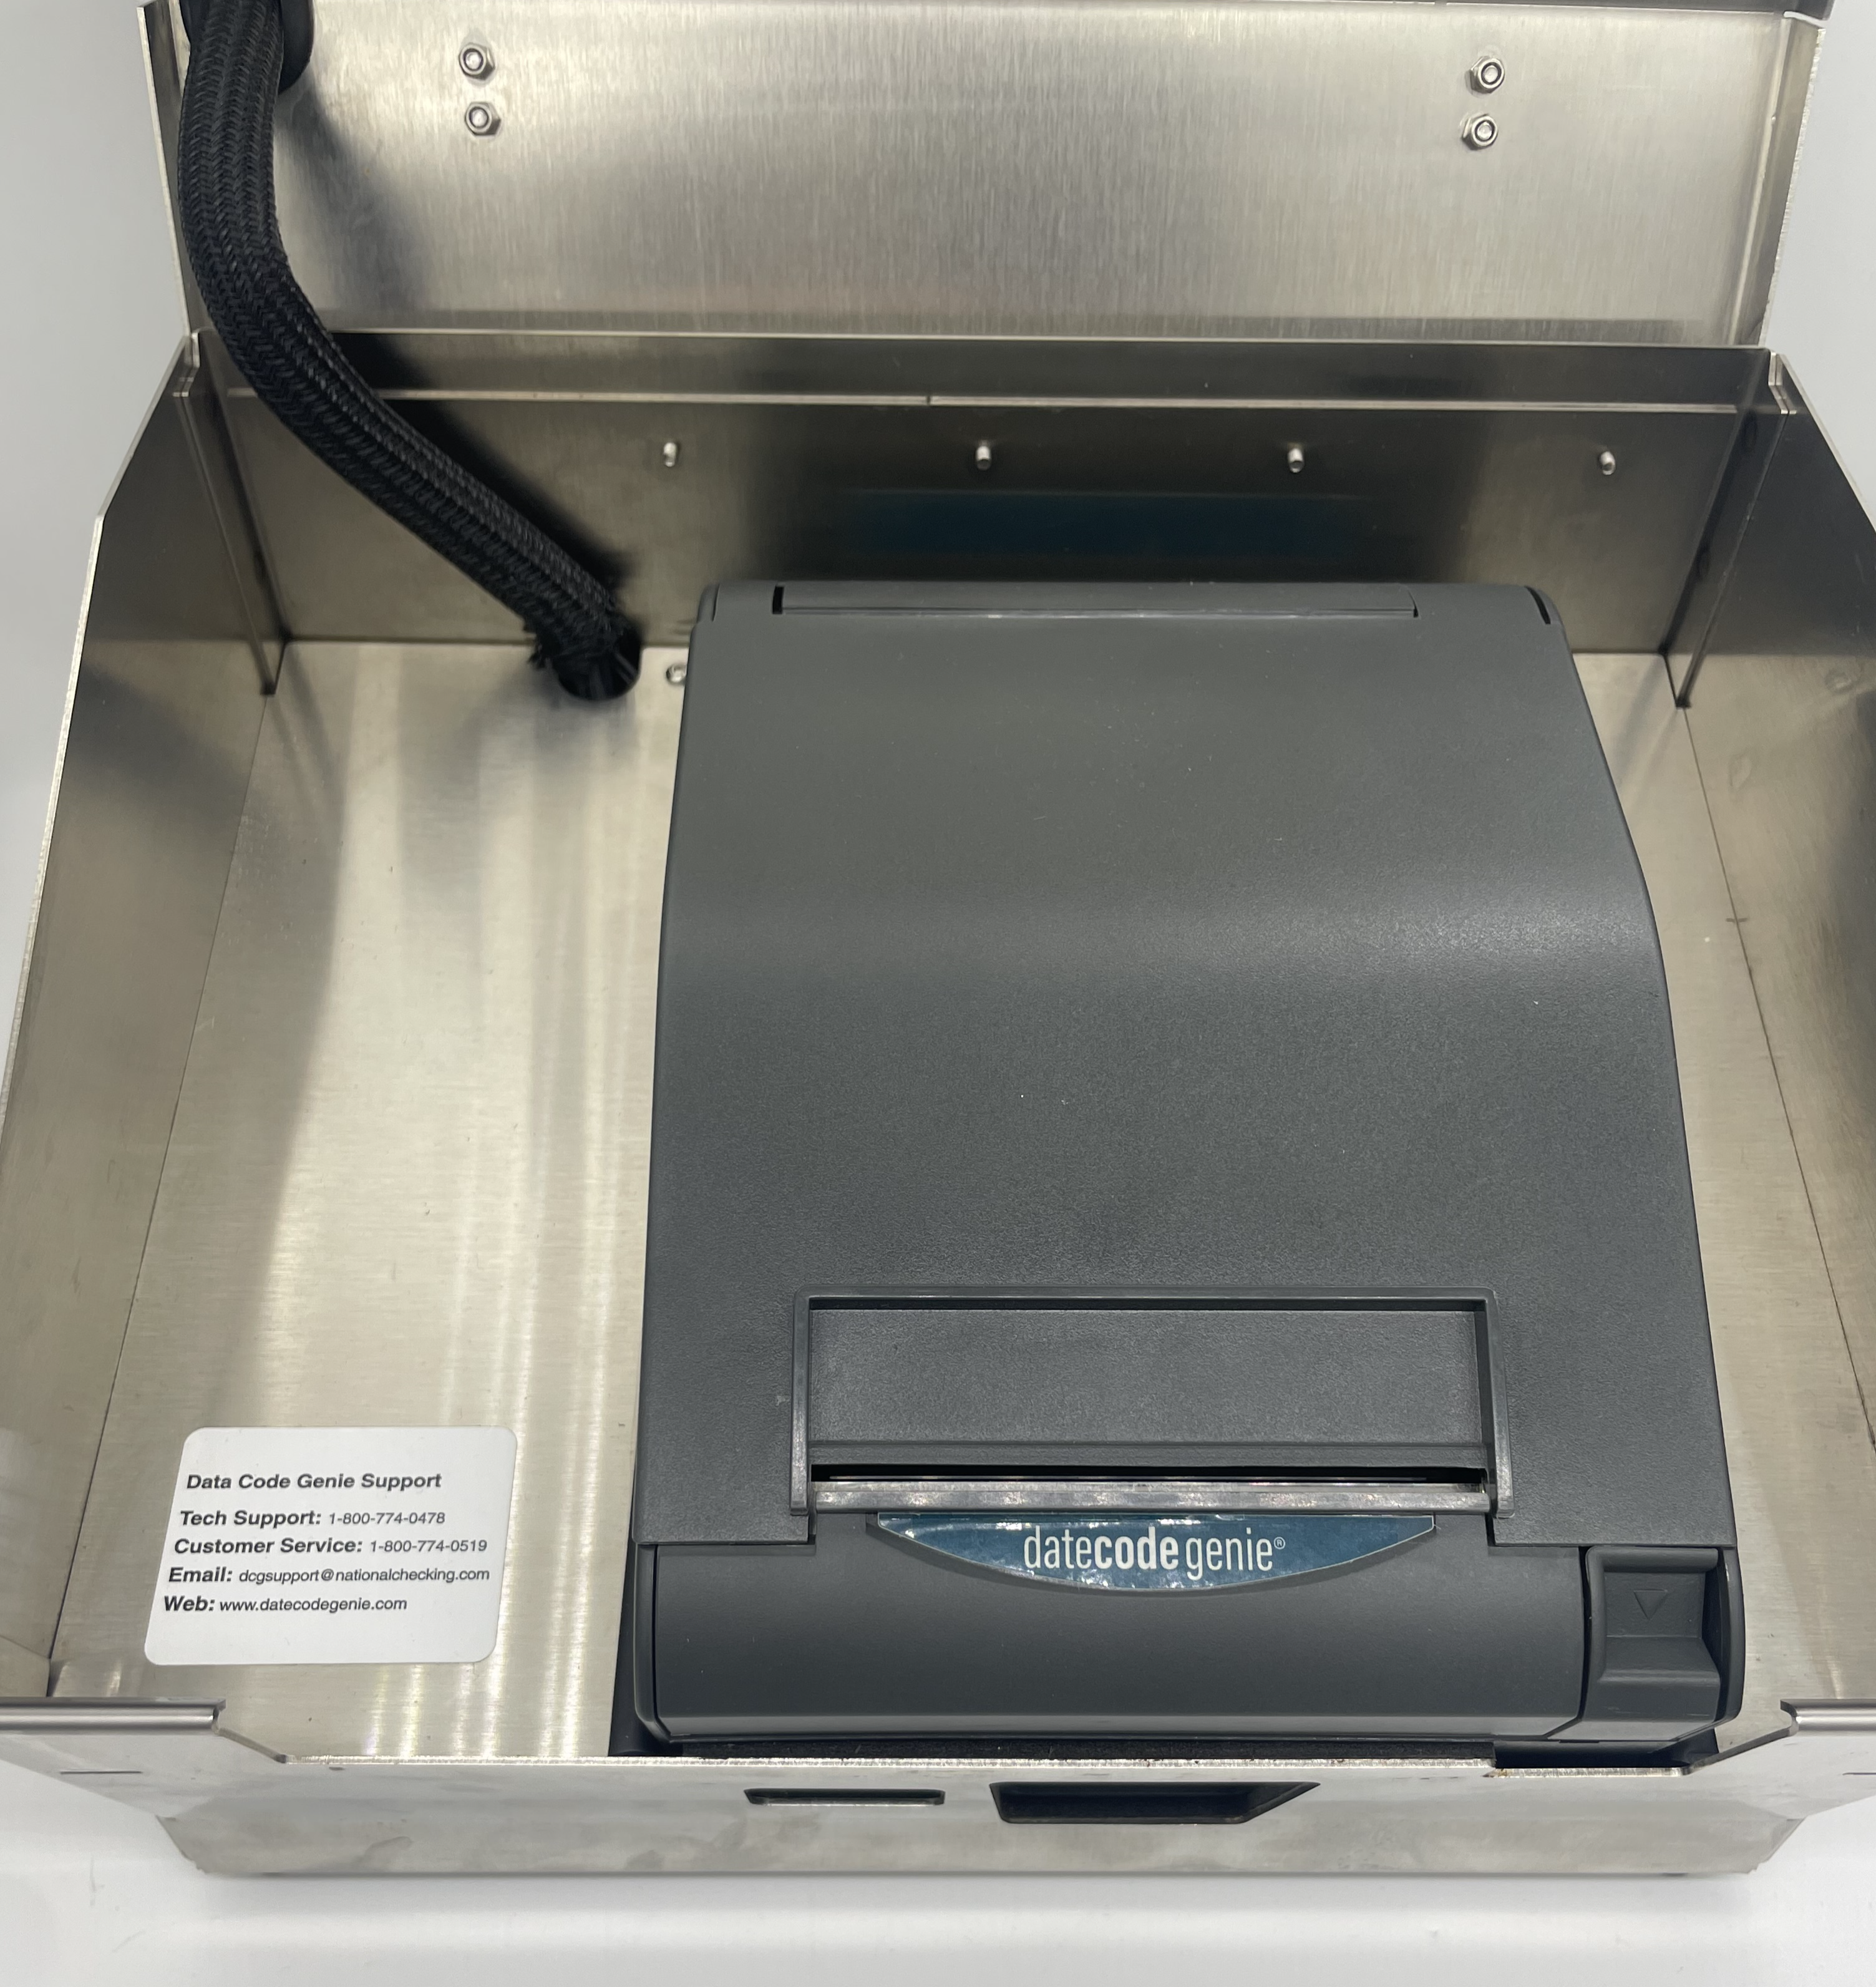
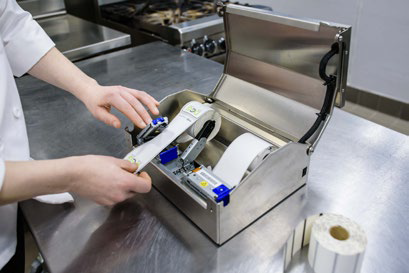
Etiketten in den mC-Label3-Drucker einlegen
Legen Sie Etiketten in einen mC-Label3-Drucker ein.
Schritte:
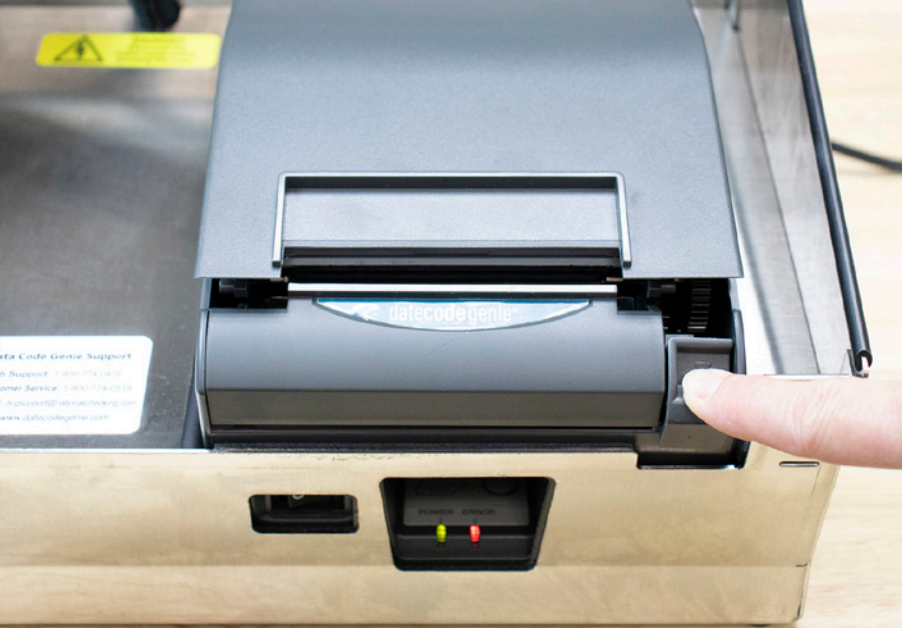
1. Drücken Sie den Hebel auf der rechten Seite des Druckers, um den Deckel zu öffnen.
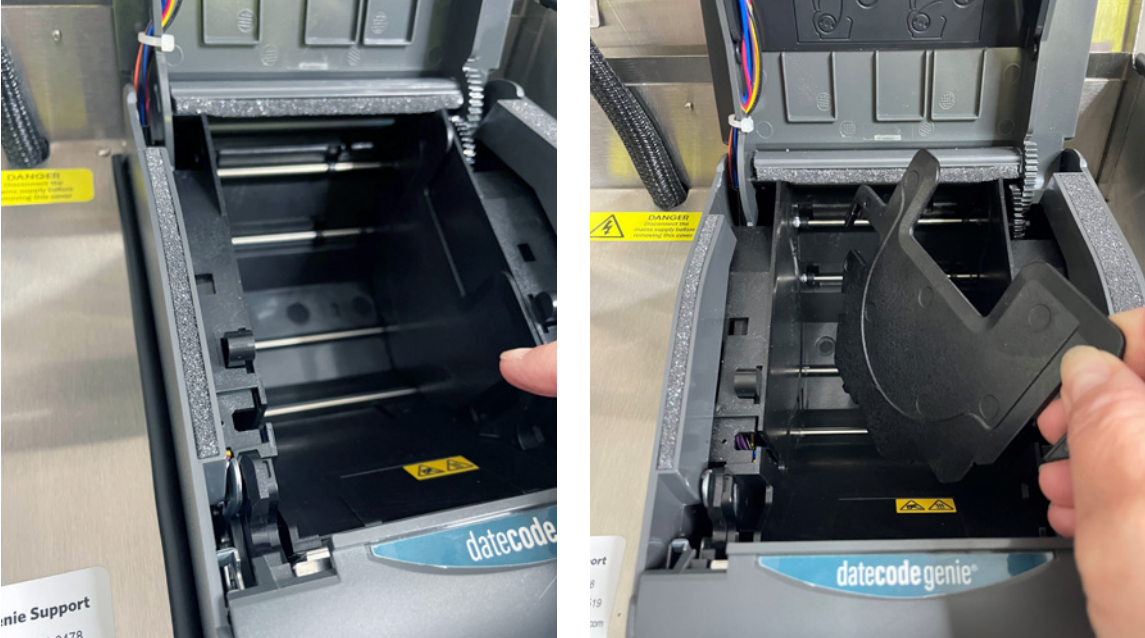
2. Drücken Sie den blauen Hebel und legen Sie die Etikettenrolle mit der Vorderseite nach oben zwischen die Führungen, um sie an die Breite der Etikettenrolle anzupassen.

3. Drücken Sie die Etikettenrolle vorsichtig in die Führungen, damit die Wellen auf beiden Seiten der Etikettenrolle einrasten.
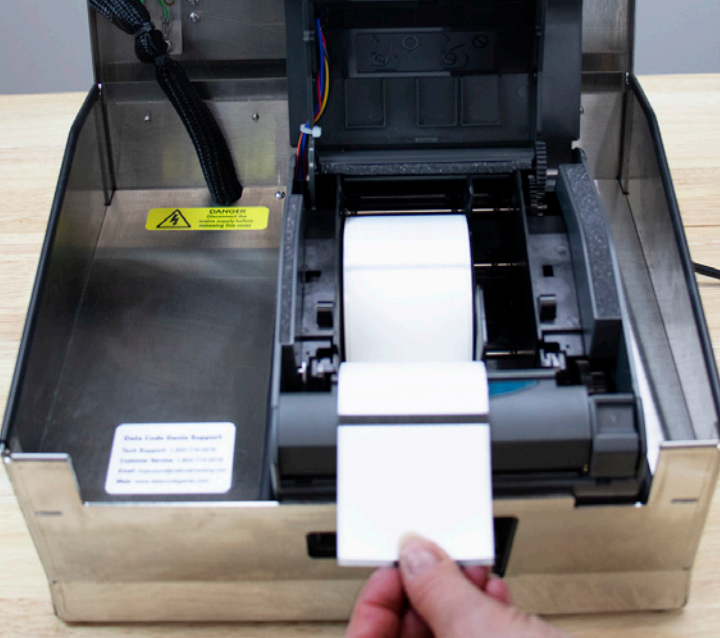
4. Ziehen Sie die Etiketten über den Rand des Druckers und schließen Sie den Druckerdeckel. Die Etiketten werden automatisch vorgeschoben und abgeschnitten, um sie für den Druck vorzubereiten.
Überprüfen Sie, ob auf der Rückseite Ihres Etiketts die korrekten schwarzen Linien sichtbar sind. Siehe DateCodeGenie®-Etiketten als Referenz.
Wenn die Linien nicht korrekt sind, ersetzen Sie die Etikettenrolle durch eine mit korrekten schwarzen Linien und versuchen Sie den Druckvorgang erneut.
Weitere Hilfe finden Sie unter „Kontakt und Support“.
