US English (US)
FR French
DE German
ES Spanish
IT Italian
NL Dutch
menu

Contact Us

No results found. Still need help? Contact us

  • Scheduled Assistance
  • Contact Us
English (US)
US English (US)
FR French
DE German
ES Spanish
IT Italian
NL Dutch
arrow_back
  • Getting Started
  • Devices
  • App
  • Portal
  • Admin Settings
  • Accessories
  • Labels
  • Repairs
  • APIs
  • Task Manager
  • Scheduled Assistance
  • Contact Us

Load Labels in the Lite Model Device

Contact Us

If you still have questions or prefer to get help directly from an agent, please submit a request.
We’ll get back to you as soon as possible.

  • Getting Started
    Getting Started Guides Set Up Training
  • Devices
    Troubleshooting Device Overview 2.0 Model X Series Model Fit Model Lite Model mC-Label3 Printer Device Tablet Internet Connection Warranty & Support
  • App
    Error Codes Troubleshooting App Overview Mobile App Subscription Prep Lists Product Control Rosters Scale Temperature Probe Print History Settings Language Location Overrides
  • Portal
    Portal Overview Locations Categories Menu Items Printer Profiles Users Settings Quick Labels Prep List Print History Mass Import and Export Media Library Location Overrides Product Control Rosters Scale Temperature Probe Groups
  • Admin Settings
    Start with Admin Settings Admin Settings Overview Locations Devices and Licenses
  • Accessories
    Bluetooth Scanner USB Scanner Temperature Probe Scale Label Rewinder Fit Printer Shelf Warranty
  • Labels
    Overview Troubleshooting
  • Repairs
    2.0 Model X Series Model Lite Model DateCodeGenie® Tablet
  • APIs
    Inbound APIs Outbound APIs
  • Task Manager
    Task Manager Overview Venues Forms Users Resources Task Manager App
+ More
  • Home
  • Devices
  • Lite Model

Loading labels in a Lite model device is easy. Follow the steps below or watch the video for assistance.

Steps:

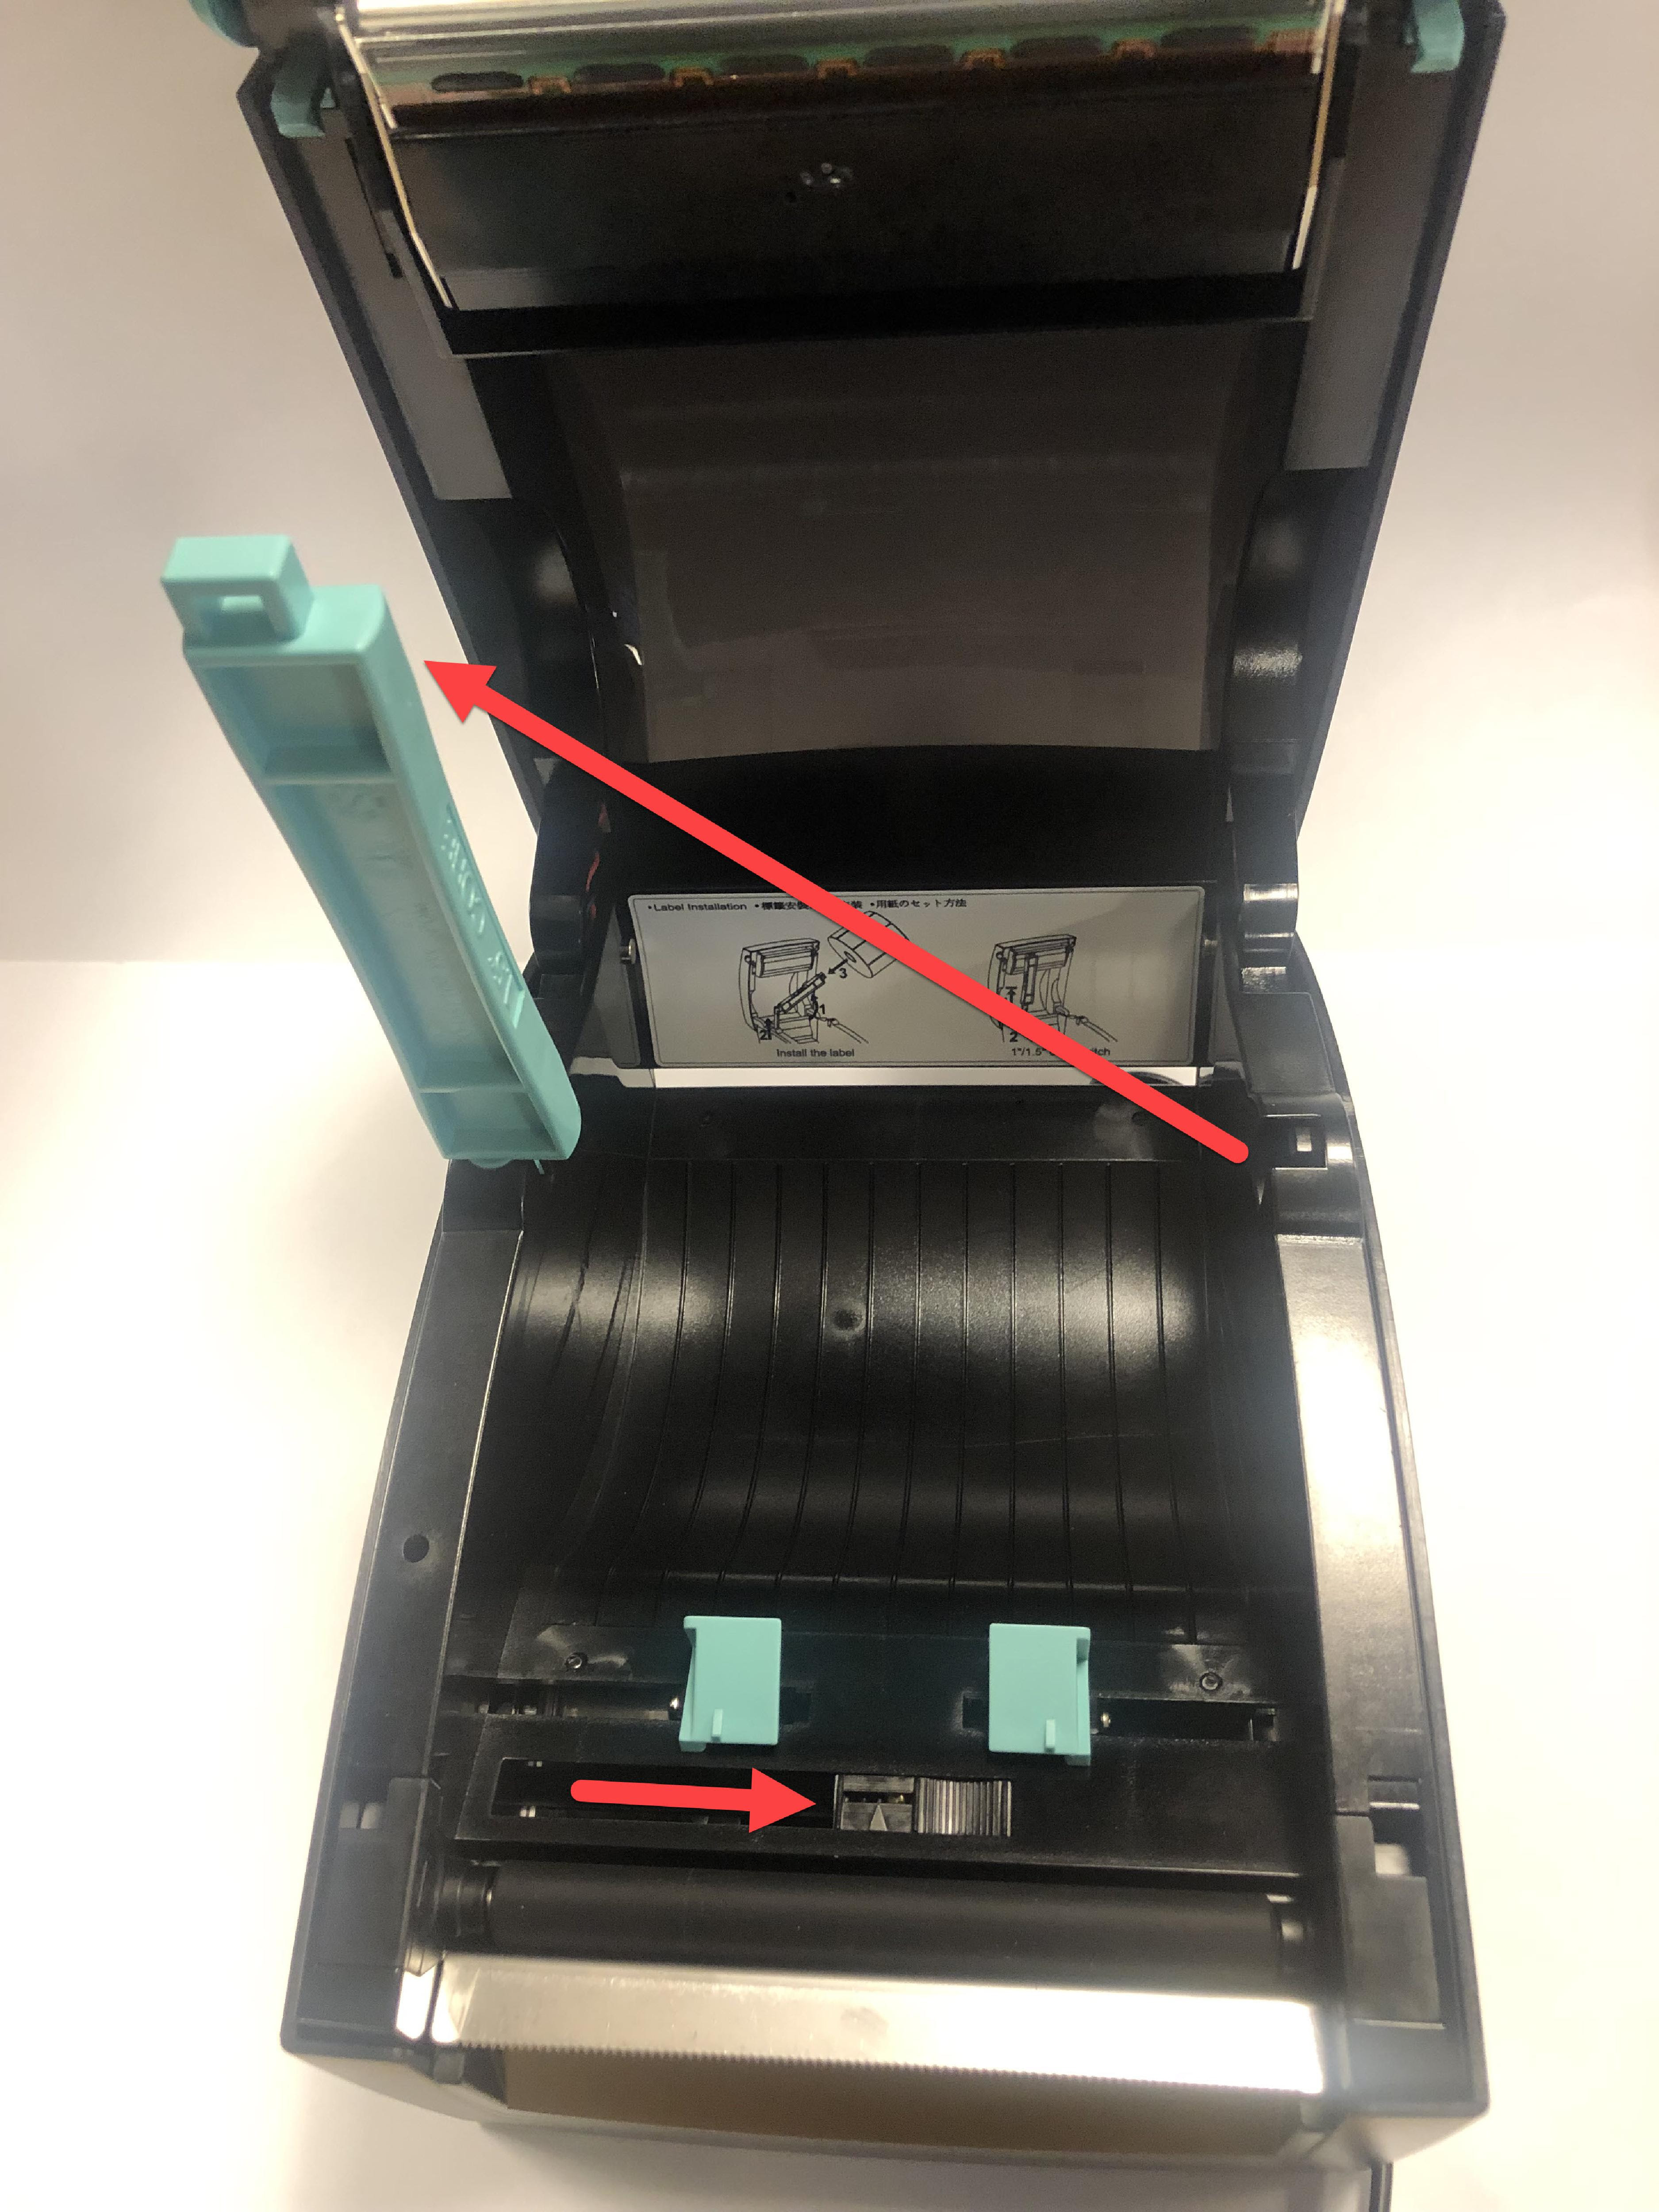
1. Gently pull the blue/green core bar from the right side and extend straight up. Slide the black line sensor to the far right of the opening

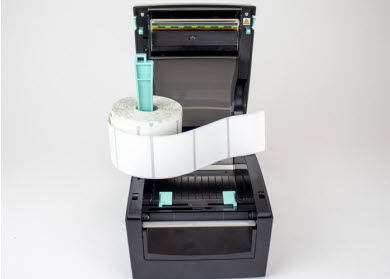
2. Slide the label roll on core bar with labels facing forward and unrolling from left. Snap the core bar closed.

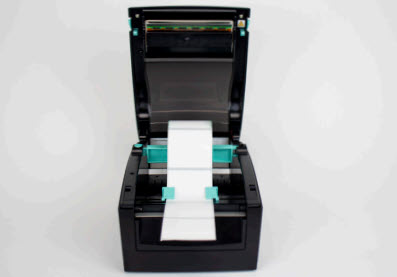
3. Feed labels through the blue/ green guides and extend over edge of printer. Adjust guides to label width and snap printer lid closed.

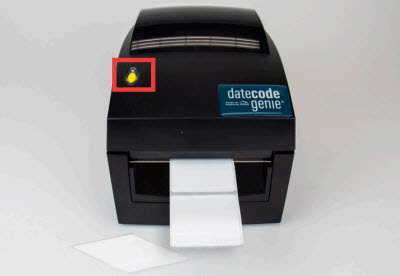
4. Press the yellow feed button, as needed, to align on black line. Pull down to tear label.

Related Articles

  • (Error 300x2) Printer Not Ready for Lite Model Device
  • (Error 300x1) Printer Connection Issue for Lite Device
  • DateCodeGenie® Lite Overview
  • Printer Calibration (Lite)

Was this article helpful?

Yes
No
Give feedback about this article

Related Articles

  • (Error 300x2) Printer Not Ready for Lite Model Device
  • (Error 300x1) Printer Connection Issue for Lite Device
  • DateCodeGenie® Lite Overview
  • Printer Calibration (Lite)
© 2025 DateCodeGenie

899 Montreal Circle, St. Paul, MN 55102

Privacy Policy

contact us
About NCCO

Knowledge Base Software powered by Helpjuice

Expand