US English (US)
FR French
DE German
ES Spanish
IT Italian
NL Dutch
menu

Contact Us

No results found. Still need help? Contact us

  • Scheduled Assistance
  • Contact Us
English (US)
US English (US)
FR French
DE German
ES Spanish
IT Italian
NL Dutch
arrow_back
  • Getting Started
  • Devices
  • App
  • Portal
  • Admin Settings
  • Accessories
  • Labels
  • Repairs
  • APIs
  • Task Manager
  • Scheduled Assistance
  • Contact Us

Test Print Labels (X Series)

Contact Us

If you still have questions or prefer to get help directly from an agent, please submit a request.
We’ll get back to you as soon as possible.

  • Getting Started
    Getting Started Guides Set Up Training
  • Devices
    Troubleshooting Device Overview 2.0 Model X Series Model Fit Model Lite Model mC-Label3 Printer Device Tablet Internet Connection Warranty & Support
  • App
    Error Codes Troubleshooting App Overview Mobile App Subscription Prep Lists Product Control Rosters Scale Temperature Probe Print History Settings Language Location Overrides
  • Portal
    Portal Overview Locations Categories Menu Items Printer Profiles Users Settings Quick Labels Prep List Print History Mass Import and Export Media Library Location Overrides Product Control Rosters Scale Temperature Probe Groups
  • Admin Settings
    Start with Admin Settings Admin Settings Overview Locations Devices and Licenses
  • Accessories
    Bluetooth Scanner USB Scanner Temperature Probe Scale Label Rewinder Fit Printer Shelf Warranty
  • Labels
    Overview Troubleshooting
  • Repairs
    2.0 Model X Series Model Lite Model DateCodeGenie® Tablet
  • APIs
    Inbound APIs Outbound APIs
  • Task Manager
    Task Manager Overview Venues Forms Users Resources Task Manager App
+ More
  • Home
  • Devices
  • X Series Model

This troubleshooting shows the printer is working correctly and is able to advance, print an image and cut labels correctly.

Steps:

1. Turn OFF printer by using master power switch on rear of housing.

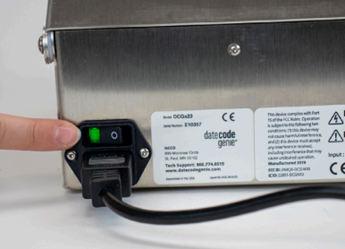
2. While pressing and holding the FEED button, front button on printer, turn printer ON by using the master power switch.

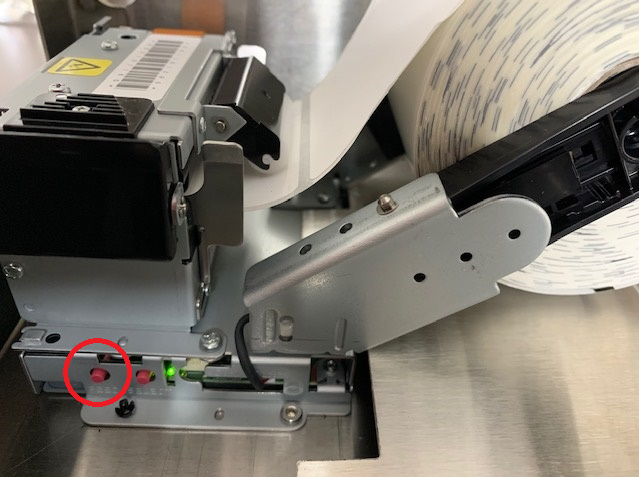
3. The printer will start the self test print. Once printing starts, the FEED button can be released.

4. After completing the self test printing, the printer will automatically cut and go into standby mode, ready for the next print job.

Test label will look similar to this:


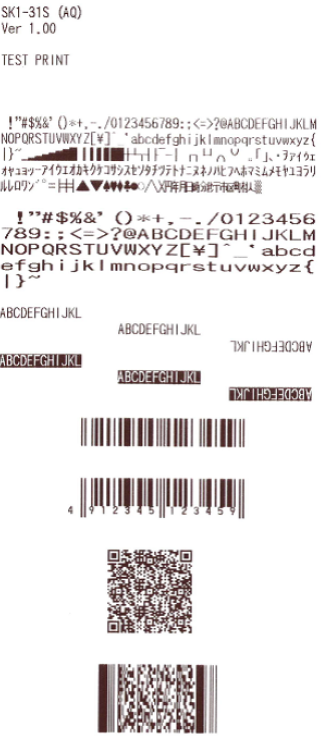
5. If printer cuts test label in middle, press the feed button again.  

6. If the printer does not advance labels or is cutting incorrectly on the label after pressing the feed button, try the process again.

Related Articles

  • Printer Calibration (X Series)
  • X Series Printer Pops Open After Printing

Was this article helpful?

Yes
No
Give feedback about this article

Related Articles

  • Printer Calibration (X Series)
  • X Series Printer Pops Open After Printing
© 2025 DateCodeGenie

899 Montreal Circle, St. Paul, MN 55102

Privacy Policy

contact us
About NCCO

Knowledge Base Software powered by Helpjuice

Expand