US English (US)
FR French
DE German
ES Spanish
IT Italian
NL Dutch
menu

Contact Us

No results found. Still need help? Contact us

  • Scheduled Assistance
  • Contact Us
English (US)
US English (US)
FR French
DE German
ES Spanish
IT Italian
NL Dutch
arrow_back
  • Getting Started
  • Devices
  • App
  • Portal
  • Admin Settings
  • Accessories
  • Labels
  • Repairs
  • APIs
  • Task Manager
  • Scheduled Assistance
  • Contact Us

Manage Groups

Contact Us

If you still have questions or prefer to get help directly from an agent, please submit a request.
We’ll get back to you as soon as possible.

  • Getting Started
    Getting Started Guides Set Up Training
  • Devices
    Troubleshooting Device Overview 2.0 Model X Series Model Fit Model Lite Model mC-Label3 Printer Device Tablet Internet Connection Warranty & Support
  • App
    Error Codes Troubleshooting App Overview Mobile App Subscription Prep Lists Product Control Rosters Scale Temperature Probe Print History Settings Language Location Overrides
  • Portal
    Portal Overview Locations Categories Menu Items Printer Profiles Users Settings Quick Labels Prep List Print History Mass Import and Export Media Library Location Overrides Product Control Rosters Scale Temperature Probe Groups
  • Admin Settings
    Start with Admin Settings Admin Settings Overview Locations Devices and Licenses
  • Accessories
    Bluetooth Scanner USB Scanner Temperature Probe Scale Label Rewinder Fit Printer Shelf Warranty
  • Labels
    Overview Troubleshooting
  • Repairs
    2.0 Model X Series Model Lite Model DateCodeGenie® Tablet
  • APIs
    Inbound APIs Outbound APIs
  • Task Manager
    Task Manager Overview Venues Forms Users Resources Task Manager App
+ More
  • Home
  • Portal
  • Groups

Table of Contents

TIPS & TRICKS WARNING

Groups are added, edited, and deleted from the Groups tab in the portal. 

There are three parts to setting up groups:

1. Add Group

1. Login to www.datecodegenie.com using the recommended browser, see What Internet Browser Should I Use to Access My DateCodeGenie® Portal?

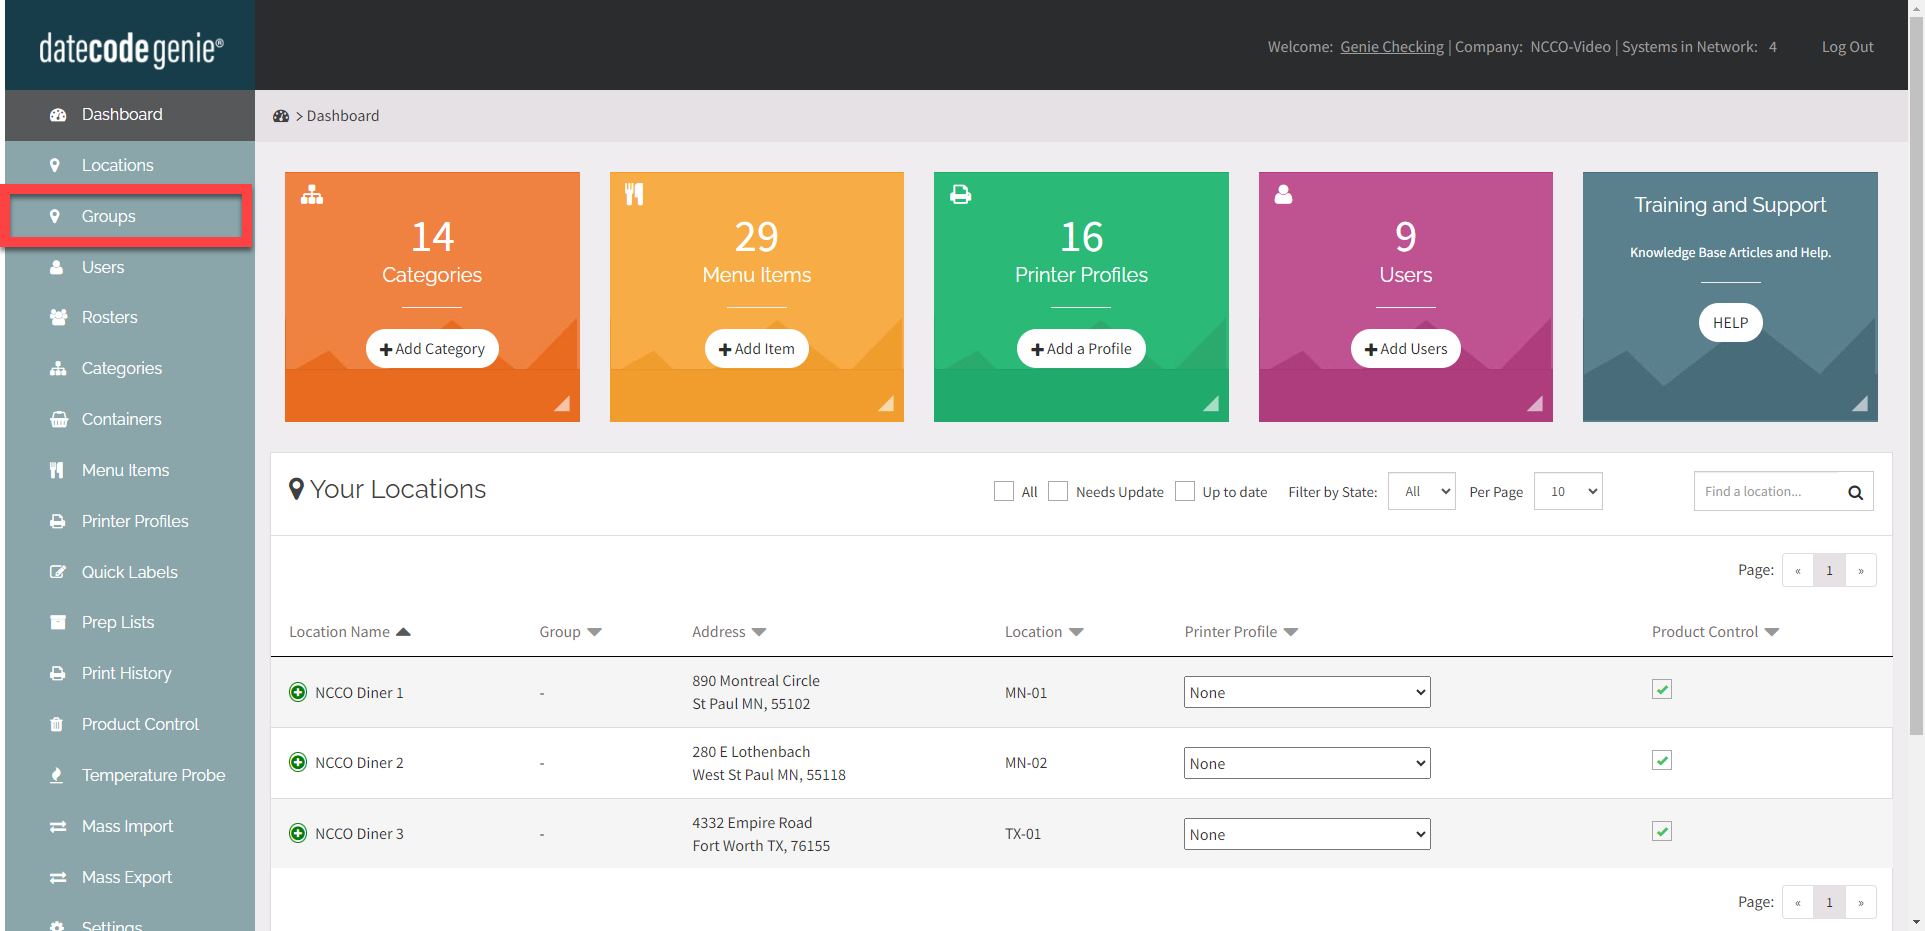
2. Click the Groups tab on the side bar.

3. Click the Add Group button.

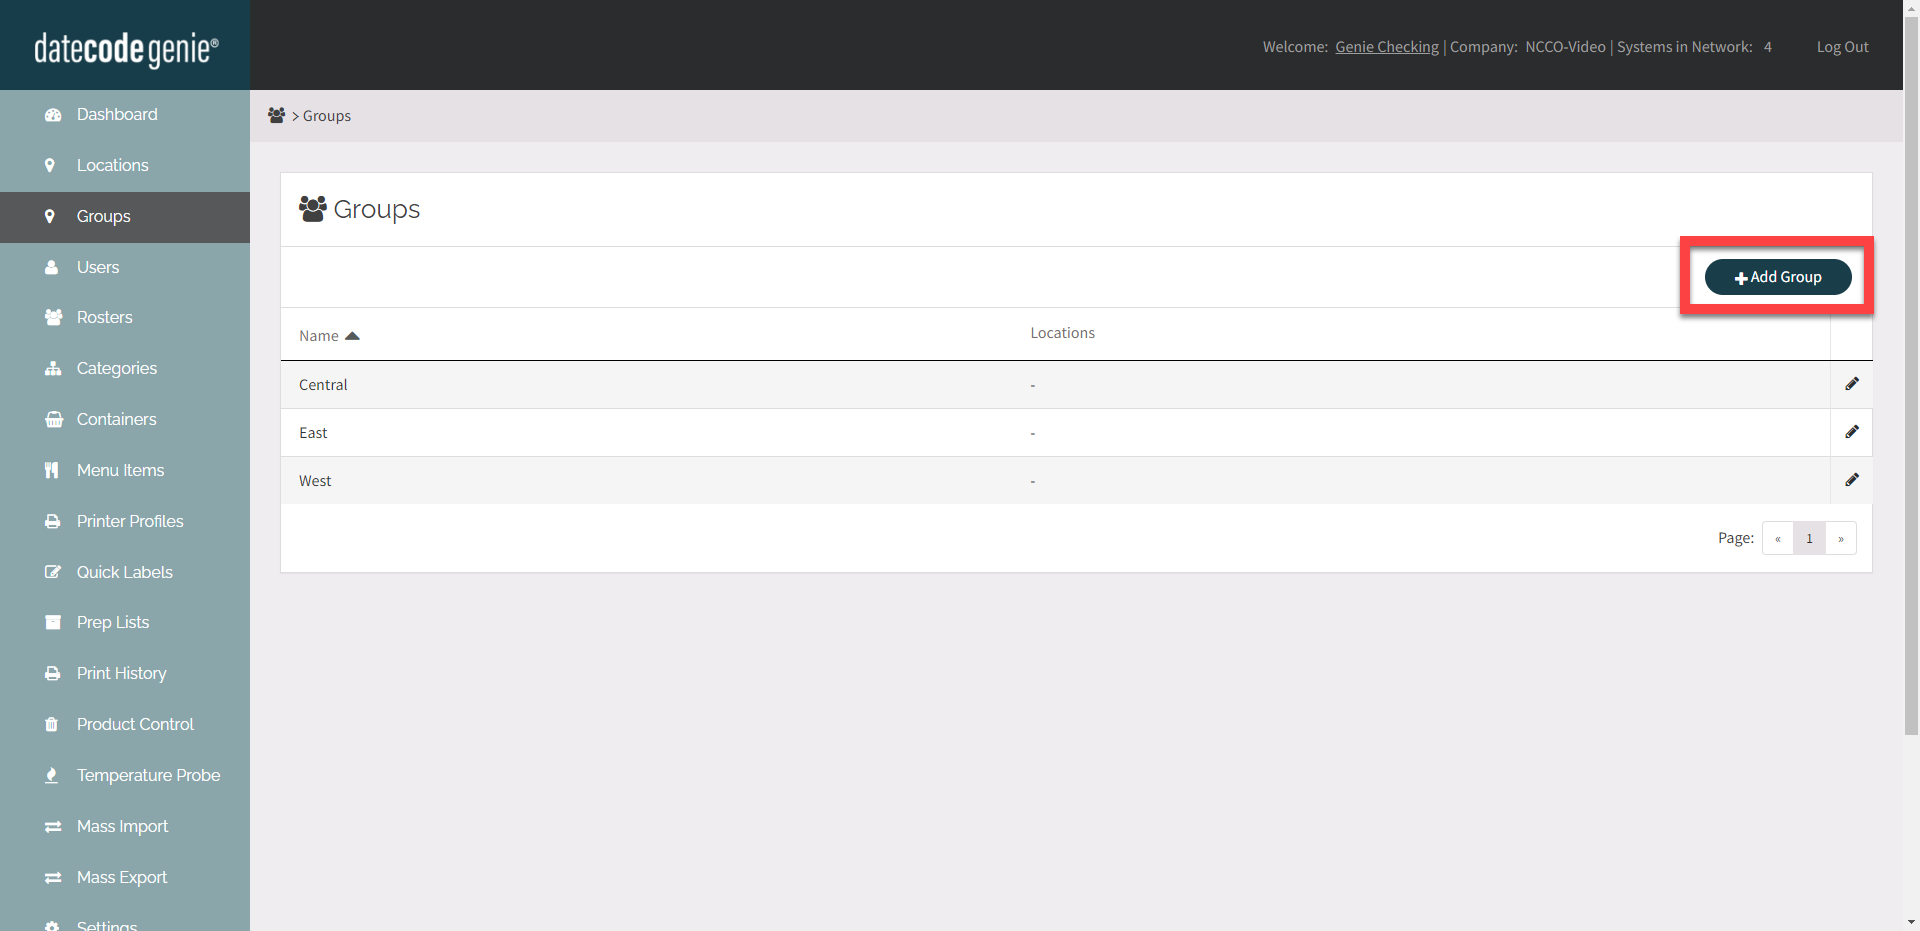
4. Enter the Name for the group.

5. Click the Add Group button. 


2. Add Data to Groups

Add data to the group from their respective tabs on the portal sidebar, see Groups for list of available data. 

TIPS & TRICKS

Use mass export to update your staff, categories and menu items to groups, see Updating and Adding Data to my Portal Using Mass Export.


3. Add and Remove Locations from Group

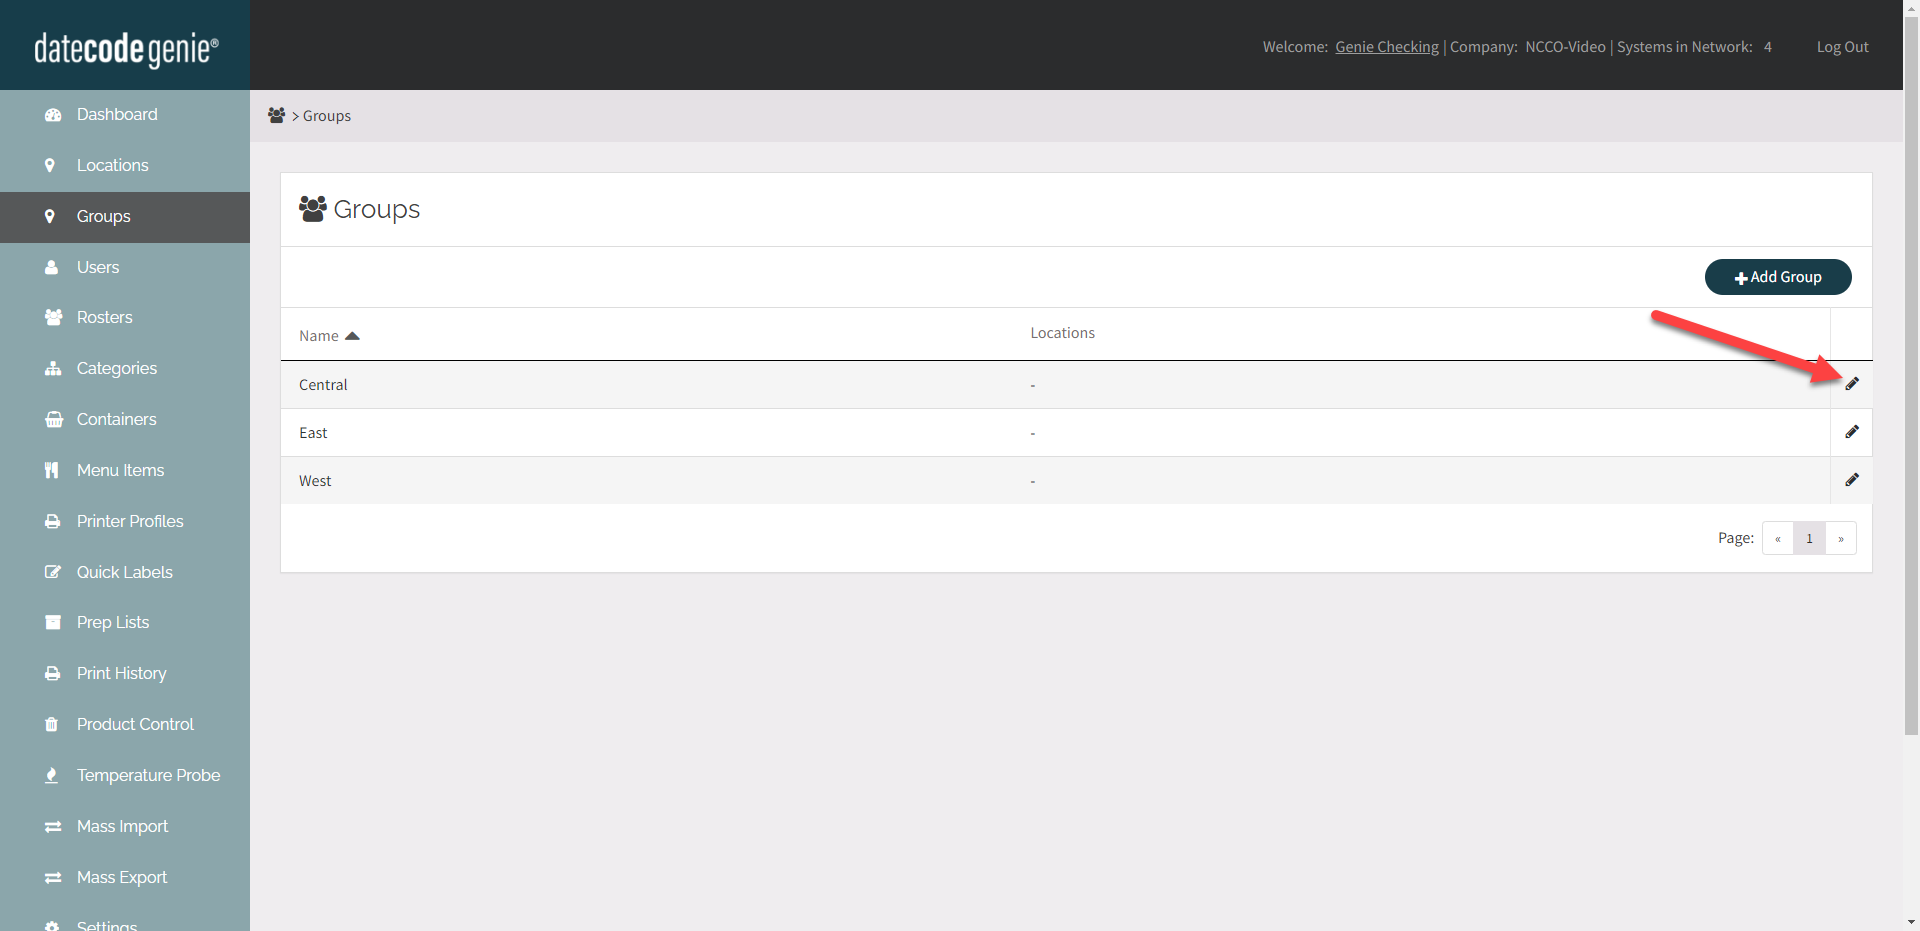
1. Click on the Edit button (pencil icon) next to the group to edit.

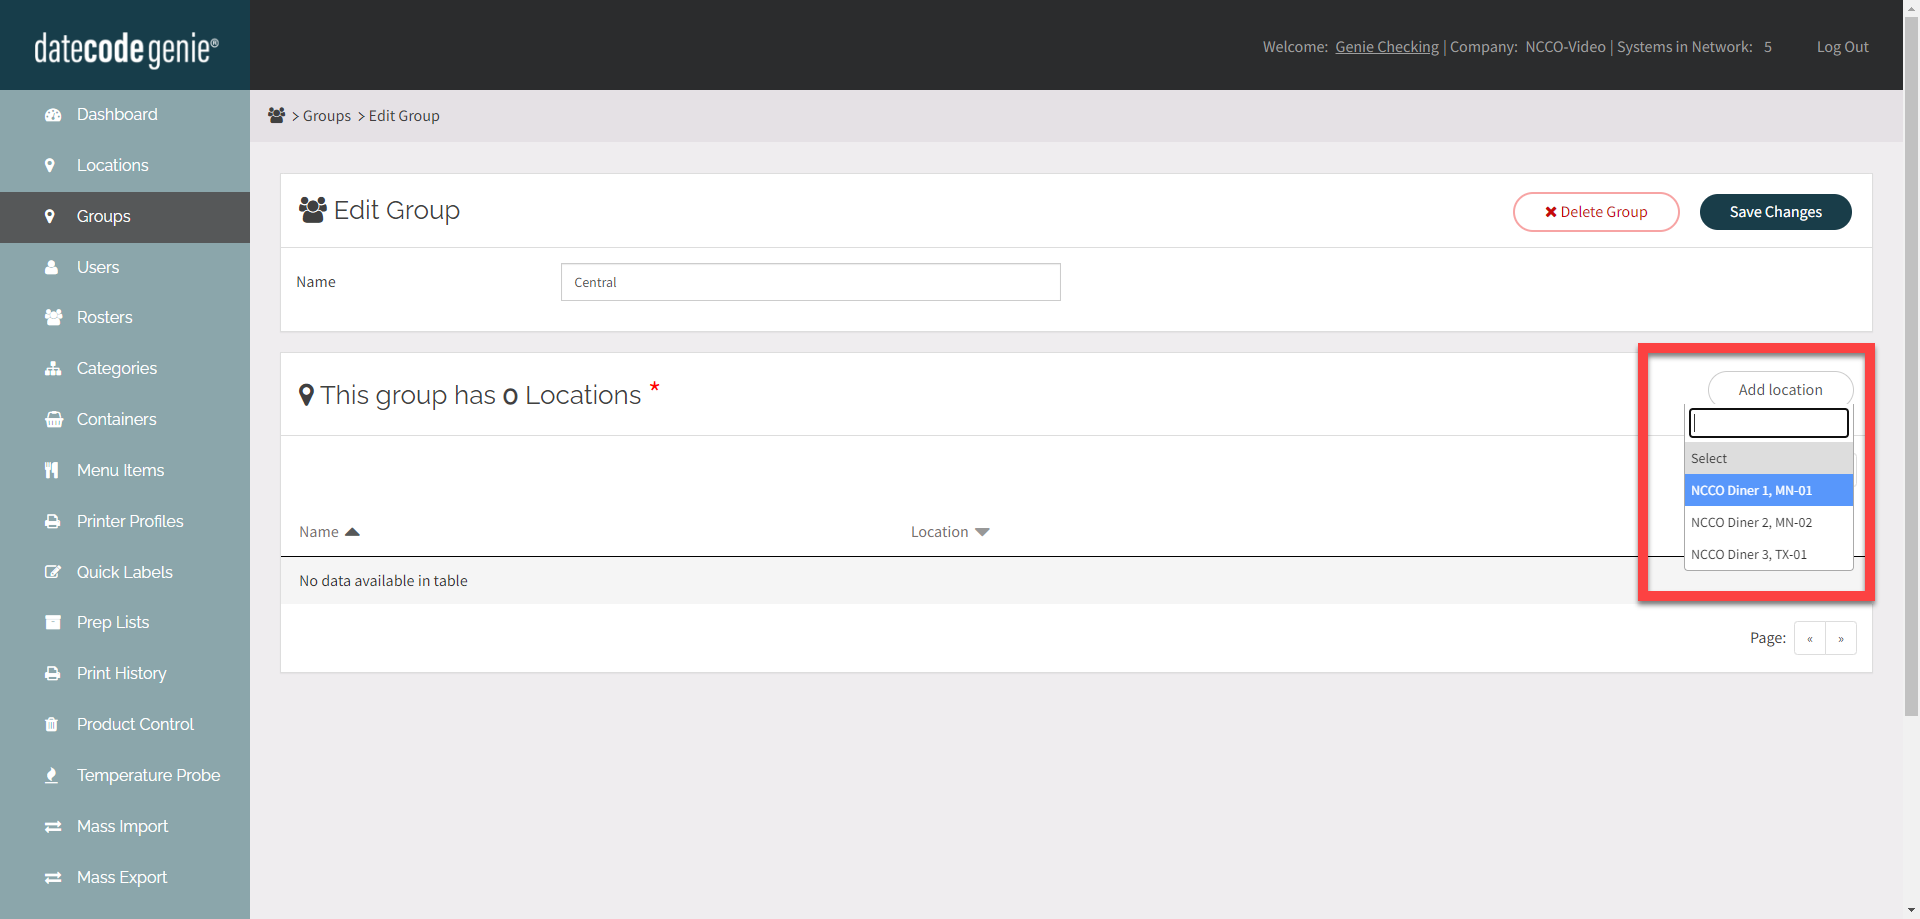
2. Click the Add Location button and select location from dropdown. Repeat for all desired locations.

WARNING

If a notification appears in red at the top of the page, then you must go to the tab indicated to add the group in order to remove the location.


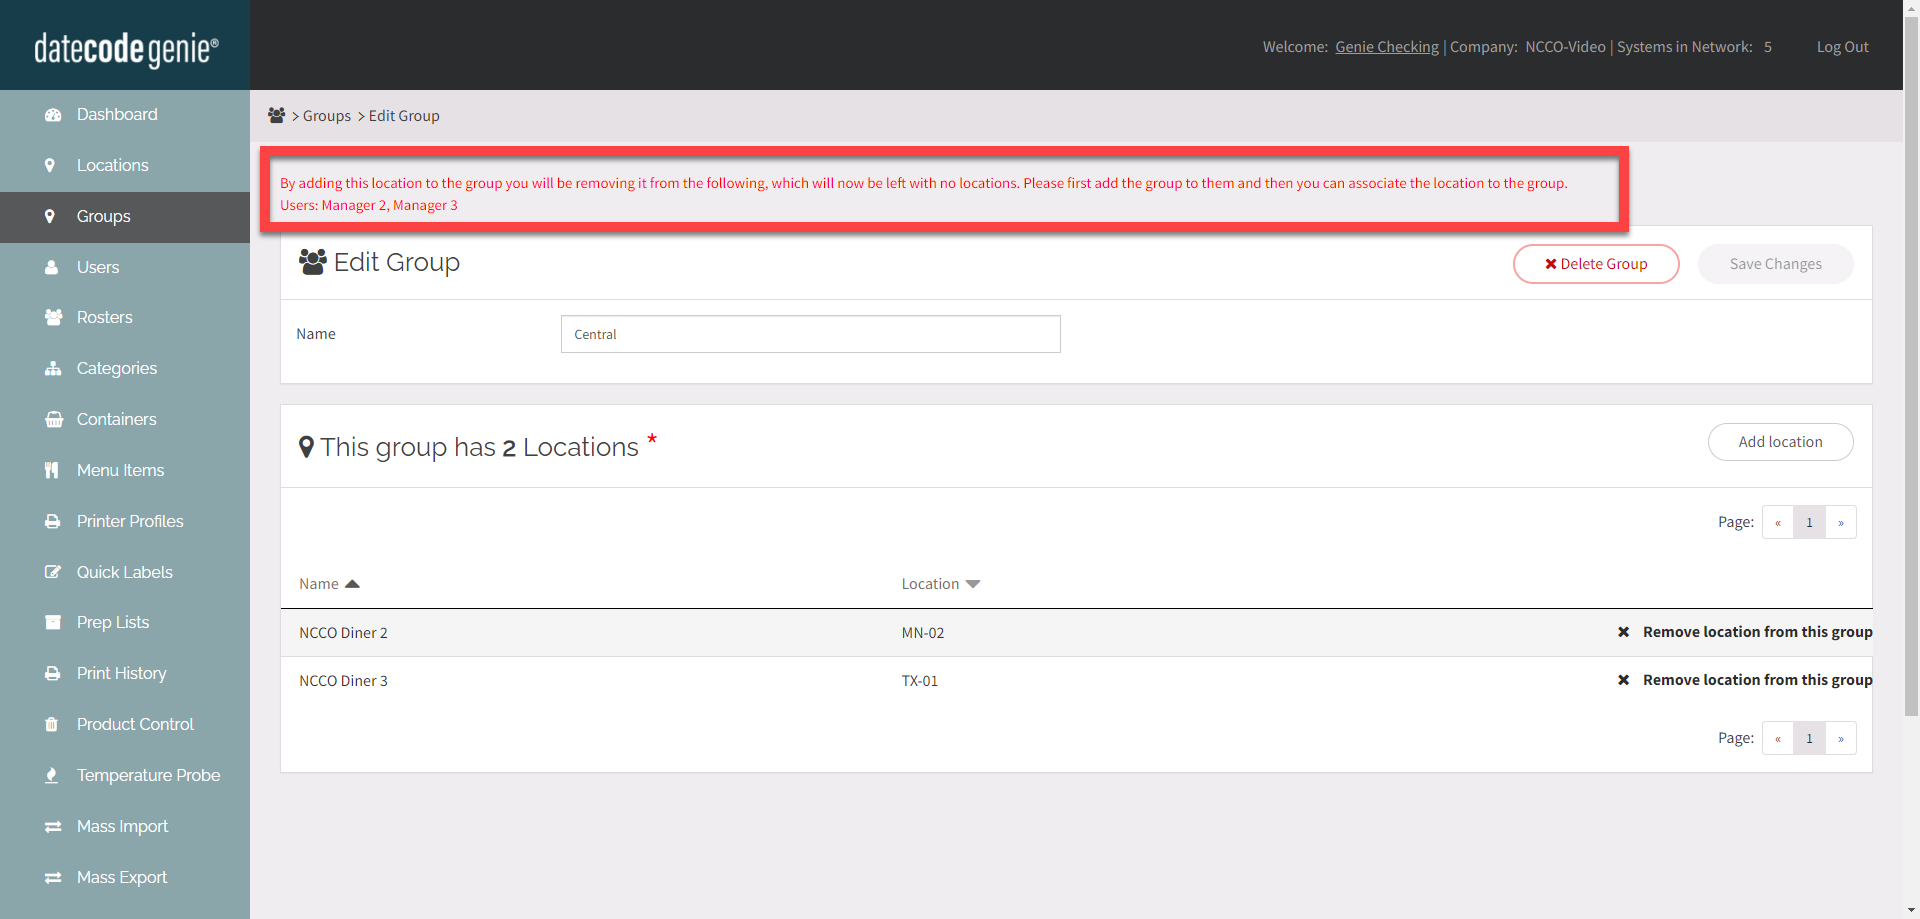
3. To remove a location, click X Remove location from this group.

4. Click the Save Changes button.


Related Articles

  • Groups
  • Manage Categories
  • Manage Staff
  • Manage Locations

Was this article helpful?

Yes
No
Give feedback about this article

Related Articles

  • Groups
  • Manage Categories
  • Manage Staff
  • Manage Locations
© 2025 DateCodeGenie

899 Montreal Circle, St. Paul, MN 55102

Privacy Policy

contact us
About NCCO

Knowledge Base Software powered by Helpjuice

Expand