
Updating and Adding Data to my Portal Using Mass Export
Table of Contents
Mass Export is a tool available to portal administrators only and allows them to update existing data in the portal or add new data to the portal all at once using the tab with instructions listed in the portal.
Upon request, it retrieves data from the Users, Category, and Menu Items tab, including location overrides (a purchased software add-on), and transfers to a protected Microsoft Excel-based template for updating or adding data. Not all data from each tab can be extracted.
Mass exporting can be a helpful timesaver when you want to:
- Update all passwords for your DateCodeGenie managers and users.
- Update menu item pricing for a price increase
- Add location overrides for locations
- Sort menu items by category to make menu item changes
- Add new menu items using similar menu item set up
- View and adjust default printer profile settings for categories and menu items
- Use the export template as a backup for data that can be used to reimport
Steps:
1. Log in to your portal.
2. Click the Mass Export on the left side of the page.
NOTE
Remove unwanted users, categories and menu items from your portal BEFORE requesting an export. Removing menu items from the export template will NOT remove the user, category or menu item from your portal after importing.
3. Request an export from the Export button in the upper right corner of the page.
4. Click OK at top of page to confirm request.
5. Refresh browser and scroll down on the page to Exports or or wait to receive an email (sent to email used for portal login) notifying you your export is ready to be downloaded. 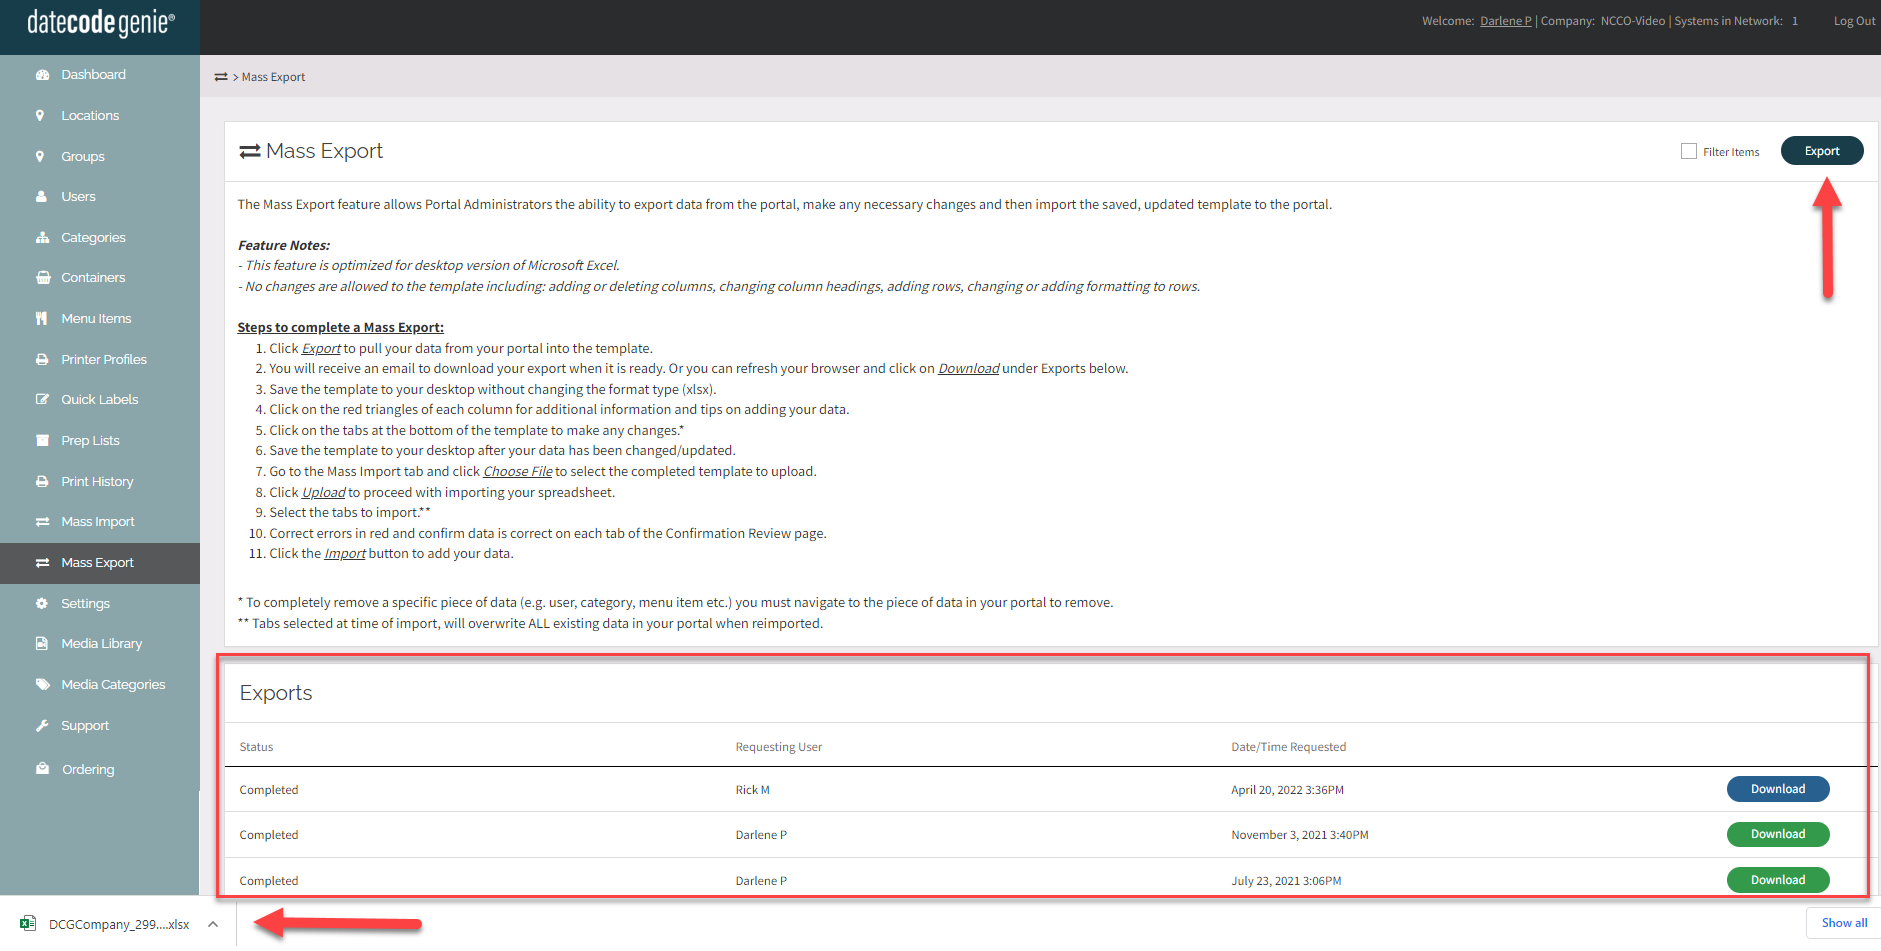
6. Exports will show status completed and the green Download button can be clicked to download the file.
7. Open the download file from your computer's download file or at the bottom left corner and Enable Editing in the yellow bar at the top of the document.
8. Update the template accordingly and save to your computer.
TIPS & TRICKS
To sort your data for easier updating, highlight all cells with YOUR data only. Click "Sort & Filter" from the menu bar and "Custom" to select the column to sort by.
NOTE
Barcodes not generated in the portal from the barcode field will export in an abbreviated format and will reimport in the correct format.
NOTE
Removing categories, users or menu items from the export template will NOT remove the user, category, or menu item from your portal after importing (see Step 2. Above).
9. Go to the Mass Import tab in your portal and follow the instructions starting at step 6 to complete the reimport.
NOTE
The first blank row on each tab of the template indicates the end of data transfer for that tab. See Tips & Tricks above for sorting.
WARNING
Do NOT import the Categories tab from an export template if custom icons have been uploaded as custom icons will be removed and will require reuploaded to each category.
