Set Up Multi-Page Printing in the Portal
Table of Contents
Set up a printer profile in the portal that prints multiple pages of labels every time when selected on the app, saving time by printing more labels at once.
This feature allows for:
- Including more information that may not fit on one label.
- Adding information for the same menu item in multiple places on a container, like on the top, bottom, or sides.
This feature is available in the Printer Profiles tab in the portal.
TIPS & TRICKS
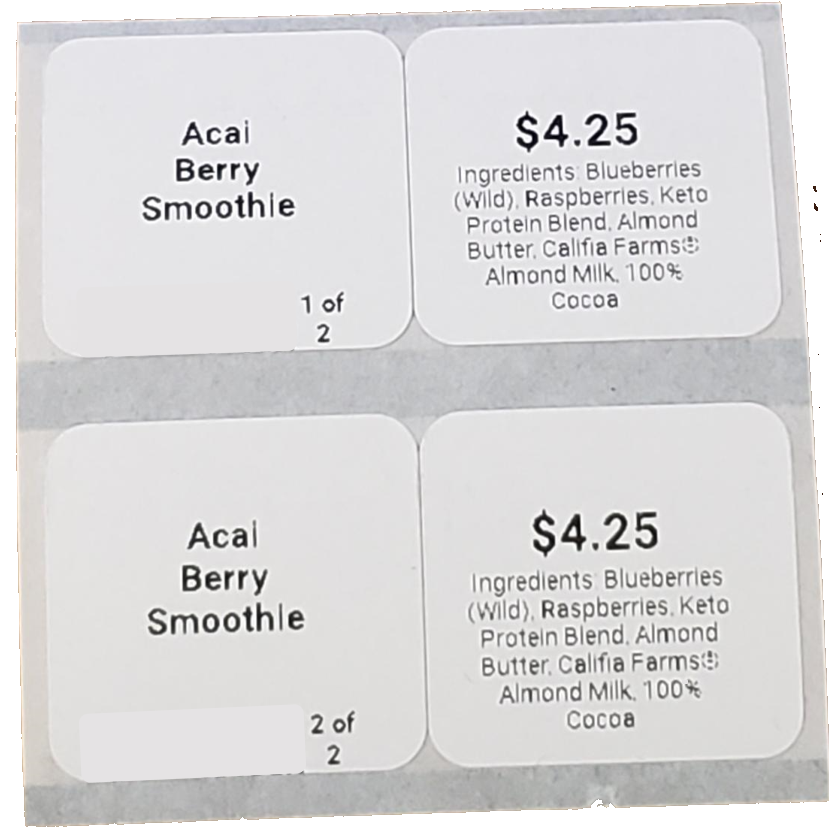
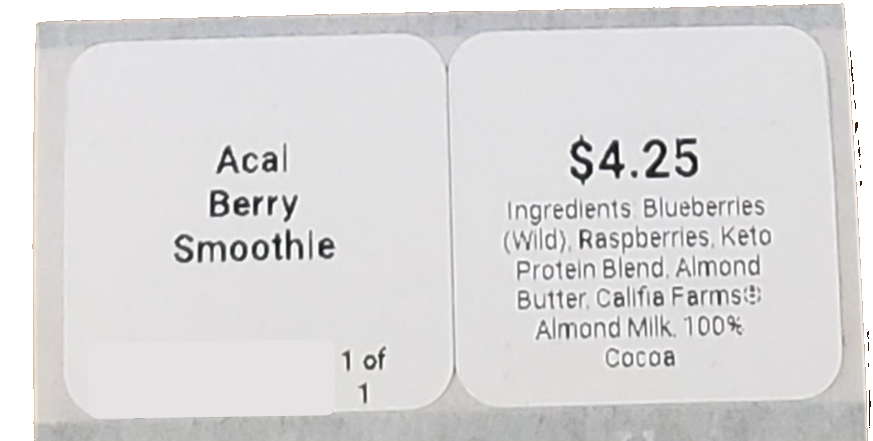
Use for grab and go labels, allowing you to add the item name, price, and barcode on the first page, and list ingredients on the second page.
Set up 2 or 3 inch labels
Set up a printer profile in your portal to allow multi-page printing of a menu item.
1. Login to www.datecodegenie.com using the recommended browser, see What Internet Browser Should I Use to Access My DateCodeGenie® Portal?
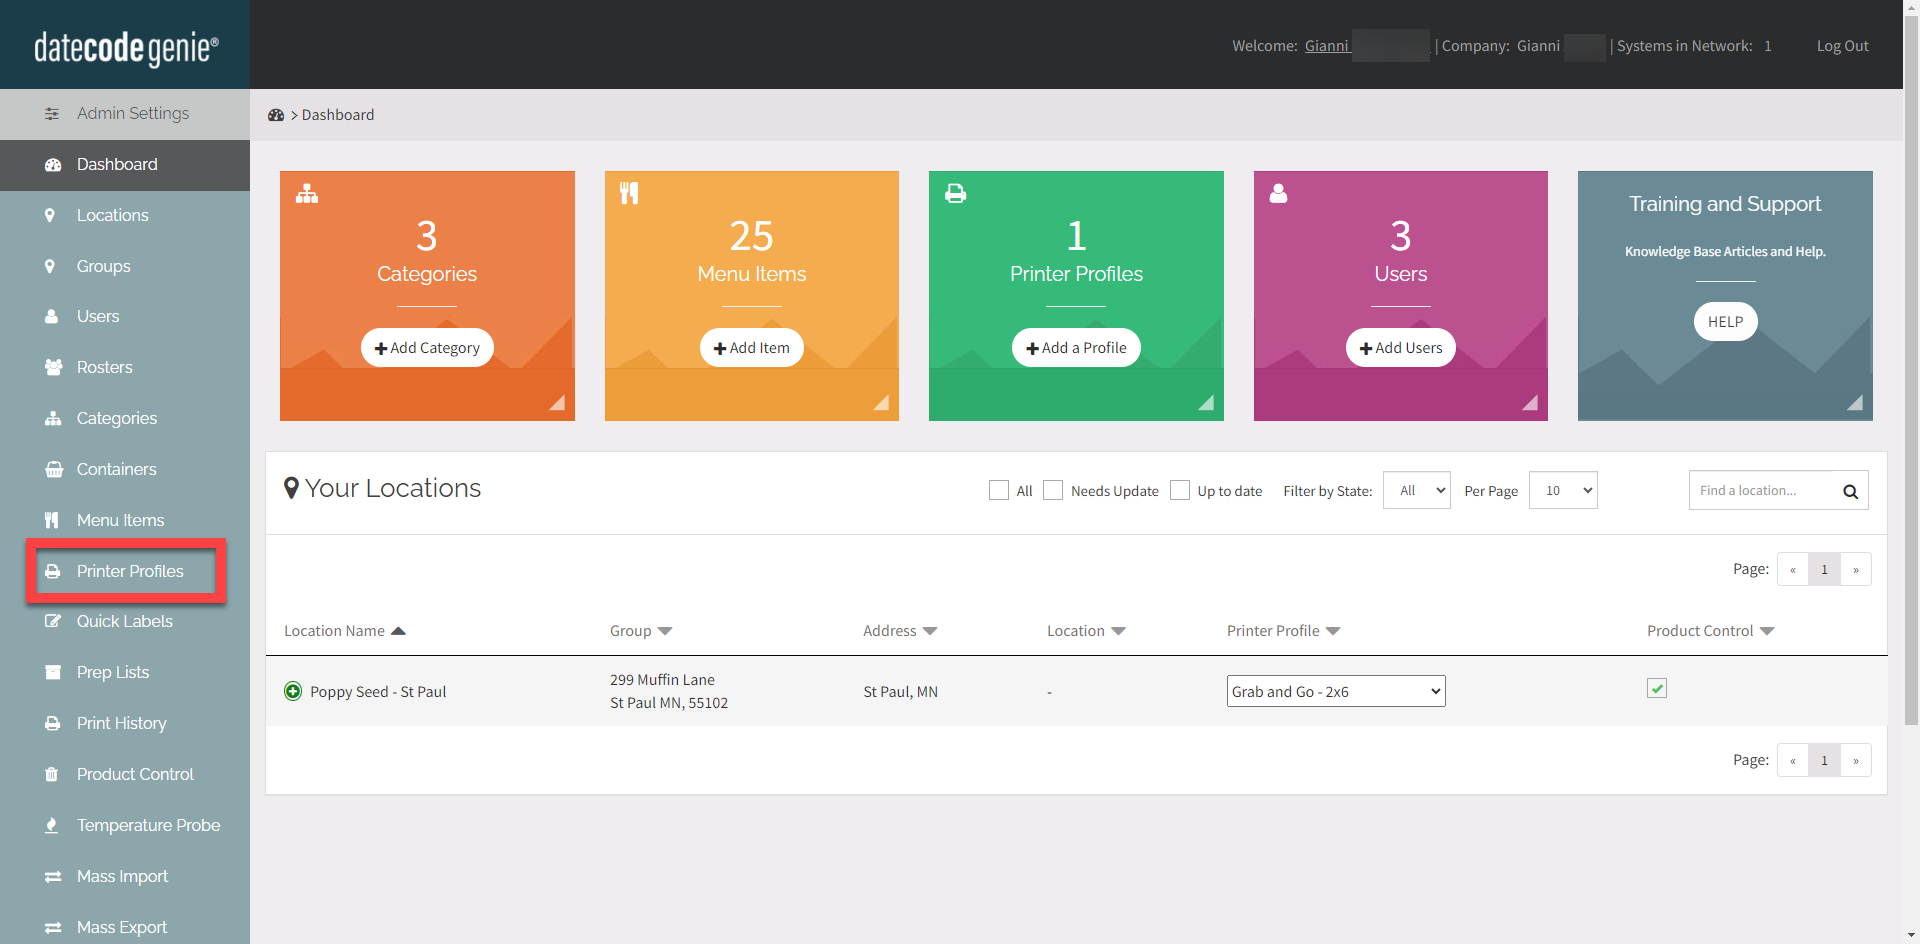
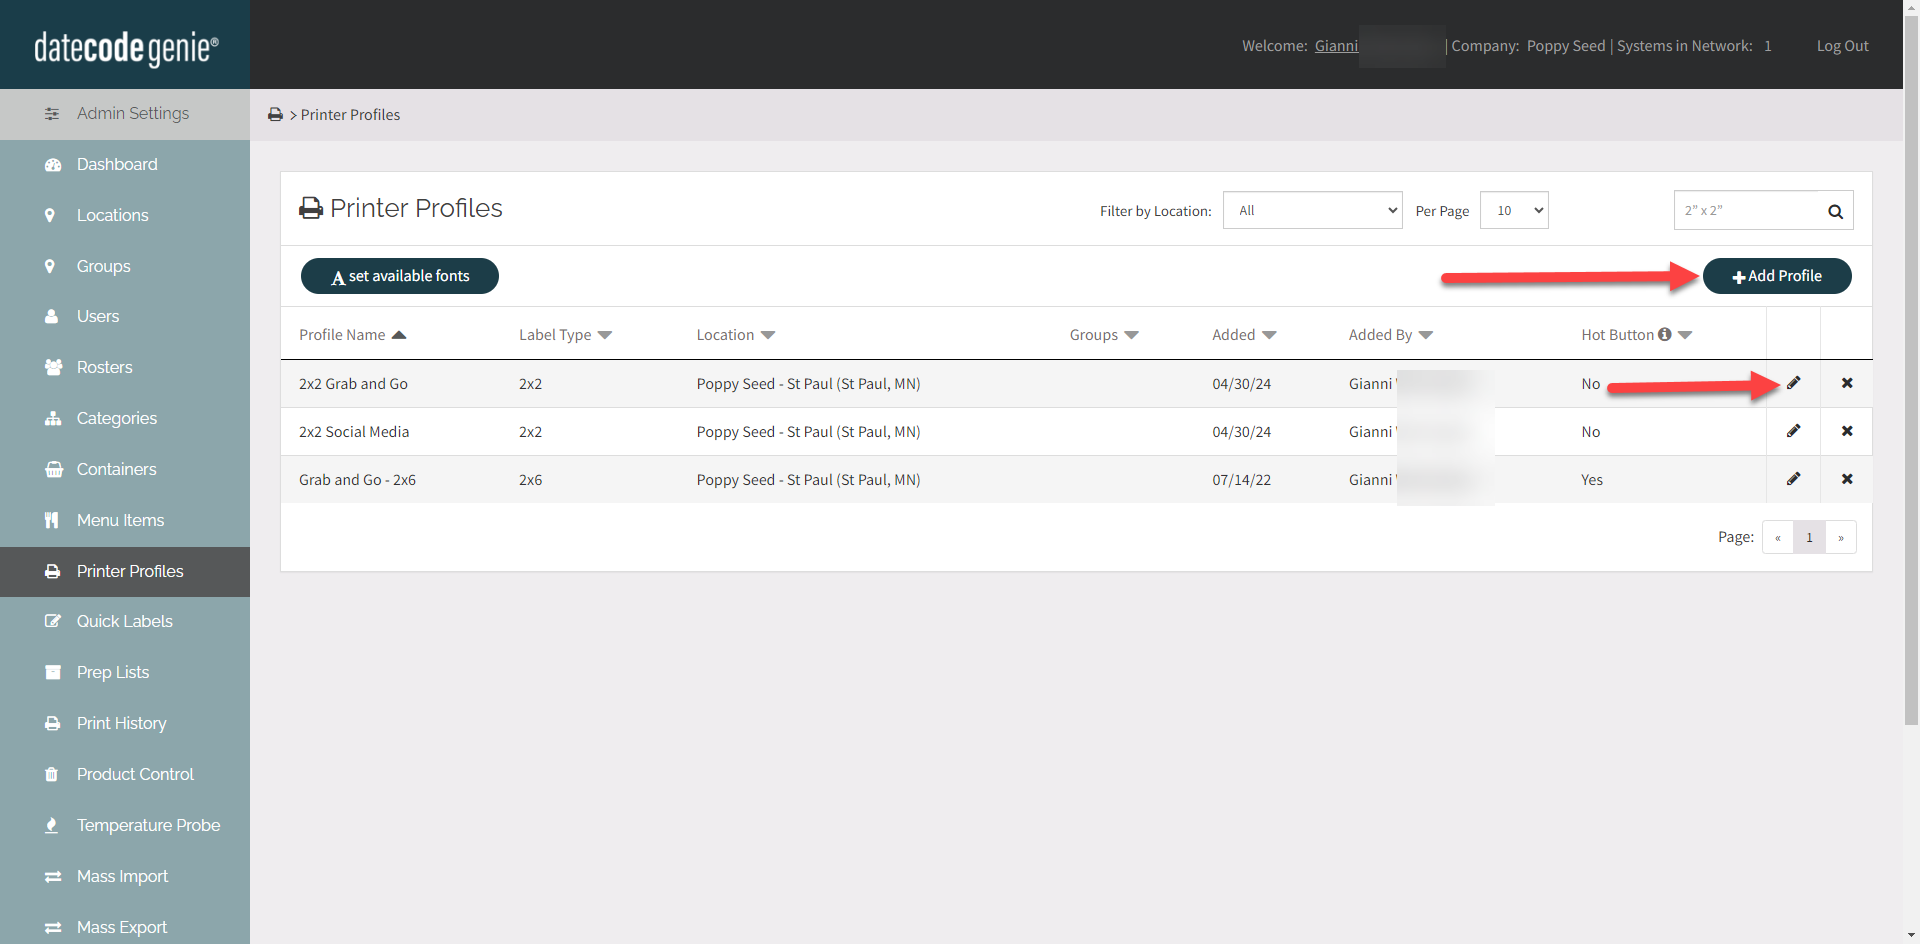
2. Click on the Printer Profiles tab on the side bar.

3. Click the Edit button (pencil icon) from a Printer Profile to edit, or add new Printer Profile. See Manage Printer Profiles

4. Click the Layout Designer button to open.

5. Click on the Label Type dropdown box and select the preferred label type.
NOTE
If you have a label with a background image, you will need to first remove it before changing your label type.

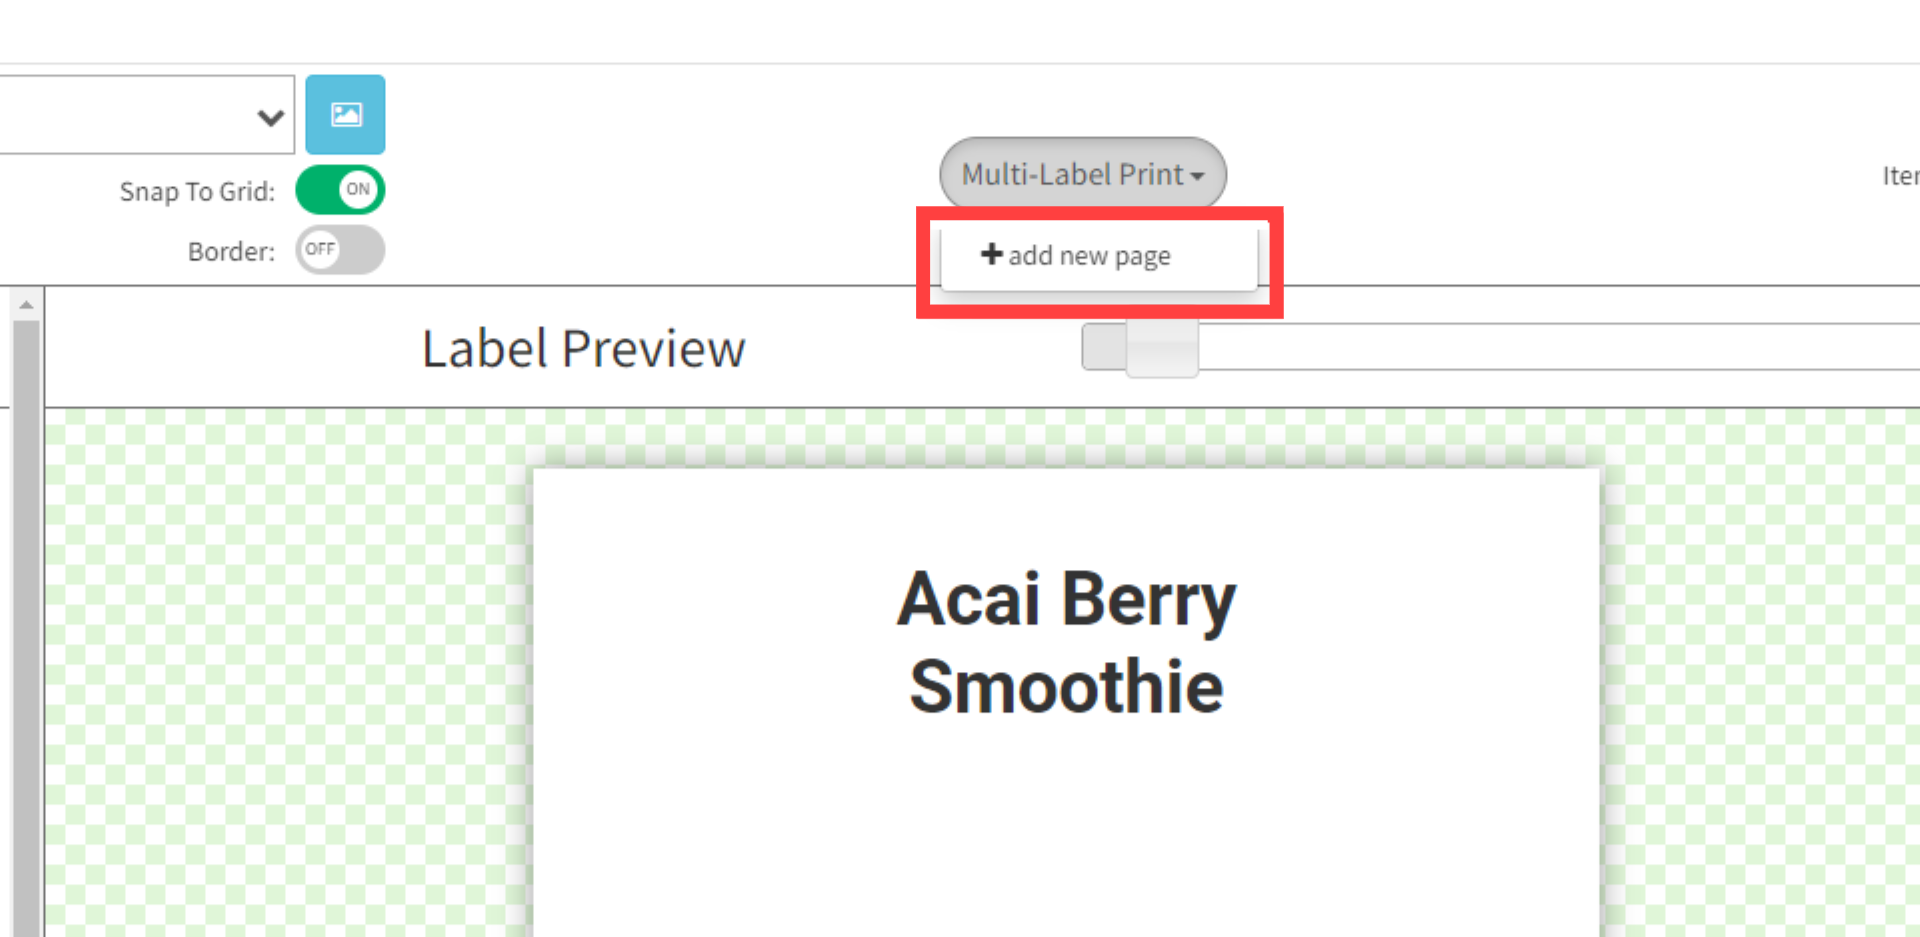
6. Select the Multi-Label Print dropdown button and click on + add new page to add additional pages.

7. Insert desired features onto the additional pages. Change the page view by clicking the Viewing dropdown and select a page.

8. Click Save Changes.
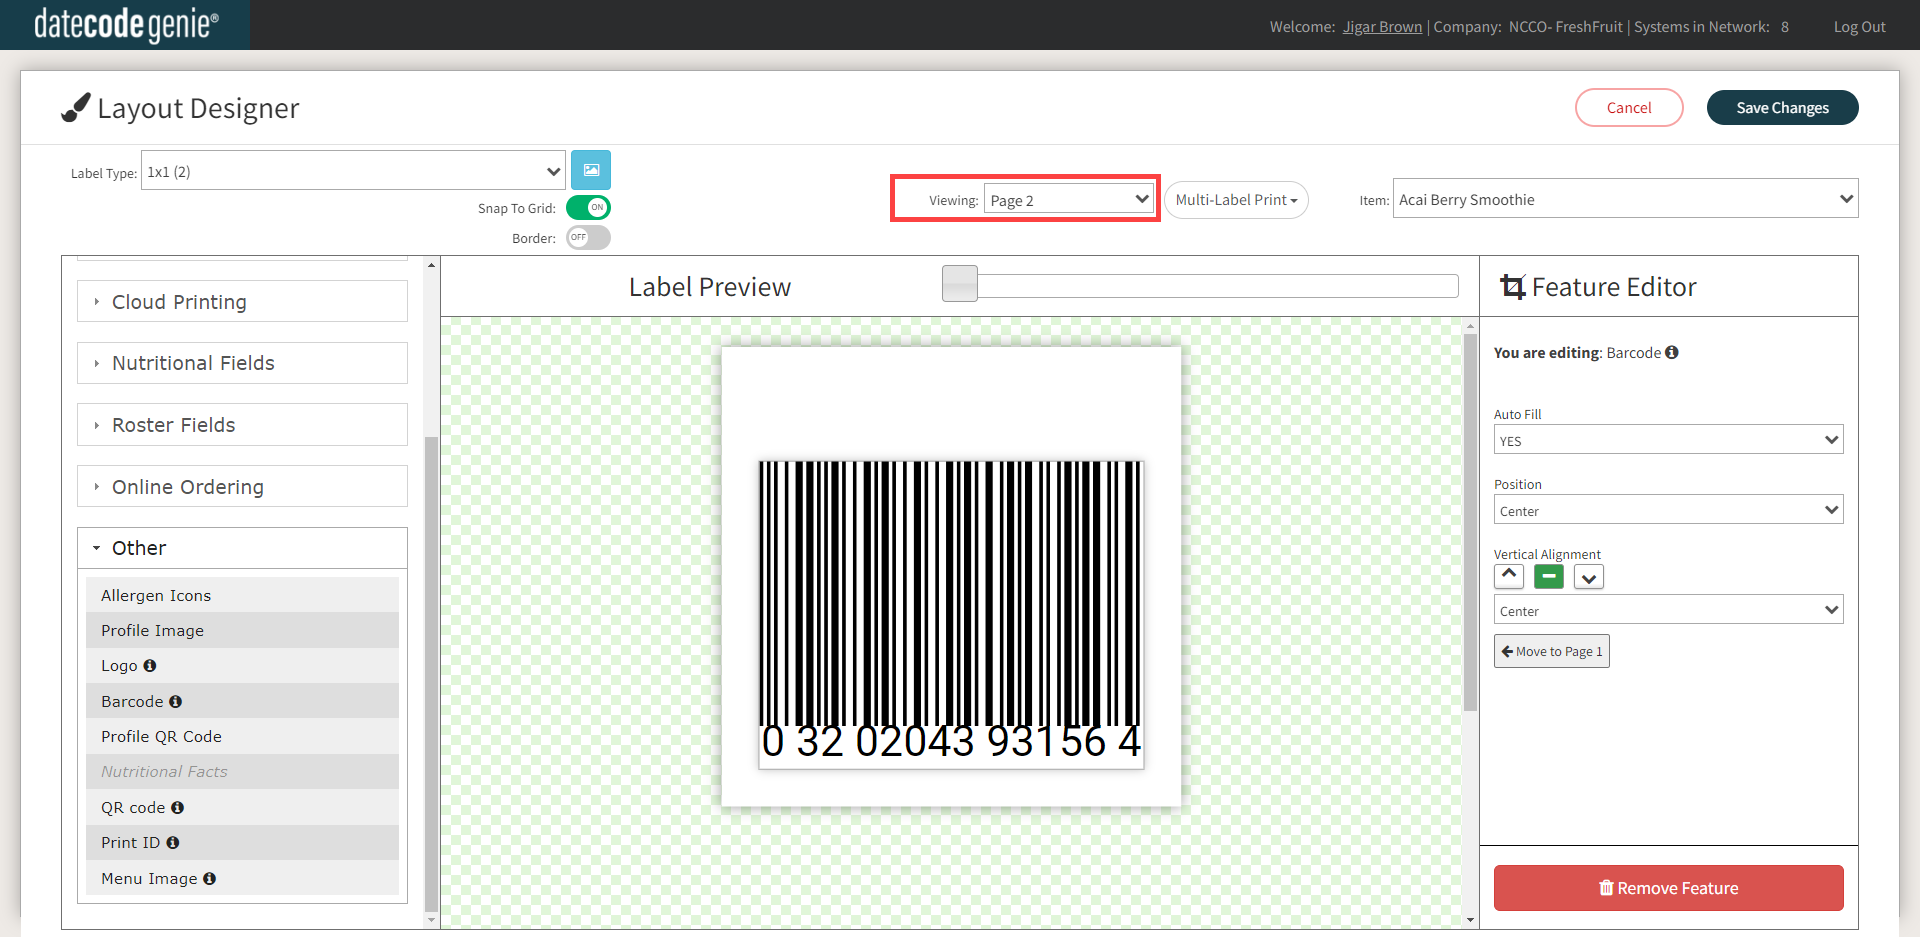
Set up 1x1 inch labels
Set up a printer profile in your portal for 1x1 (2) labels with two 1x1 inch squares side-by-side on the label roll.
NOTE
Each square is considered an individual label.
1. Login to www.datecodegenie.com using the recommended browser, see What Internet Browser Should I Use to Access My DateCodeGenie® Portal?
2. Click on the Printer Profiles tab on the side bar.
3. Click the Edit button (pencil icon) from a Printer Profile to edit, or add new Printer Profile. See Manage Printer Profiles
4. Click the Layout Designer button to open.

5. Click on the Label Type dropdown box and select 1x1 (2).
NOTE
If you have a label with a background image, you will need to first remove it before changing your label type.
![]()
6. Select the Multi-Label Print dropdown button and click on + add new page to add additional pages.
7. Insert desired features onto the additional pages. Change the page view by clicking the Viewing dropdown and select a page.
8. Click Save Changes.
The following examples show how single and multi-page labels will print with single or multiple copies.
NOTE
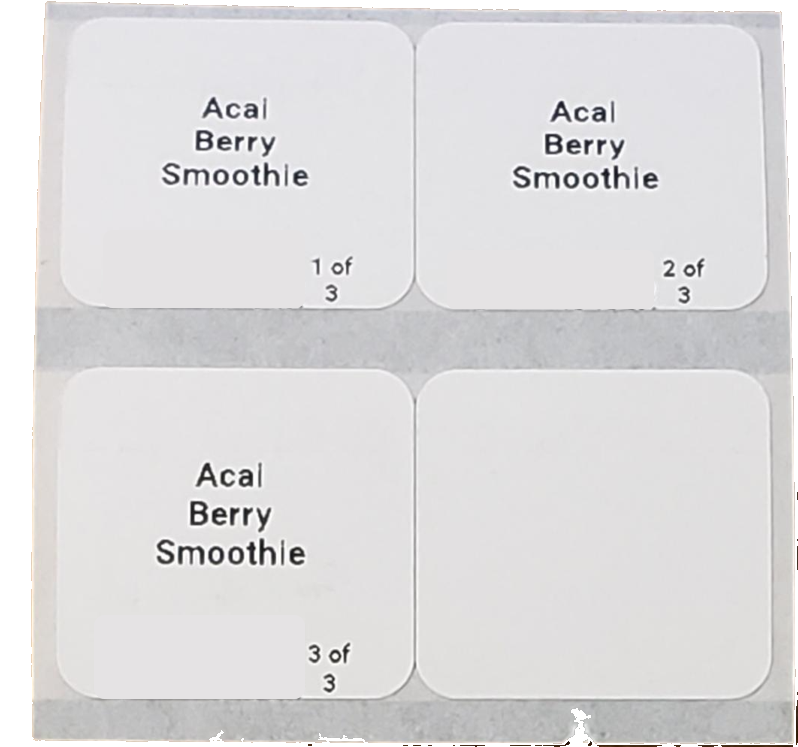
The last 1" x 1" square will be blank when an odd number of total labels are printed.
Single-Page Labels
Single page, one copy

Single-Page Labels, Multiple Copies
Single page, three copies.
Multi-Page Labels
Two pages, one copy
Multi-Page Labels, Multiple Copies
Two pages, two copies