
Use Date Fields in a Printer Profile
Date fields in printer profiles allow staff to print labels with expiration dates. This feature is useful for printing labels of menu items with accurate expiration dates and times from the portal or app, see Date Fields
Edit date fields for each menu item, see Use Date Fields in a Menu Item. For years, update the prepared and expiration dates on the app.
TIPS & TRICKS
The labels used to refer to each date feature on the menu item page and mass import/export columns can’t be changed. However, labels for each date feature can be changed from the feature editor of each date feature added to your printer profile.
Steps:
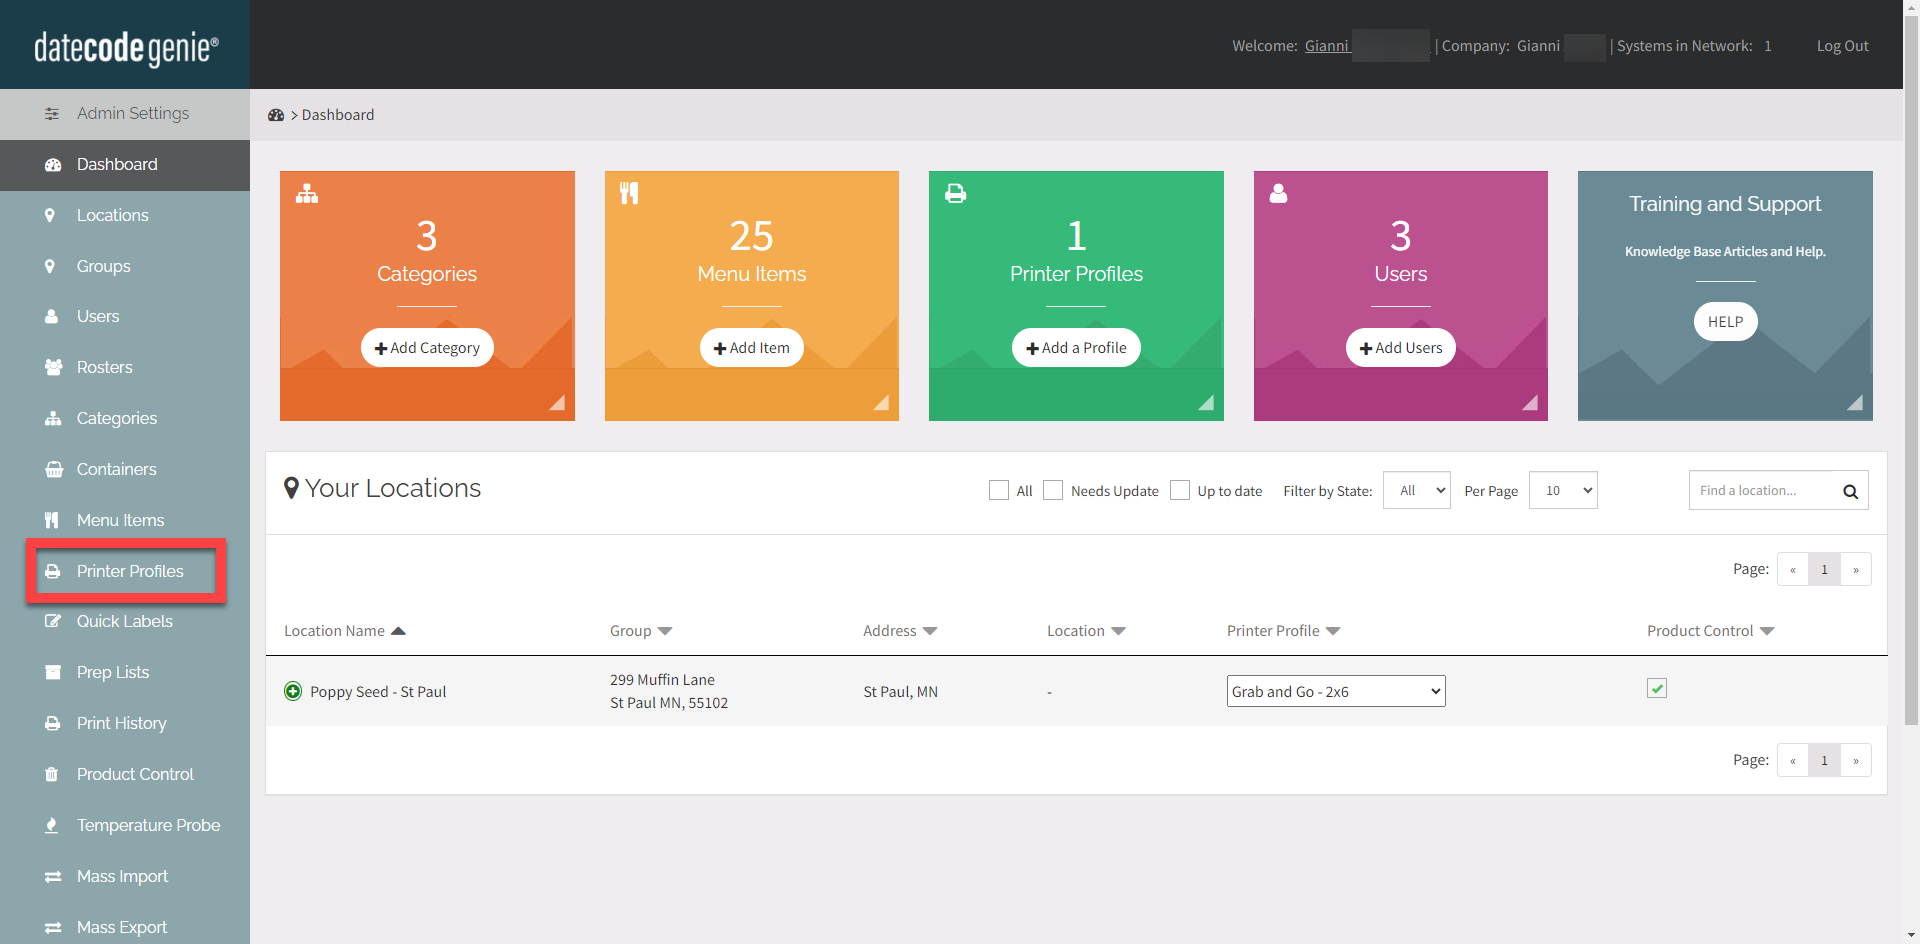
1. Login to www.datecodegenie.com using the recommended browser, see What Internet Browser Should I Use to Access My DateCodeGenie® Portal?
2. Click on the Printer Profiles tab on the side bar.
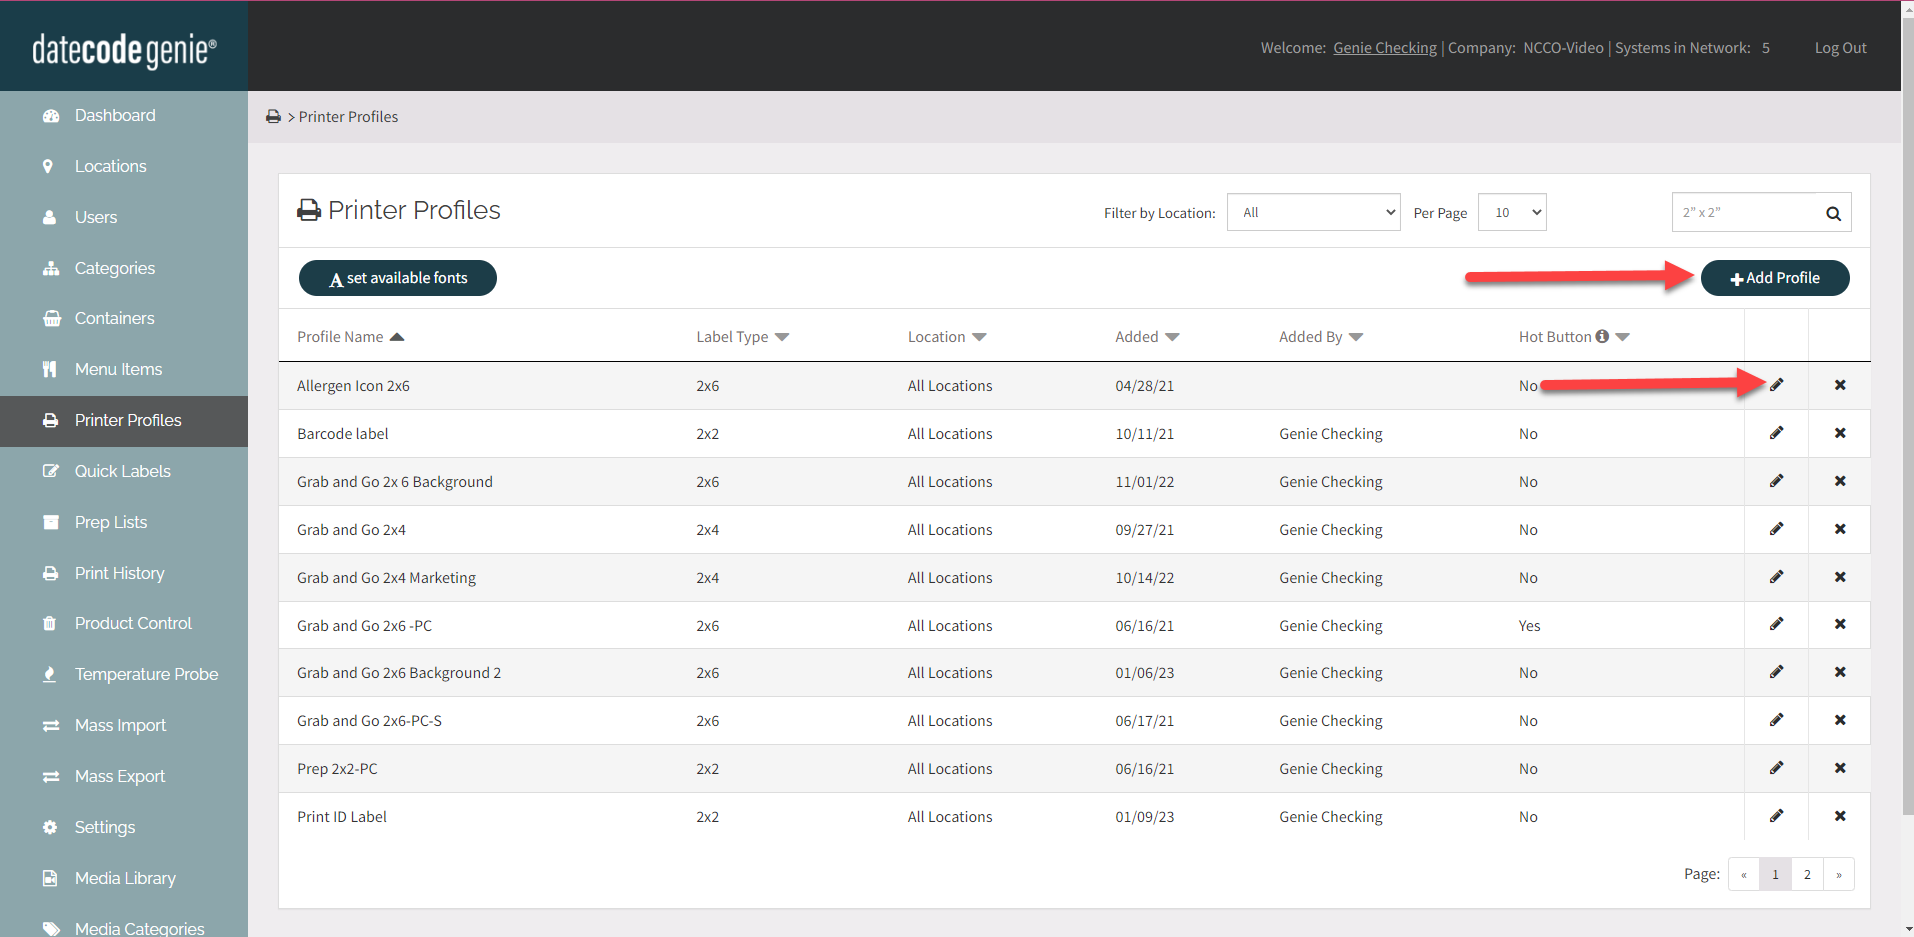
3. Click the Edit button (pencil icon) from a Printer Profile to edit, or add new Printer Profile. See How to Add Labels Using Printer Profiles.
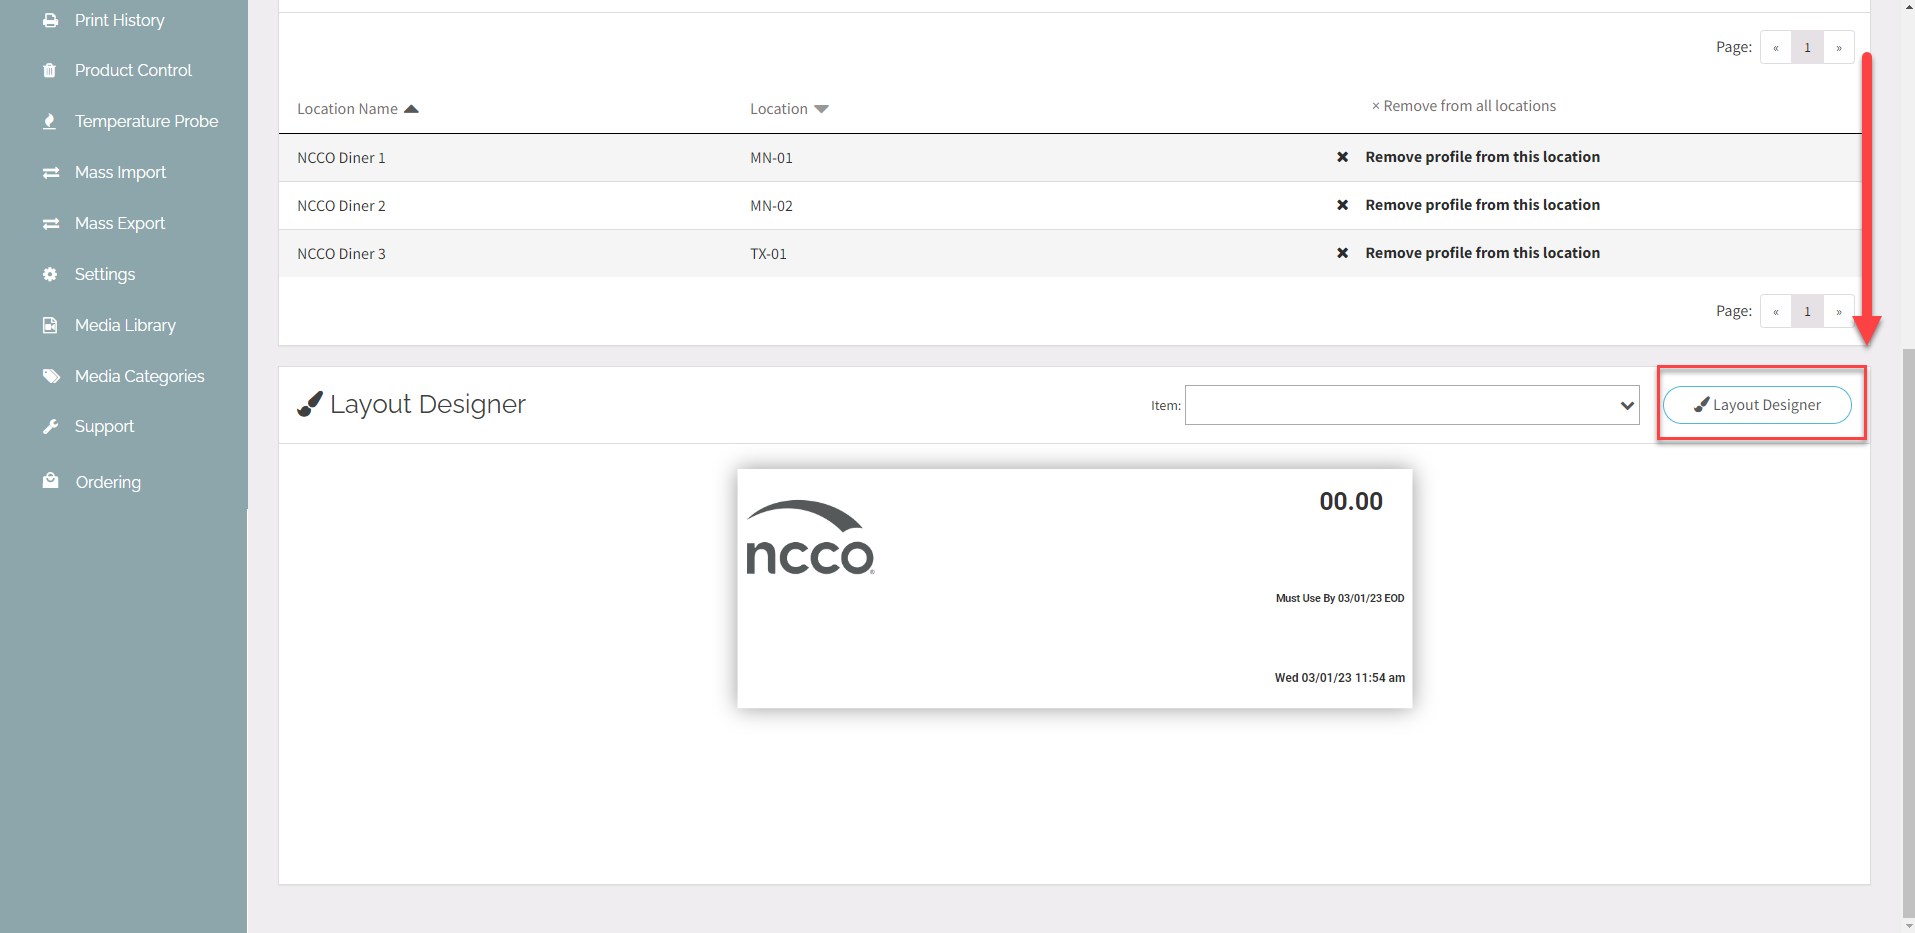
4. Scroll down and click the Layout Designer button to open.
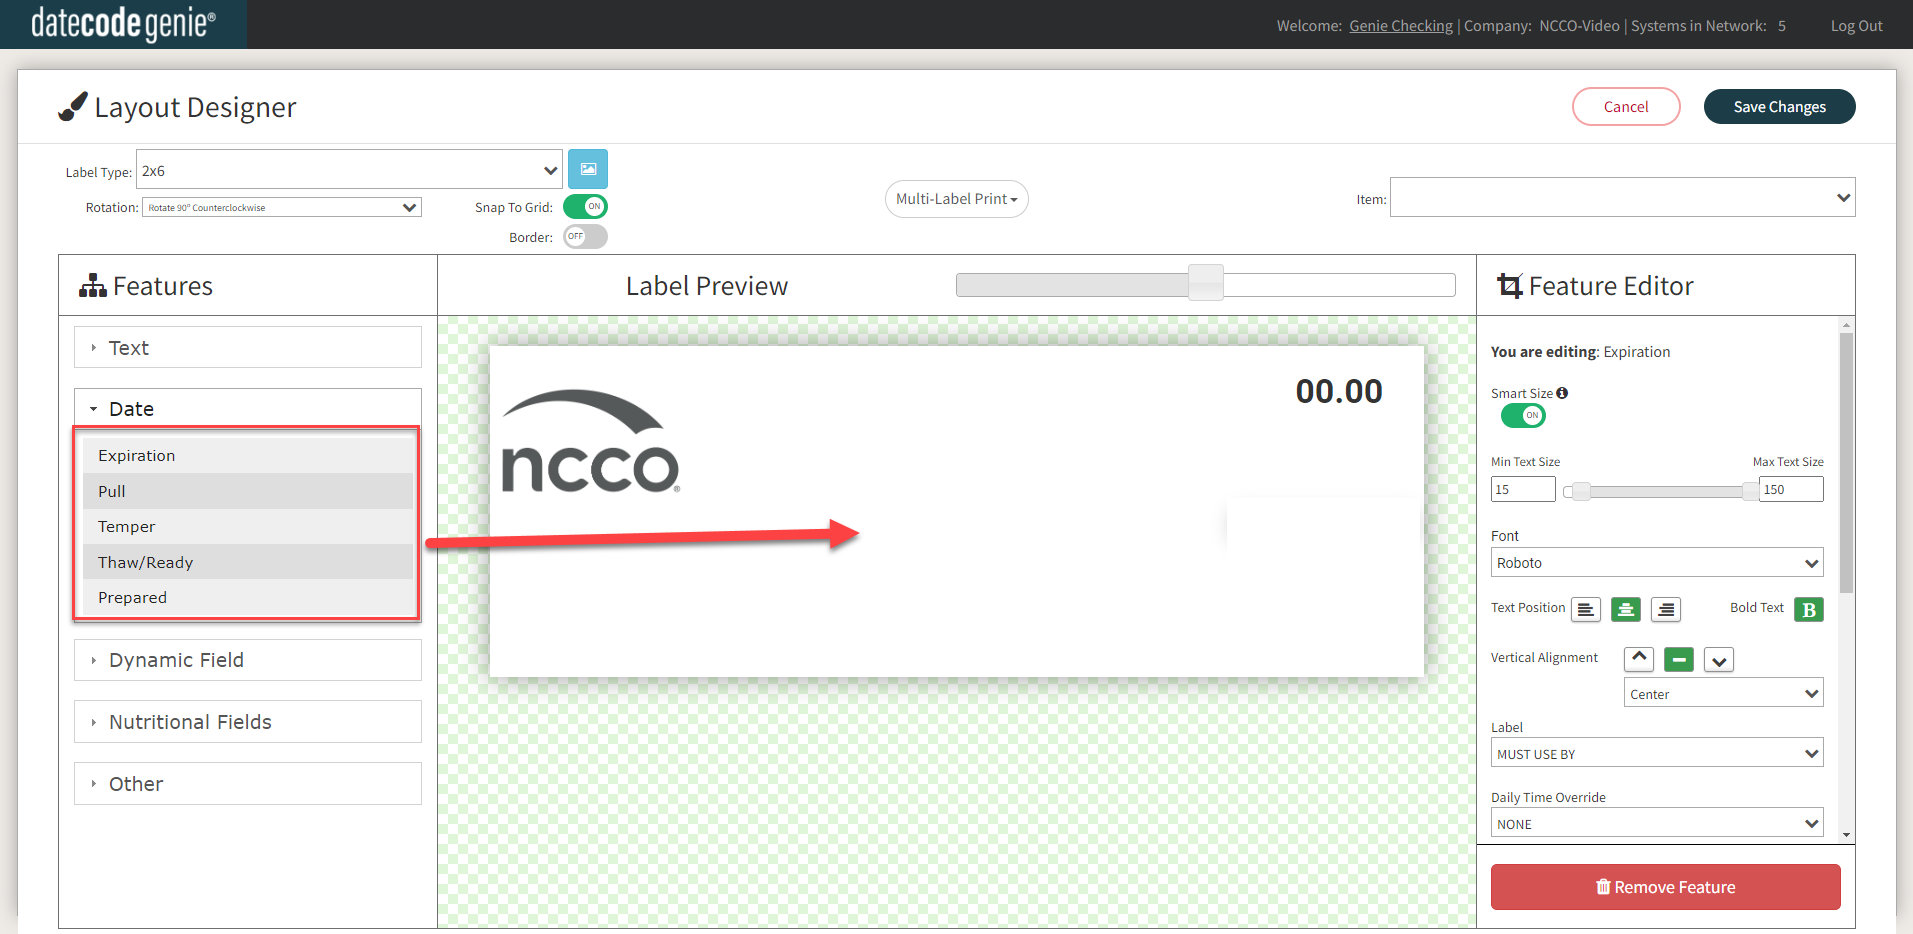
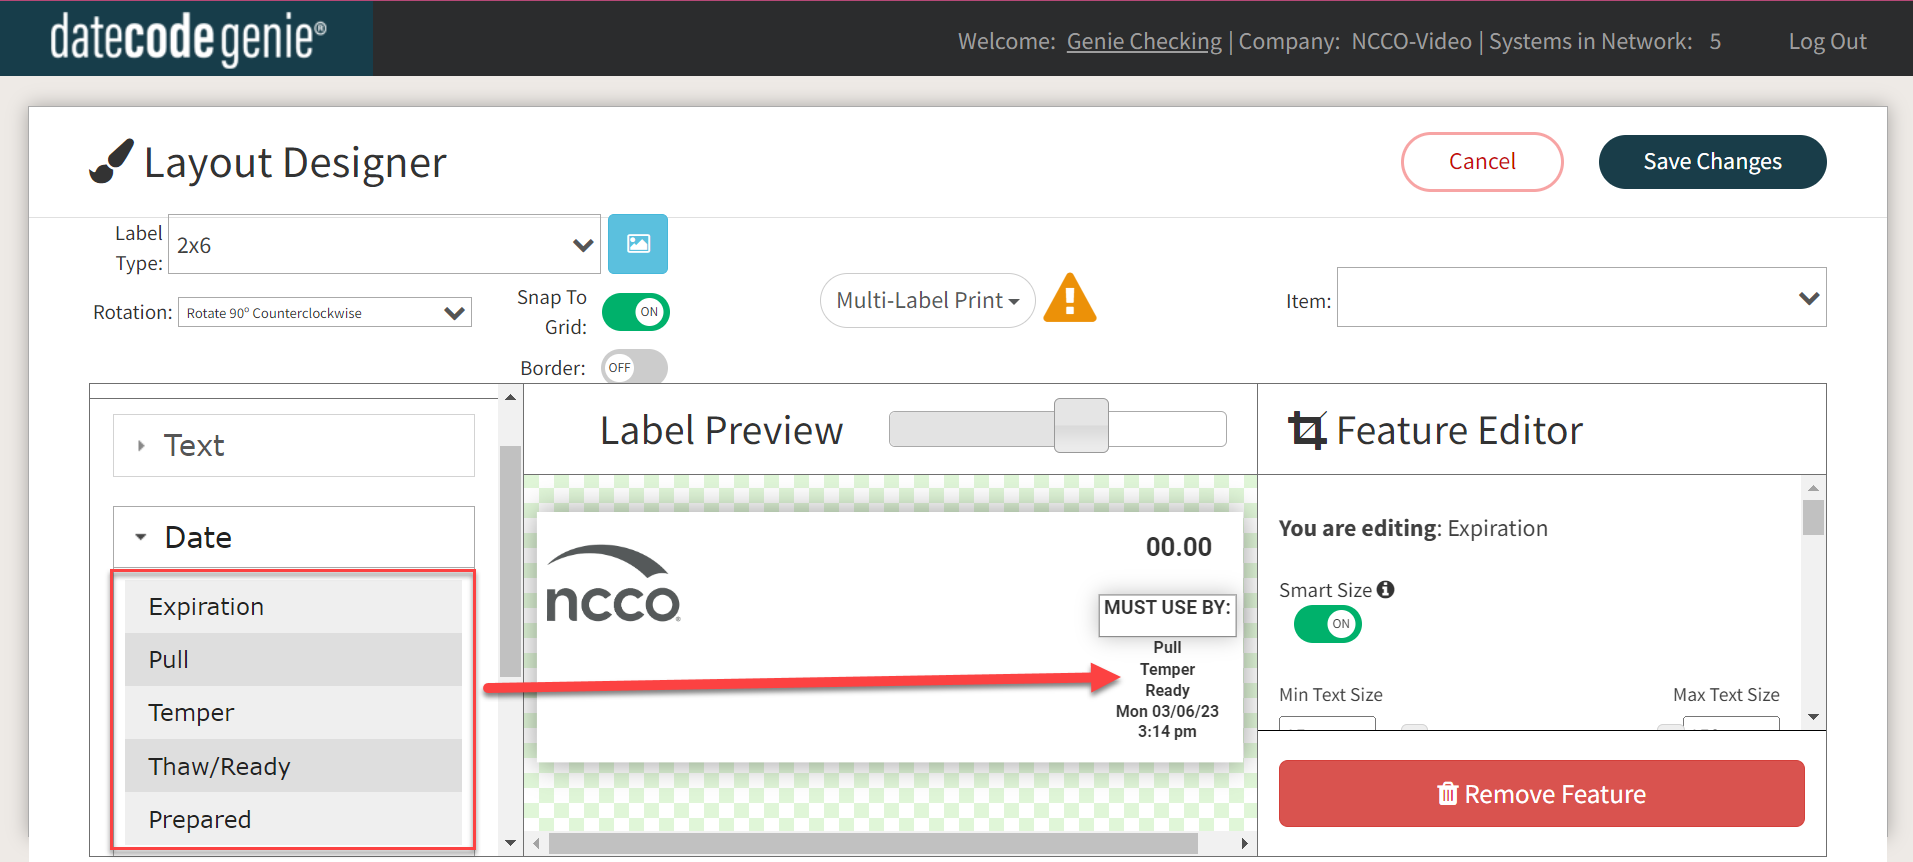
5. Scroll down in the Features window and click the Date group to open dropdown.
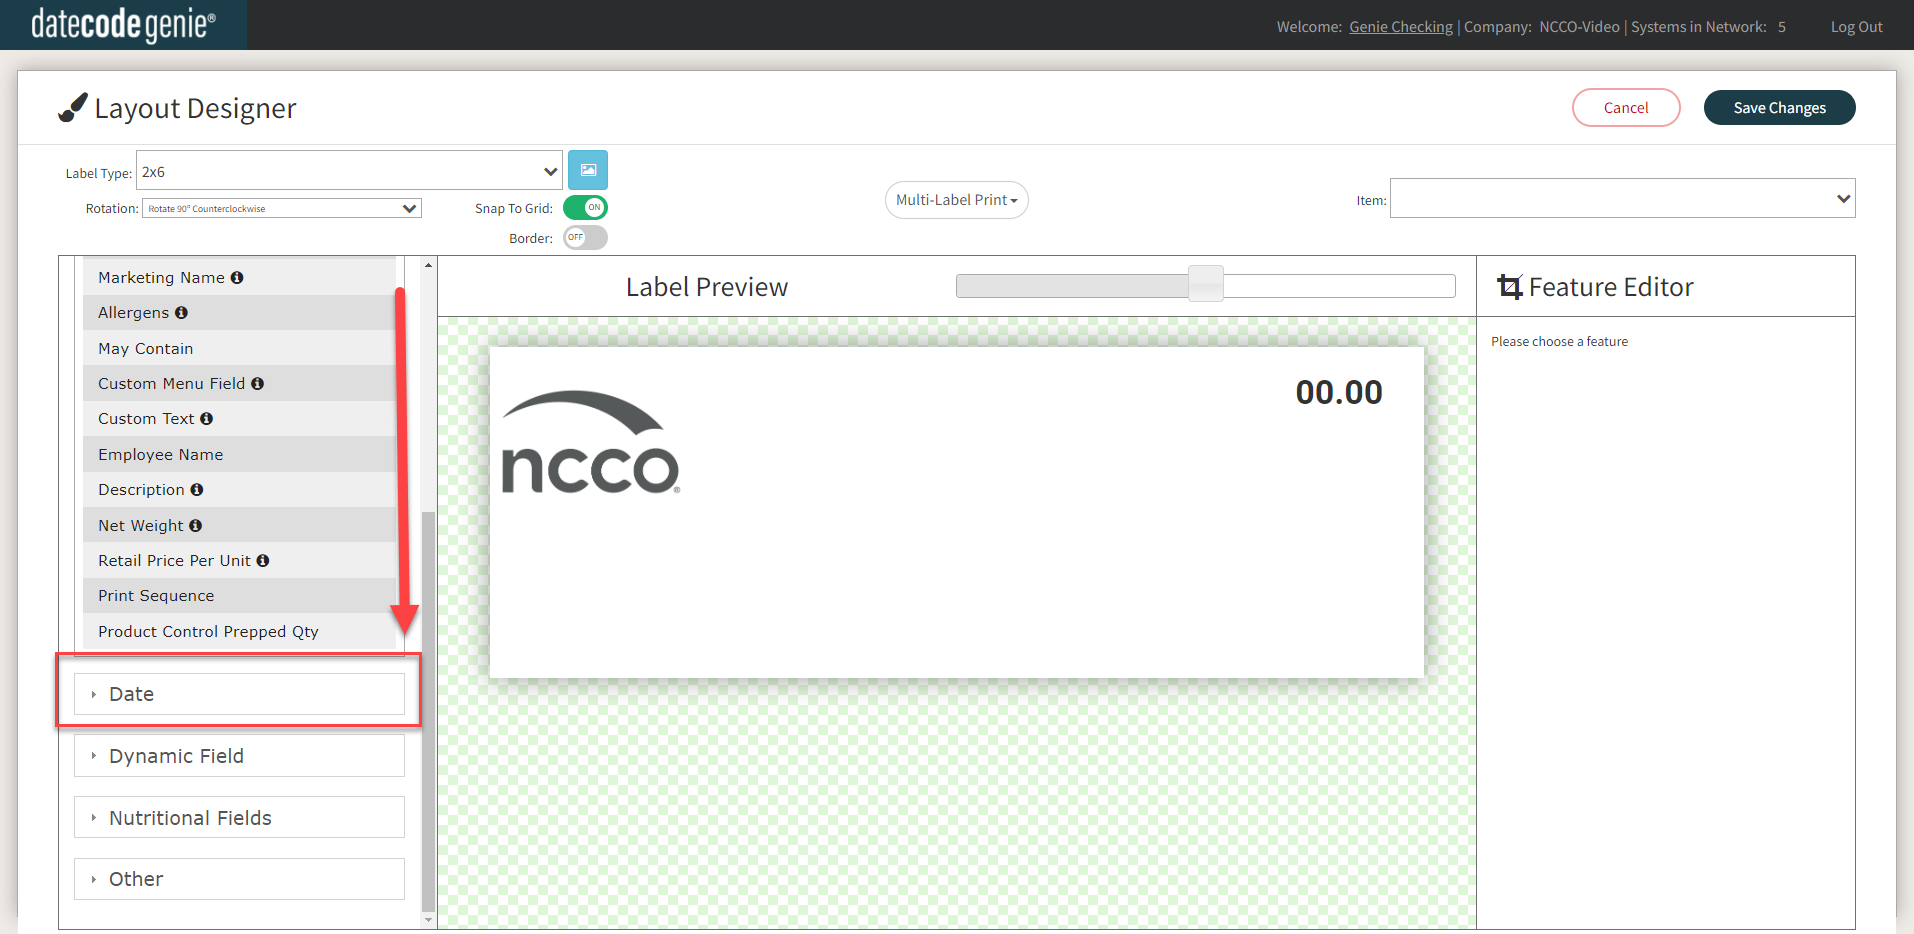
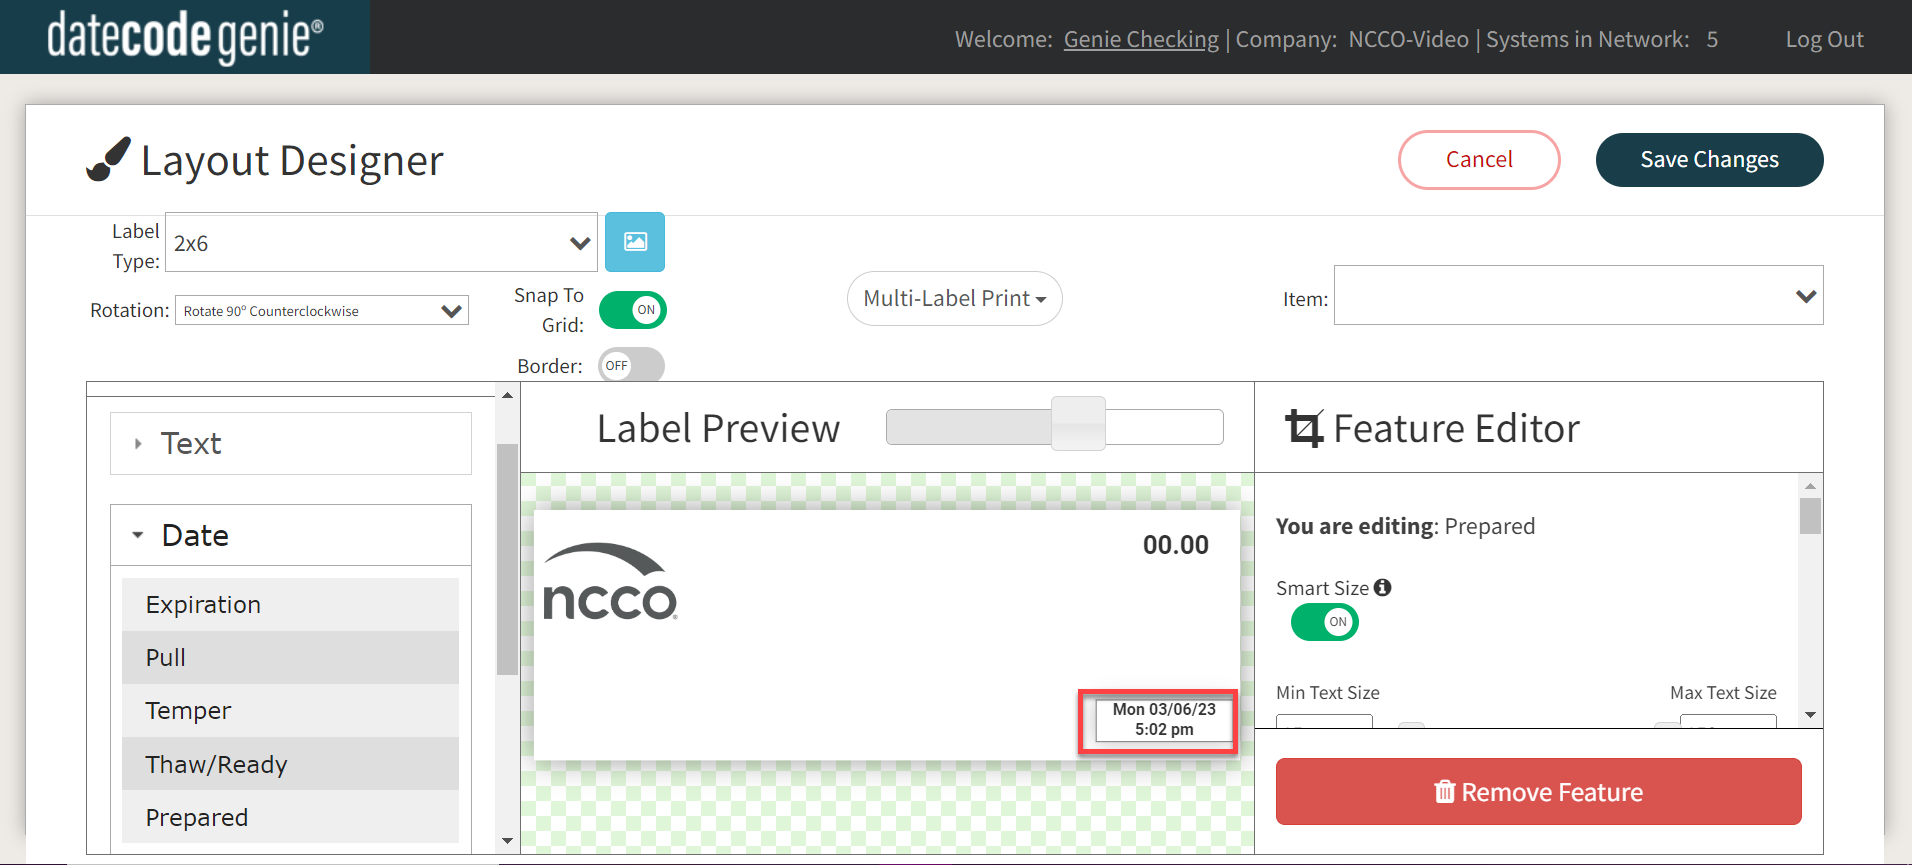
6. Drag and drop the Expiration, Pull, Temper, Thaw/Ready, or Prepared features onto the label preview.
The Prepared date field will automatically display the start date for the other four date fields of the menu item to print the correct date on the label.
NOTE
The four other features pull from the Prepared date and the time set in the menu item.
TIPS & TRICKS
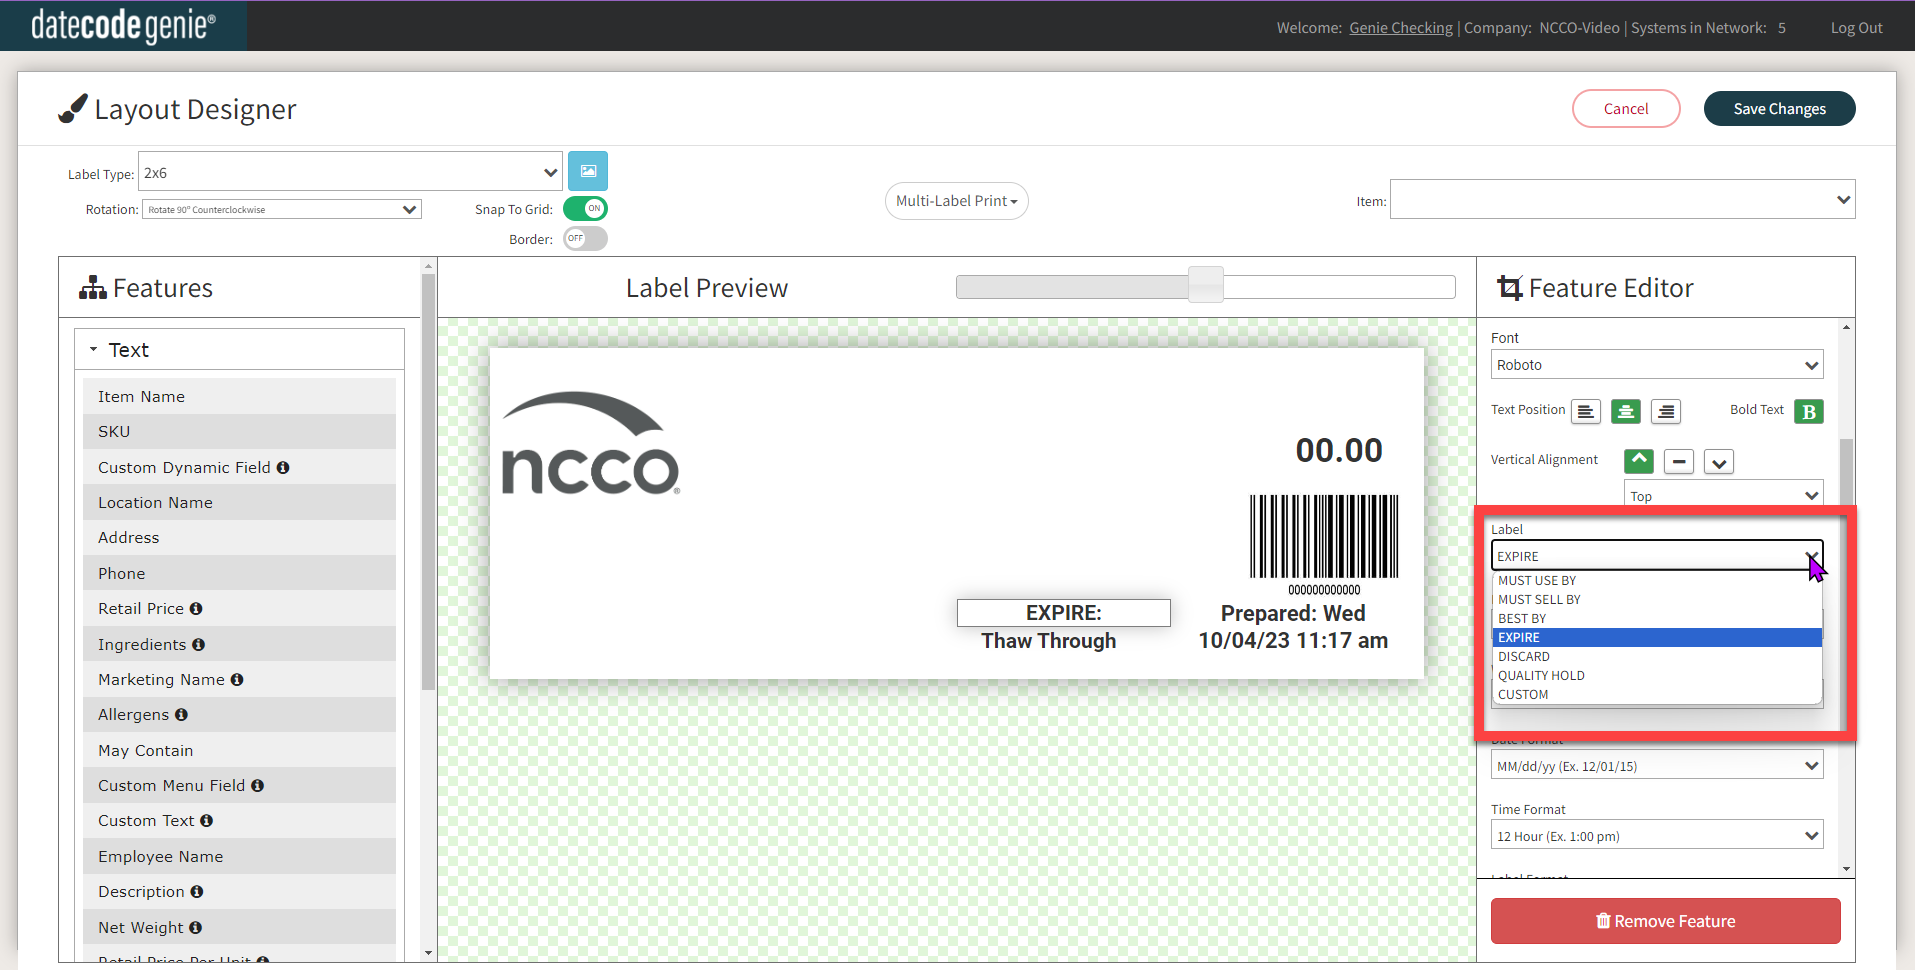
- If you need to change the label text or add a custom text, click to open Label dropdown and select text or CUSTOM.
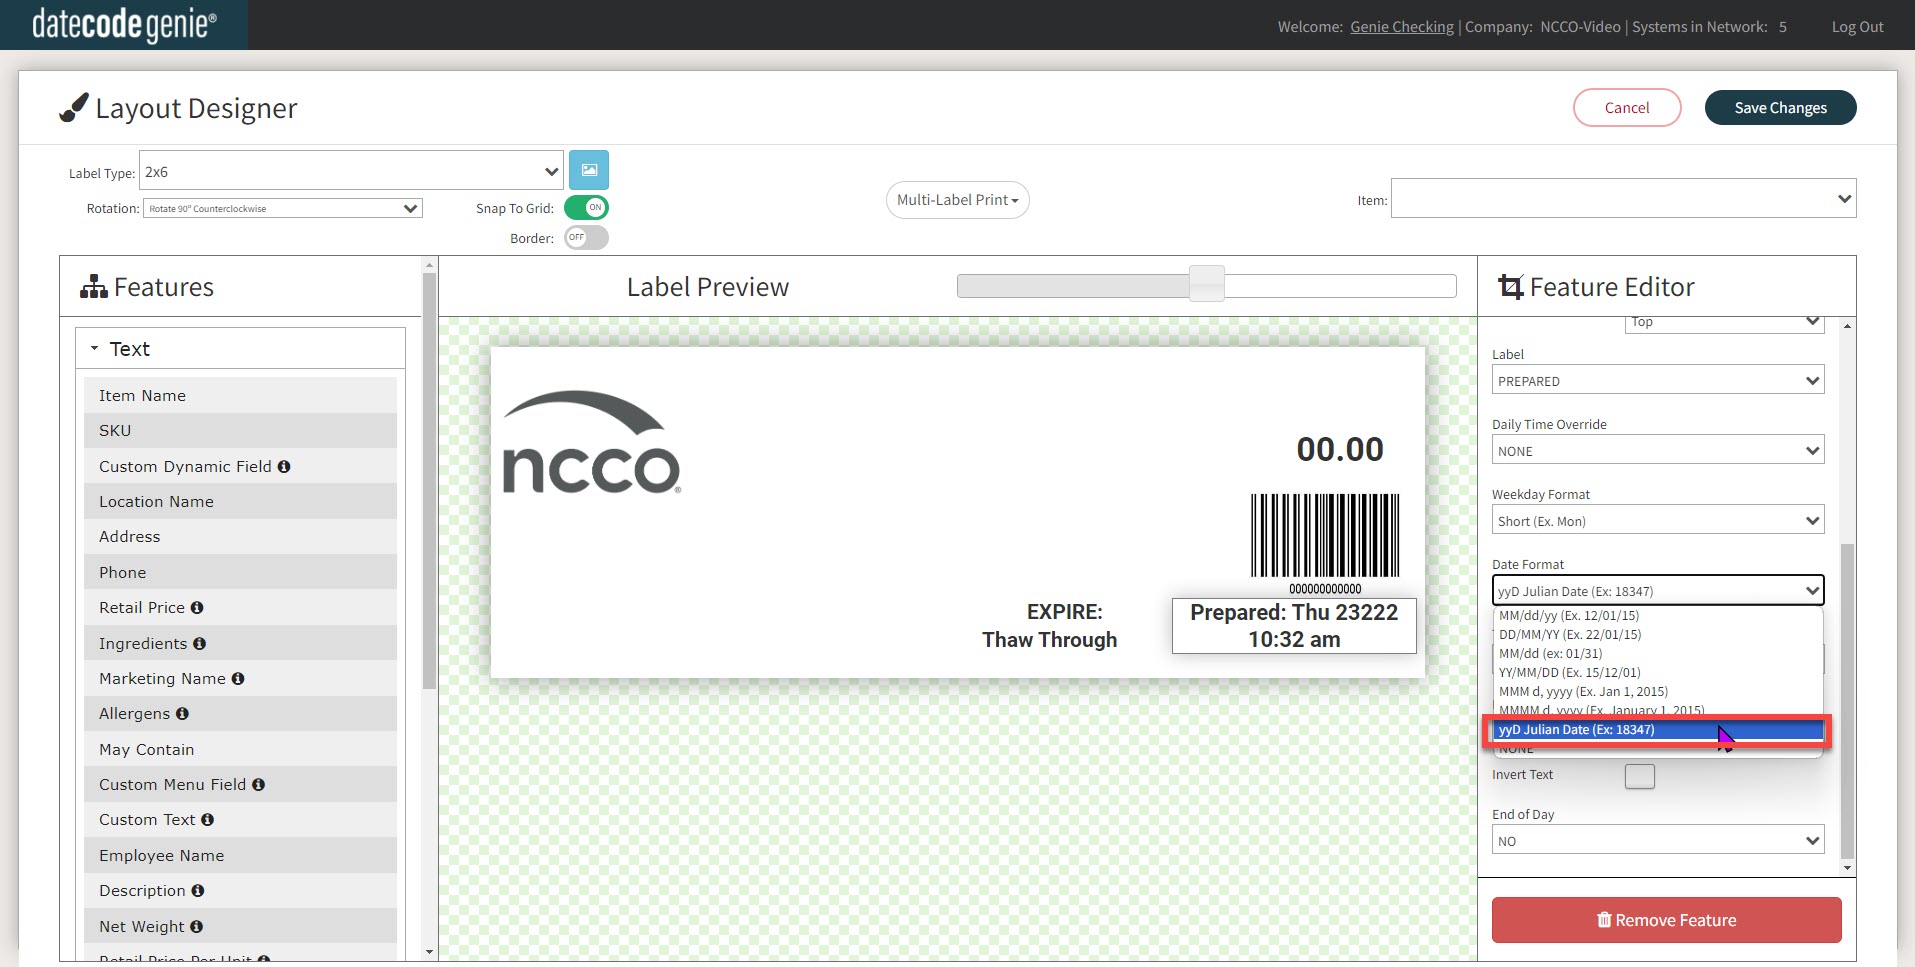
- If you need to change the day and date format to Julian Date, click on yyD Julian Date (Ex:18347) from the Date Format dropdown in the Layout Designer. This format can help keep track of batches.
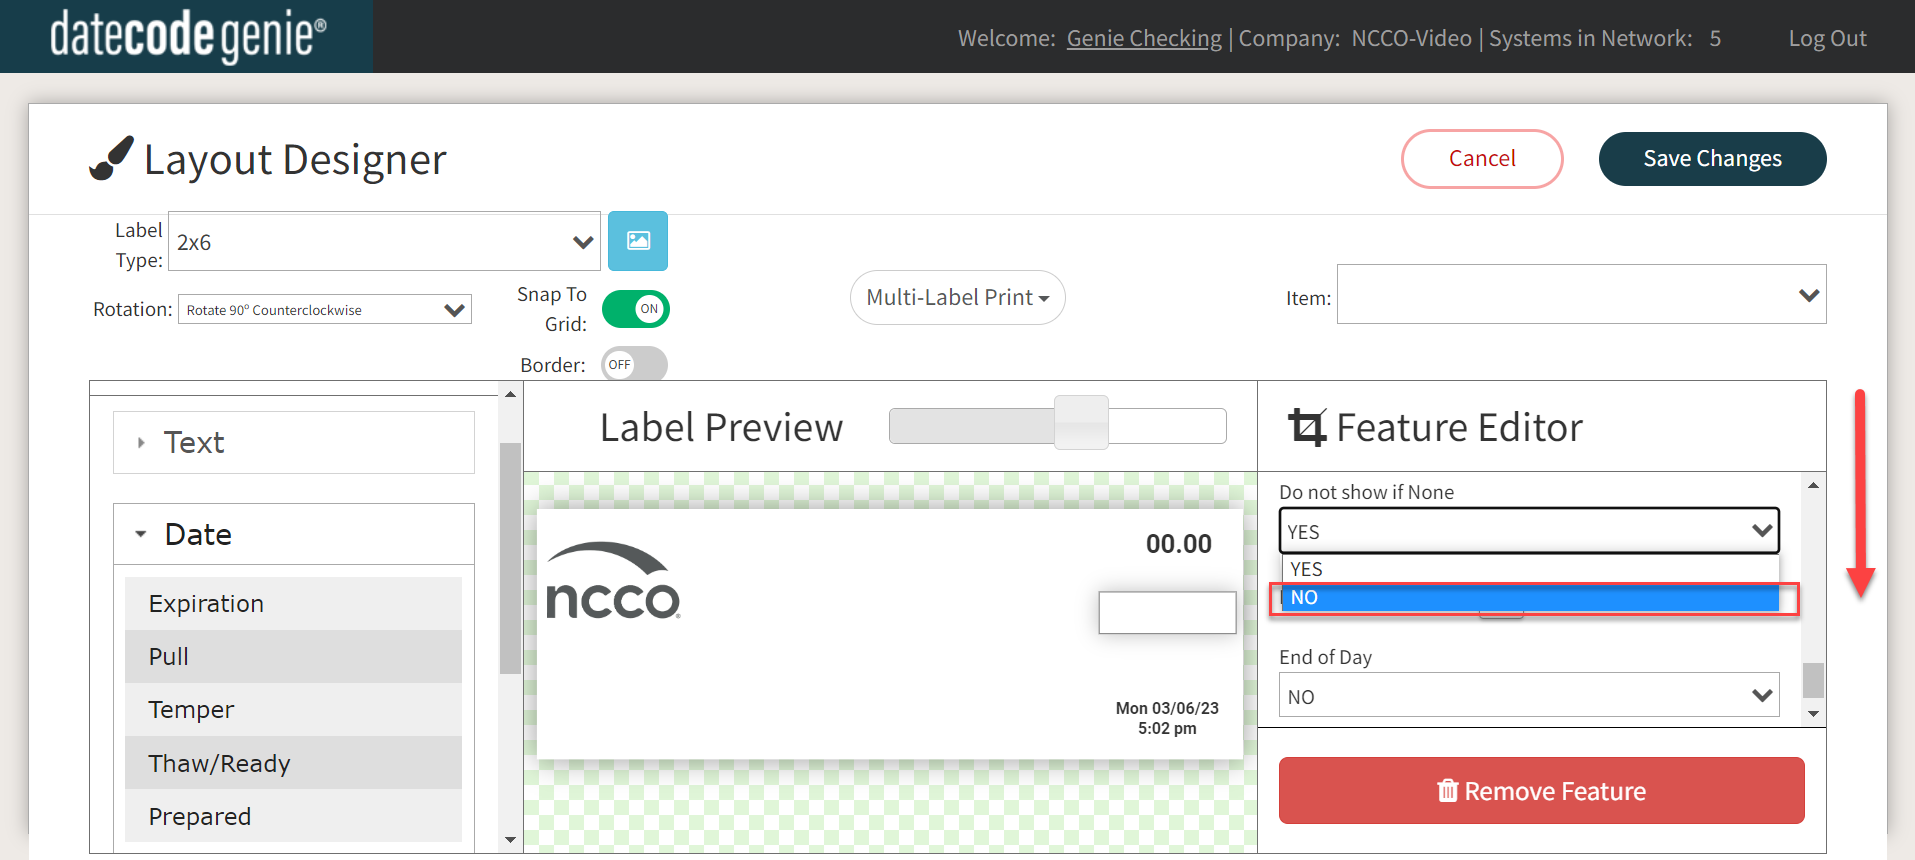
7. OPTIONAL: Scroll down in each preferred date field to click on the Do not show if None dropdown menu under the Feature Editor and select NO to display each date field. If YES is selected, then the date field will not display if no date is set.
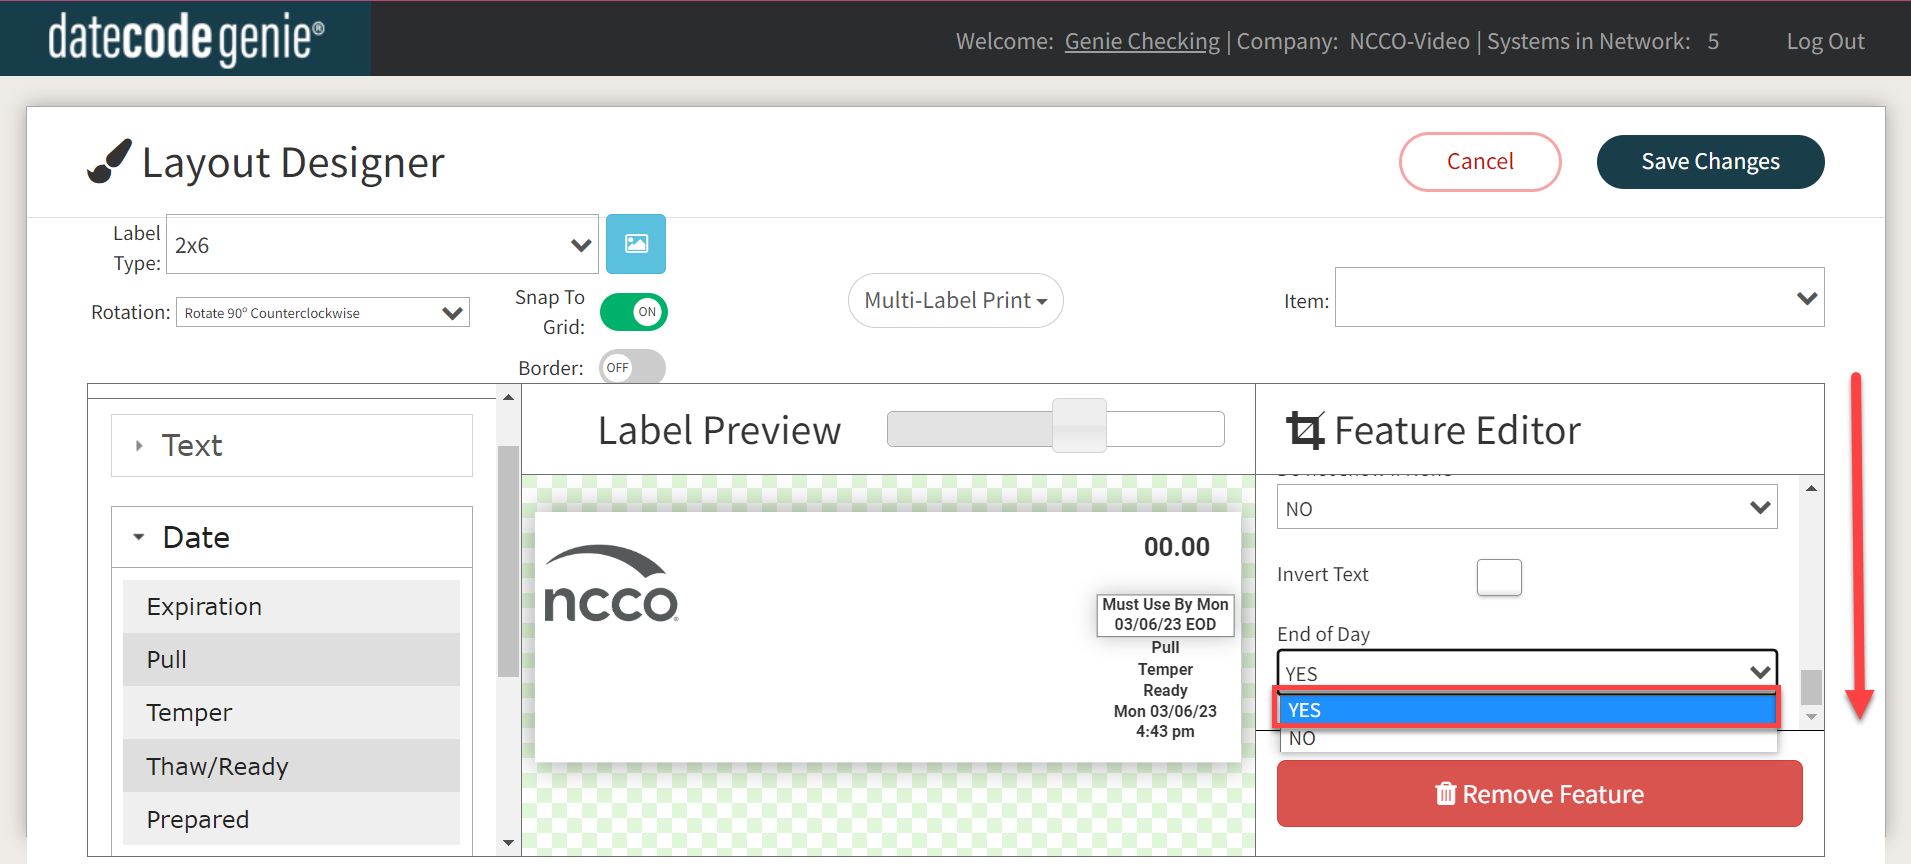
8. OPTIONAL: Scroll down in each preferred date field to click on the End of Day dropdown under the Expiration Date and select YES. Staff can view the End of Day (EOD) feature after the date displayed to know the menu item will expire on that date.
WARNING
End of Day (EOD) feature used on a printer profile will override the food expiration date of a menu item.
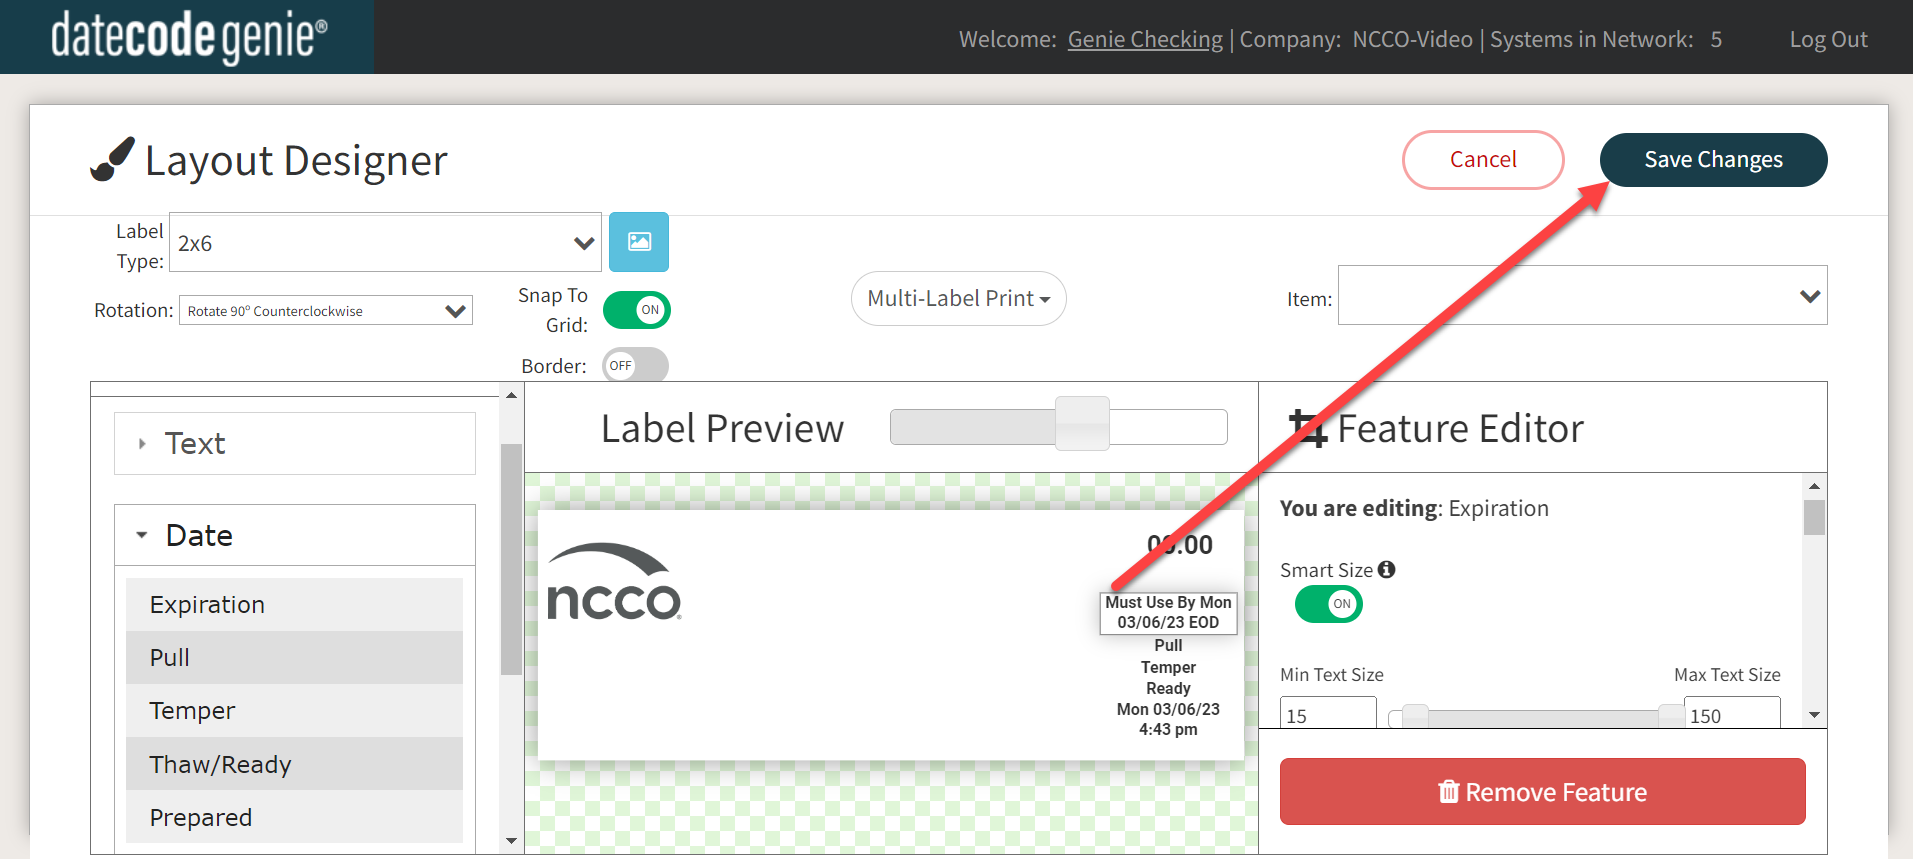
9. Click the Save Changes button to save your profile.
10. Download updates on your device to update your printer profile.
