Set Up Product Control Tracking in the Portal
Product control tracking requires three tabs to set up for use:
1. Set Up Menu Items
Each menu item must be set up for product control tracking using the required and optional product control fields.
1. Log in to the portal at www.datecodegenie.com using the recommended browser. See What Internet Browser Should I Use To Access My DateCodeGenie® Portal?
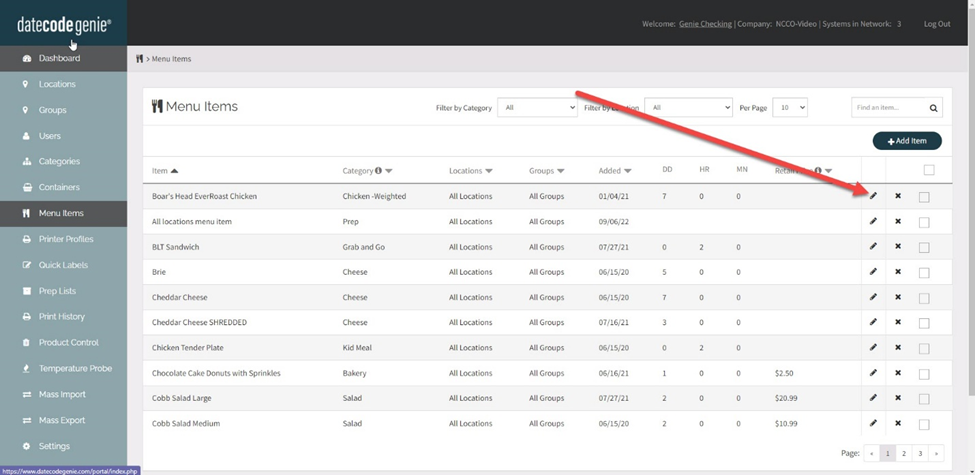
2. Click on the Menu Items tab on the side bar.

3. Click the Edit button (pencil icon) for a menu item or create a new item, see What is a Menu Item and How Do I Add or Edit?
4. Scroll down and click the Product Control checkbox to set the item to track and see the additional settings.
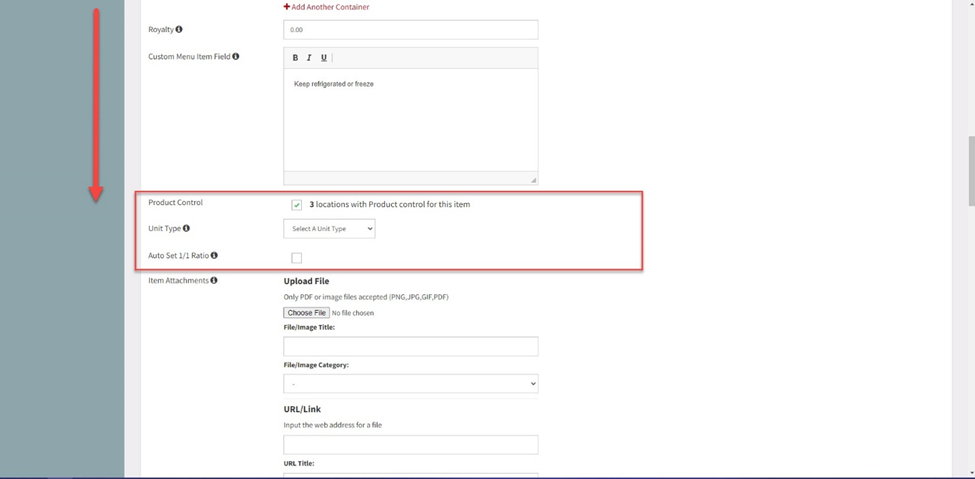
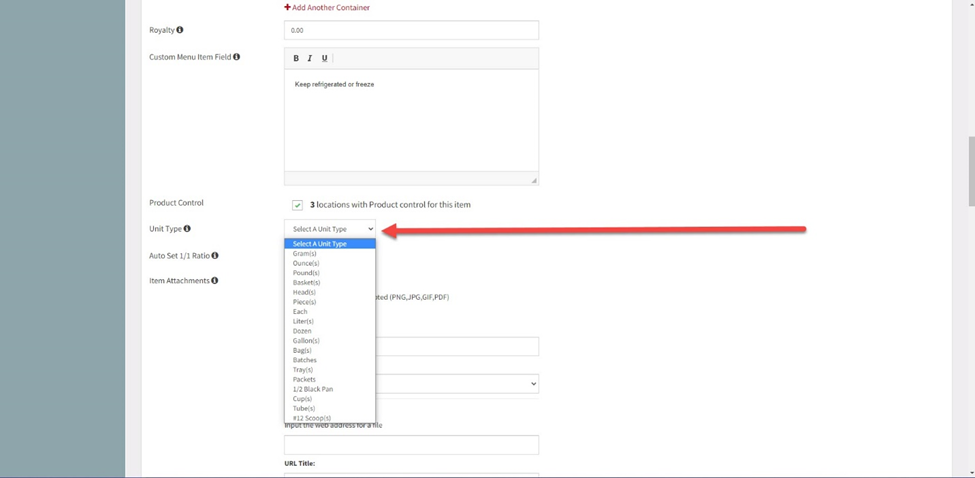
5. Select the Unit Type from the dropdown list for the measurement of the menu item.
6. Click the Auto Set 1/1 Ratio checkbox if the menu item will be tracked by printing 1 label for 1 prepped item. Leave unchecked if the menu item will be tracked by printing 1 label and the prep quantity will vary.
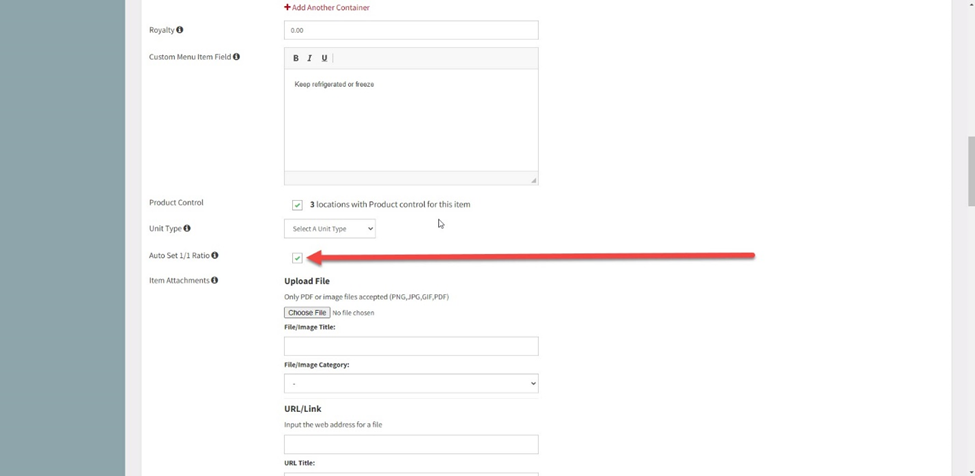
7. Add a monetary value (no currency symbol required) to the Cost of Goods field, and a percentage to the Royalty field if needed.
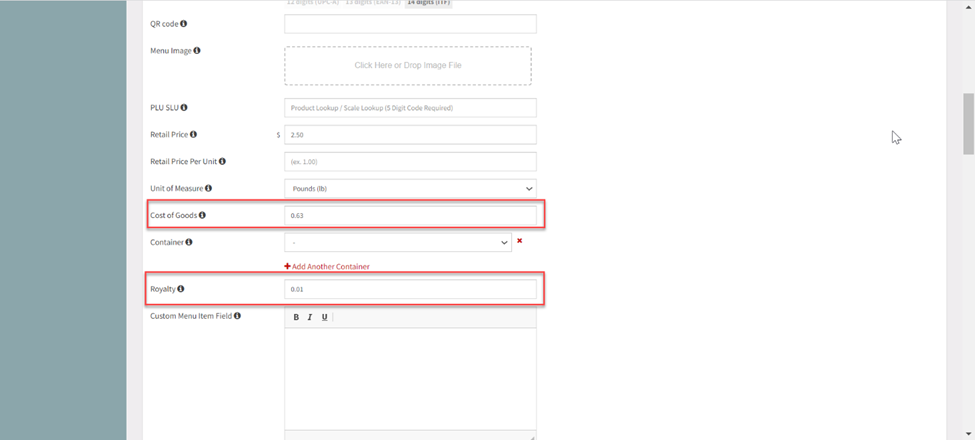
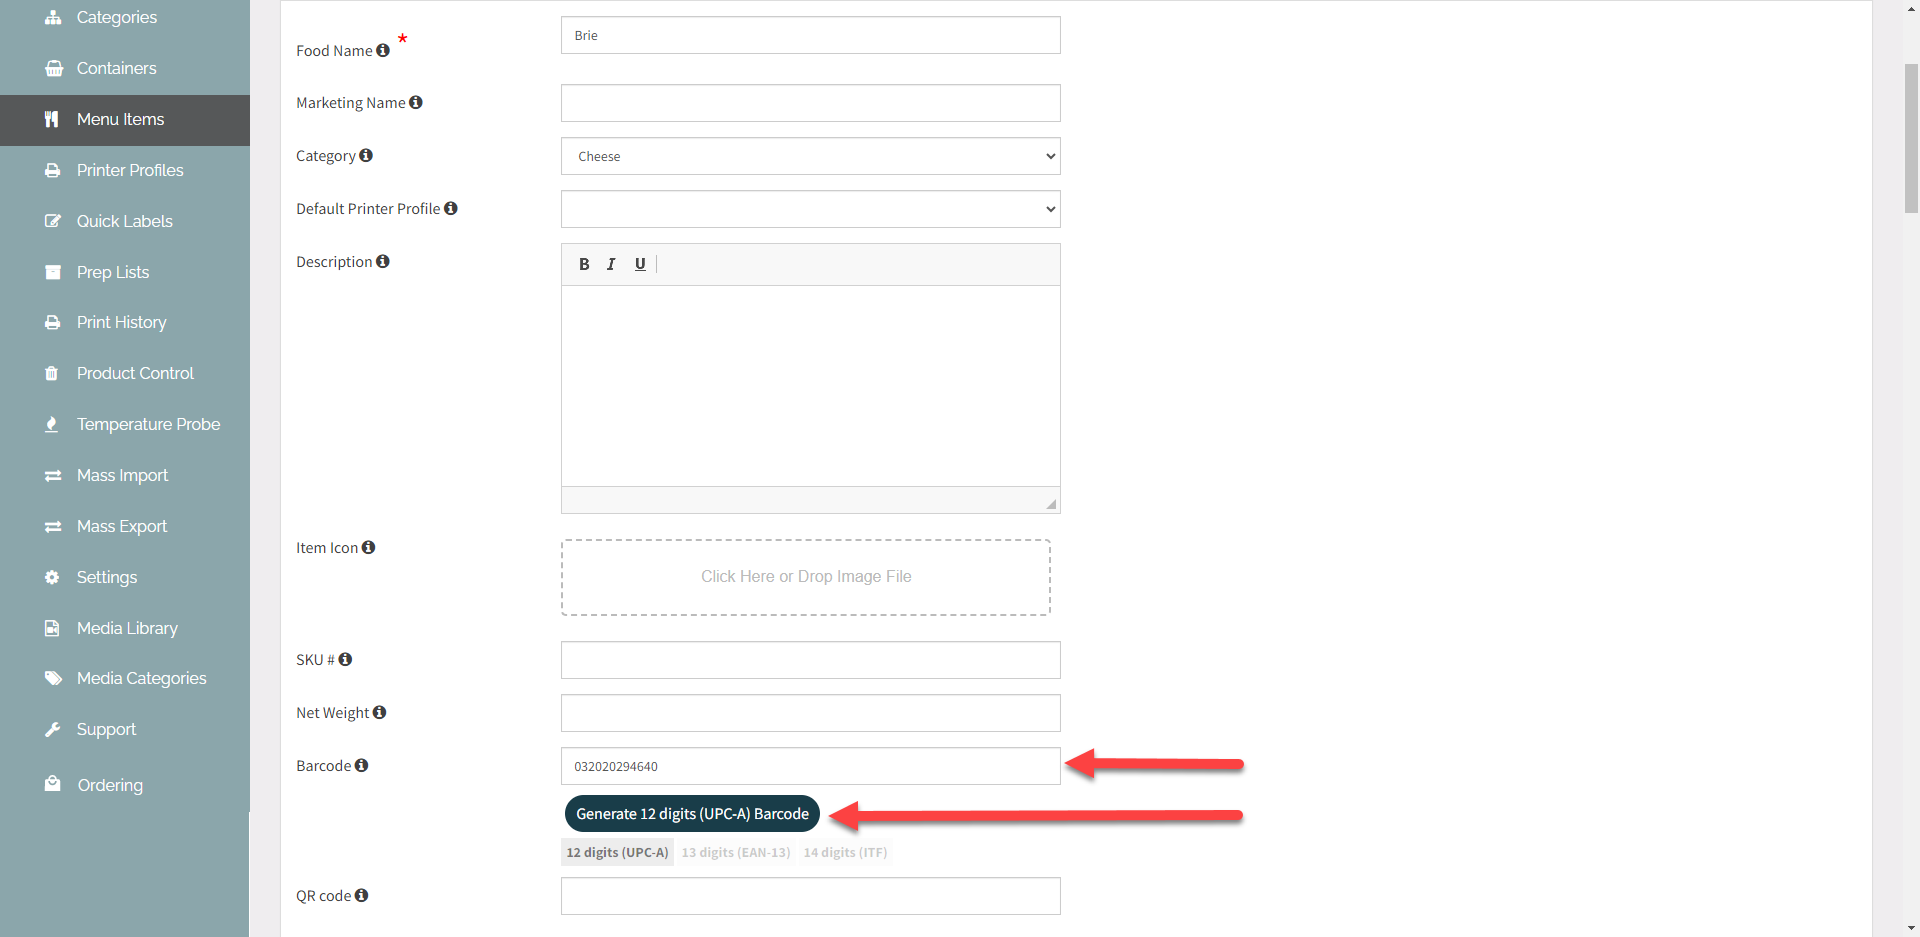
8. OPTIONAL: Set up the barcode, if using a barcode to track waste, see Add a Barcode.
9. Click Save Changes.

2. Set Default Scanning Method
If using barcode or Print ID to scan waste, set how waste will be tracked in the settings tab.
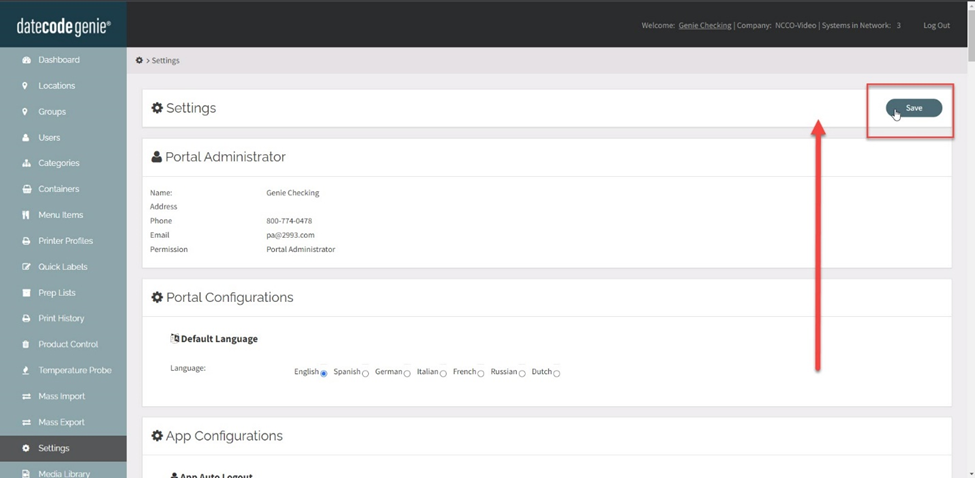
1. Go to the Settings tab on the side bar.
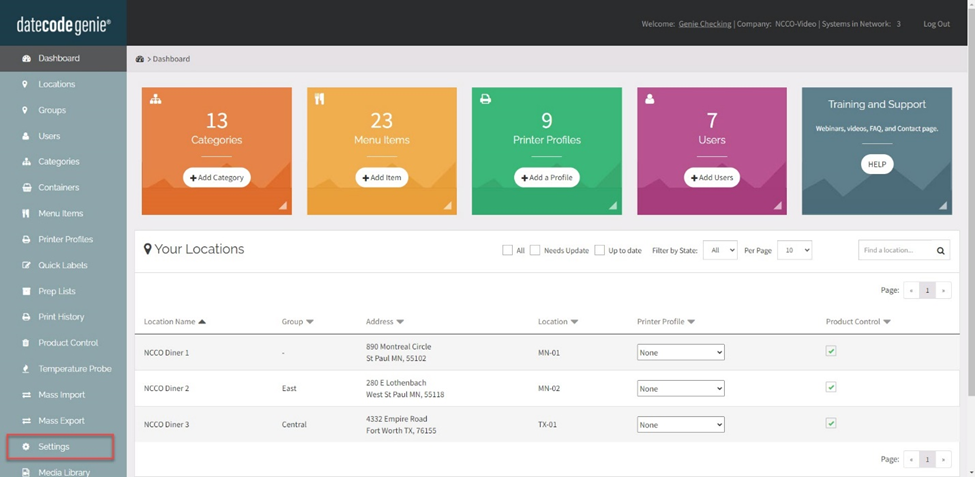
2. Scroll down to App Product Control Defaults and select your preferred scanning method from the dropdown menu, barcode, or QR code (Print ID).
NOTE
Selecting Both from the dropdown list will require staff to select Barcode or QR Code on the app to scan waste.
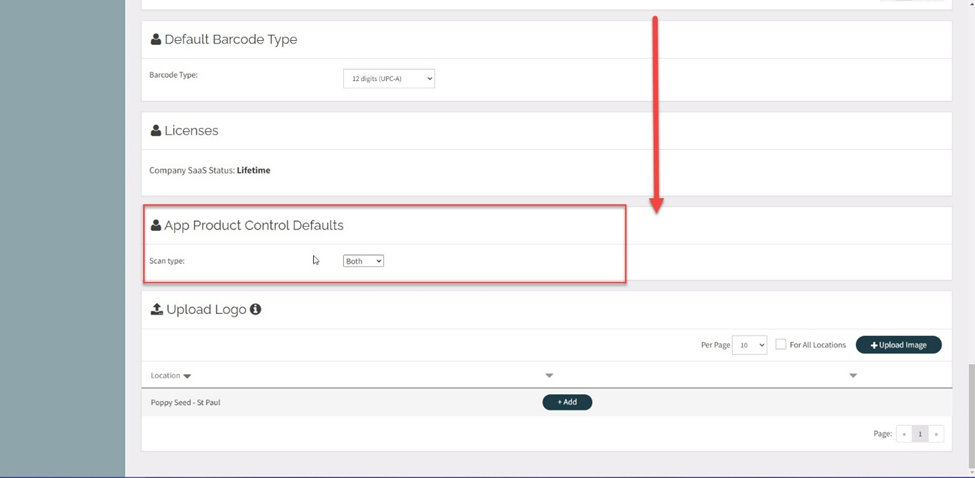
3. Scroll to the top of the page and click Save.
3. Set Up Printer Profile
Add features to print on labels from the Layout Designer for prep and waste recording.
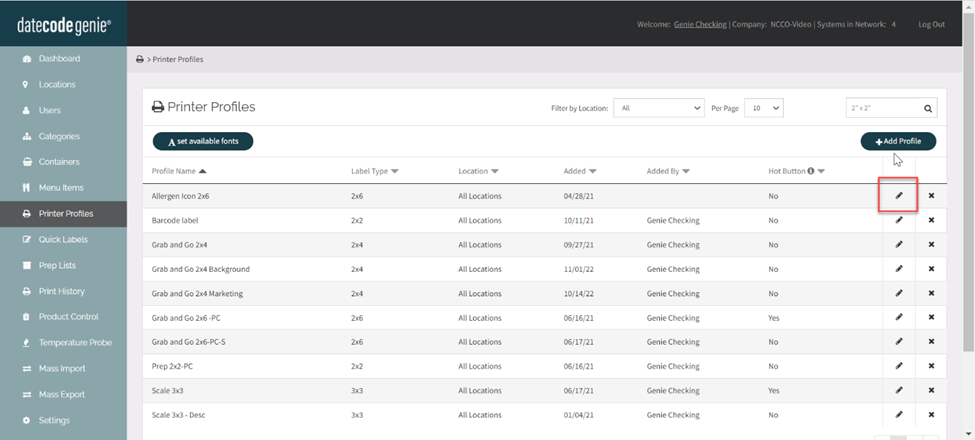
1. Click on the Printer Profile tab on the side bar.

2. Click the Edit button (pencil icon) from a Printer Profile to edit, or add new Printer Profile. See How to Add Labels Using Printer Profiles.
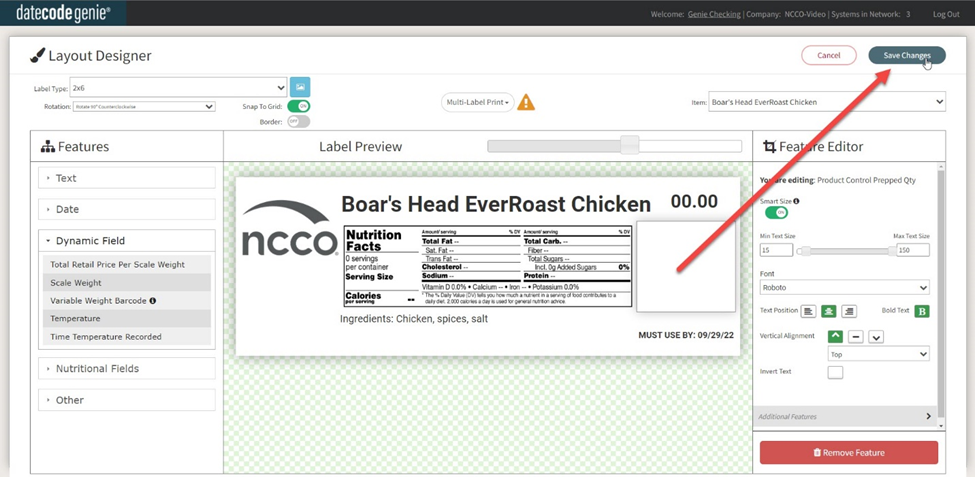
3. Scroll down and click the Layout Designer button to open the Layout Designer window.
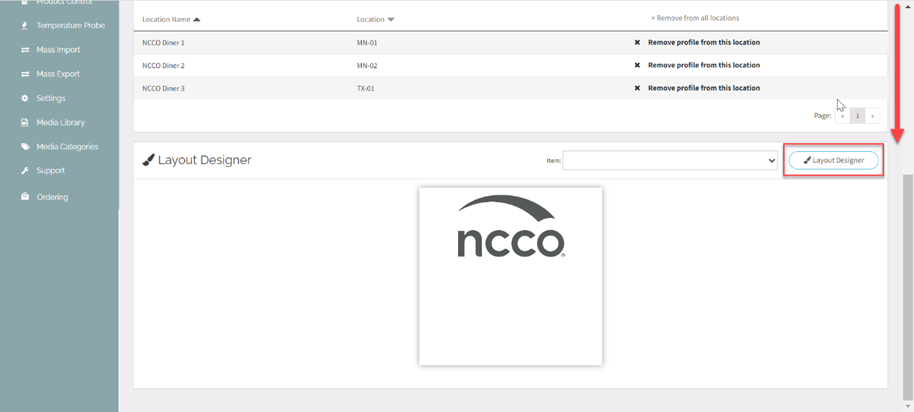
4. Locate any features needed from the Features section, on the left hand side, and drag and drop onto the label in the middle label preview section.
a. Text Group - Product Control Prepped Qty
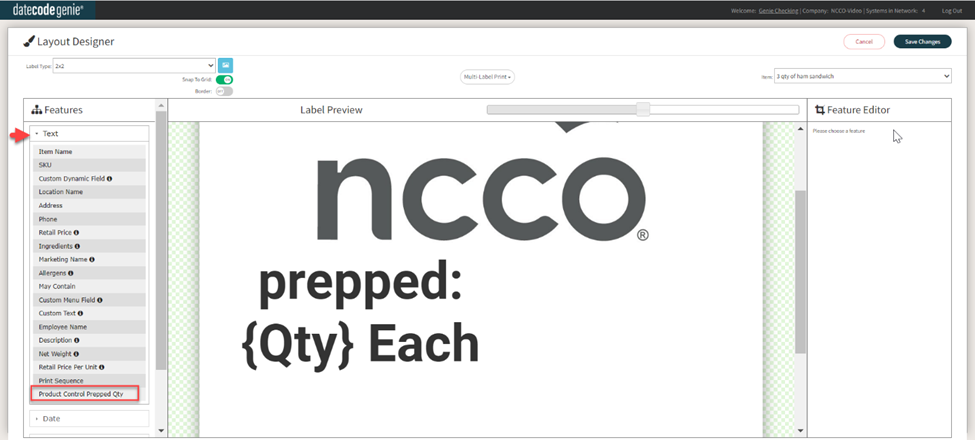
TIPS & TRICKS
Add to prep labels when menu items are not recorded with a one to one ratio for a visual on the label of the total quantity prepped.
b. Other Group - Barcode or Print ID
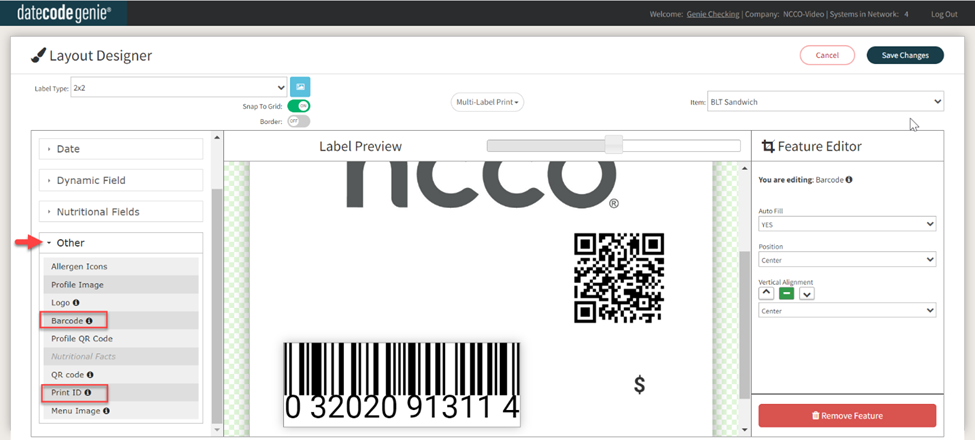
WARNING
Be sure to select the Print ID feature if using an auto-generated QR Code to track waste.
NOTE
- When placing more than one scannable feature on a label such as barcode, QR Codes or Print ID, allow enough space between each feature to scan properly.
- Size of Print ID feature area on label preview cannot be reduced due to consistent ability to scan.
5. Click Save Changes button.