
Export Print History on the App
Portal Administrators can export print history in the DateCodeGenie® app. There are two options to export print history, which both must be allowed through Admin Options with the DCG KioskHome app.
There are two options to export print history:
- Google Drive
- Gmail
Google Drive
Steps:
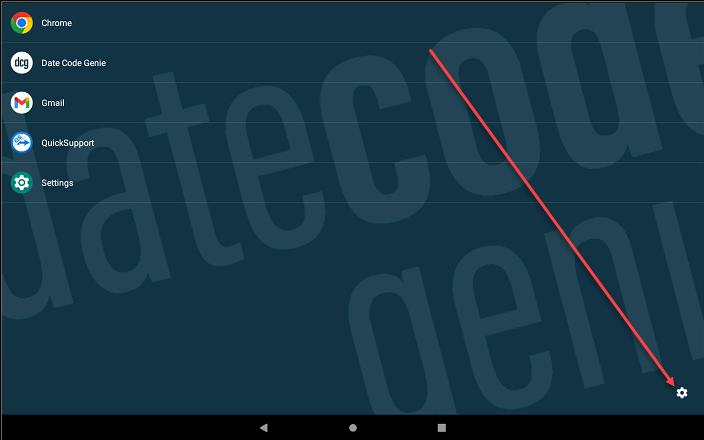
1. Tap on optional settings (gear icon) in the bottom right corner of the touchscreen.
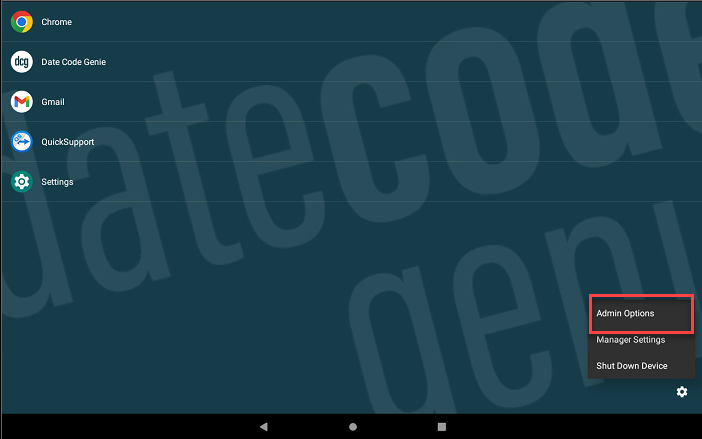
2. Tap on Admin Options.
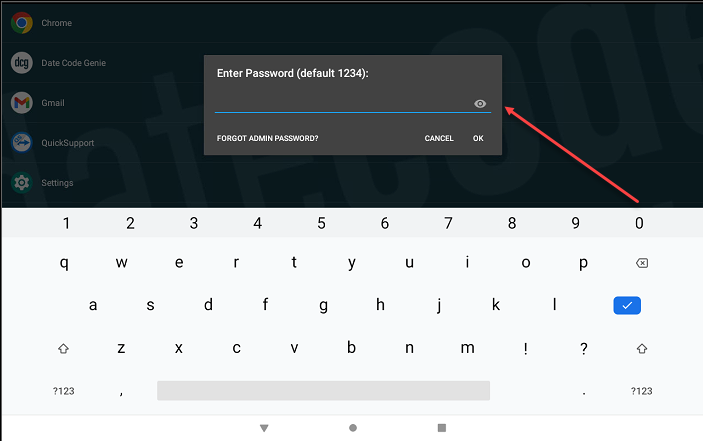
3. Enter password and tap OK.
NOTE
Contact your Portal Administrator for assistance, if password is unknown for Admin Options.
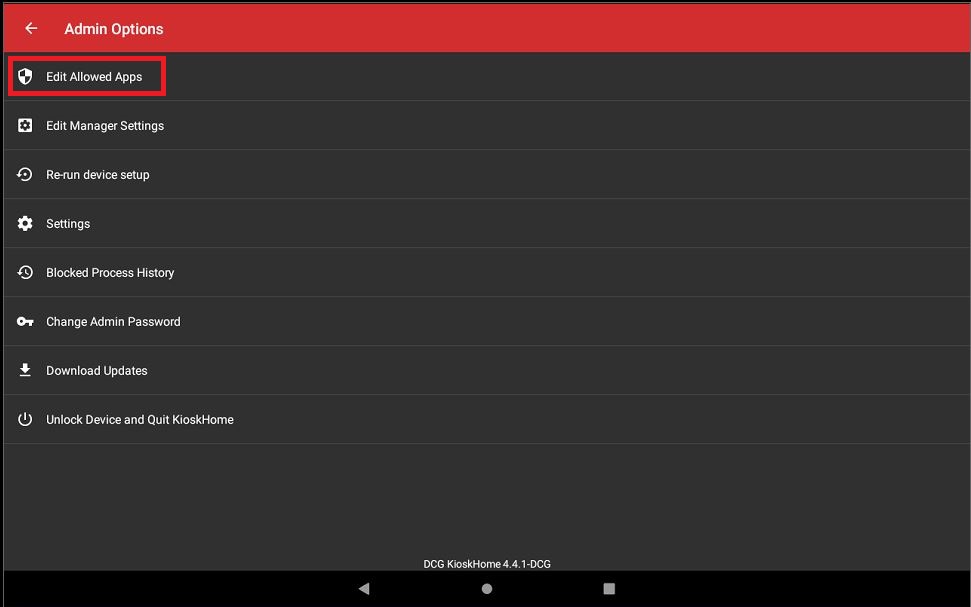
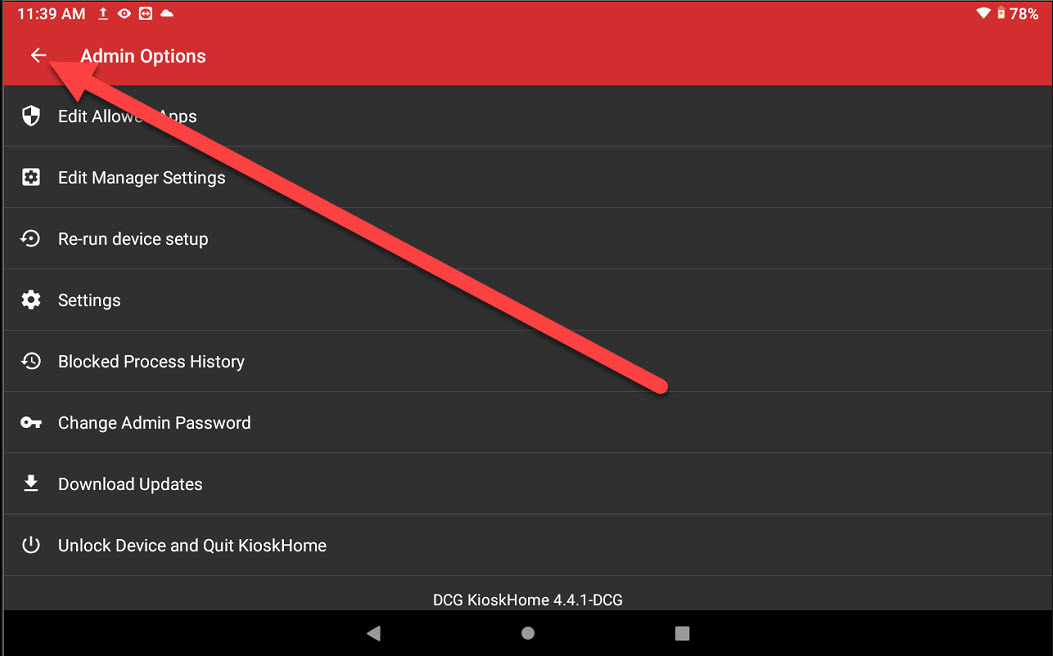
4. Tap Edit Allowed Apps.
5. Scroll to Google Drive to checkmark and allow access to app.
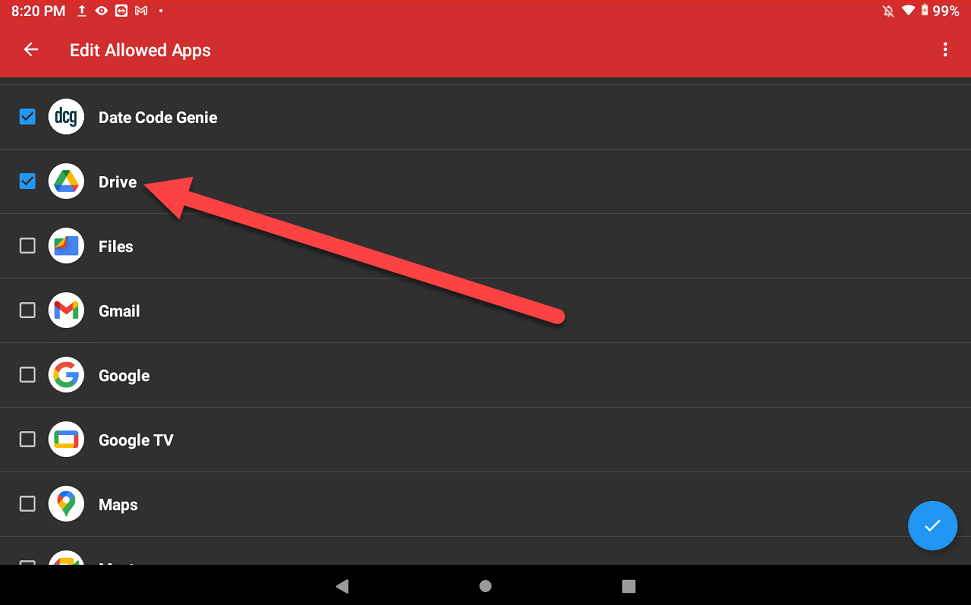
6. Tap blue circle button (checkmark icon)in the bottom right corner to confirm allowed apps.
7. Tap the back button (arrow icon) to return to the tablet home screen.
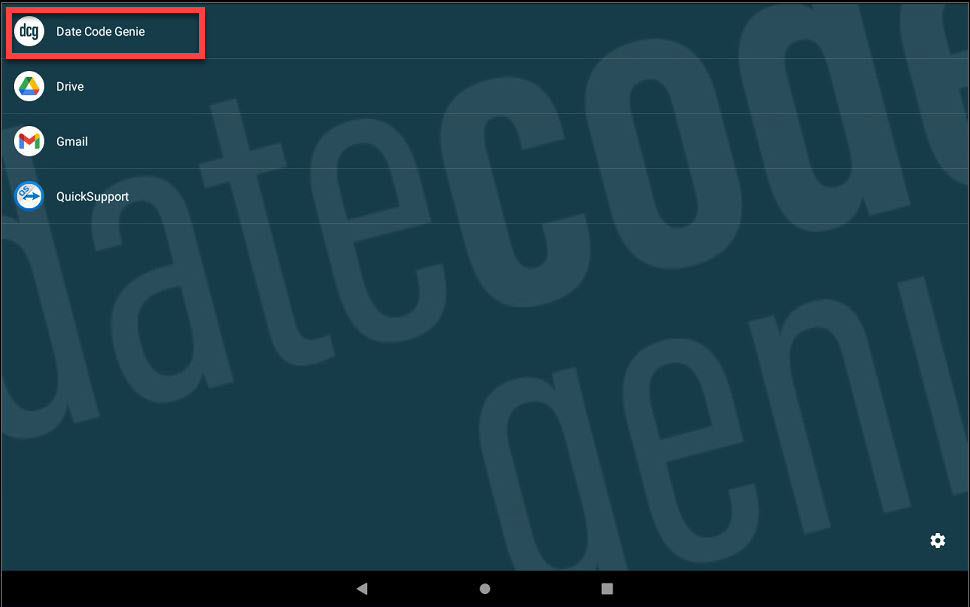
8. Tap on the DateCodeGenie app from tablet home screen to open.
9. Log in to the DateCodeGenie app with your username and password, if required.
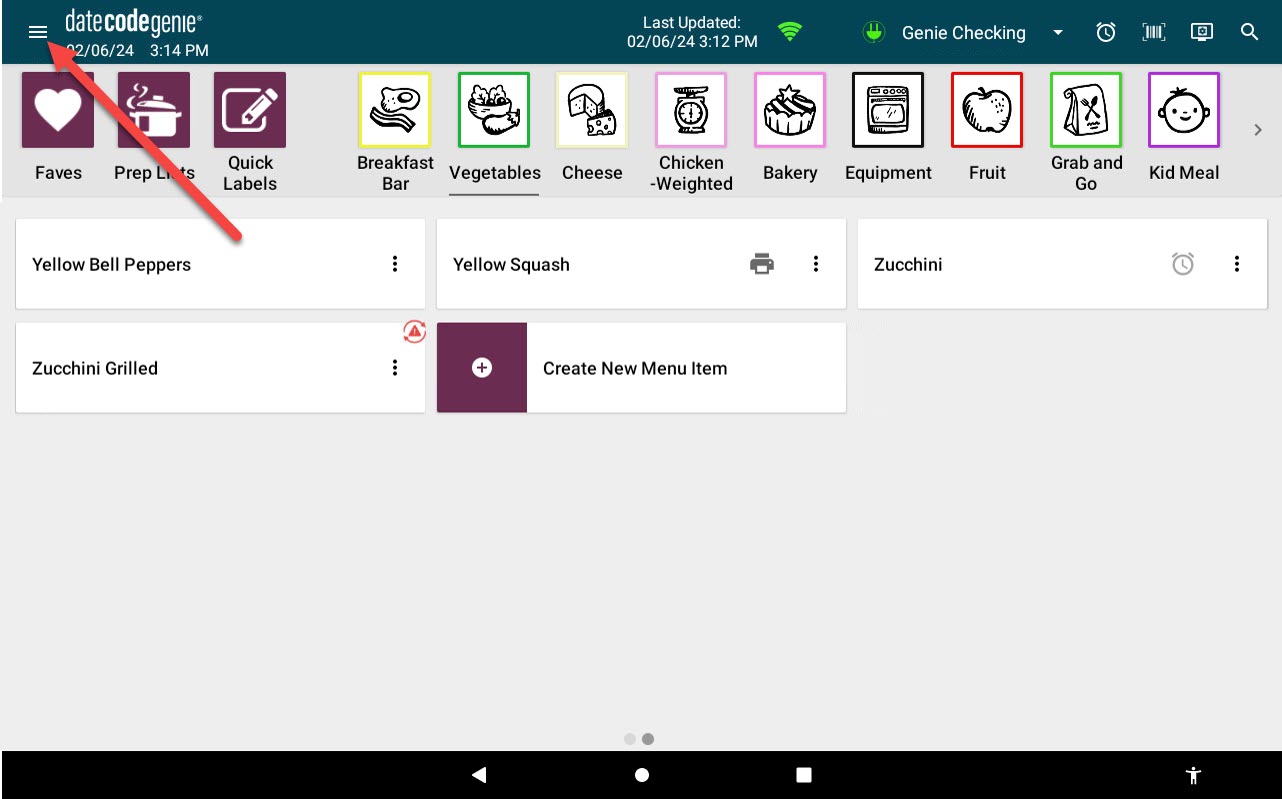
10. Tap the navigation button to open available options.
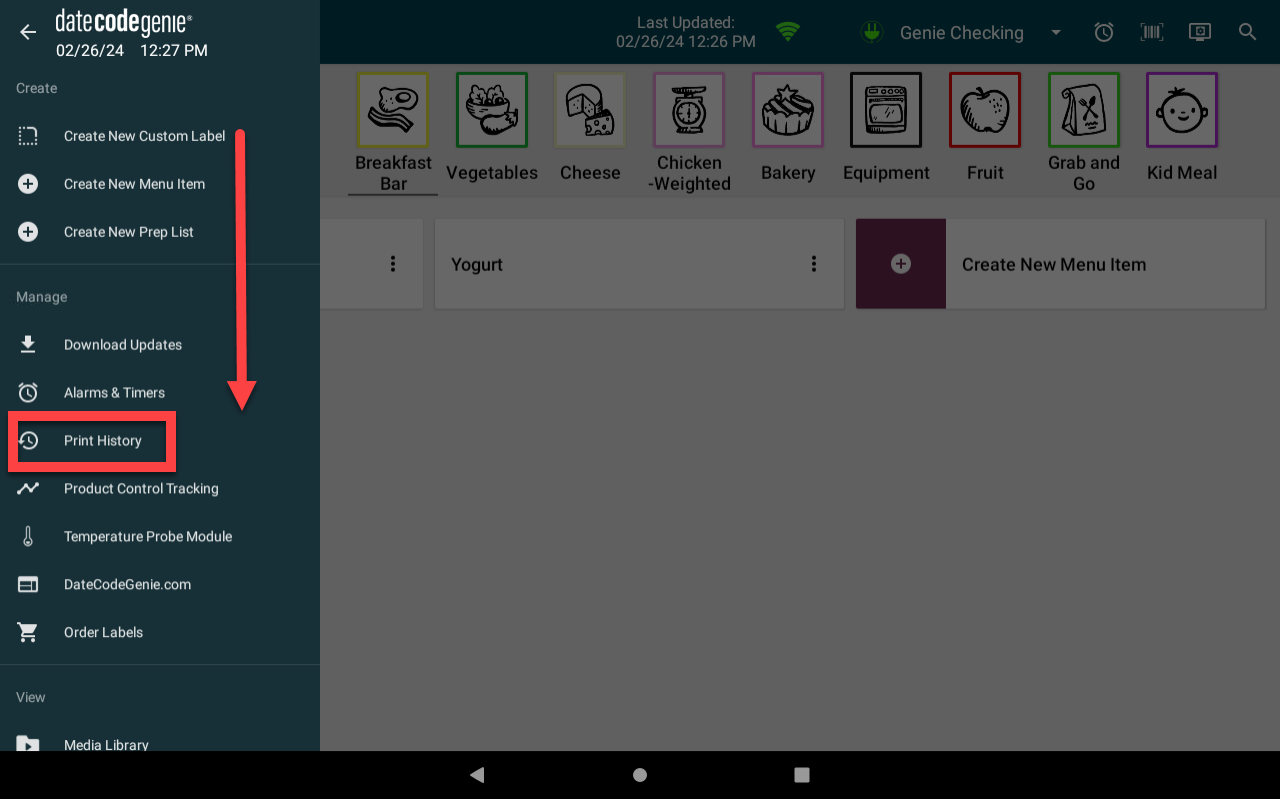
11. Scroll to the Print History section and tap to open.
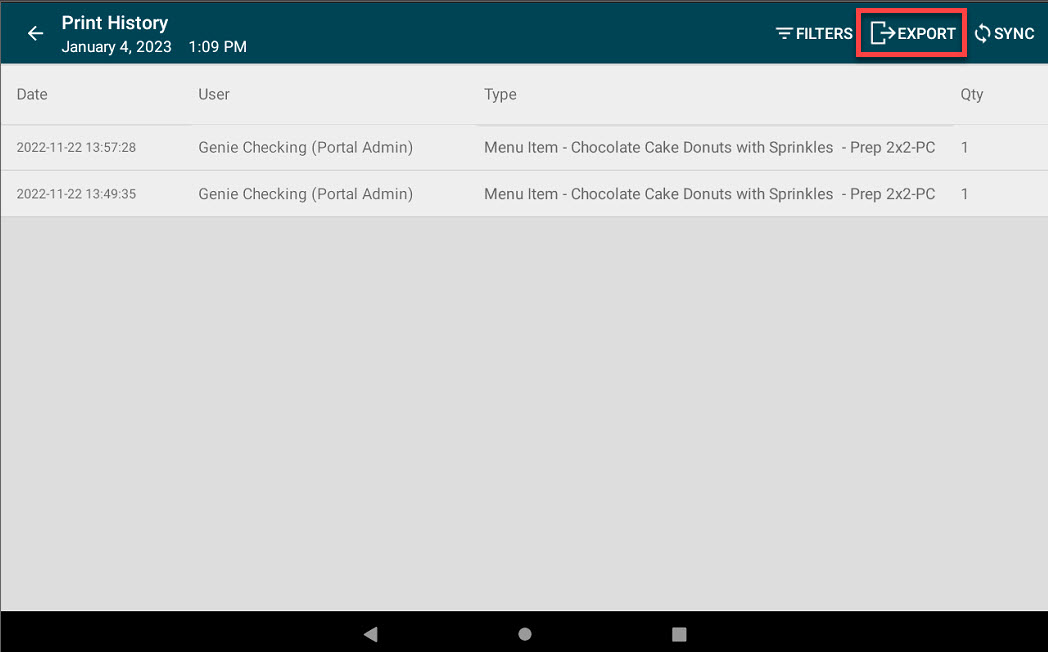
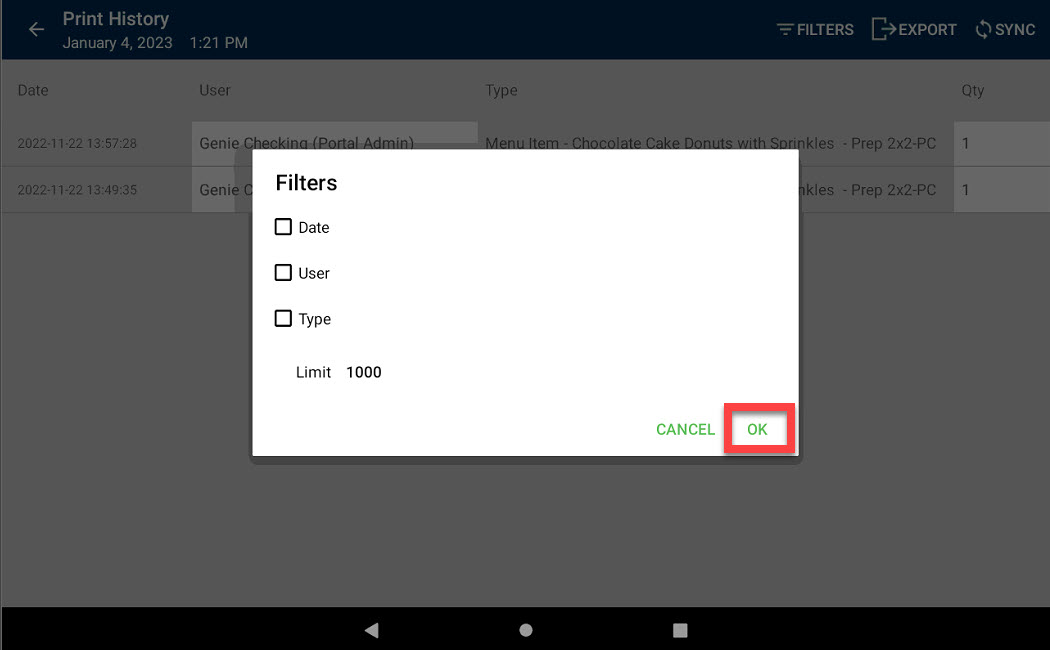
12. Tap the EXPORT button.
13. Adjust any filter settings, if needed, and tap OK.
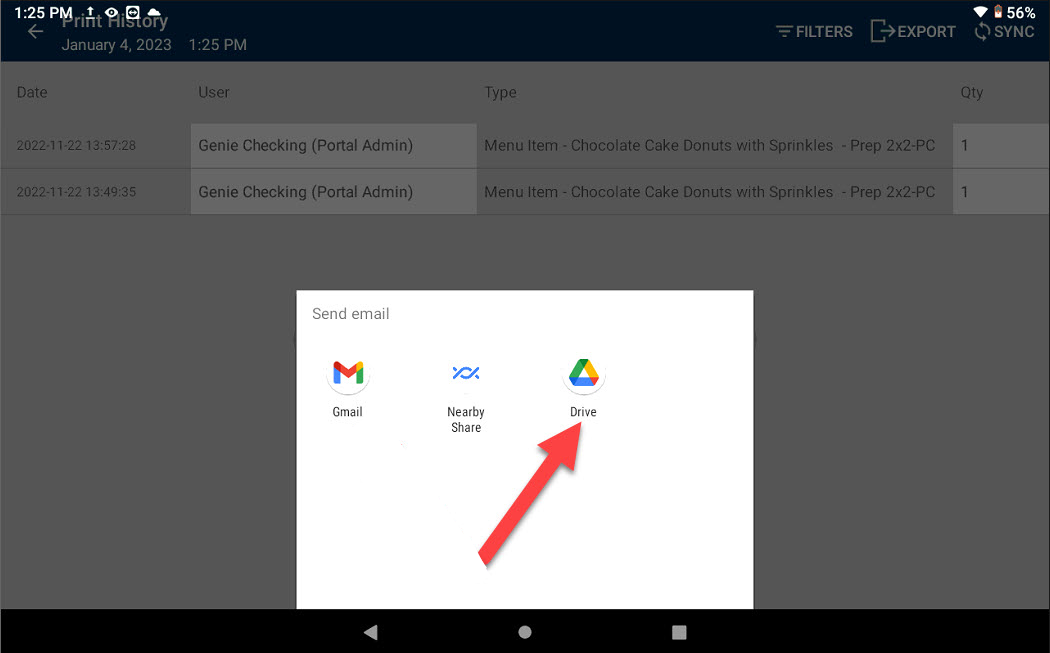
14. Tap Google Drive to export the print history report.
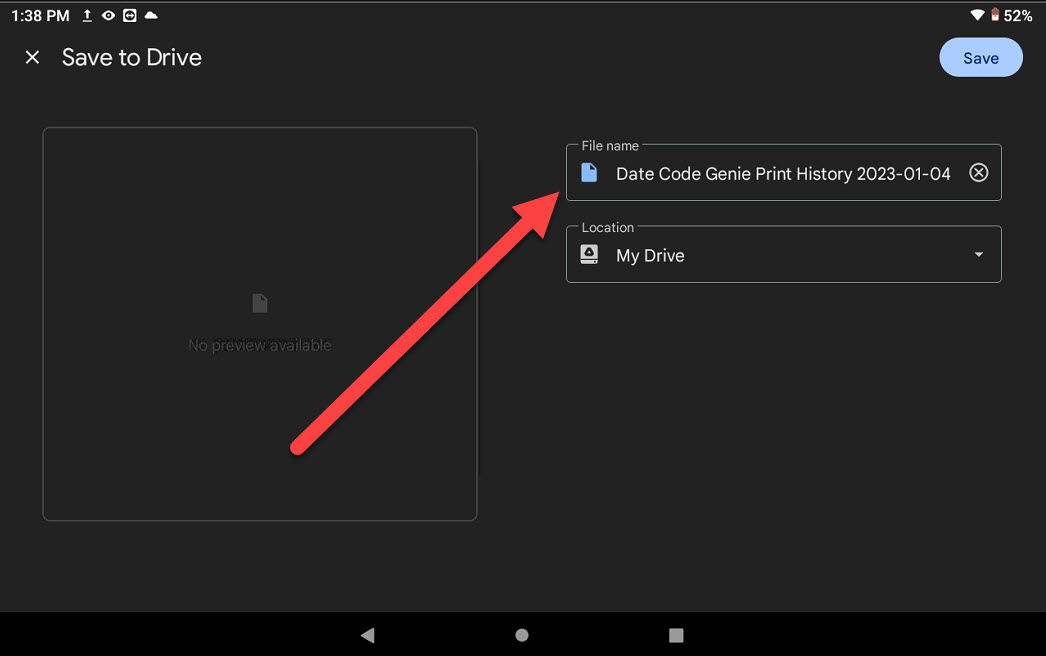
15. Complete the account setup in the app and a file with the exported print history report will upload. Tap Save button.
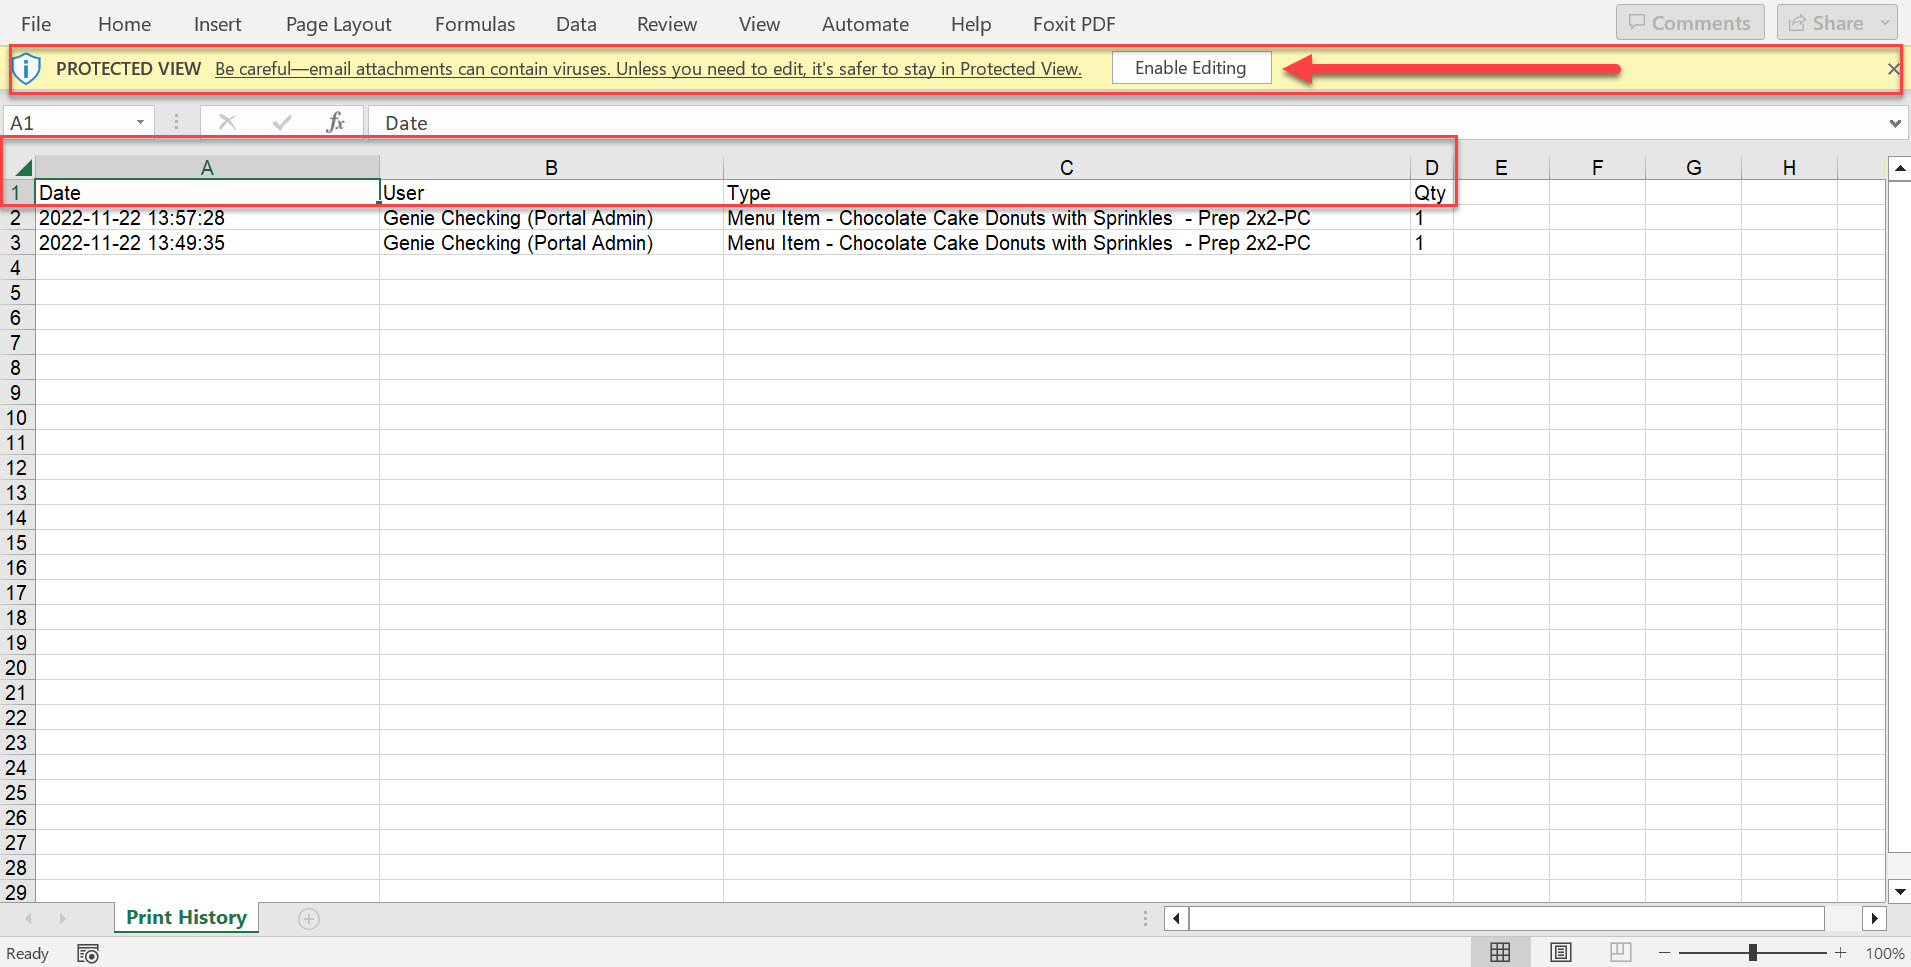
16. The report will open in a CSV file with the filters in step 13 and click the Enable Editing button in the yellow ribbon to allow editing of the report.
Gmail
Steps:
1. Tap on optional settings (gear icon) in the bottom right corner of the touchscreen.
2. Tap on Admin Options.
3. Enter password and tap OK.
NOTE
Contact your Portal Administrator for assistance, if password is unknown for Admin Options.
4. Tap Edit Allowed Apps.
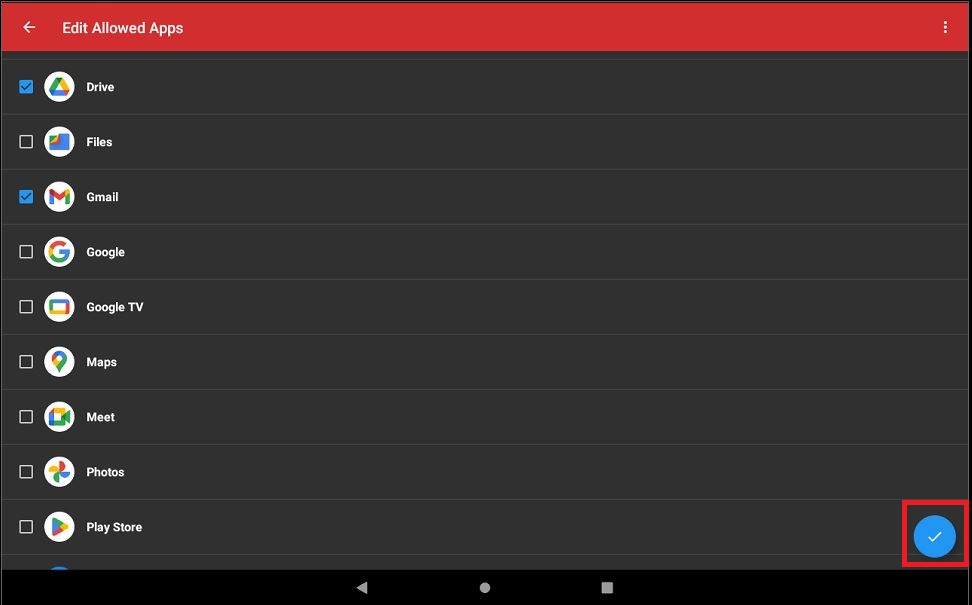
5. Scroll to Gmail to checkmark and allow access to app.
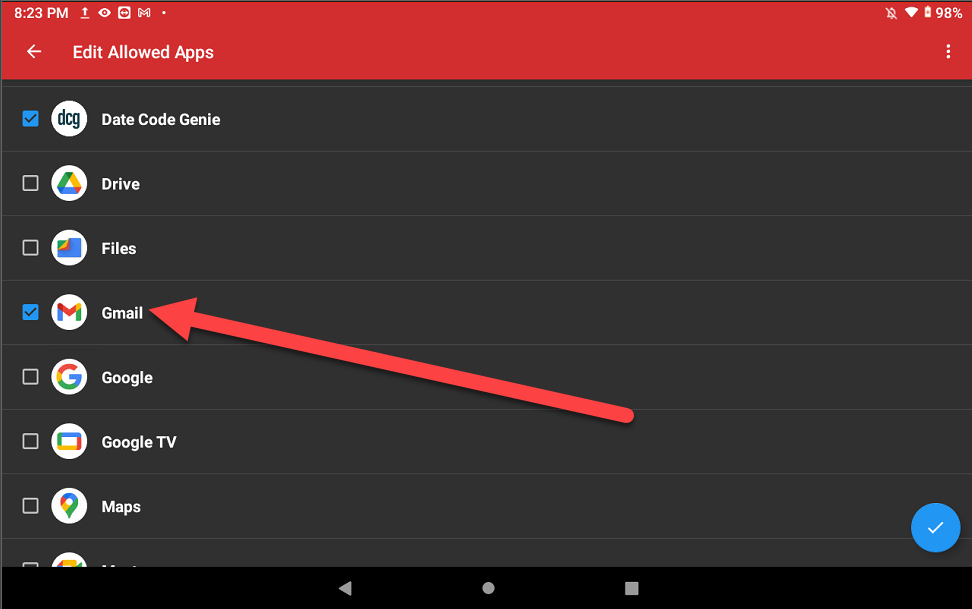
6. Tap blue circle button (checkmark icon)in the bottom right corner to confirm allowed apps.
7. Tap the back button (arrow icon) to return to the tablet home screen.
8. Tap on the DateCodeGenie app from tablet home screen to open.
9. Log in to the DateCodeGenie app with your username and password, if required.
10. Tap the navigation button to open available options.
11. Scroll to the Print History section and tap to open.
12. Tap the EXPORT button.
13. Adjust any filter settings, if needed, and tap OK.
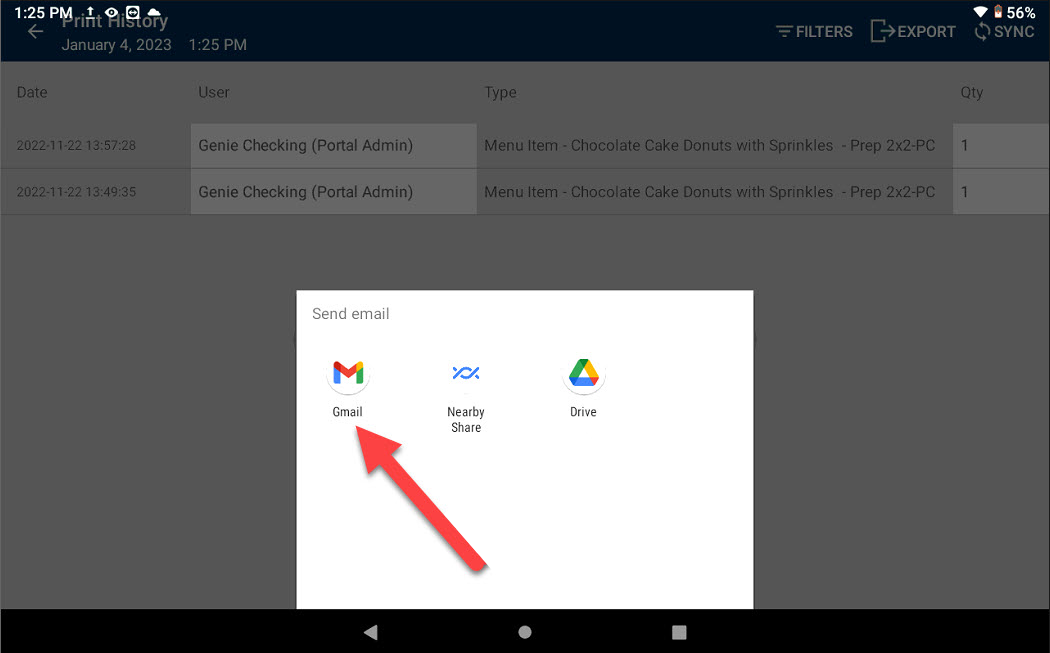
14. Tap Gmail to export the print history report.
15. Complete the account setup in the app and a file with the exported print history report will upload. Tap Send button (arrow icon).
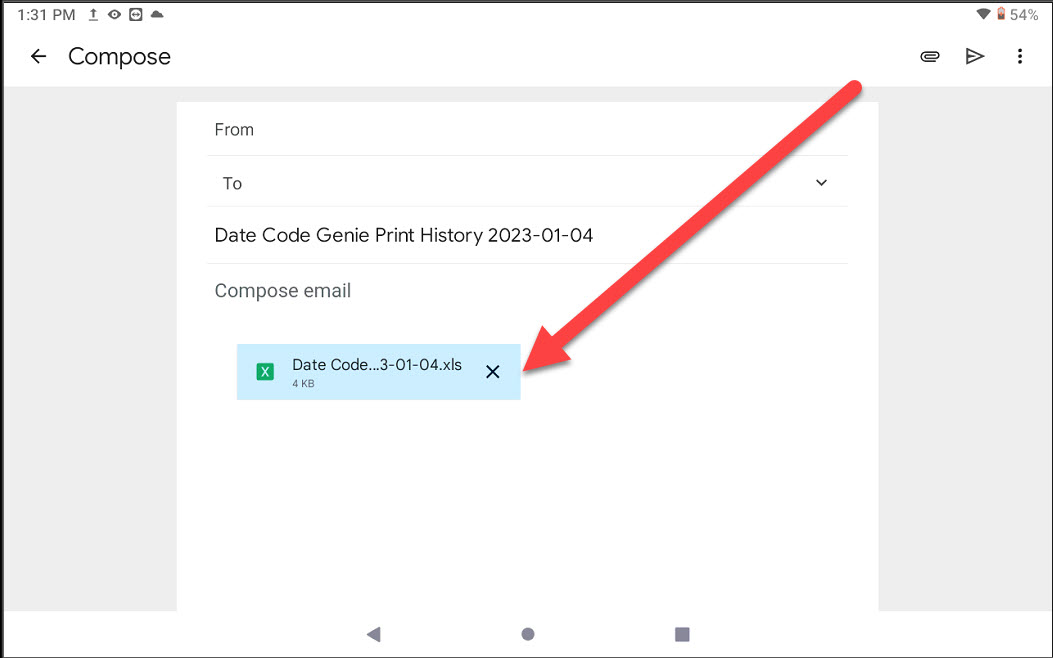
16. The report will open in a CSV file with the filters in step 13 and click the Enable Editing button in the yellow ribbon to allow editing of the report.

