Utiliser le contrôle des produits sur l'application
- Commencer
- Dispositifs
- Application
-
Portail
Groupes Aperçu du portail Catégories Profils d'imprimante Éléments de menu Sonde de température Liste de préparation Étiquettes rapides Contrôle des produits Médiathèque Échelle Historique d'impression Emplacements Remplacements d'emplacement Importation et exportation de masse Paramètres Listes Utilisateurs Soutien
- Accessoires
- Étiquettes
- Réparations
L'utilisation du suivi du contrôle des produits sur l'application comporte quatre éléments :
1. Éléments du menu Imprimer et enregistrer préparés
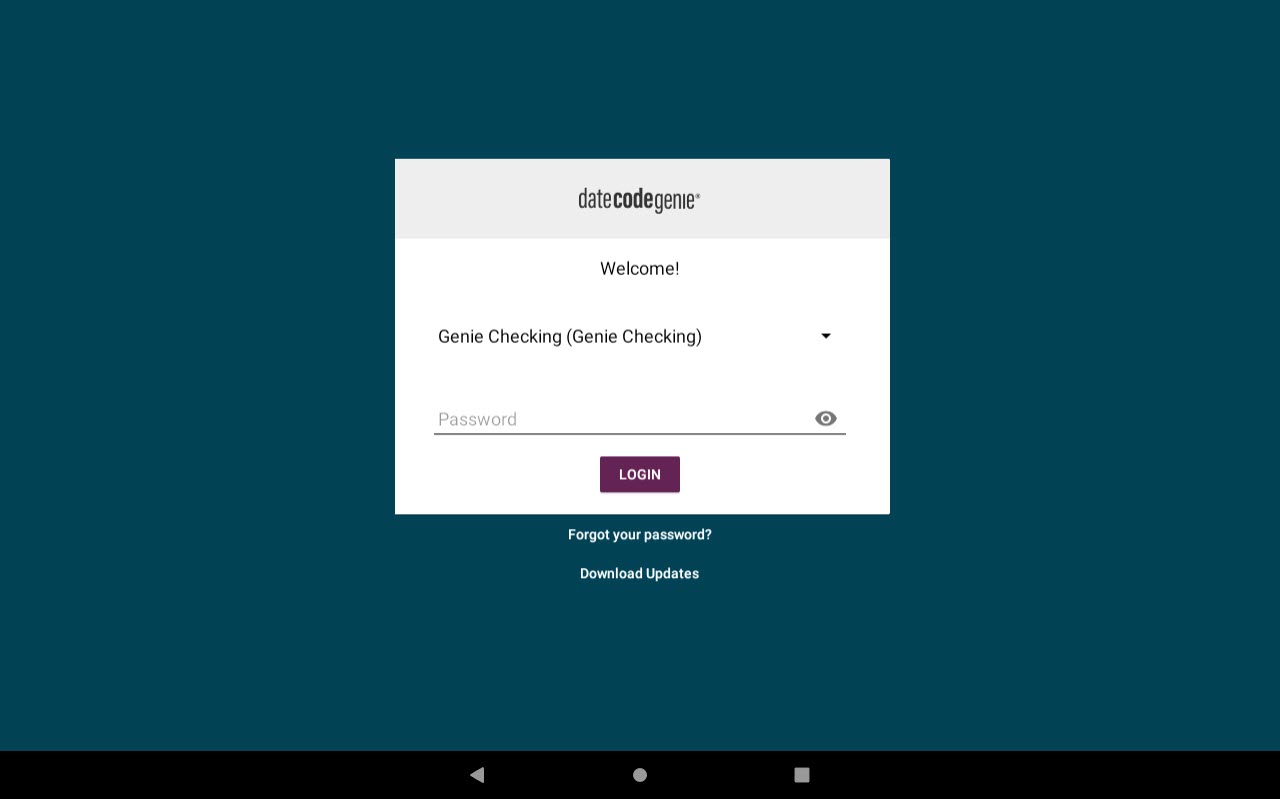
1. Connectez-vous à l'application avec votre nom d'utilisateur et votre mot de passe, si nécessaire.
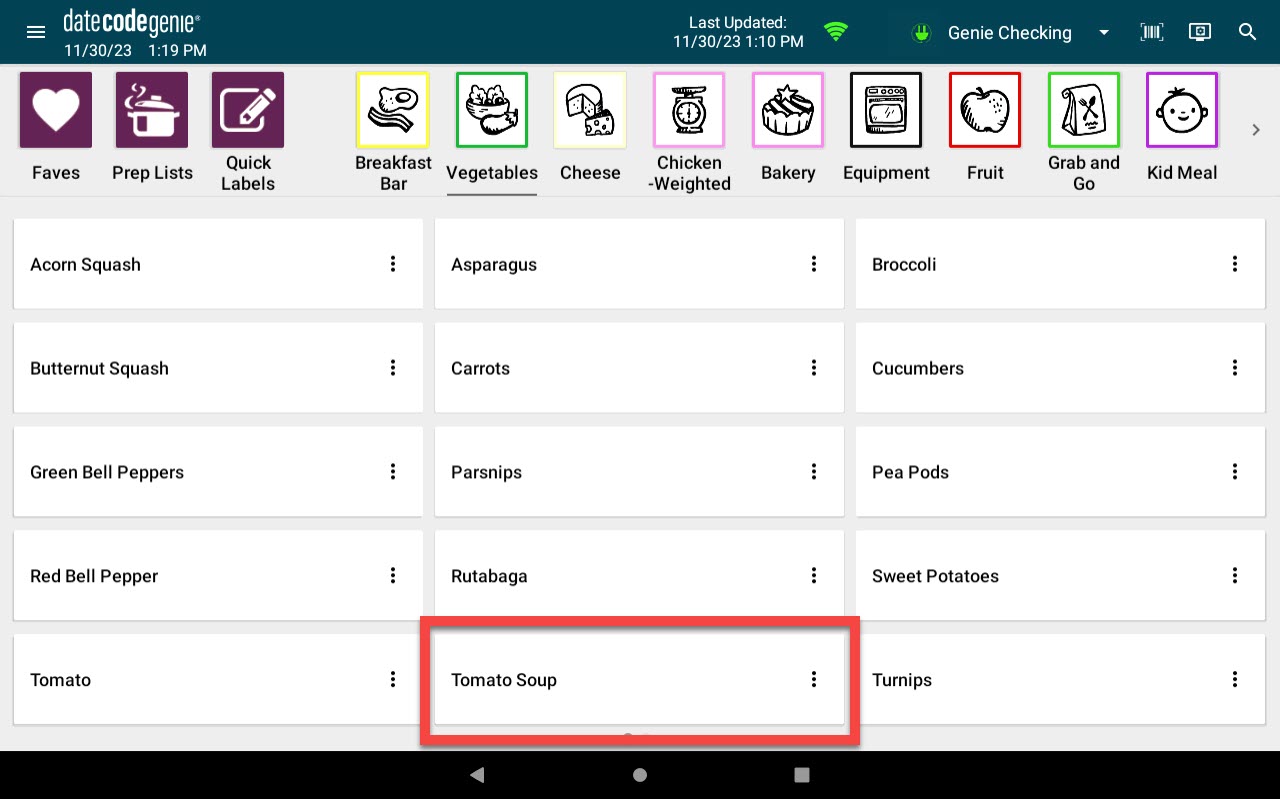
2. Appuyez sur un élément de menu du tableau de bord de l'application pour suivre la préparation.
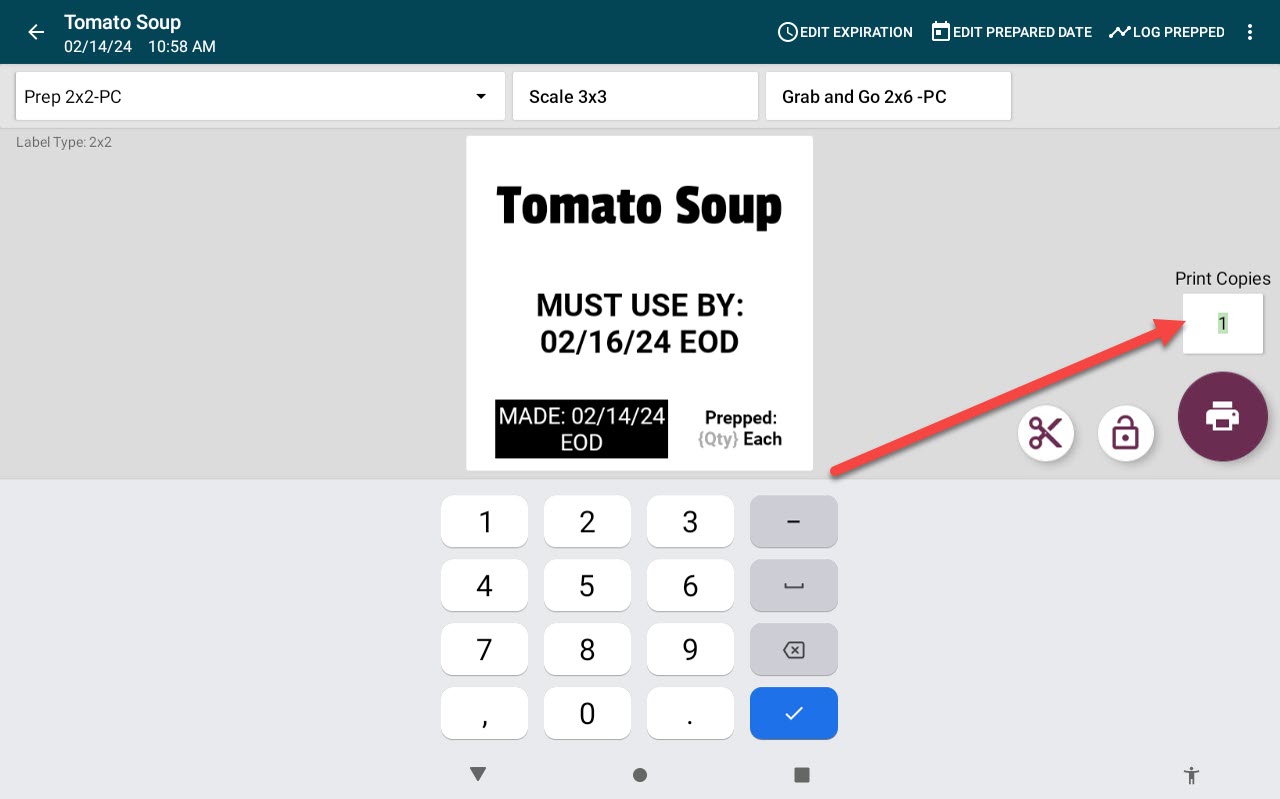
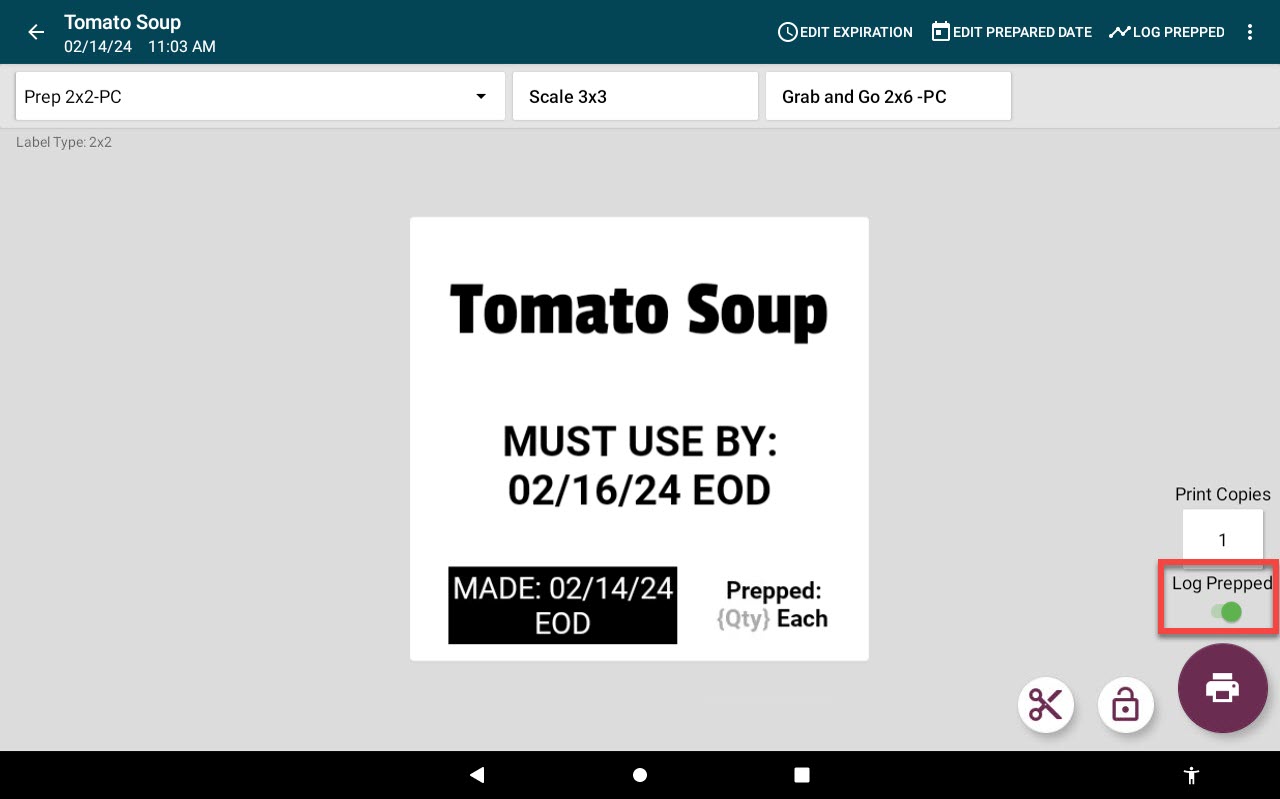
3. Entrez le nombre d'étiquettes à imprimer dans la zone Imprimer copie .
NOTE
Les éléments de menu configurés pour imprimer 1 étiquette et enregistrer 1 élément préparé afficheront la bascule Journal préparé. Basculer avec la préparation du journal activée par défaut, affichant le vert.
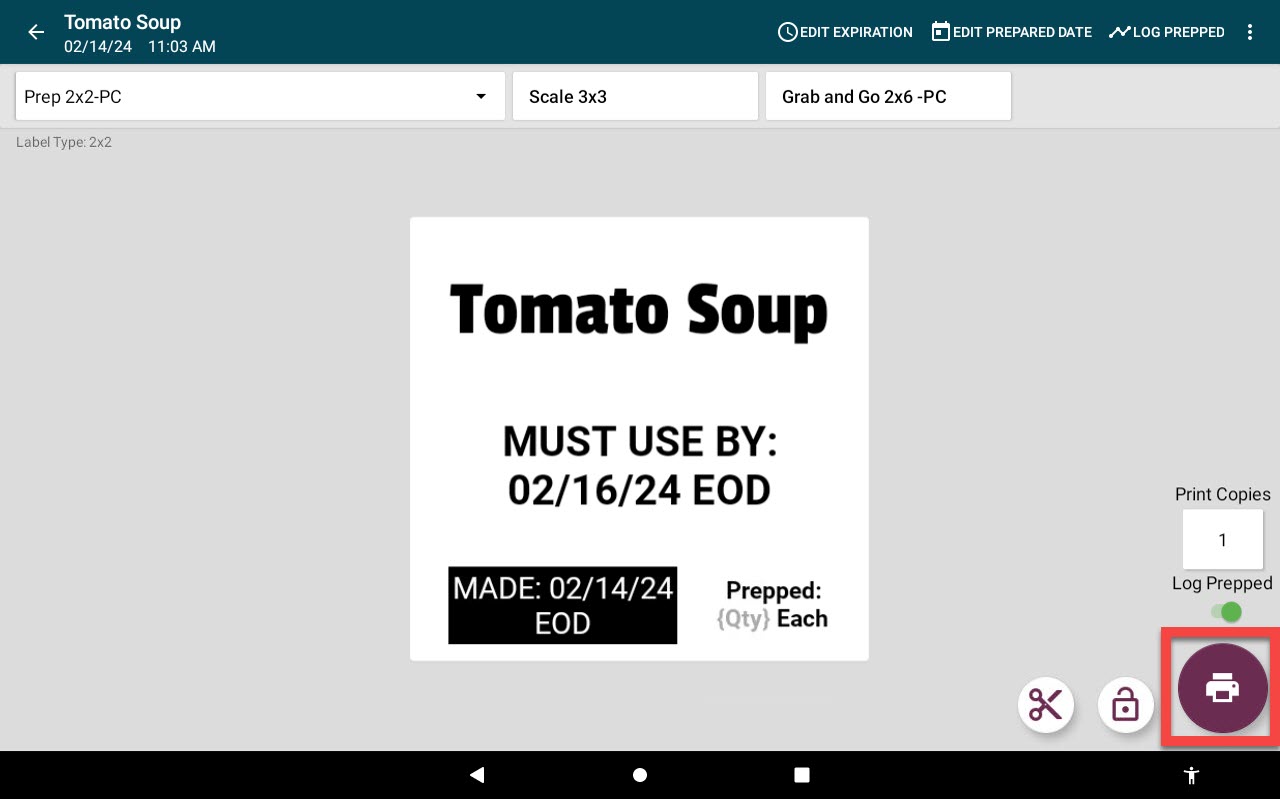
4. Appuyez sur le bouton Imprimer pour imprimer.
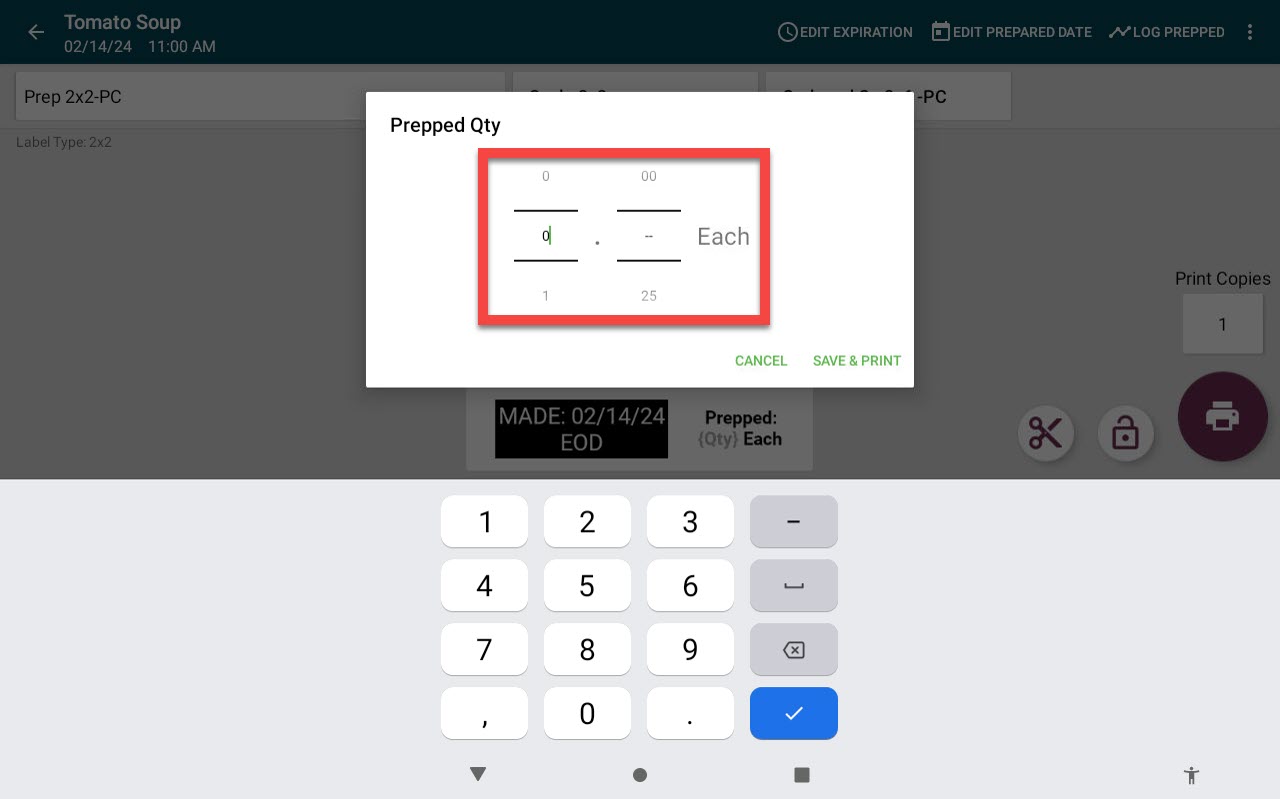
5. Pour un article qui n'est pas défini comme une étiquette par article, une fenêtre contextuelle apparaîtra avant l'impression. Entrez la quantité préparée par étiquette dans la case Quantité préparée , puis appuyez sur Enregistrer et imprimer.
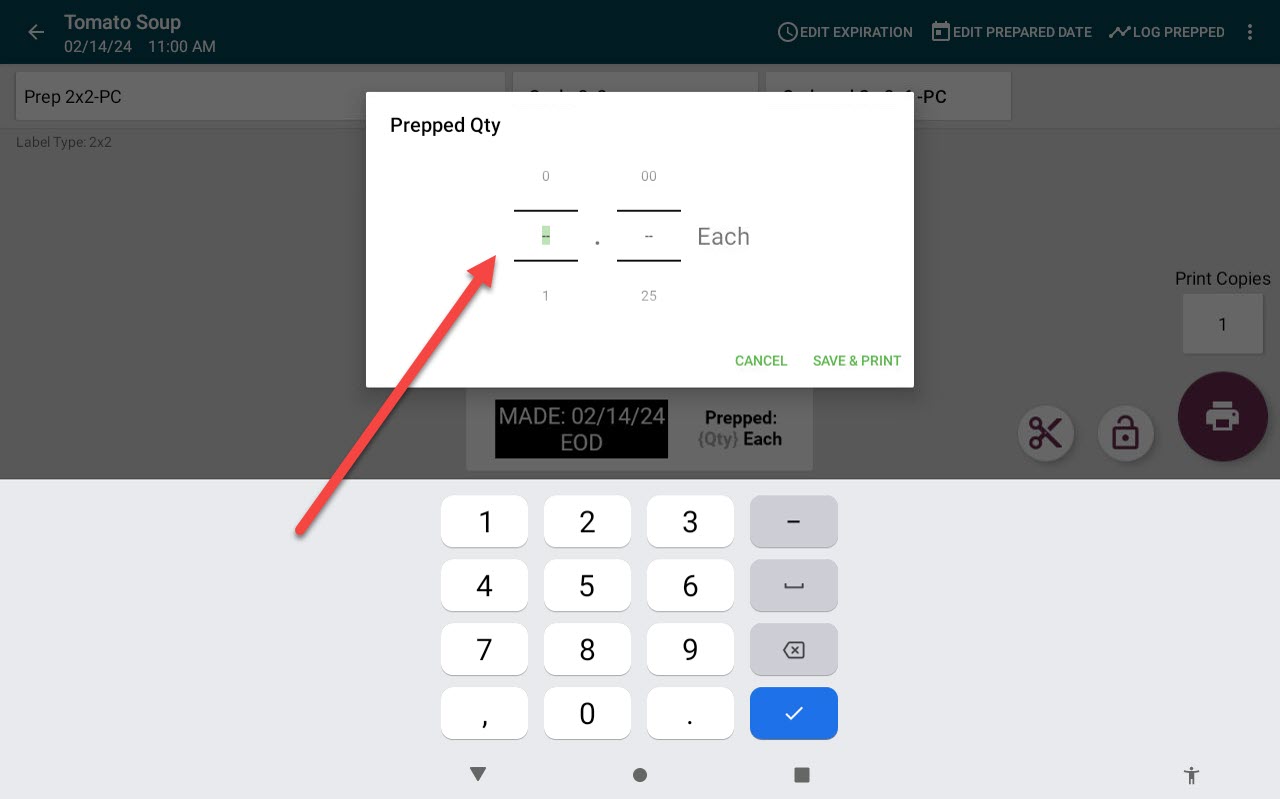
La quantité préparée sera enregistrée, indiquée par le message Prep Quantity Saved .
2. Imprimer sans journalisation Élément de menu préparé
Il existe deux manières d'imprimer des étiquettes sans préparation de journalisation :
- Bouton de préparation des journaux
- Entrez le montant préparé à zéro
1. Si l'élément de menu comporte la bascule Log Prepped , sélectionnez la bascule pour qu'elle devienne blanche pour contourner la journalisation.
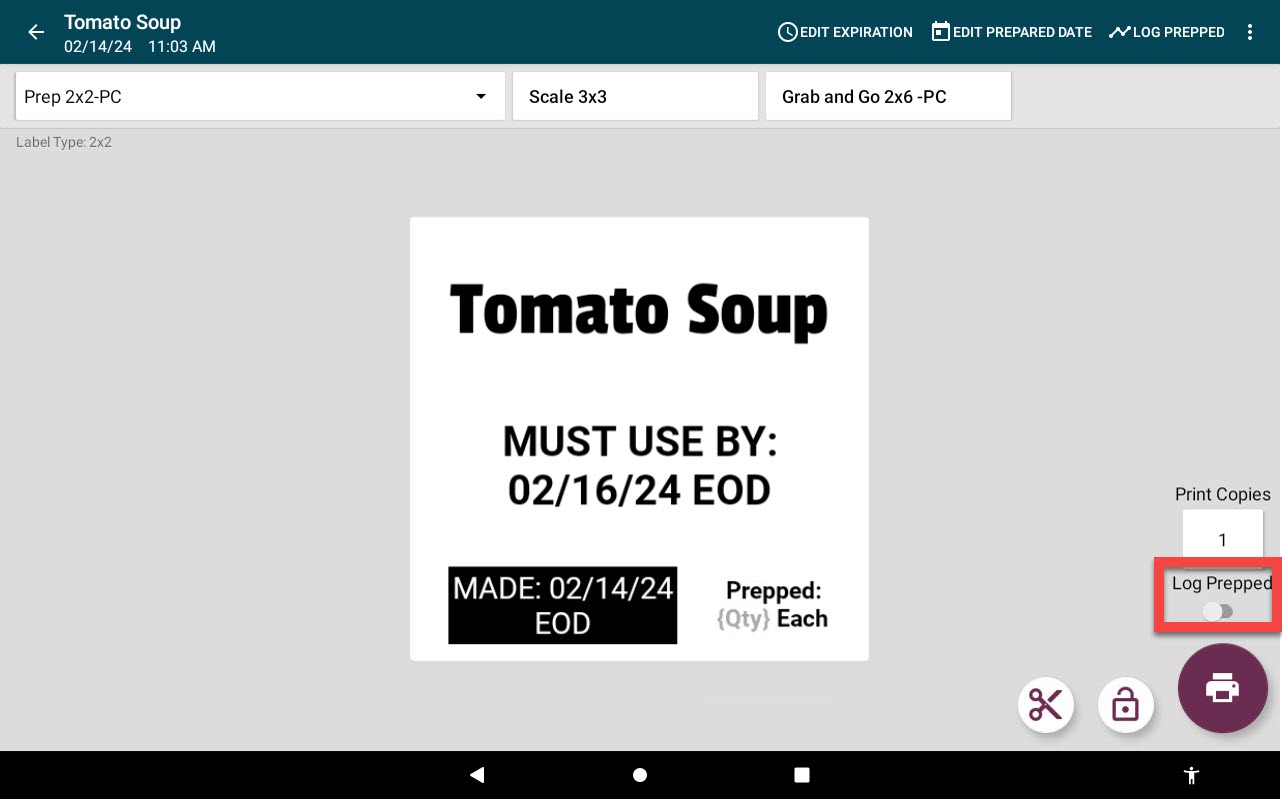
CONSEILS & ASTUCES
Vous ne voyez pas le bouton Log Prepped ? Demandez à votre administrateur de portail d'activer l'autorisation de remplacement de la quantité de préparation autorisée.
2. Si l'élément de menu n'a pas la bascule Log Prepped, appuyez sur le bouton Imprimer . Lorsque la fenêtre contextuelle apparaît, entrez 0 comme quantité préparée . Appuyez sur Enregistrer et imprimer.
3. Enregistrer les éléments de menu gaspillés manuellement (sans scanner)
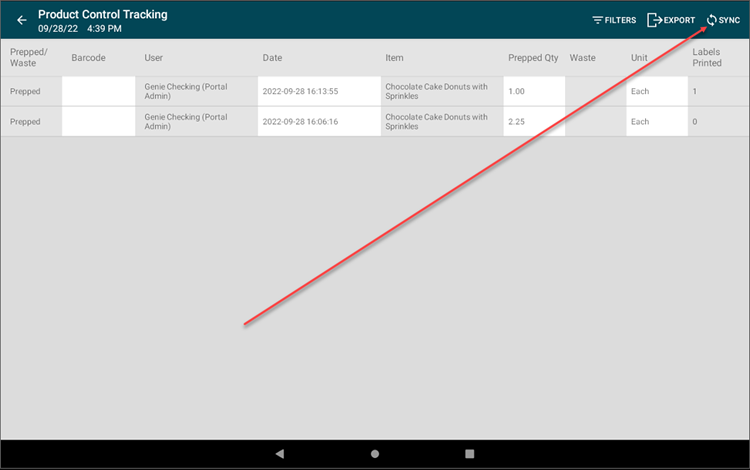
1. Appuyez sur le bouton de navigation (icône à 3 lignes).
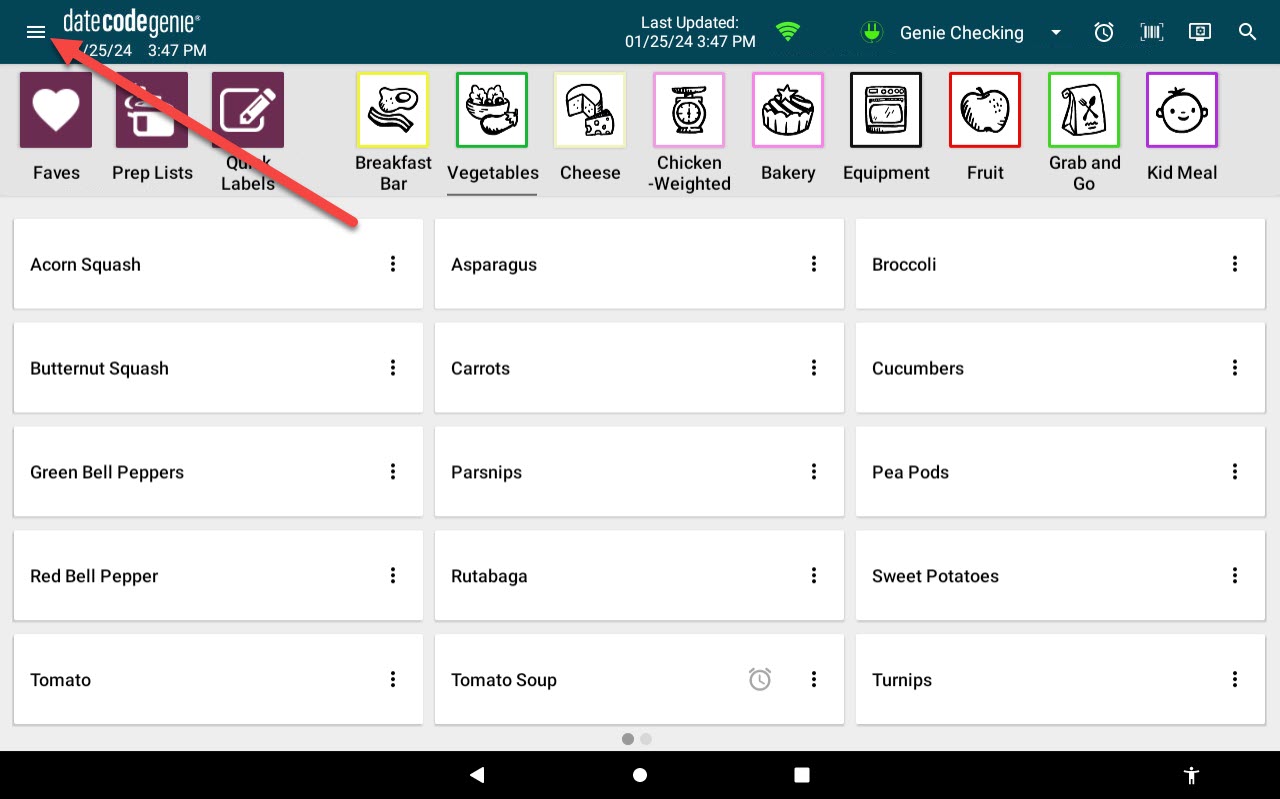
2. Appuyez sur Suivi du contrôle des produits .
![]()
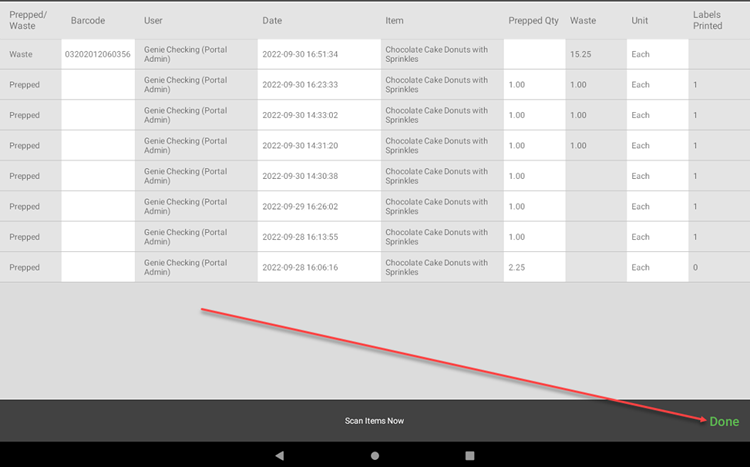
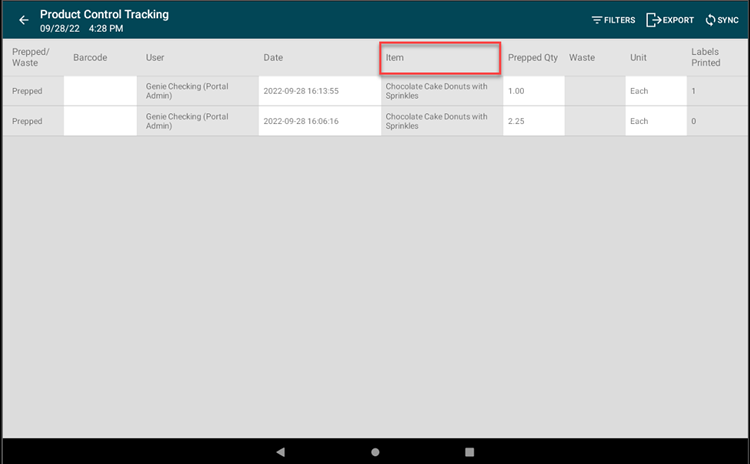
3. Faites défiler pour localiser un nom d'élément de menu dans la colonne Élément .
NOTE
Pour plusieurs éléments de menu identiques, sélectionnez la date et l’heure dans la colonne Date.
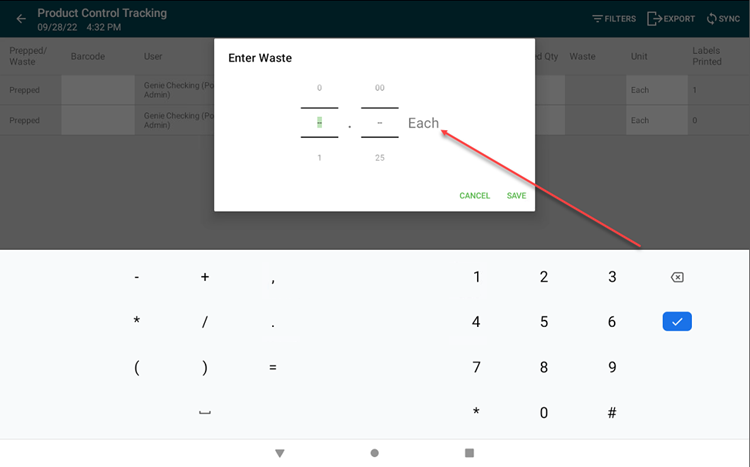
4. Appuyez sur la colonne Déchets et entrez la quantité d'élément de menu gaspillée. Appuyez sur ENREGISTRER et répétez pour tous les articles gaspillés.
5. Appuyez sur SYNC dans la barre de navigation de l'application. La synchronisation terminée s'affichera et les données seront envoyées à votre portail.
4. Enregistrer les éléments de menu gaspillés avec le scanner
Il existe deux méthodes de numérisation différentes pour enregistrer les déchets.
- code à barre
- Code QR (ID d'impression)
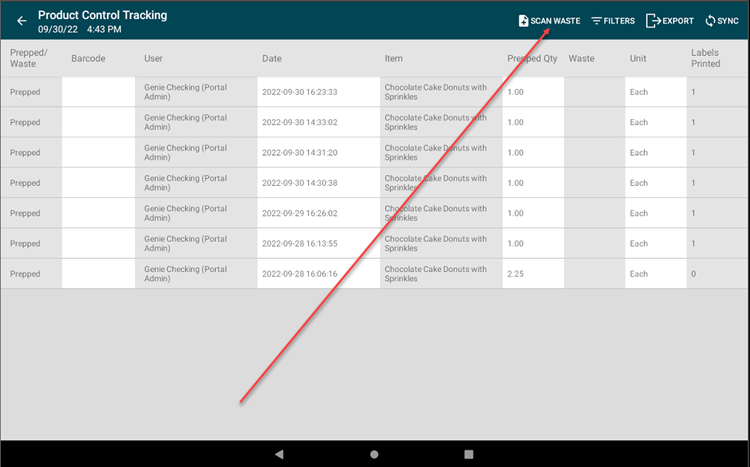
1. Appuyez sur le bouton de navigation (icône à 3 lignes).
2. Appuyez sur Suivi du contrôle des produits .
![]()
3. Appuyez sur Analyser les déchets dans la barre de navigation de l'application.
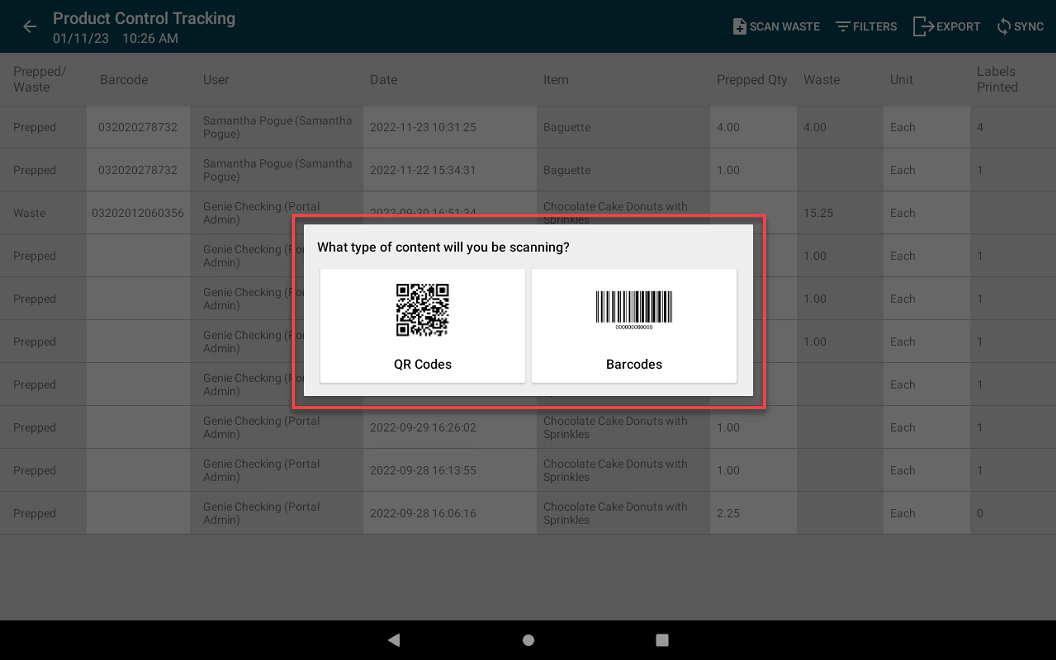
4. Une boîte de dialogue contextuelle peut apparaître si la méthode de numérisation n'est pas déjà définie. Si tel est le cas, appuyez sur la méthode de numérisation que vous allez utiliser.
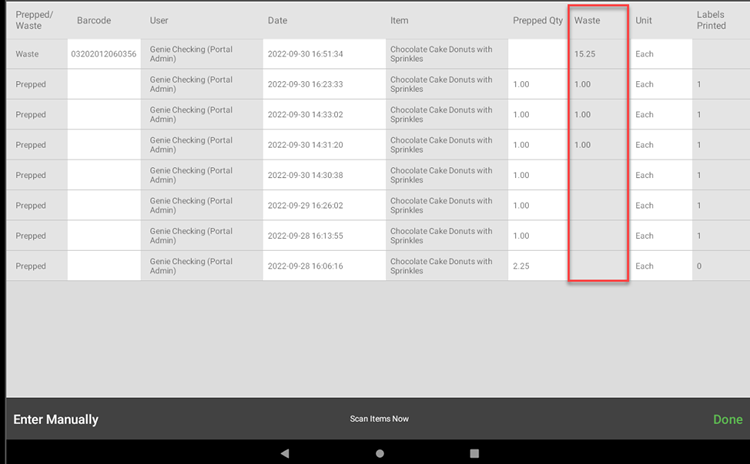
5. Continuez à analyser les déchets.
- code à barre
- Scannez chaque article et la quantité apparaîtra dans la colonne Déchets .
NOTE
Chaque scan augmente la quantité de déchets de 1.
- Code QR (ID d'impression)
- Scannez le code QR sur chaque élément pour que votre appareil localise automatiquement l'élément de menu exact, y compris la date exacte, l'heure imprimée et enregistrée pour enregistrer la quantité gaspillée.
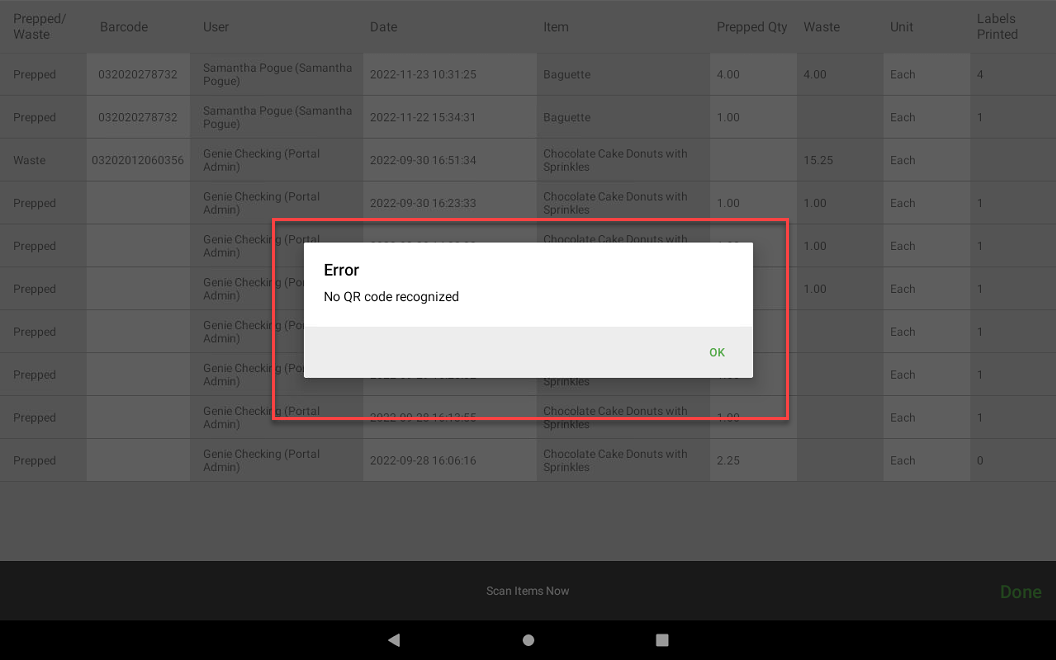
NOTE
Si le message d'erreur « Aucun code QR reconnu » apparaît, le mauvais type de code QR a été scanné. Essayez de scanner un autre code QR ou consultez Codes QR sur les étiquettes .
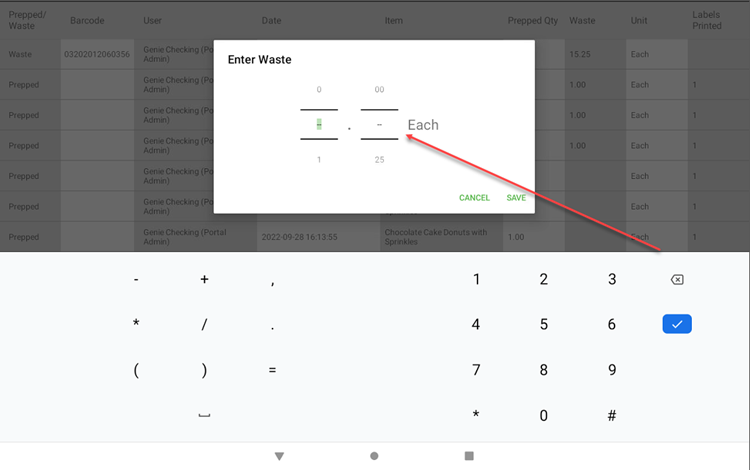
6. Saisissez le montant dans la fenêtre contextuelle Saisir les déchets pour suivre les déchets d'une réimpression à l'aide d'un code QR numérisé et appuyez sur Enregistrer.
7. Appuyez sur Terminé lorsque vous avez terminé de numériser les éléments. La synchronisation terminée s'affichera et les données seront envoyées à votre portail.