Clear Data on the DateCodeGenie® App
Table of Contents
Clearing data removes all data from the app and requires redownloading the data from your portal. Clearing app data is completed on the device and can resolve a variety of issues.
WARNINGS
- DO NOT uninstall the app. Uninstalling the app will remove it from the device and will need to be reinstalled by making a repair call. See Contact & Support
- Clearing data will permanently remove all ad-hoc items added to the app. See What Does the Red Triangle and Circle on Menu Buttons Mean?
Before clearing app data, you must have:
- Wi-Fi or ethernet connection on the device See How to Connect the Device to Wi-FI or How to Connect the Device to Ethernet
- Username
- Password
- UDID See What is a UDID Number and Where Can I Find It?
NOTE
These steps are for DateCodeGenie devices with integrated printers devices only. For mobile app users, refer to your tablet's manufacturer information for tablet setup assistance.
Steps:
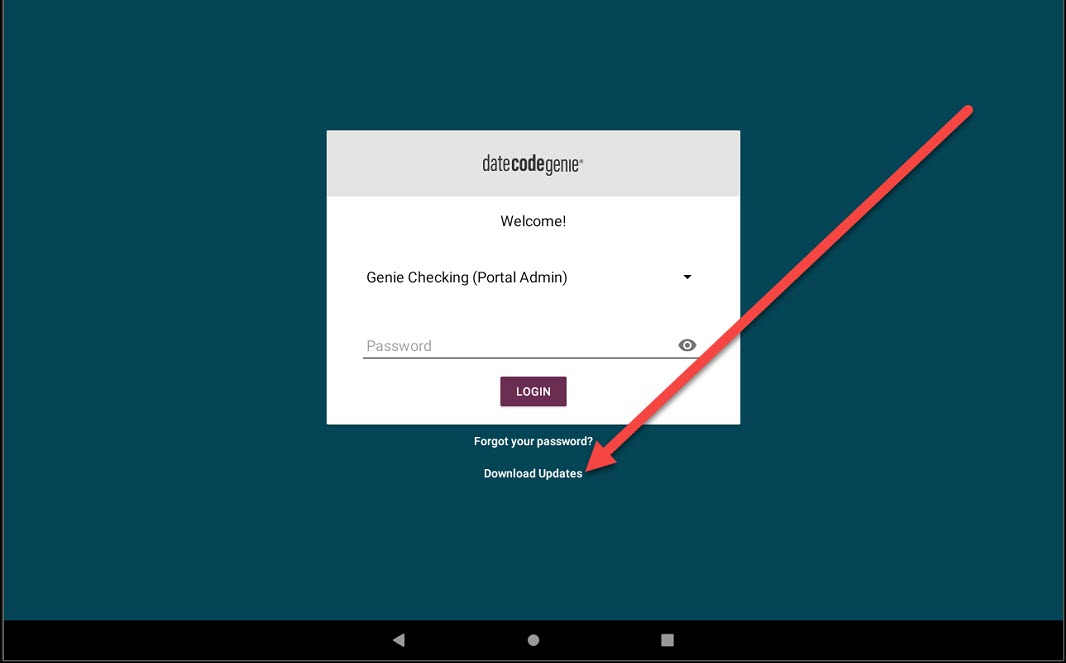
1. Tap Download Updates from the app login screen or in the app to upload Print History and Product Control Tracking data to the portal. See How to Download Updates on the App.
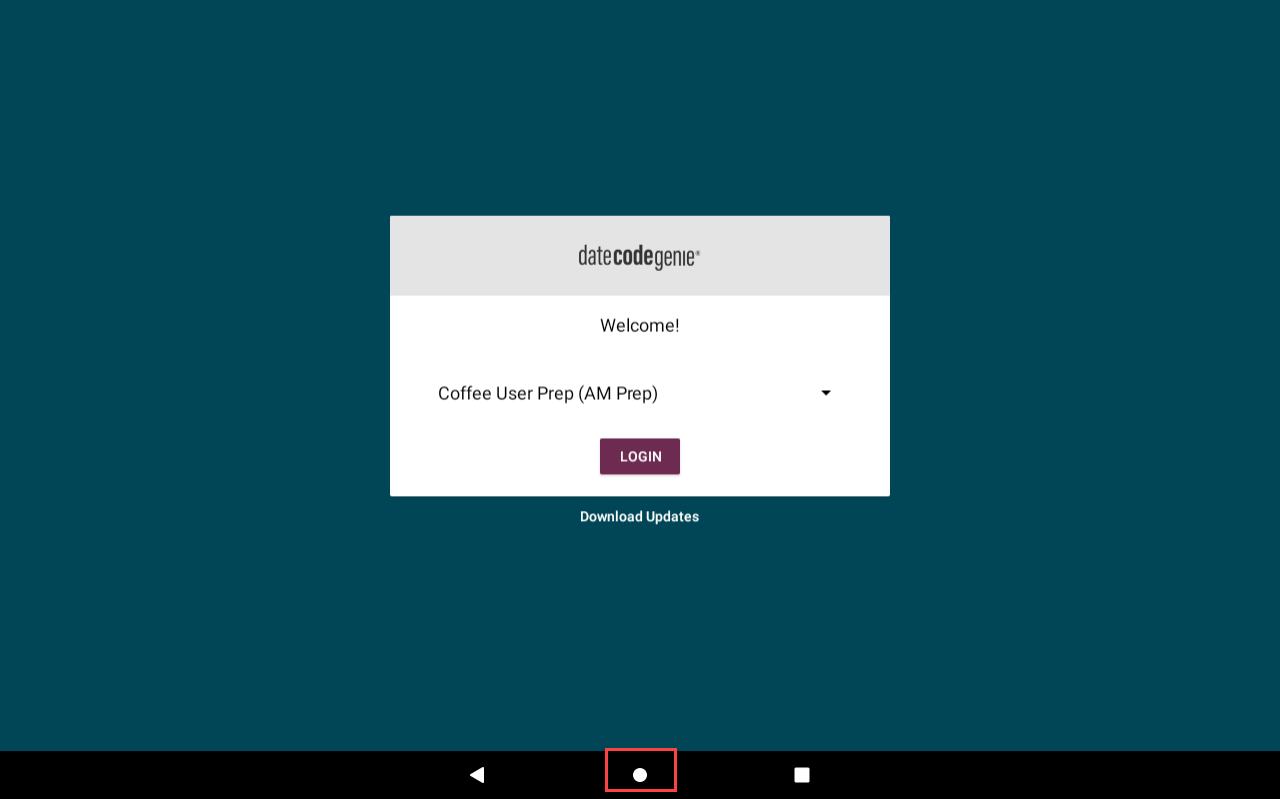
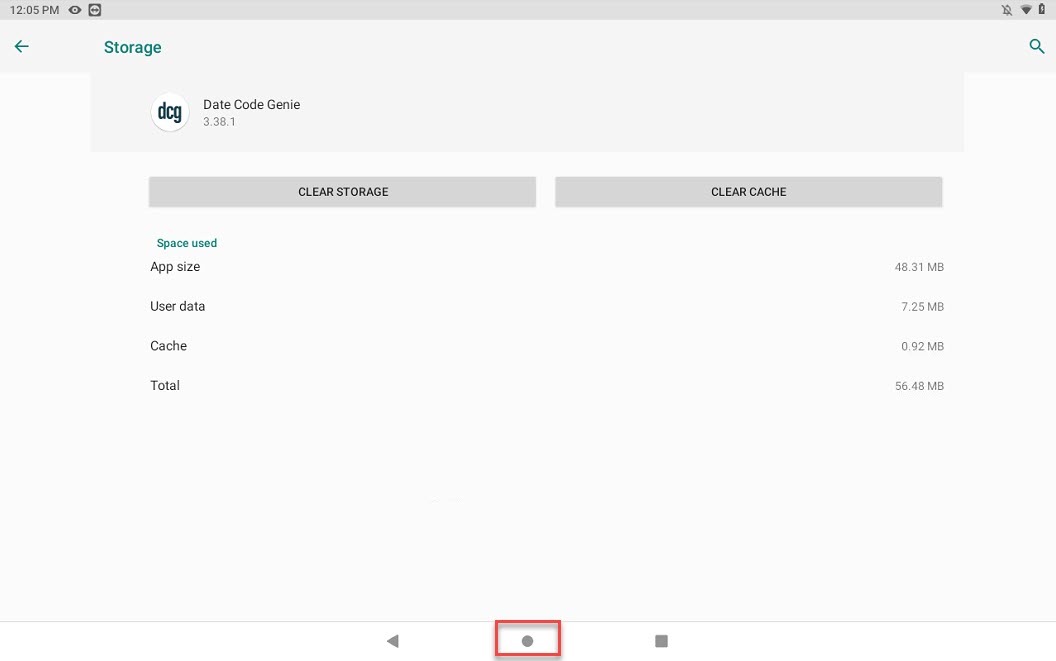
2. Tap the Home Button (circle icon).
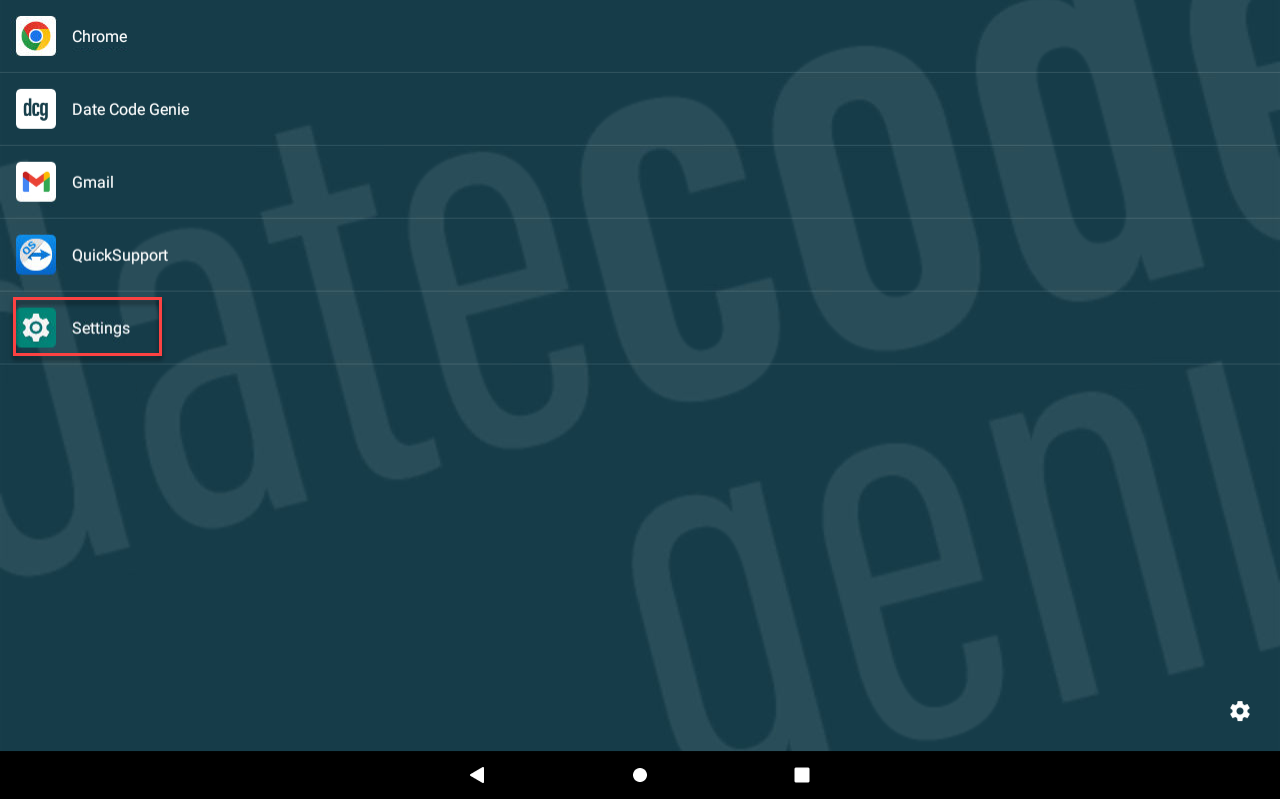
3. Tap Settings.
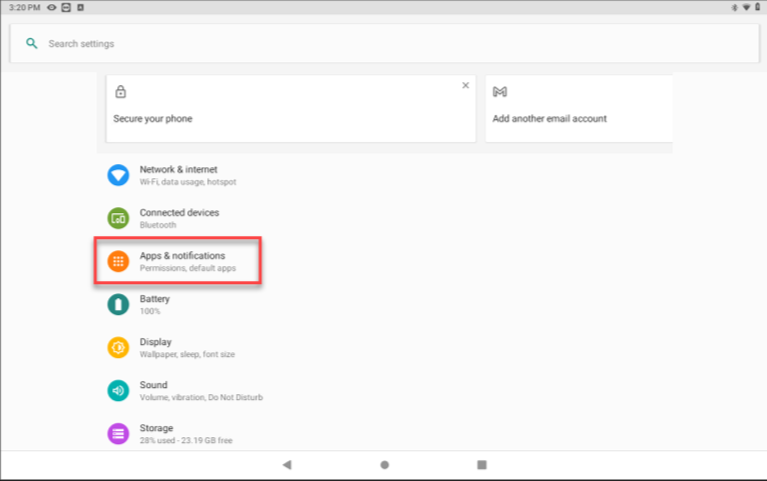
4. Tap Apps & Notifications or Apps.
5. Tap the Date Code Genie app.
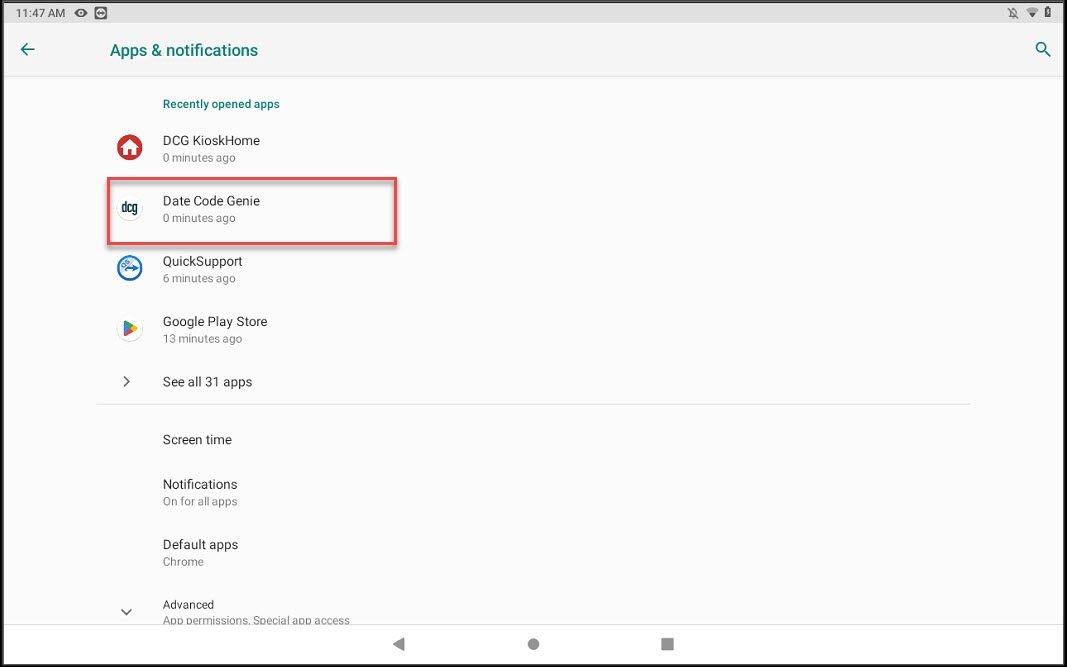
6. Tap Storage.
WARNING
DO NOT uninstall the app. If uninstalled, reinstall by contacting Technical Support. See Contact & Support
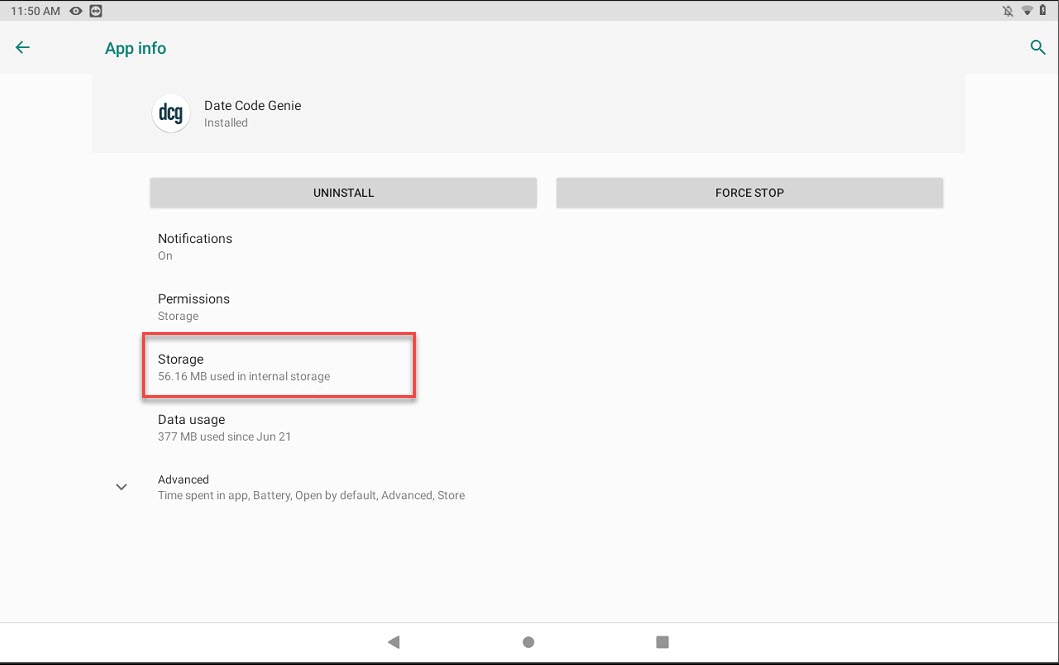
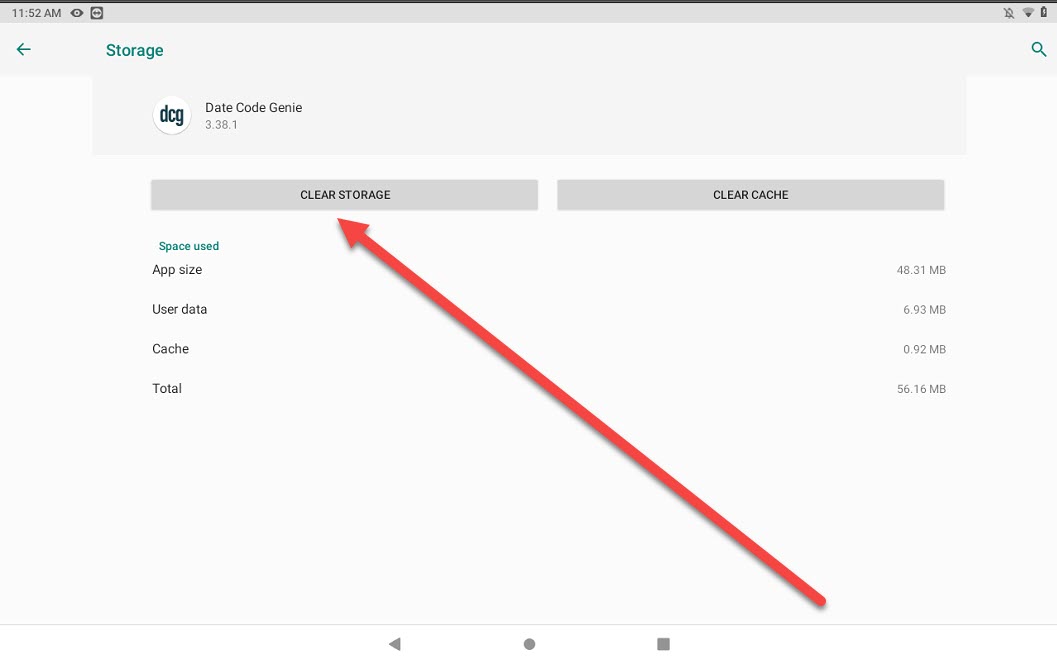
7. Tap the CLEAR STORAGE or CLEAR DATA button.
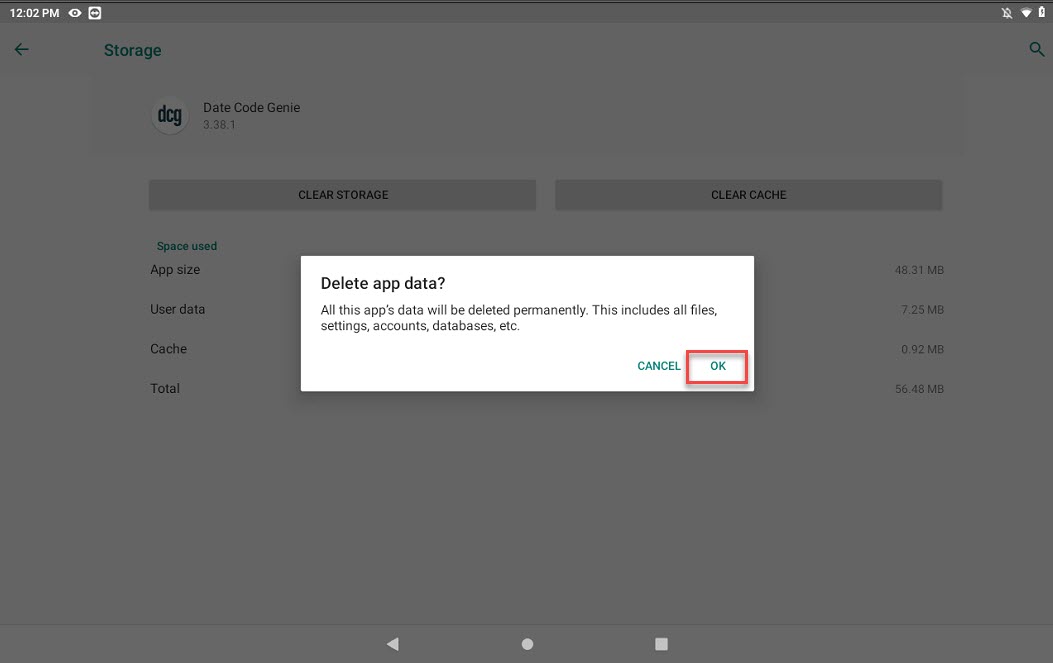
8. Tap OK from pop-up.
9. Tap the Home Button (circle icon) to return to the tablet home screen.
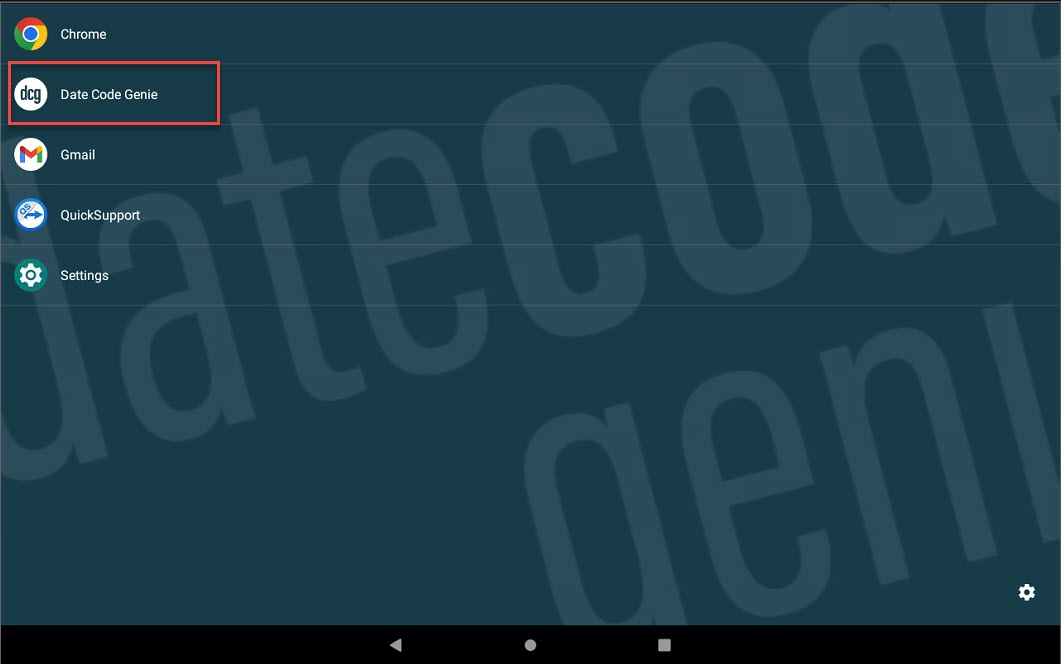
10. Tap the DateCodeGenie app to open.
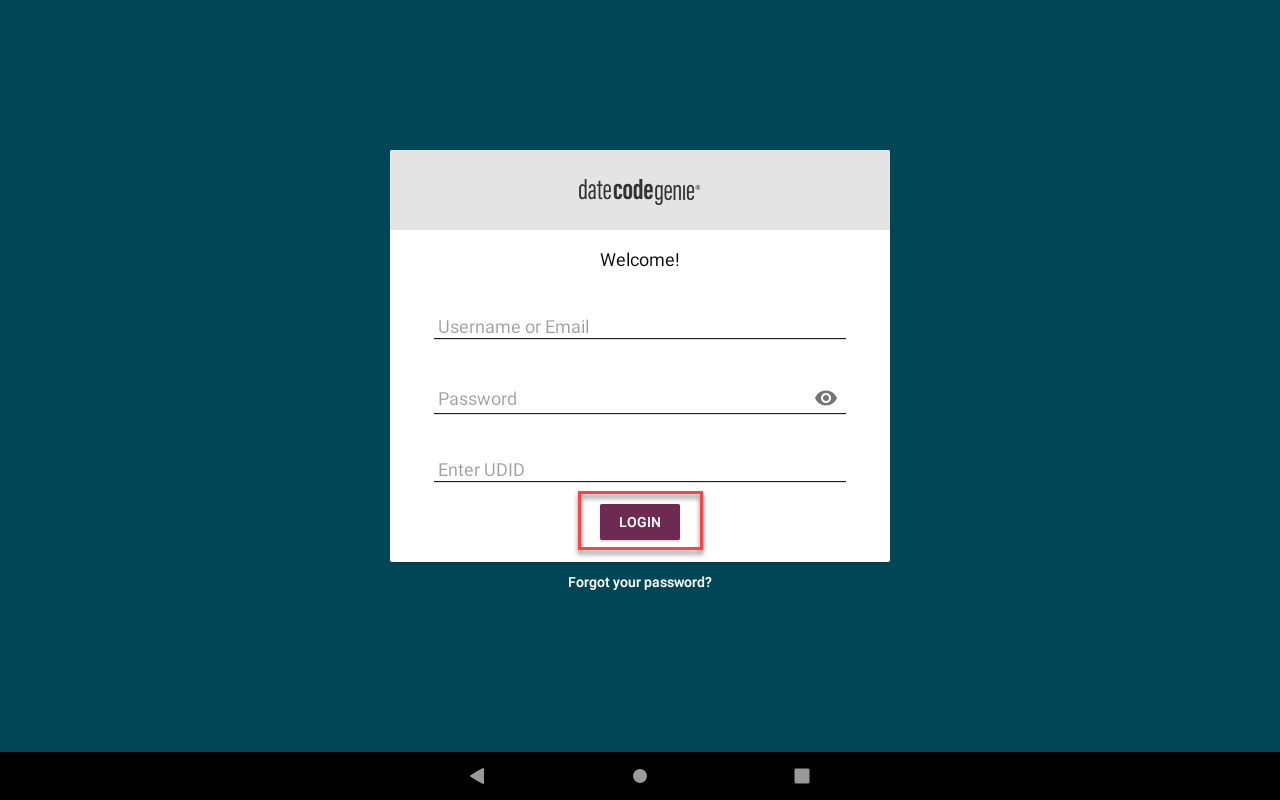
11. Type in the username, password and UDID and tap the LOGIN button.
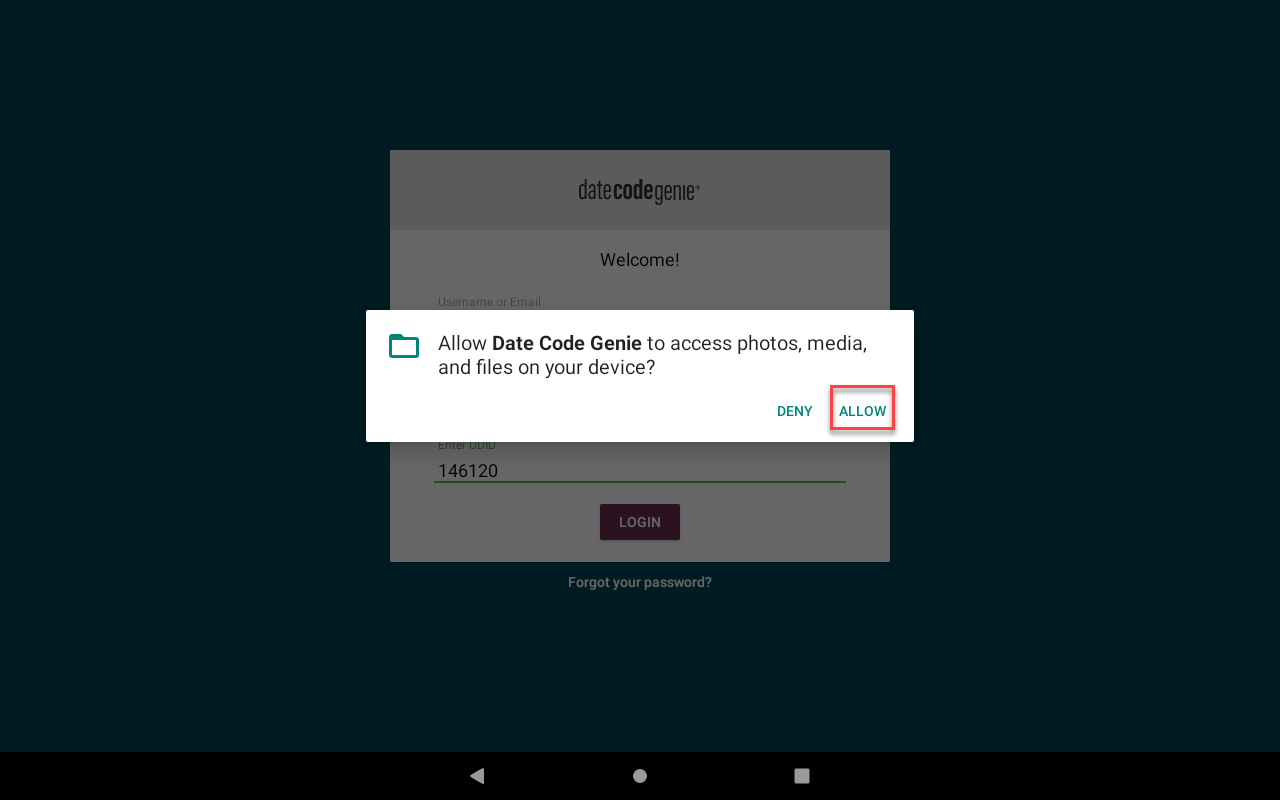
12. Tap Allow from the pop-up.
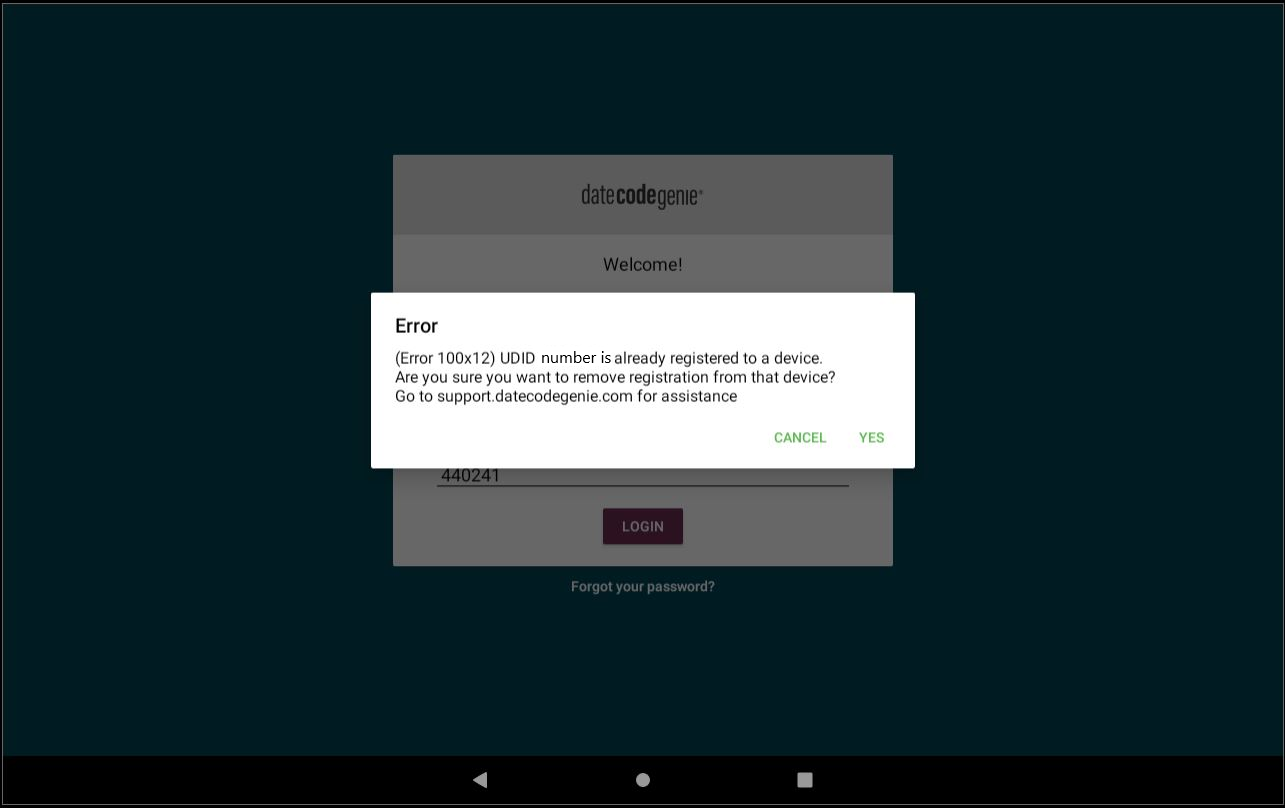
13. (Error 100x12) UDID Number Entered is Already Registered may appear. Verify UDID is correct, and if so, tap Yes.
14. Confirm the app is working correctly by printing a label.


