Add Data to the Portal At One Time Using Mass Import
Table of Contents
Mass import is a time-saving tool that allows all portal administrators and DateCodeGenie® managers with permission to add a large quantity of data to the portal at once. Mass Import is located in the portal under the Mass Import tab and allows adding data using the most recent protected downloaded version of a Microsoft Excel-based template.
Find additional instructions for import are listed in the Mass Import tab and each column heading displays instructions in a pop-up on the downloaded template.
These tabs can be added using the mass import template but not all data for each tab can be imported:
- Users tab
- Category tab
- Menu Items tab including location overrides (a purchased software add-on)
Common uses of Mass Import are:
Common uses of Mass Import are:
- Adding data to an empty portal
- Adding location overrides to a new location
TIPS & TRICKS
To update existing data added to the portal or to add new data to the portal see Updating and Adding data to my portal using Mass Export.
Steps:
1. Log in to the portal using the preferred browser. See Preferred Portal Browser
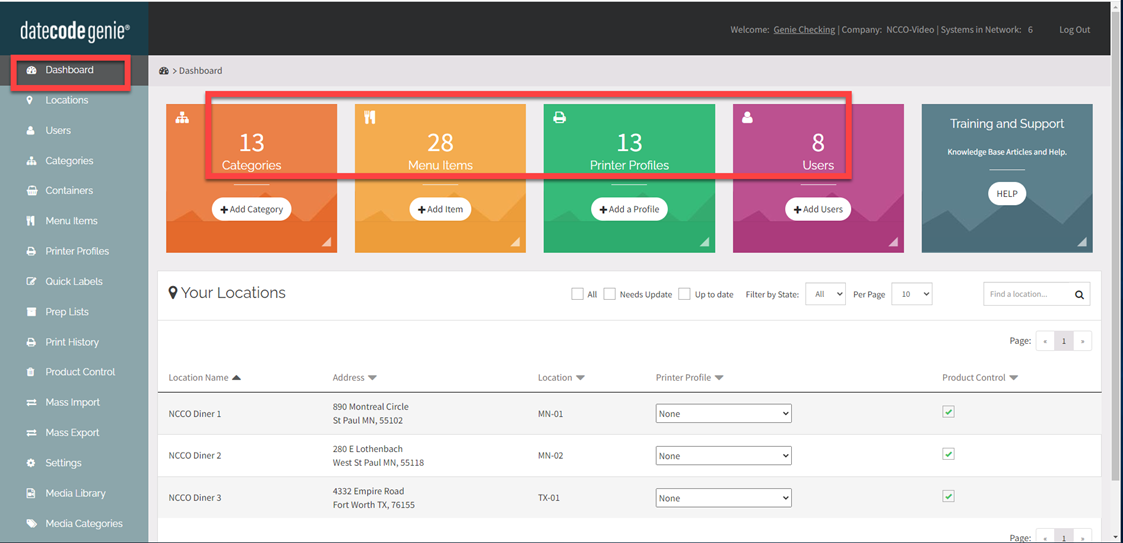
2. Scroll and click the Mass Import tab from the sidebar to open.
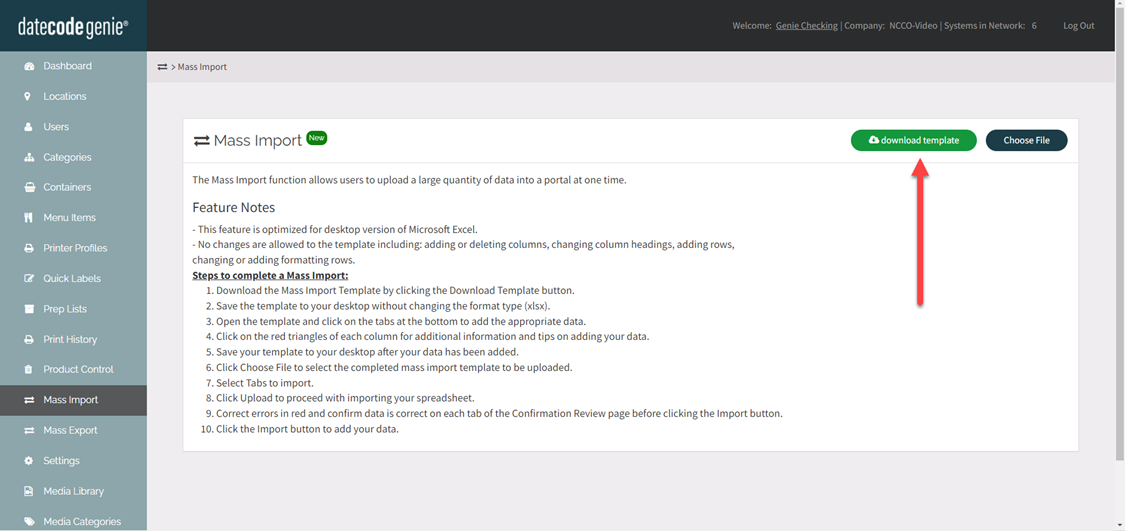
3. Download the template by clicking the green download template button in the upper right corner of the page.
WARNING
Always download a new template each time. Importing from a template not recently downloaded will not import if changes to the template have been made.
4. Open the download file from your computer's download file or from the bottom left corner.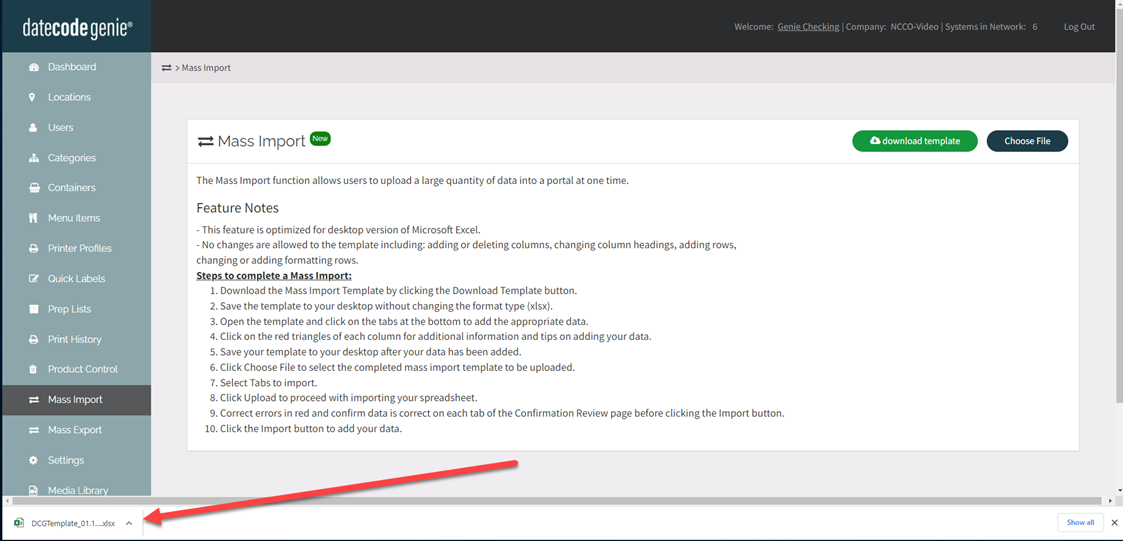
5. Click Enable Editing in the yellow bar at the top of the template and save the template to your desktop without changing the format type (xlsx).
WARNING
The template is optimized for the desktop version of Microsoft Excel and no changes are allowed to the template columns or rows including adding, deleting, or formatting.
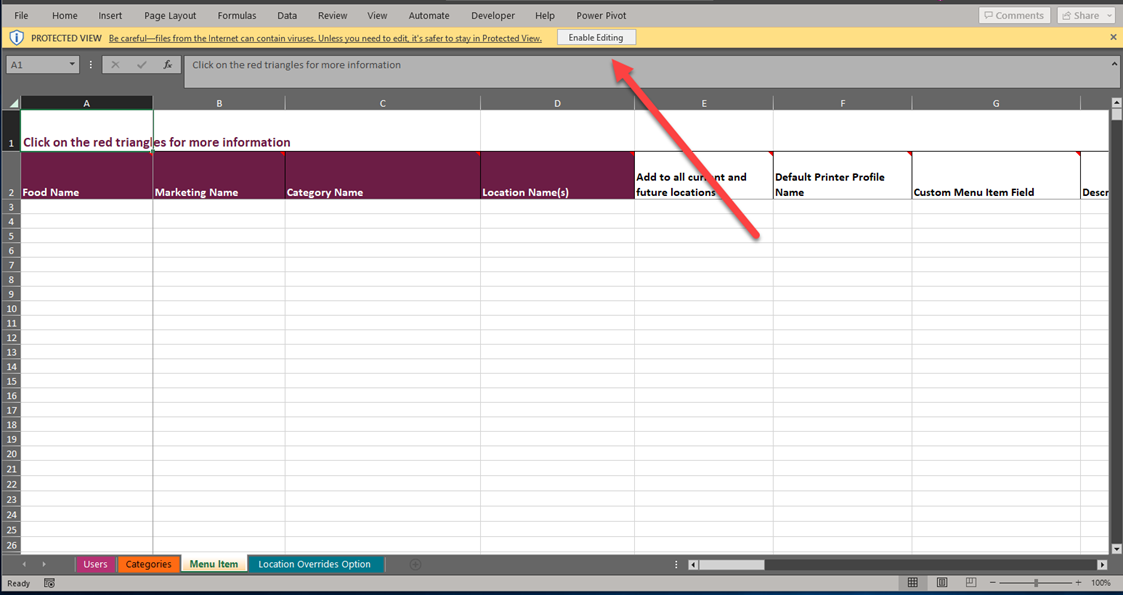
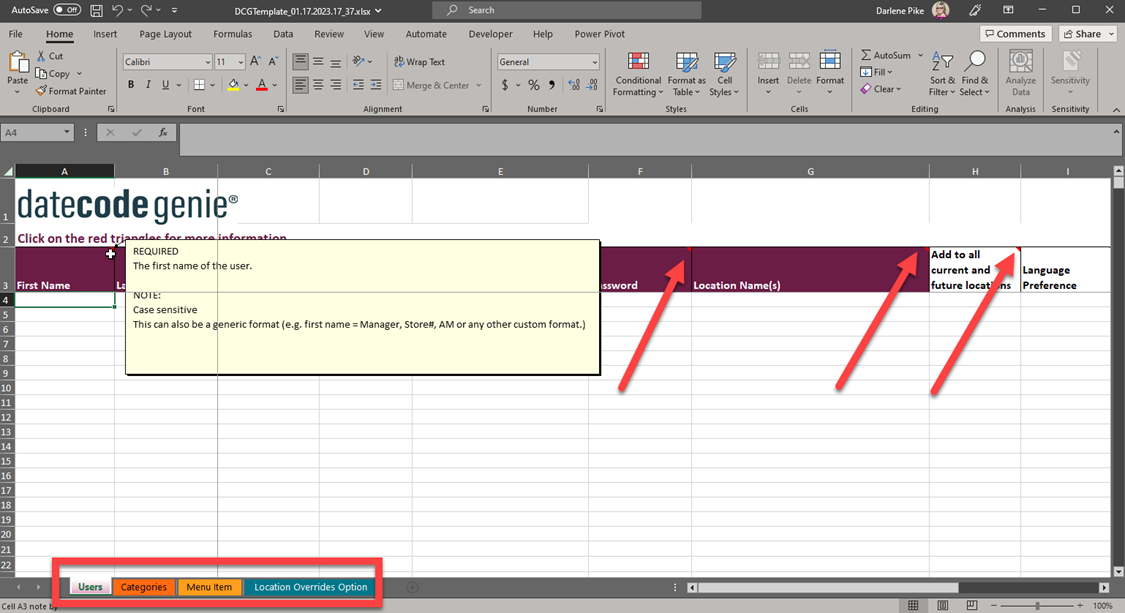
6. Click the tab at the bottom to add the appropriate data to each tab. Click each red triangle for additional instruction. Add data to rows without any blank rows between your data. Data after blank rows is not imported and cannot be formatted to delete the rows. Make sure to copy data to paste higher up to remove blank rows.
NOTE
The mass import template does not generate barcodes. To generate several 12 digit UPC-A barcodes to add to menu items see How to Generate Several Barcodes at One Time
TIPS & TRICKS
To sort your data for easier updating, highlight all cells with data added NOT column headings. Click "Sort & Filter" from the menu bar and "Custom" to select the column to sort by.
7. Save the completed template to your computer. Go to the open import page and click the Choose File button to select the saved template.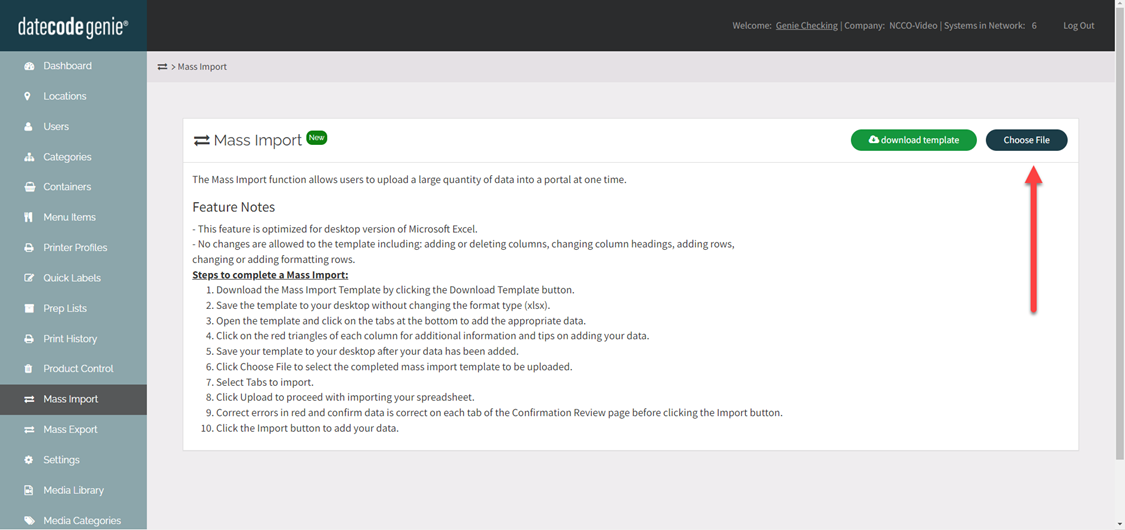
8. The template file name will display. Toggle each tab to Y (orange) to upload the template data to the portal and click the Upload button to begin uploading.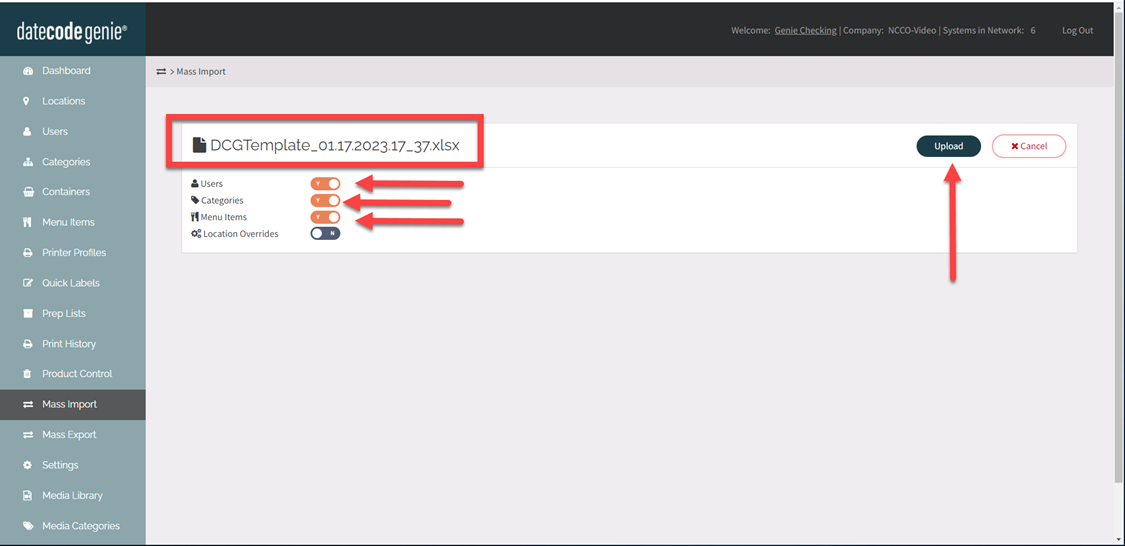
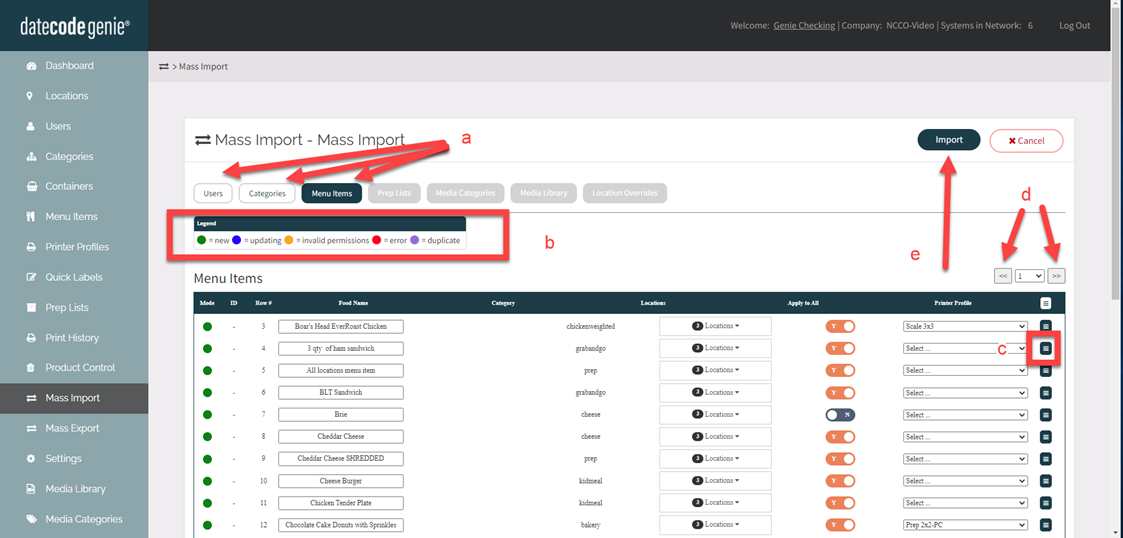
9. Data will display:
- Preview by tab
- Use the legend key for color detail
- Click the three line icon to view additional data for each row
- Click the arrows to change pages
- Click the Import button to confirm and upload to each tab
10. Click the Done button to complete the import and return to the Dashboard tab to see updated data content displayed.