Frozen/Looping Update
Table of Contents
The DateCodeGenie® app is frozen or shows a spinning update wheel on the tablet.
Frozen/Looping Update Troubleshooting
Are you using an integrated printer device, or your own tablet with the mobile app subscription?
1. Verify if the tablet screen is frozen, or just the app.
Try to tap out of the app by hitting any of the buttons on the tablet navigation bar below. If unresponsive, then the tablet is frozen.

2. Close out the DateCodeGenie app.
Steps:
1. Tap the app display button (square icon).

2. Hold the app and swipe left or right to close, which forces the DateCodeGenie application to quit.
NOTE
For some tablet models, users may close all apps by tapping Clear All, pressing the X on the app, or swiping up to close apps.

3. Reopen the app and try to log in again.
3. Verify internet connection status
Wi-Fi
Connect Device to Wi-Fi
Connecting your DateCodeGenie® device to Wi-Fi is easy and only takes minutes. Be sure your tablet is charged and turned on.
NOTES
- These steps are for DateCodeGenie® devices with integrated printers devices only. For mobile app users, refer to your tablet's manufacturer information for tablet setup assistance.
- Contact your company for correct network and password requirements.
- See Setting Up Specific or Hidden Wi-Fi to connect to hidden networks.
Steps:
1. Tap the home button (circle icon or house icon) at the bottom of the tablet to return to the tablet home screen.
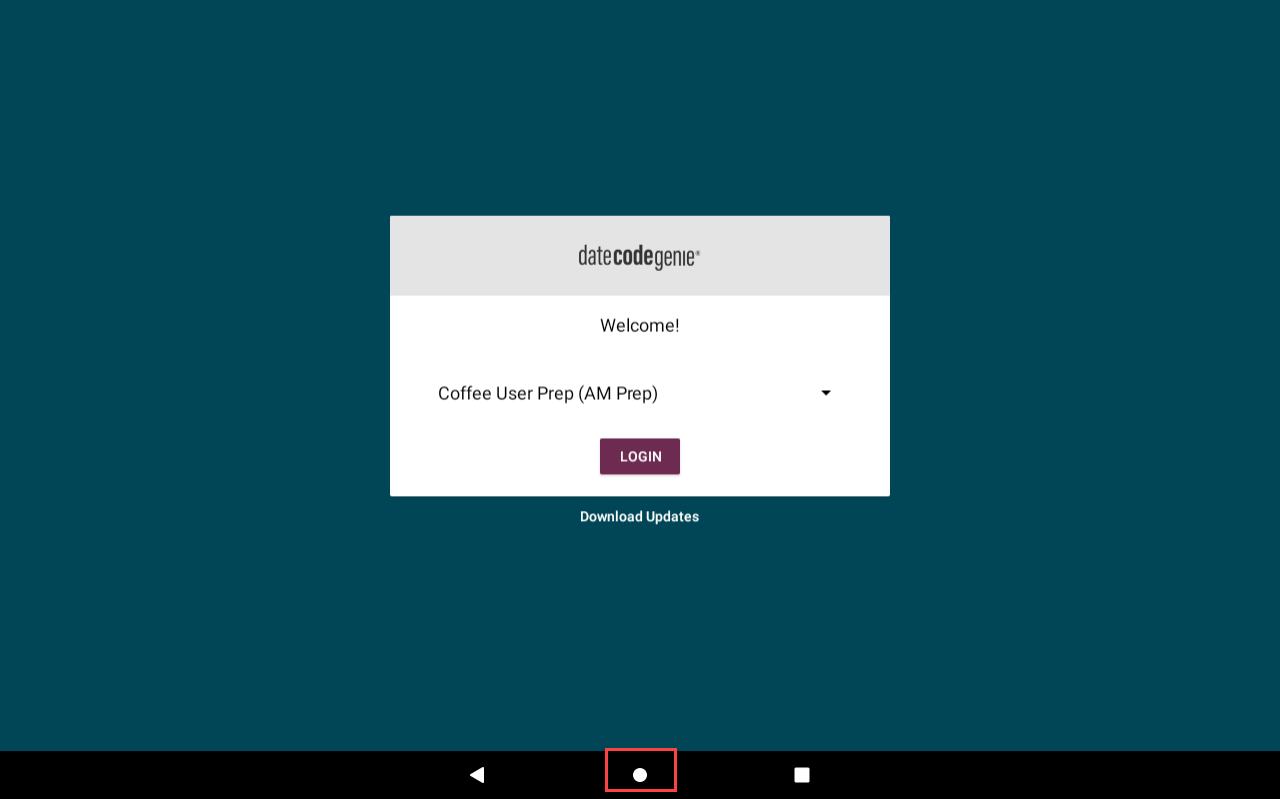
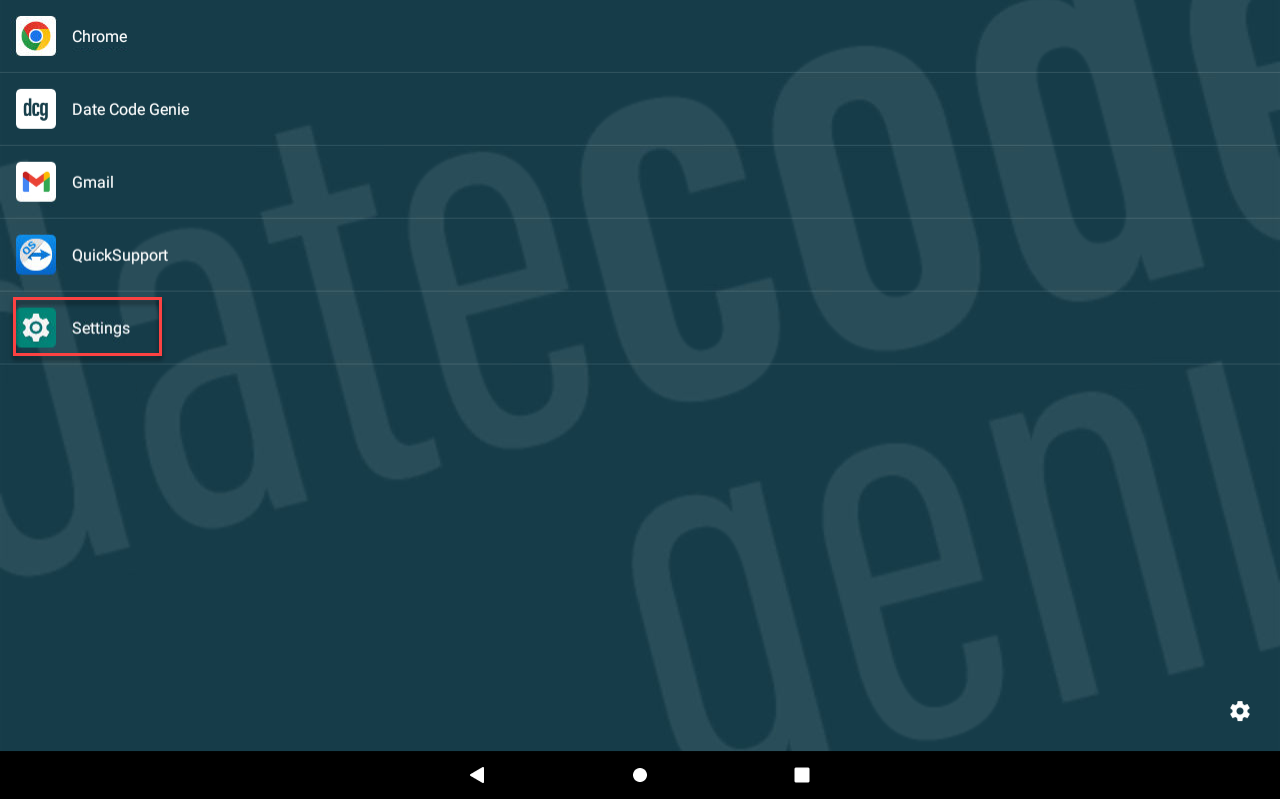
2. Tap Settings.
NOTE
If Settings does not display on the app list, see Using KioskHome for Tablet Access
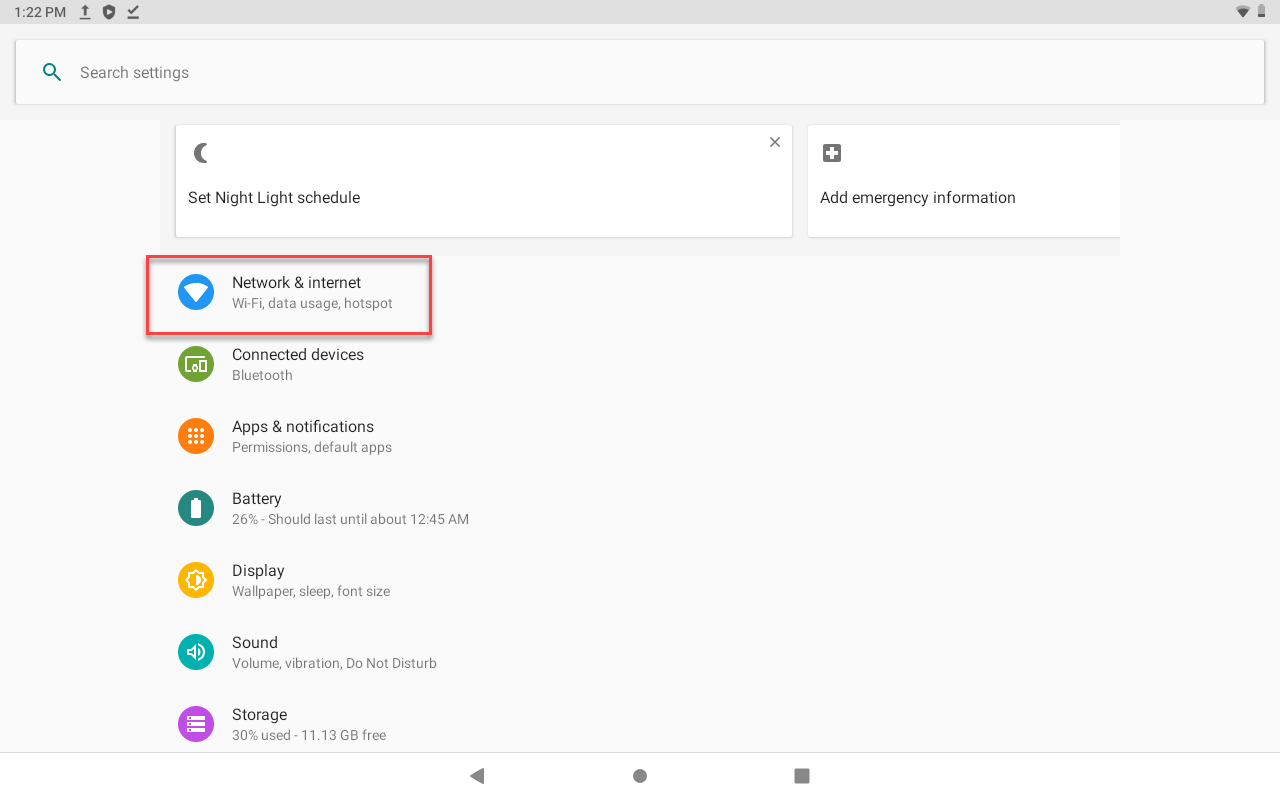
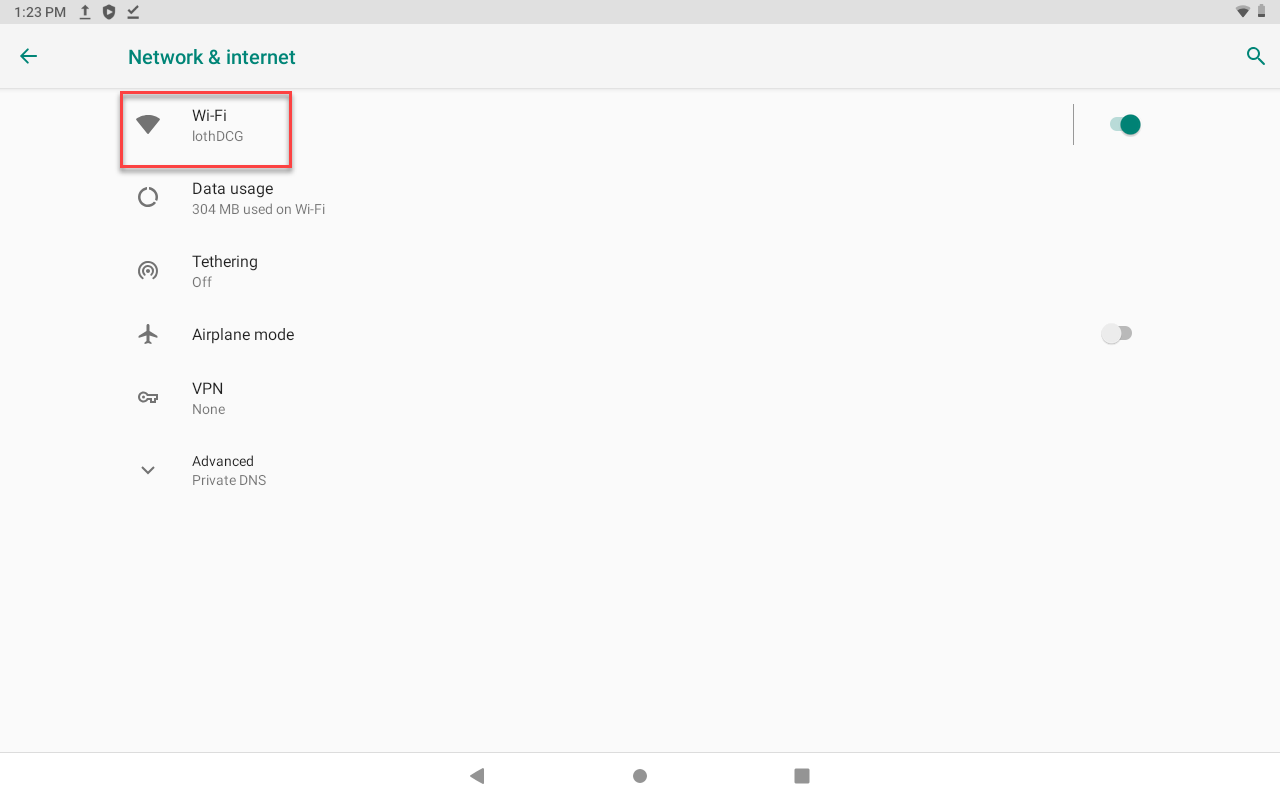
3. Tap Network & Internet.
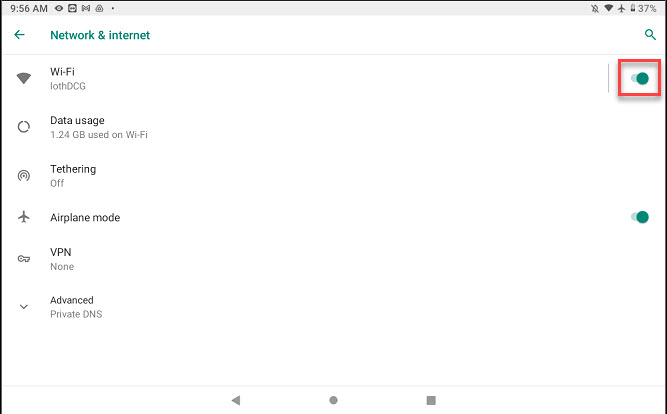
4. Tap the Wi-Fi toggle to turn green.
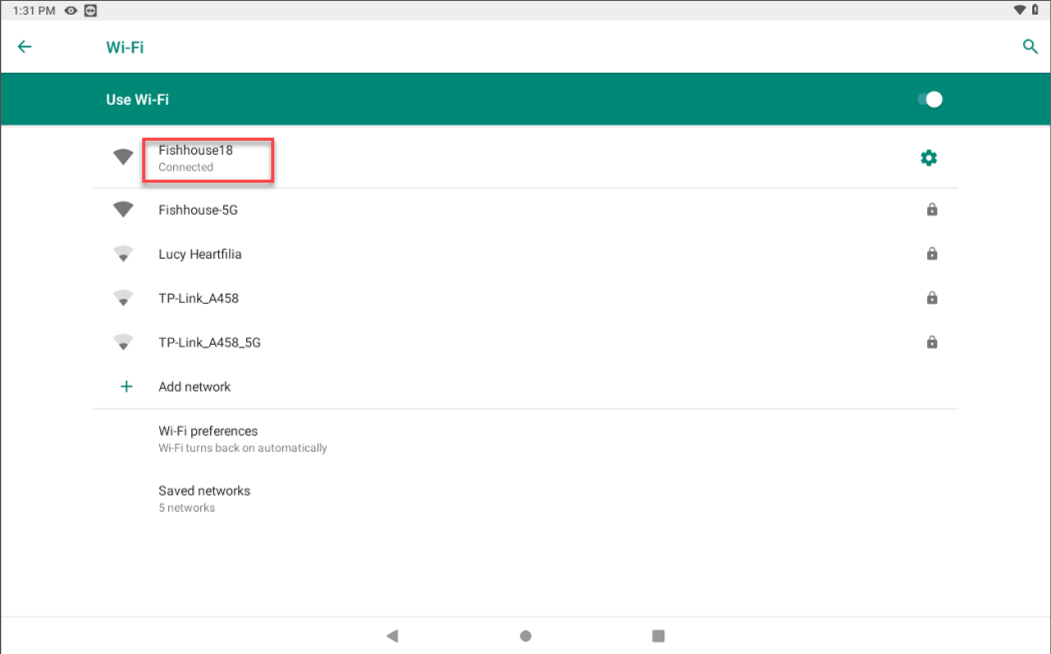
5. Tap Wi-Fi to display the network list and select your network.
6. Connected will display when successfully connected. Tap the home button to return to the home screen.
NOTE
Not connecting to Wi-Fi? See Incorrect Date and Time or Wi-Fi Authentication for Guest or Public Networks. Contact your company for assistance with connection to your network.
Ethernet
Connect Device to Ethernet
NOTE
This article is for DateCodeGenie® devices with integrated printers or Lite model device tablets only. For mobile app users, refer to your tablet's manufacturer information for tablet setup assistance.
Connecting your device to Ethernet is very easy and only takes minutes. Be sure your tablet is charged and turned on before connecting.
WARNING
X Series model devices were manufactured with a USB port on the back. Please confirm your device does indeed have the USB port. See X Series Model Device, step 1.
Required Model Devices:
X Series Model Device
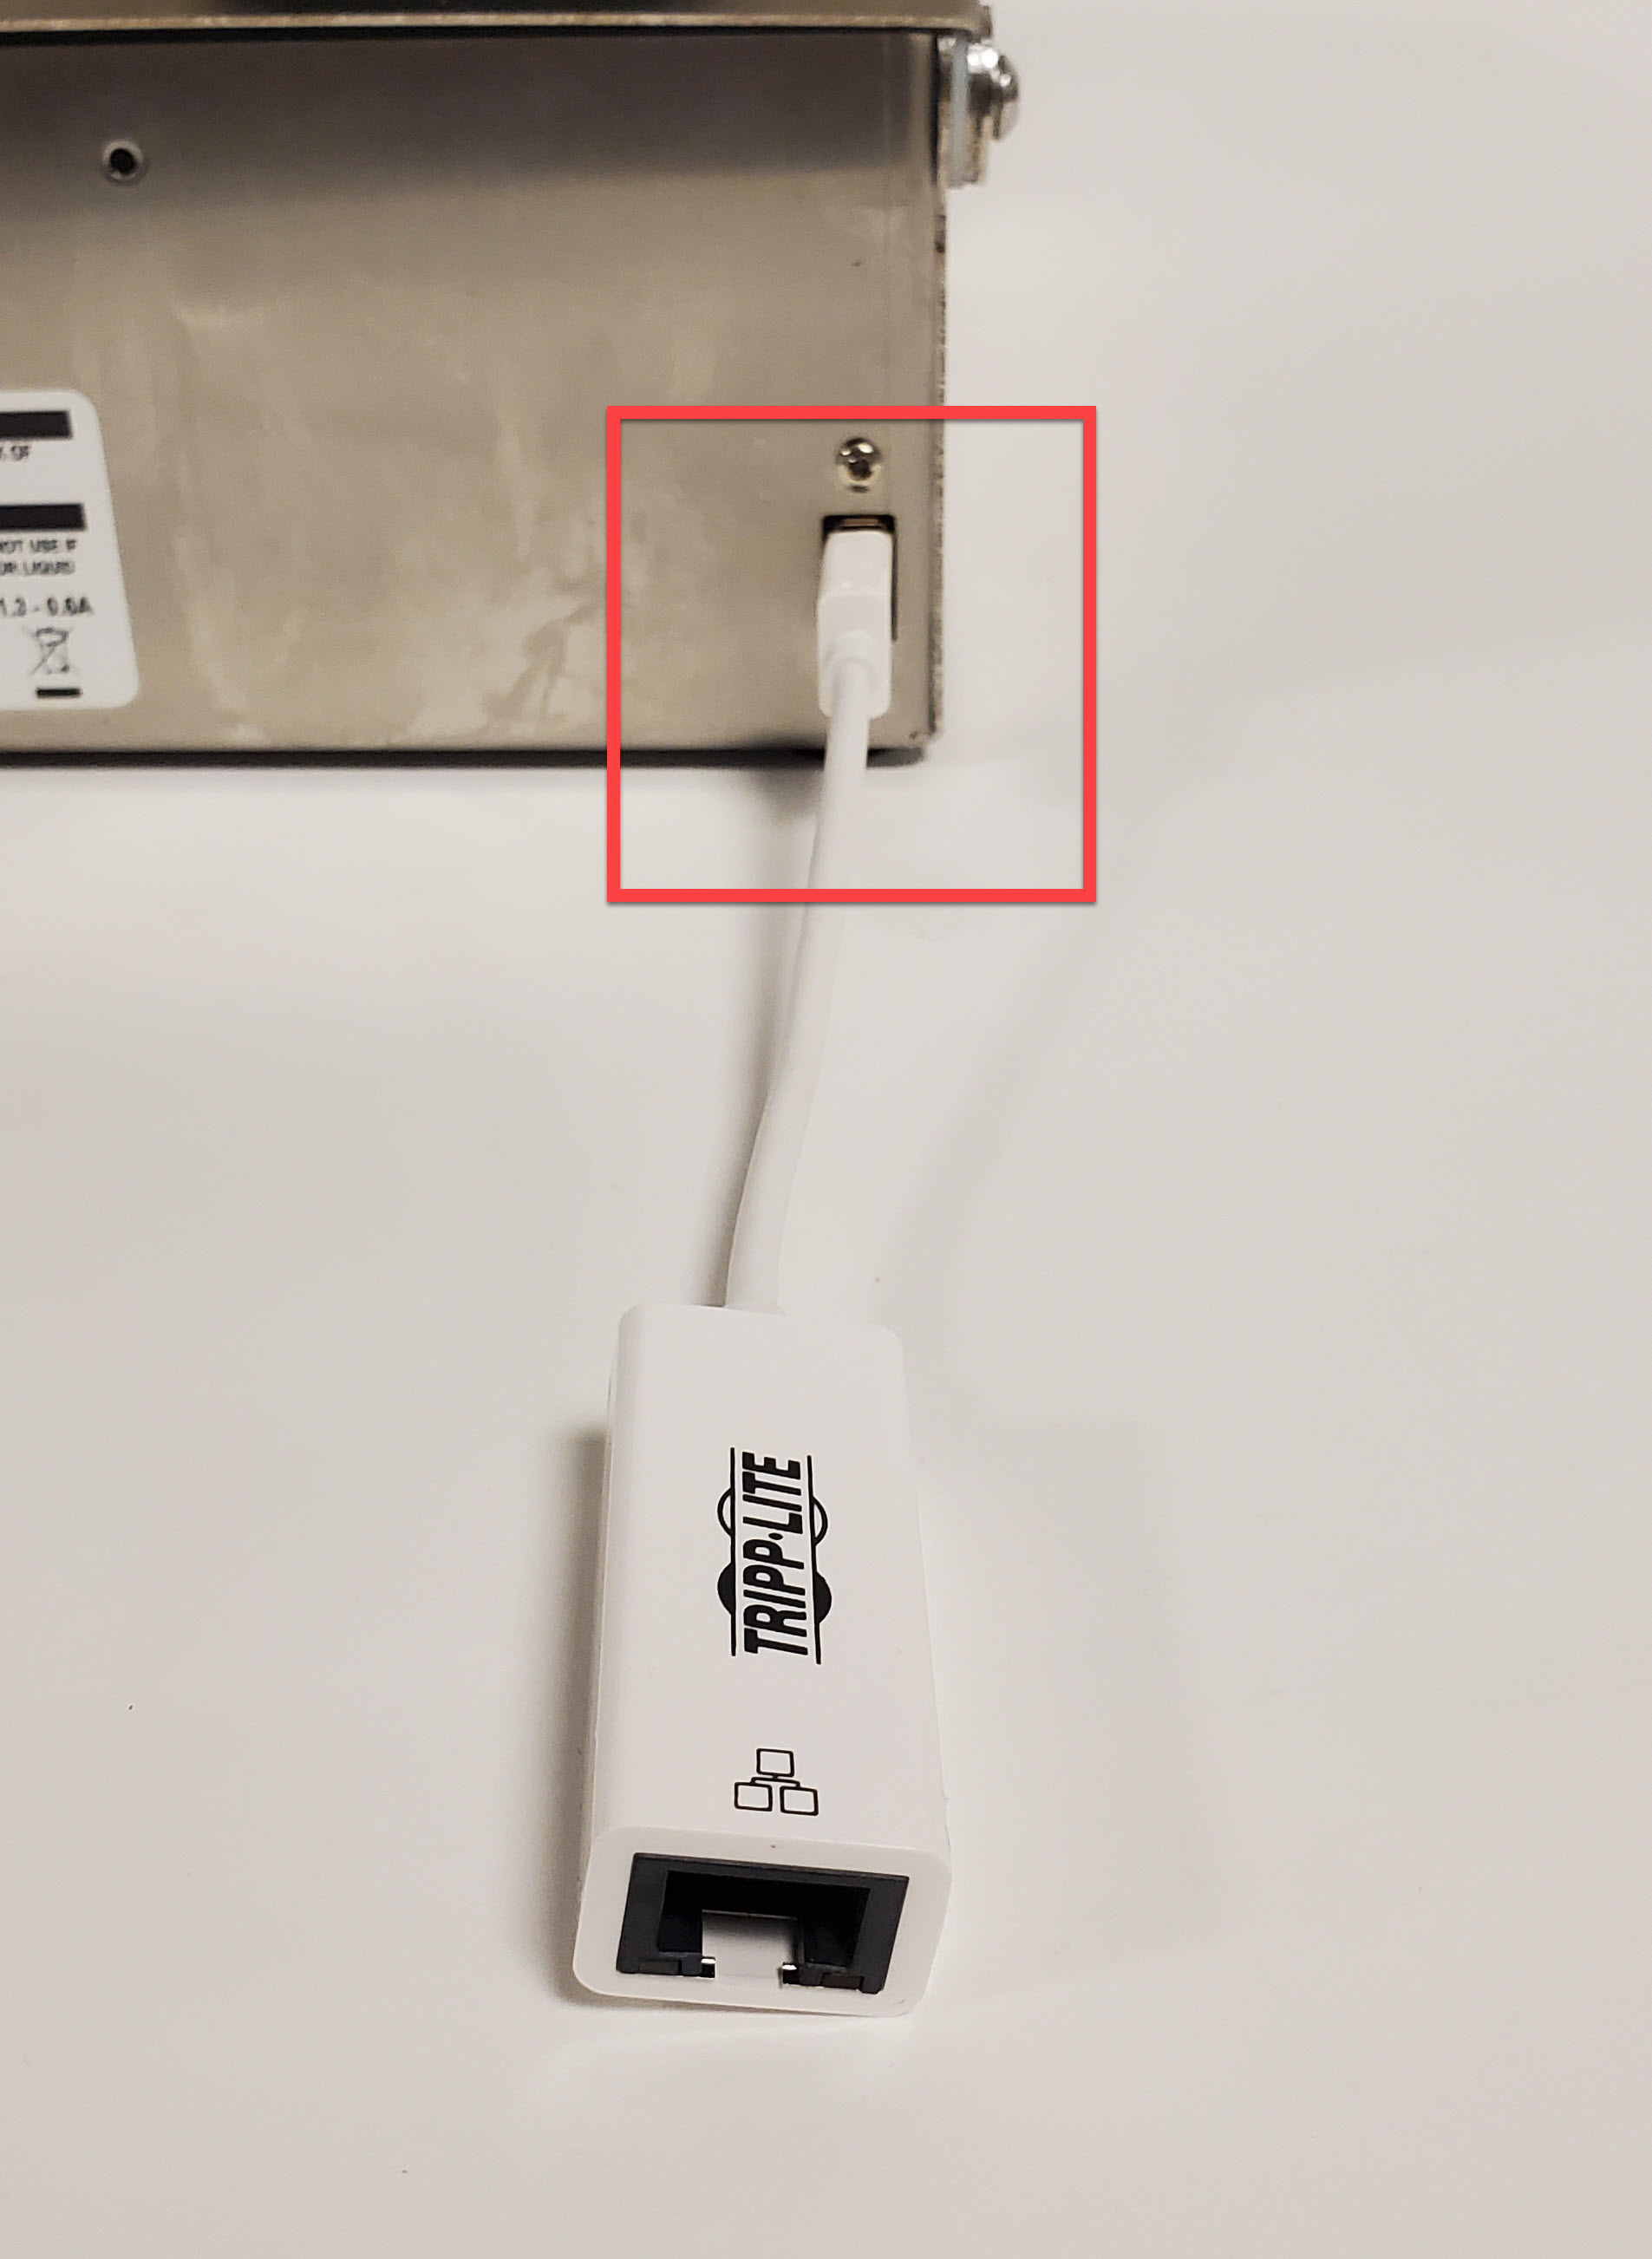
1. Pinch and remove the USB cap (black) from the USB port located on the back of the device.

2. Plug in the USB Ethernet adapter into the USB port. Go to https://store.ncco.com/ to purchase USB Ethernet adapter (purchased separately).
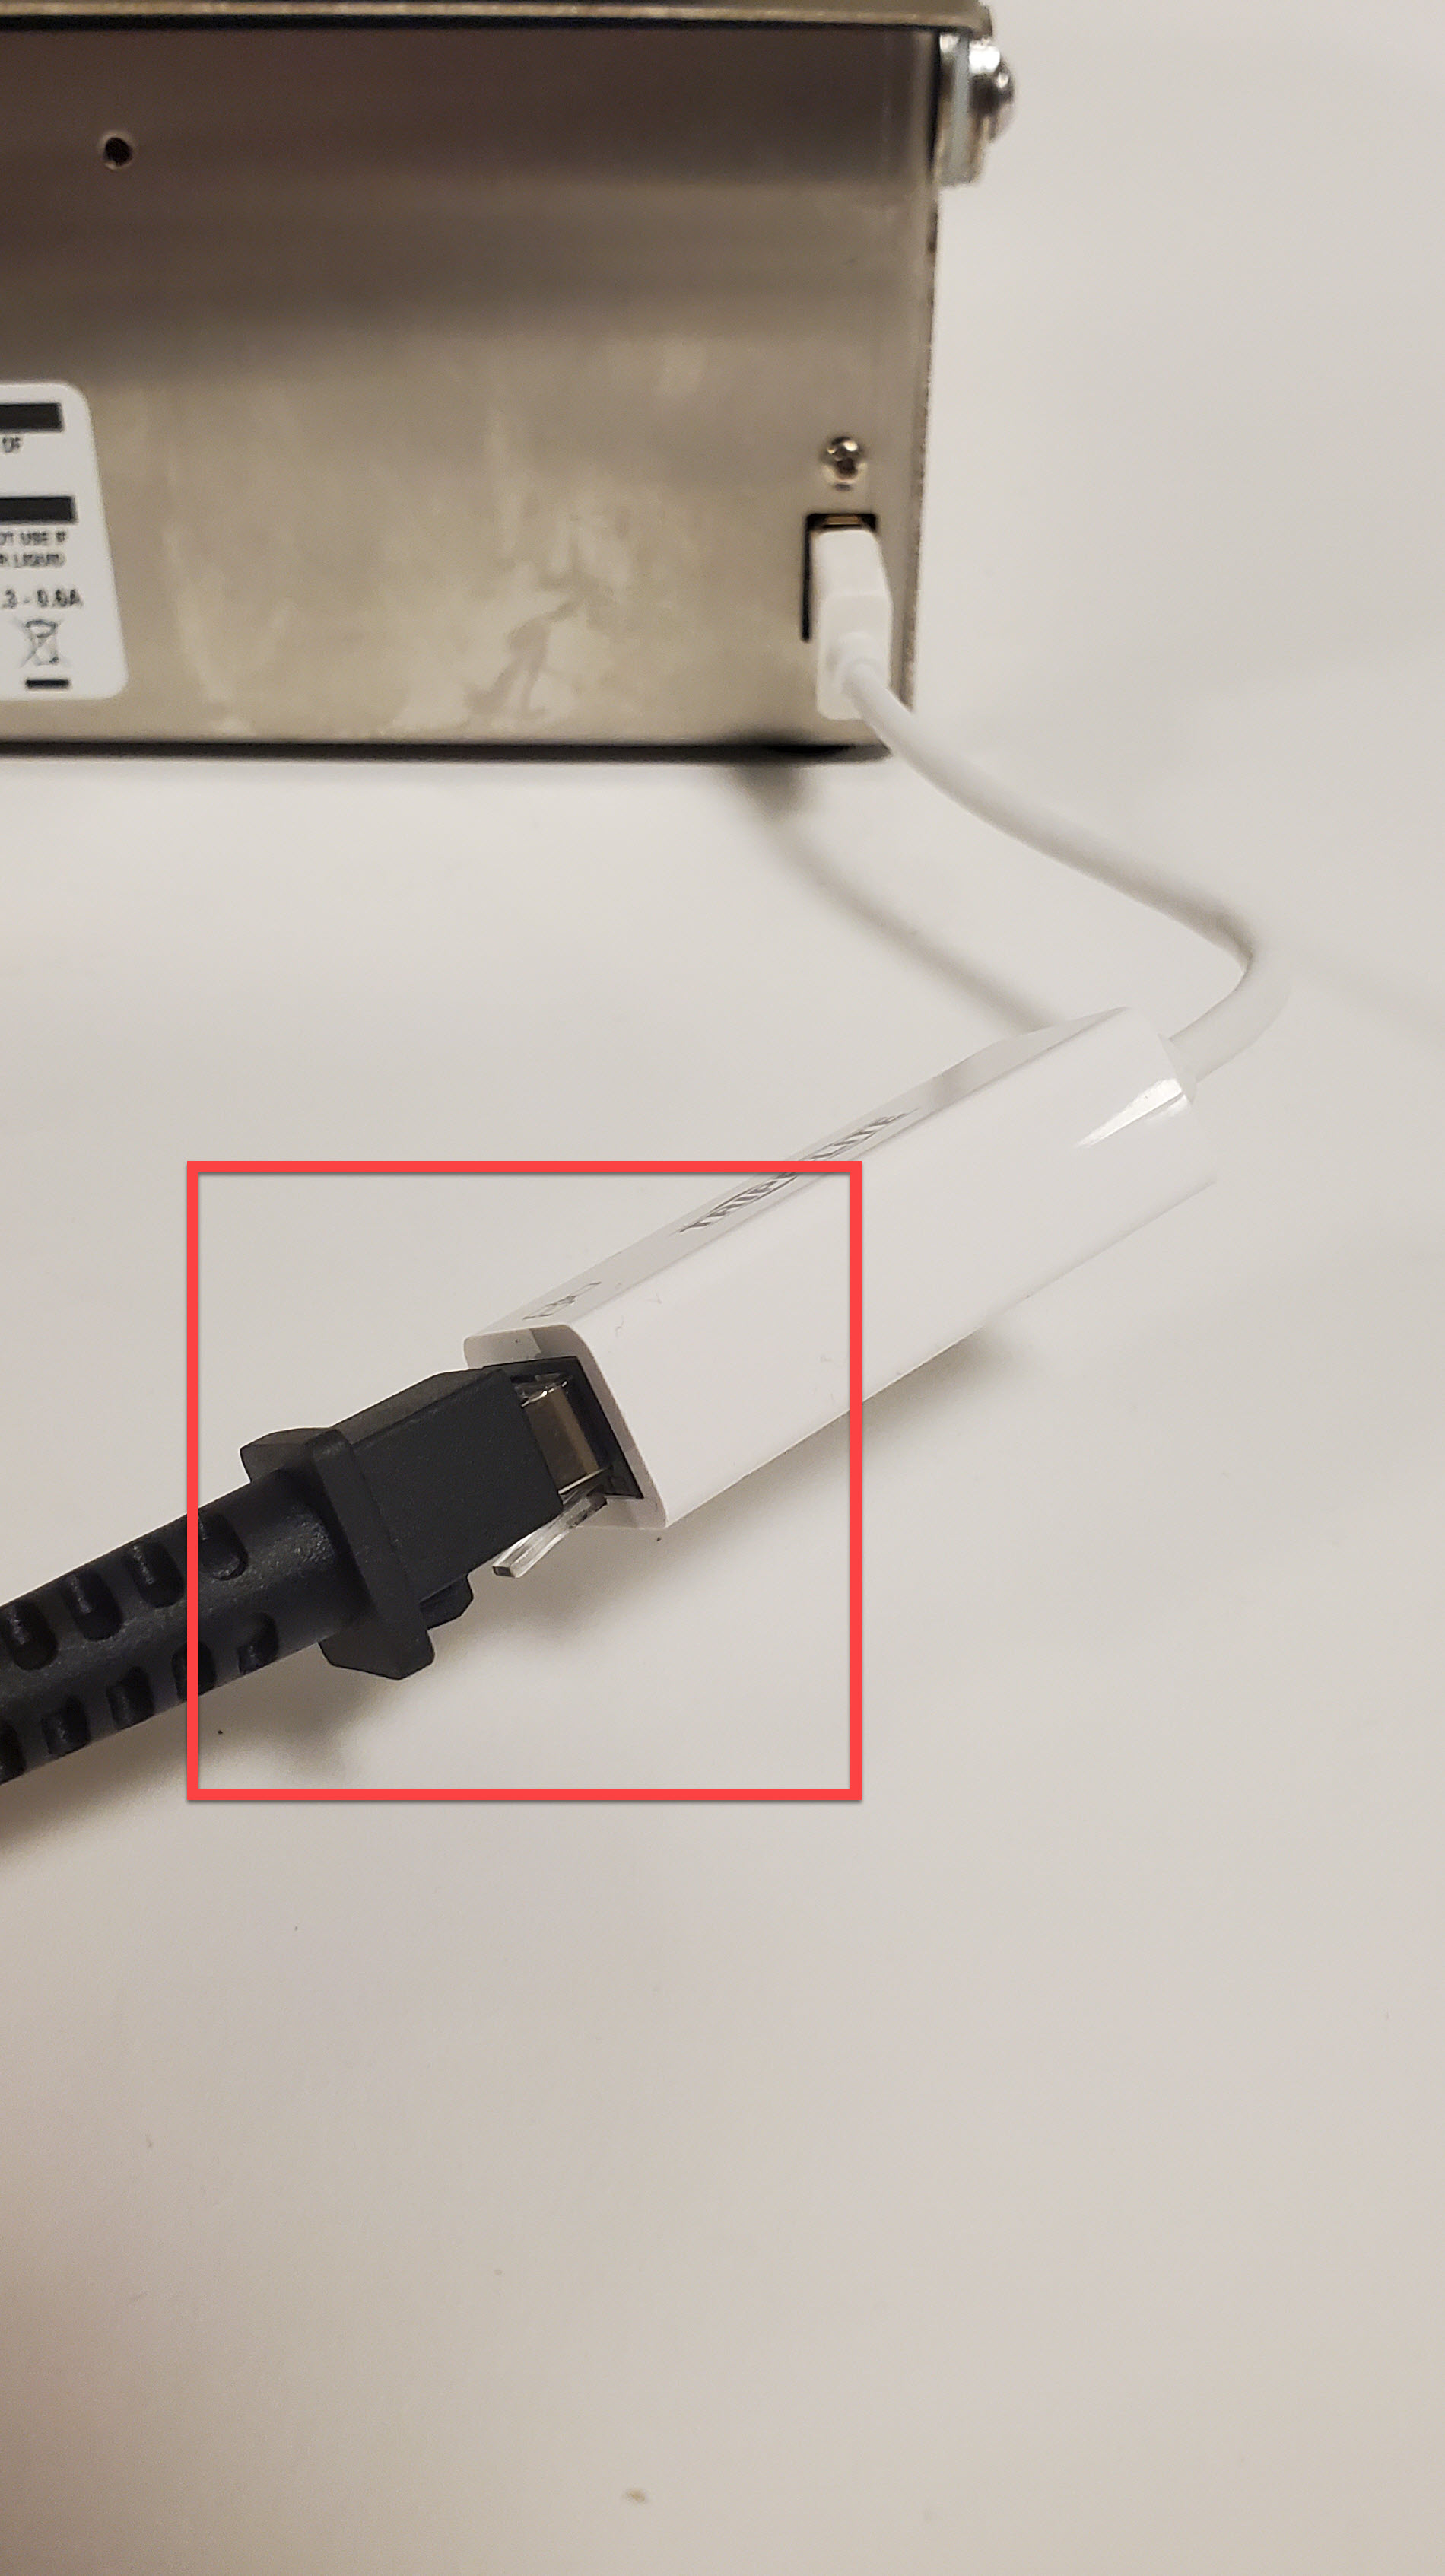
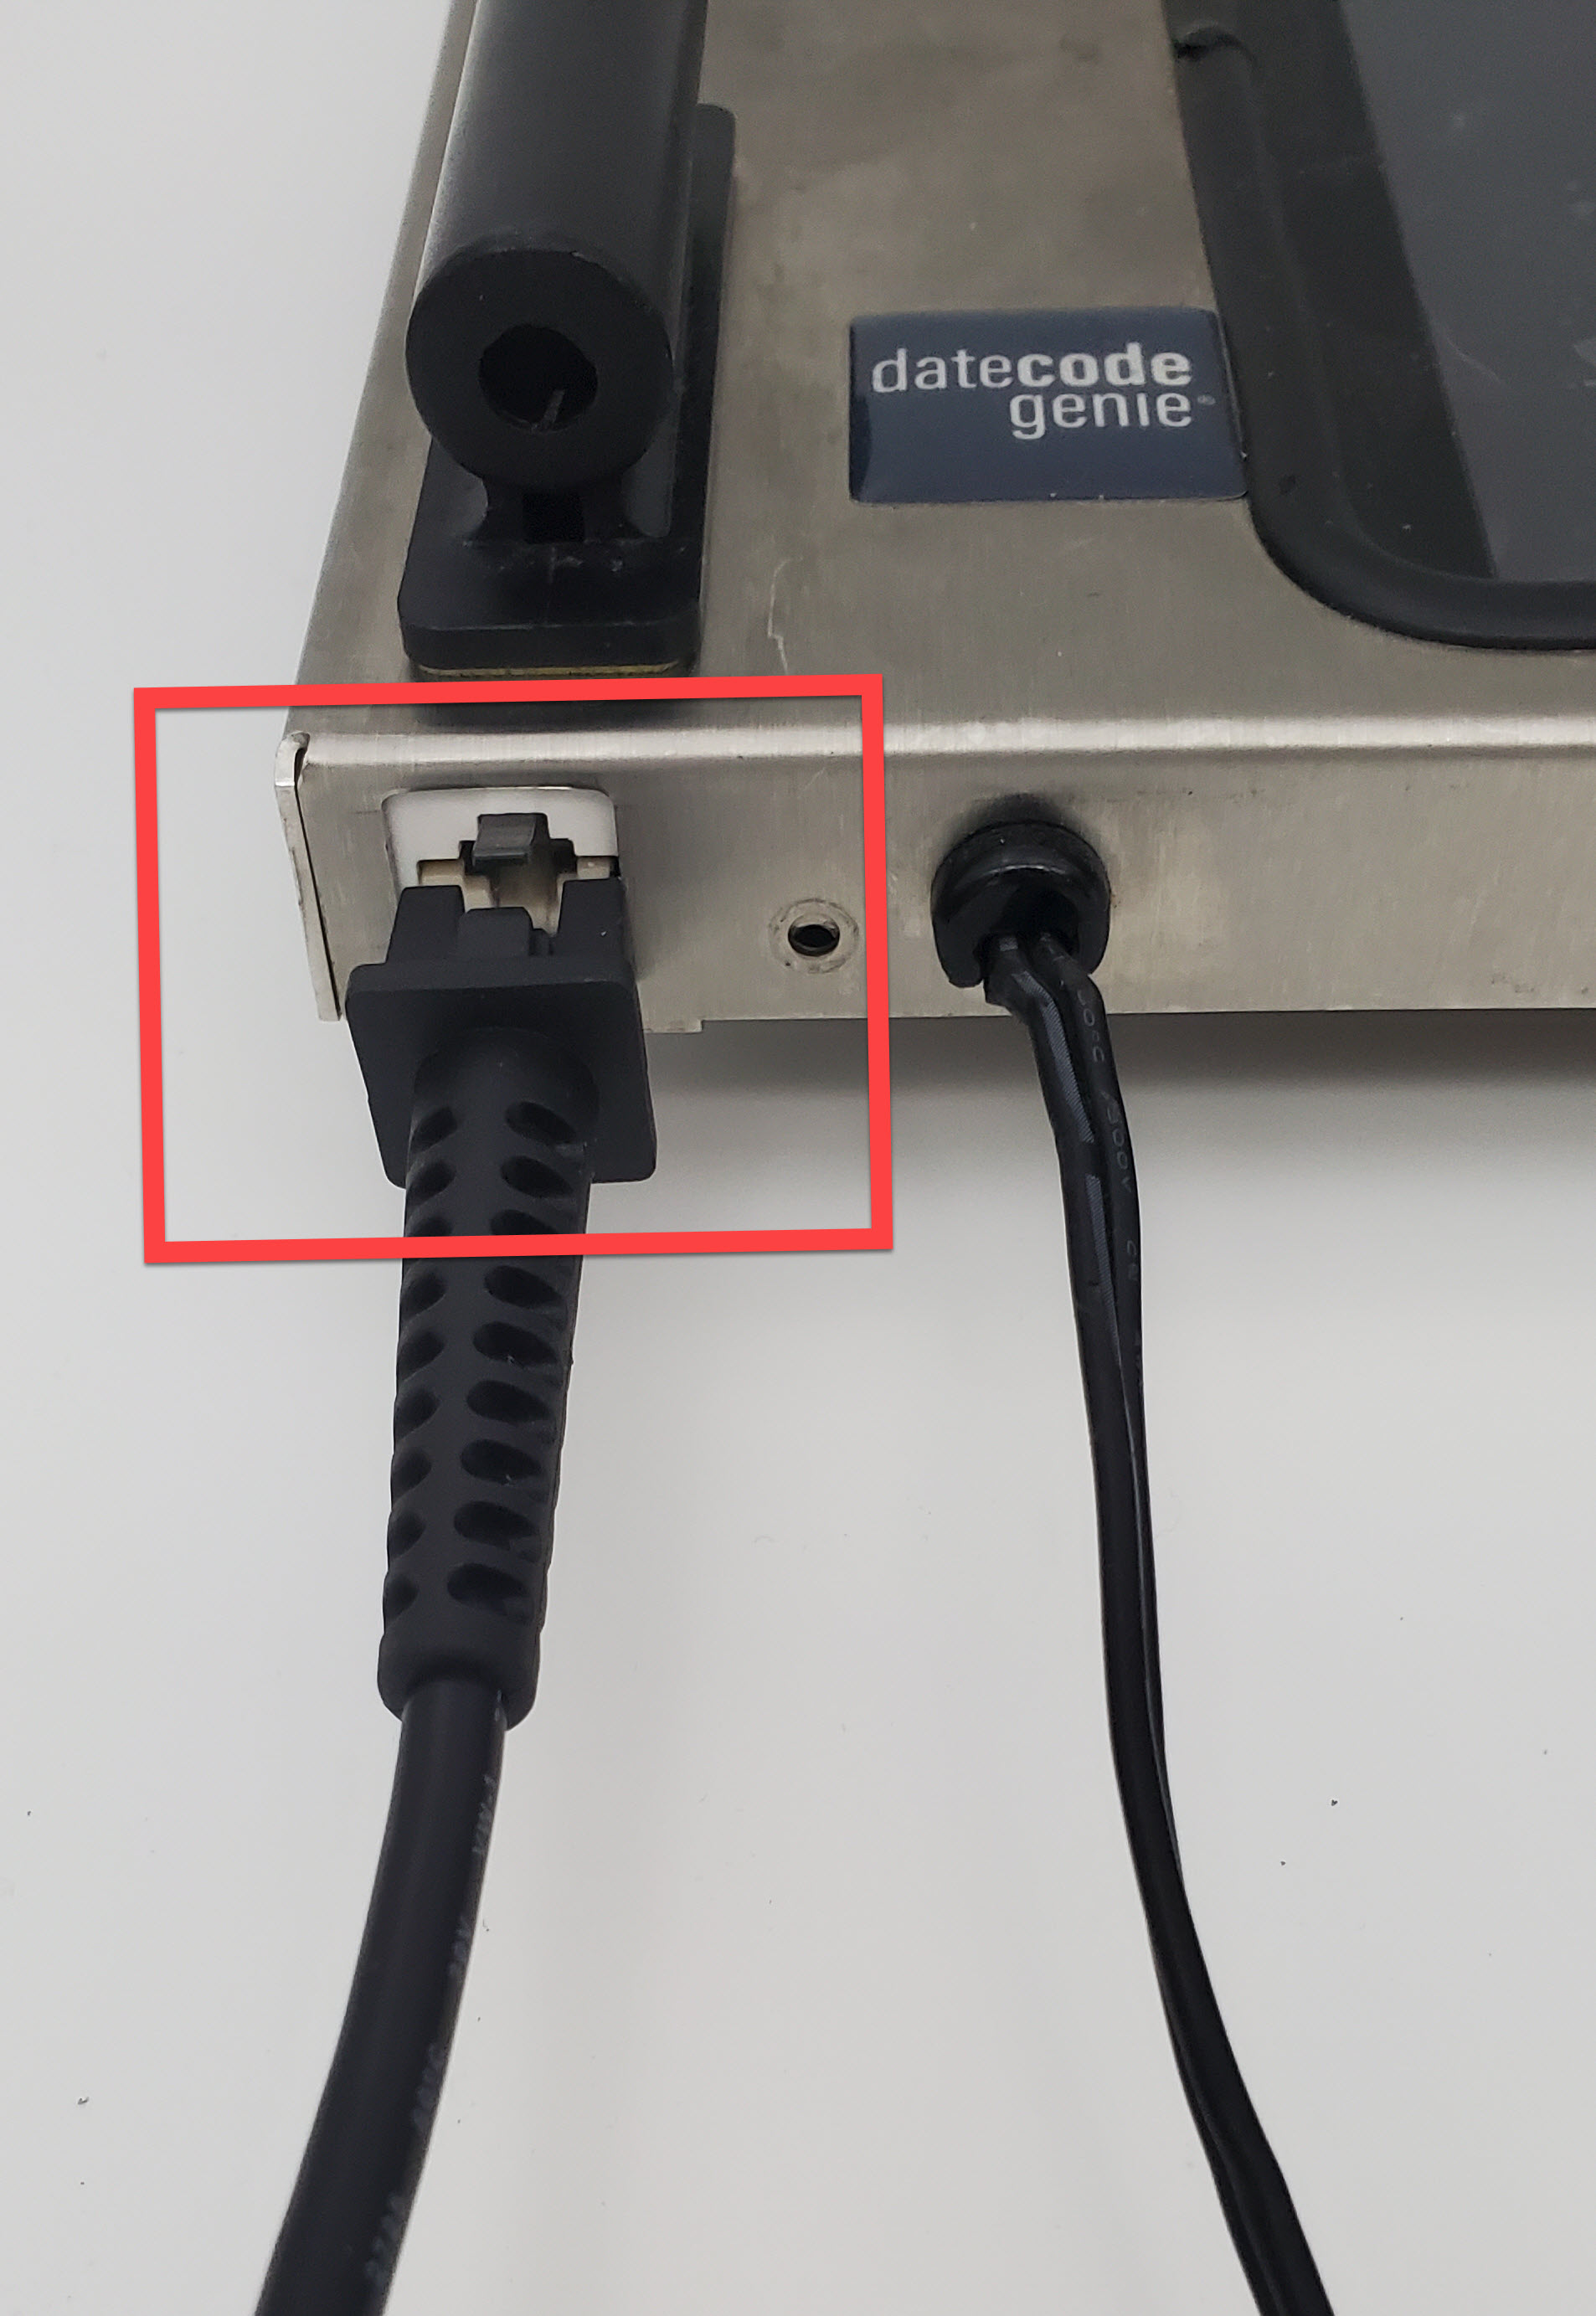
3. Pluseparg in the Ethernet cable into the Ethernet port of the adapter.
Fit Model Device
1. Plug in the Ethernet cable into the Ethernet port.
4. Check date and time.
Incorrect Date and Time
If the date and time is incorrect on the tablet or the DateCodeGenie® app, your tablet may:
- Not connect to Wi-Fi
- Display an error 600 message
- Print the incorrect dates on your labels
NOTE
- These steps are for DateCodeGenie devices with integrated printers devices only. For mobile app users, refer to your tablet's manufacturer information for tablet setup assistance.
- Verify if the date and time are incorrect by launching the Chrome browser.
Steps:
1. Tap the home button (circle or outline of house icon) at the bottom of the tablet to return to the tablet home screen.

2. Scroll to Settings (gear icon) and tap to open.
NOTE
If Settings is not displayed in the left column of tablet home screen, tap Optional Settings (gear icon) in the bottom right corner of the touchscreen to access DCG KioskHome. Access Manager Settings, learn more about Using DCG KioskHome for Tablet Access

3. Scroll and tap System to open.
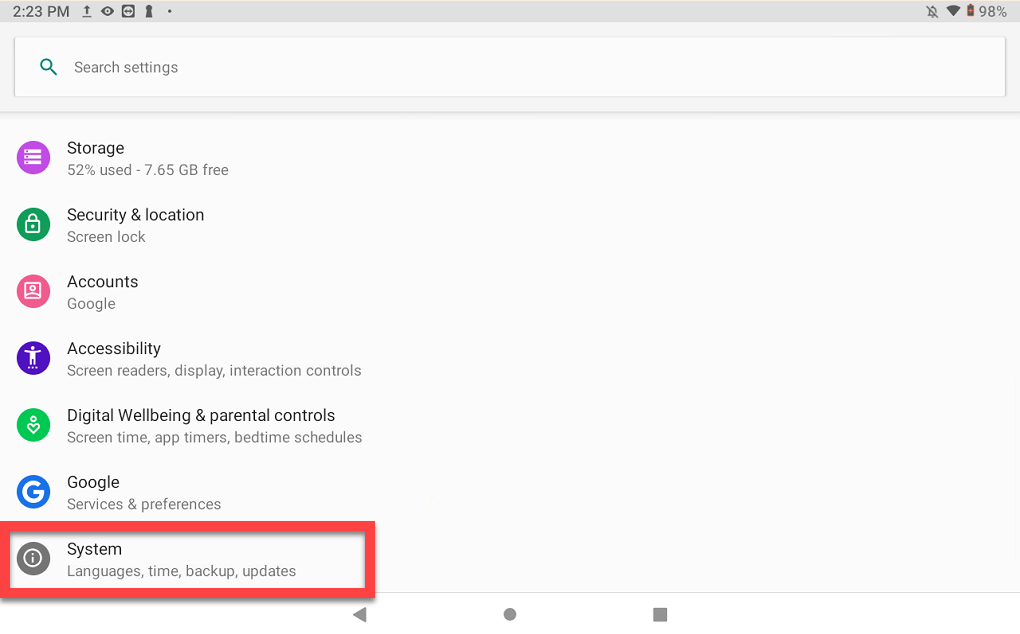
4. Tap Date & Time and tap Automatic date & time to turn Off.


5. Configure Set date, Set time and Select time zone for your area.

6. Tap Automatic date & time again and tap Use network-provided time.

7. Tap the home button to return to the tablet home screen.
8. Tap the DateCodeGenie app to open, download updates or log in to the app to download updates, and begin printing.
5. Restart the tablet.
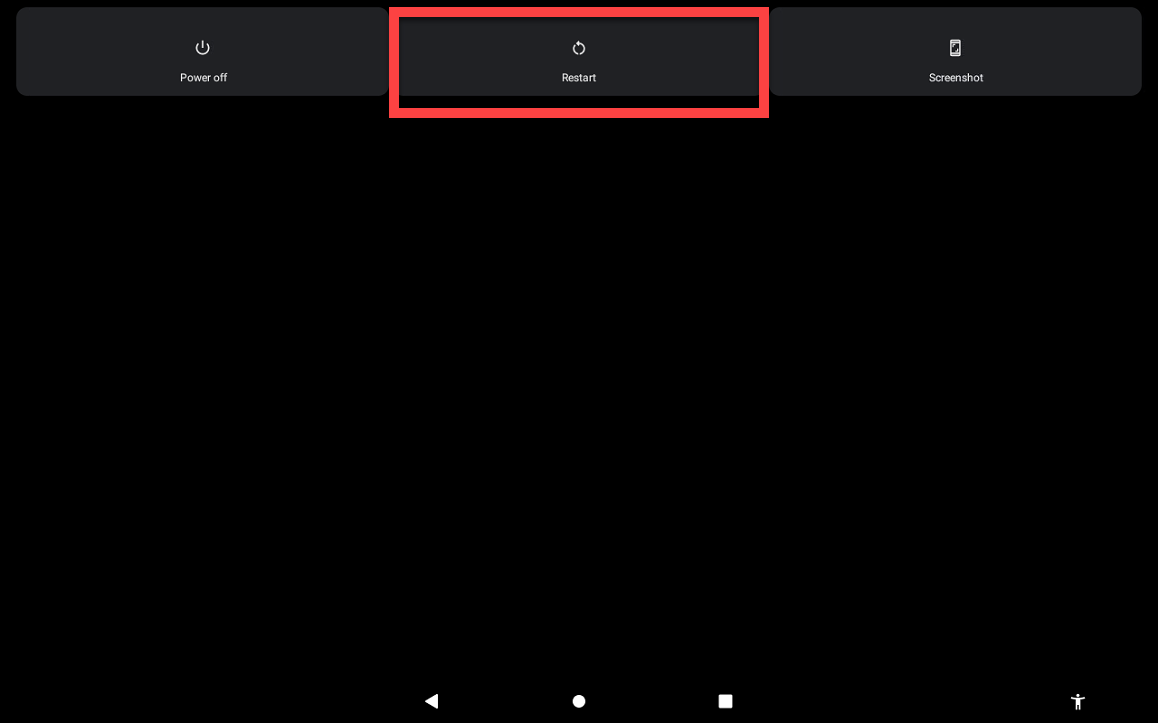
Restart the tablet by holding the tablet power button for two seconds, then selecting Restart.
6. Forget and reconnect to SSID.
If using a specific or hidden Wi-Fi network, forget and reconnect.
NOTE
Have your SSID and password on hand. Contact your company for this information if unknown.
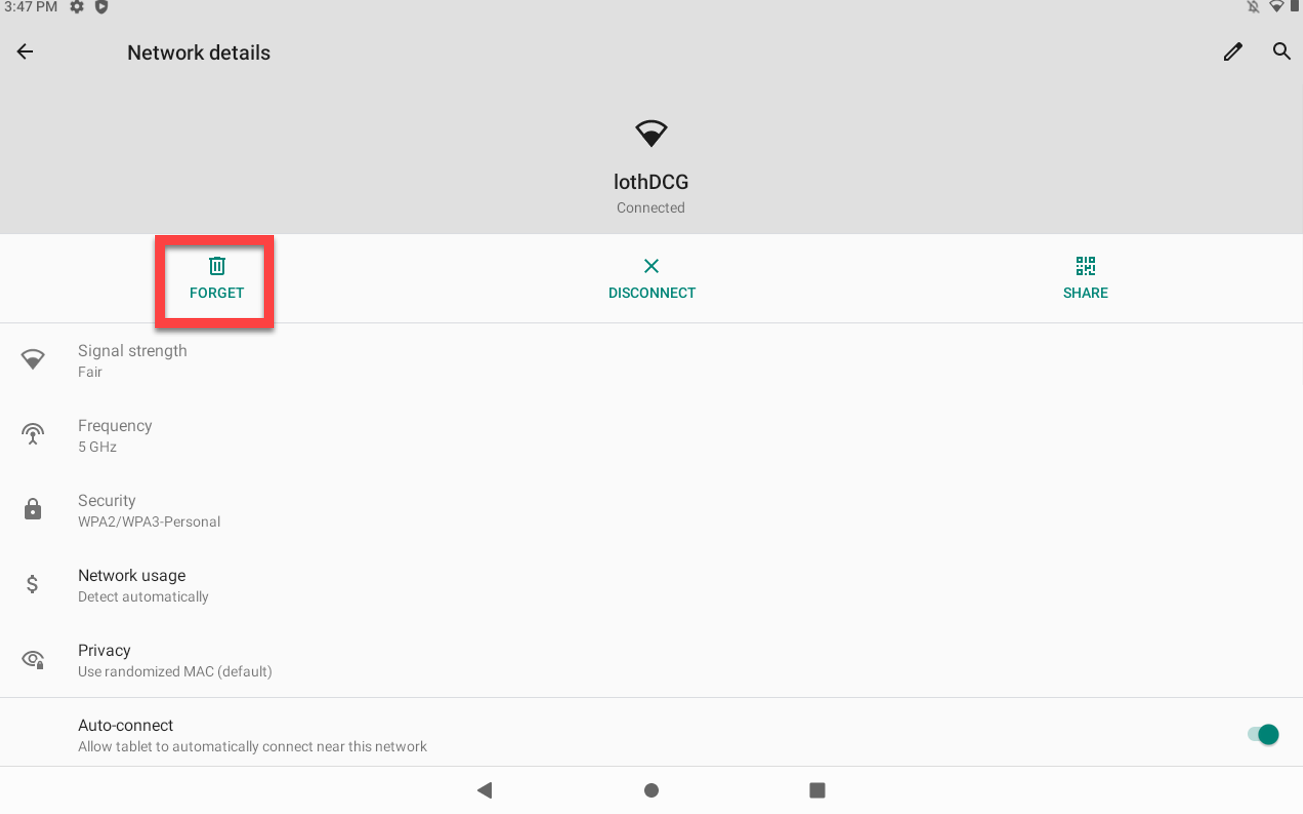
1. Forget SSID
1. Tap Settings.

2. Tap Network & Internet.

3. Tap Wi-Fi.

4. Tap the network you are using.
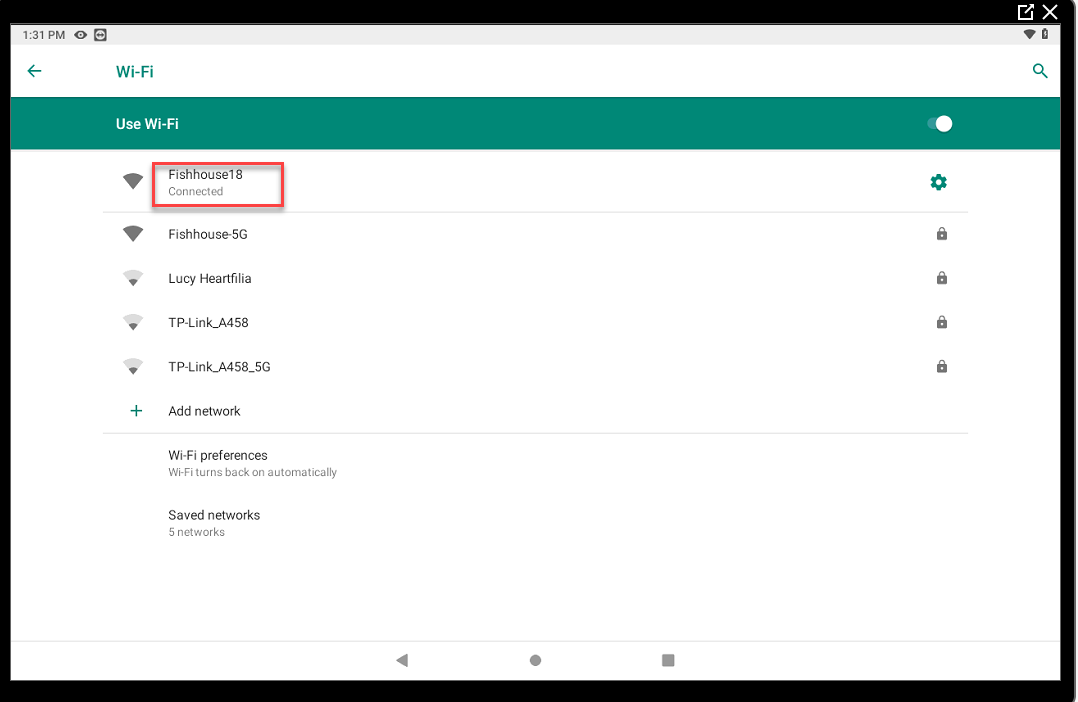
5. Tap FORGET.
2. Reconnect so specific or hidden Wi-Fi
Set Up Specific or Hidden Wi-Fi
Set up a specific or hidden Wi-Fi network on your DateCodeGenie device.
NOTES
- This article is for DateCodeGenie® devices with integrated printers or Lite model device tablets only. For mobile app users, refer to your tablet's manufacturer information for tablet setup assistance.
- Contact your company for the SSID and password.
Steps:
1. Tap the home button (circle icon or house icon) on the bottom of the tablet display to return to the tablet home screen.

2. Tap Settings.

3. Tap Network & Internet.

4. Tap Wi-Fi.

5. Tap Saved networks.
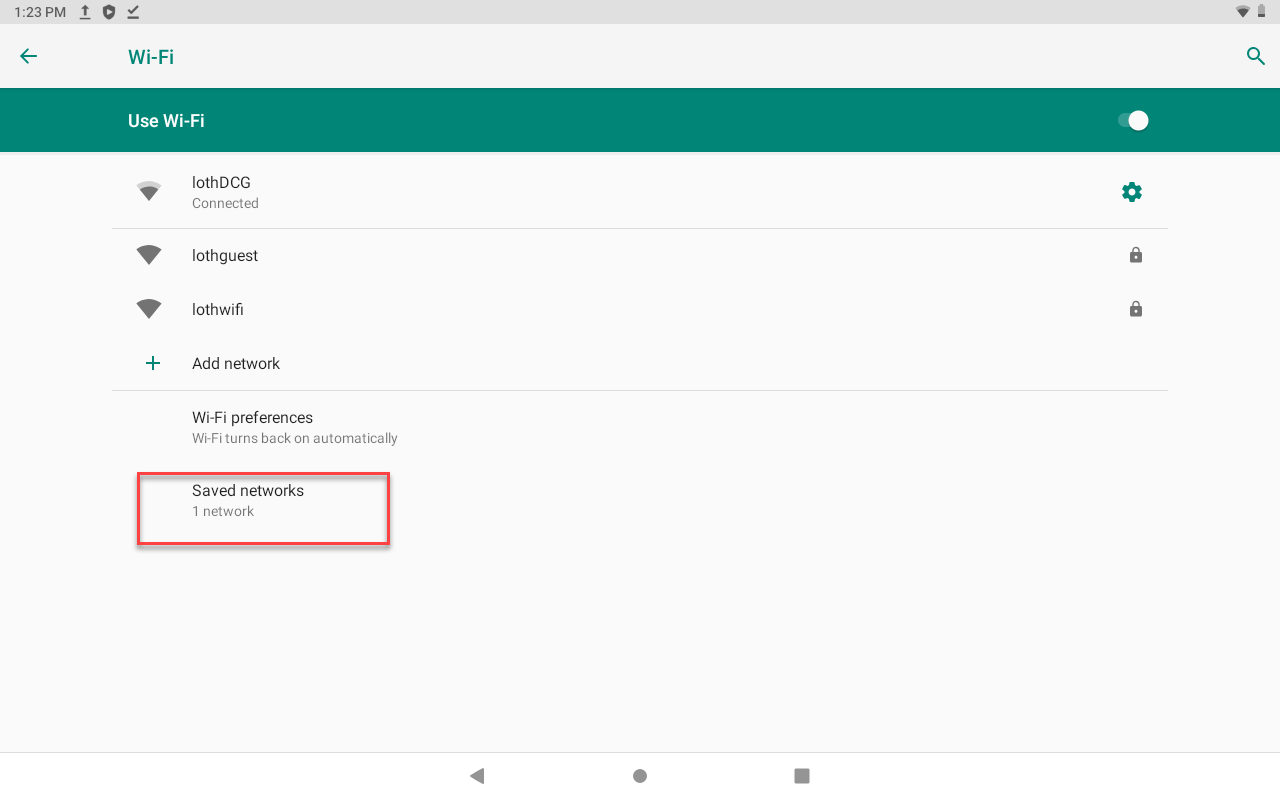
6. Tap Add network.
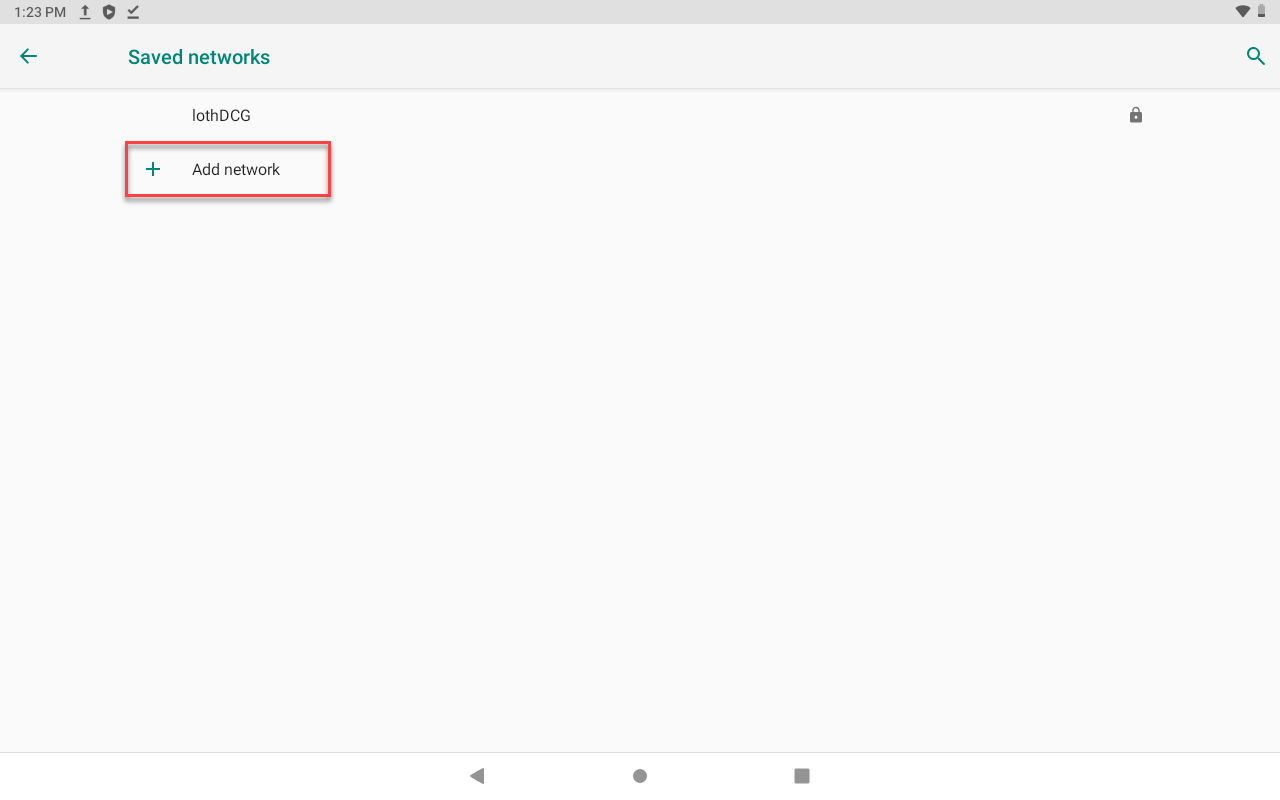
7. Type the SSID.
NOTE
SSIDs are case sensitive
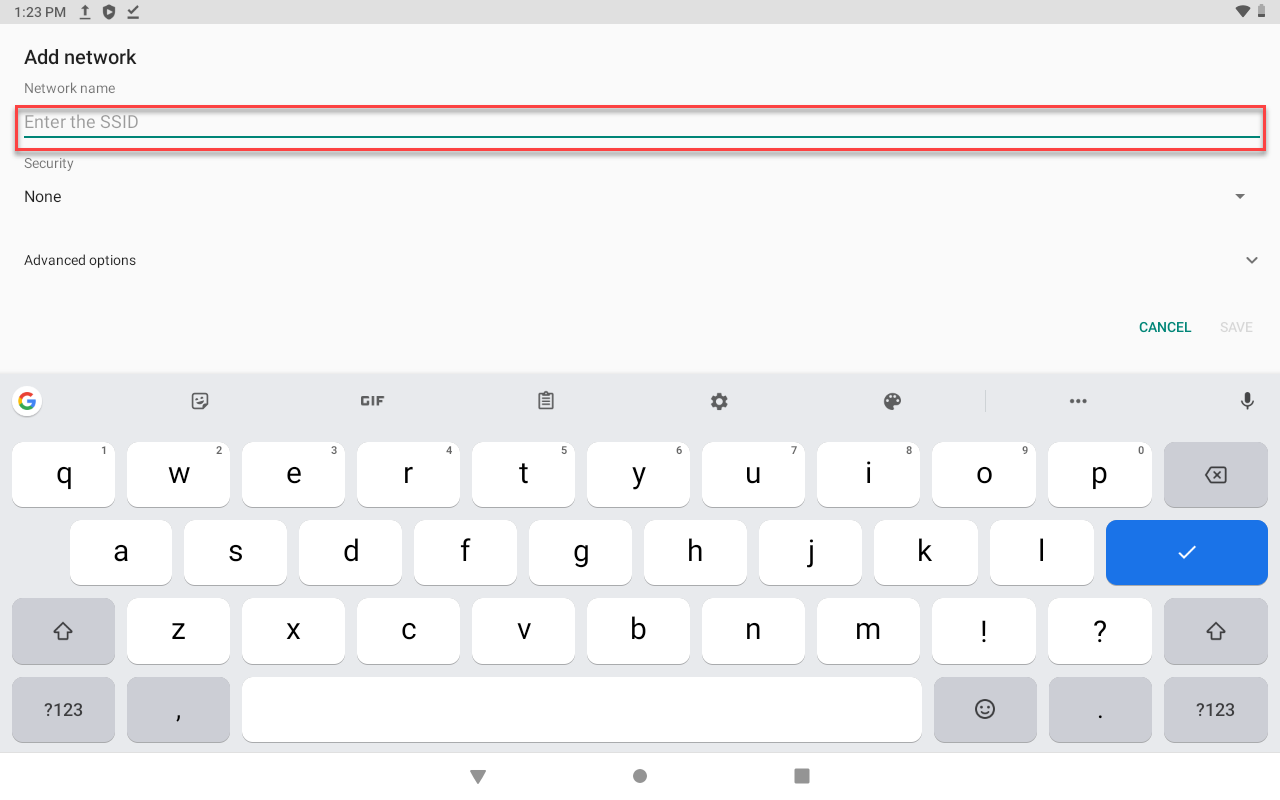
8. Tap Security and select your Wi-Fi's wireless security protocol to type in password.
NOTE
The most common protocol is WPA/WPA2 PSK. If you're unsure which to select, contact your company's IT department for assistance.
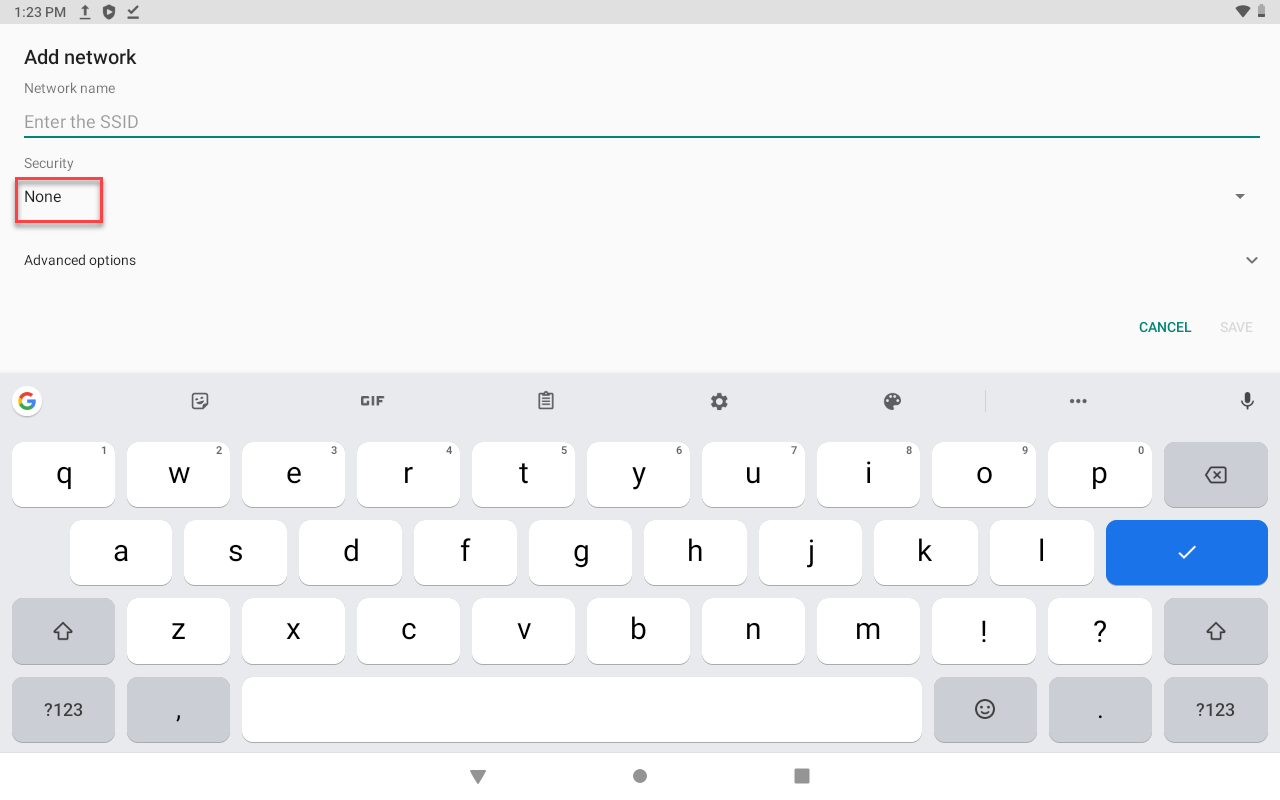
9. Tap Advanced Options.
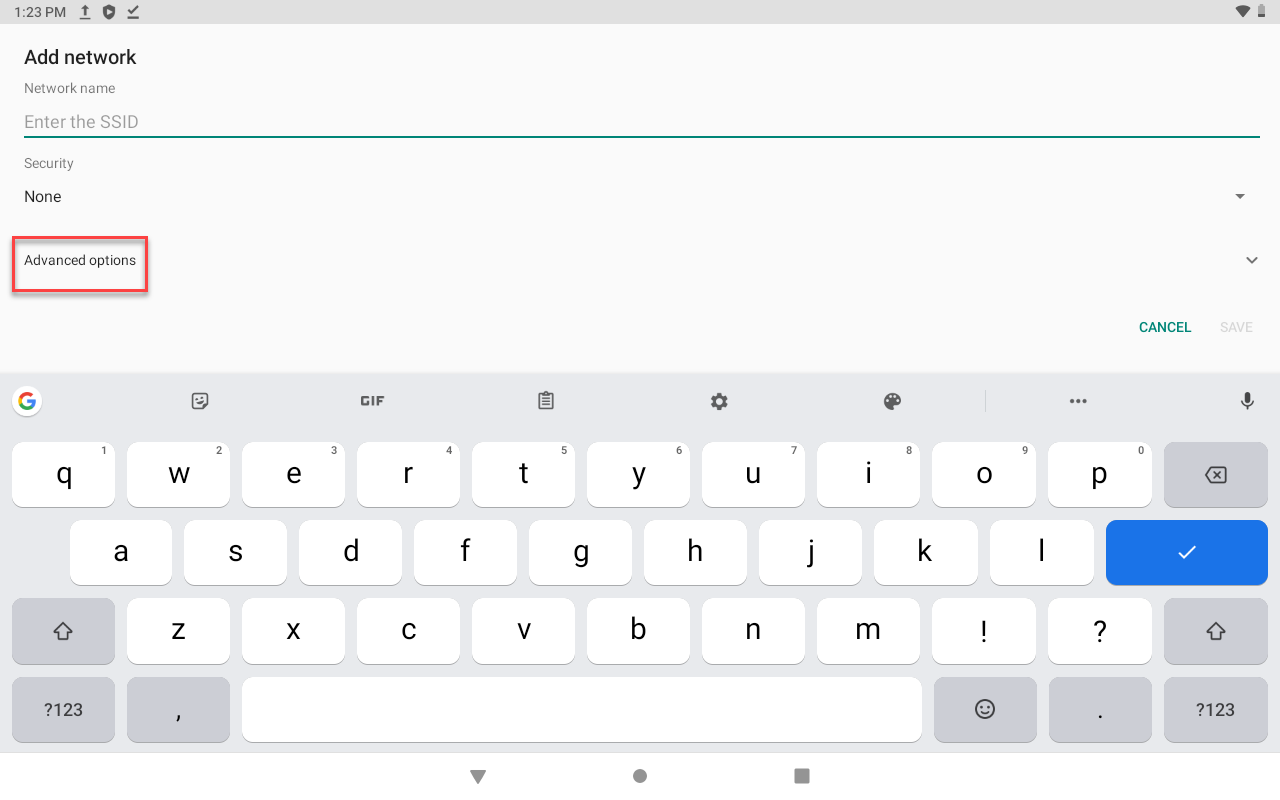
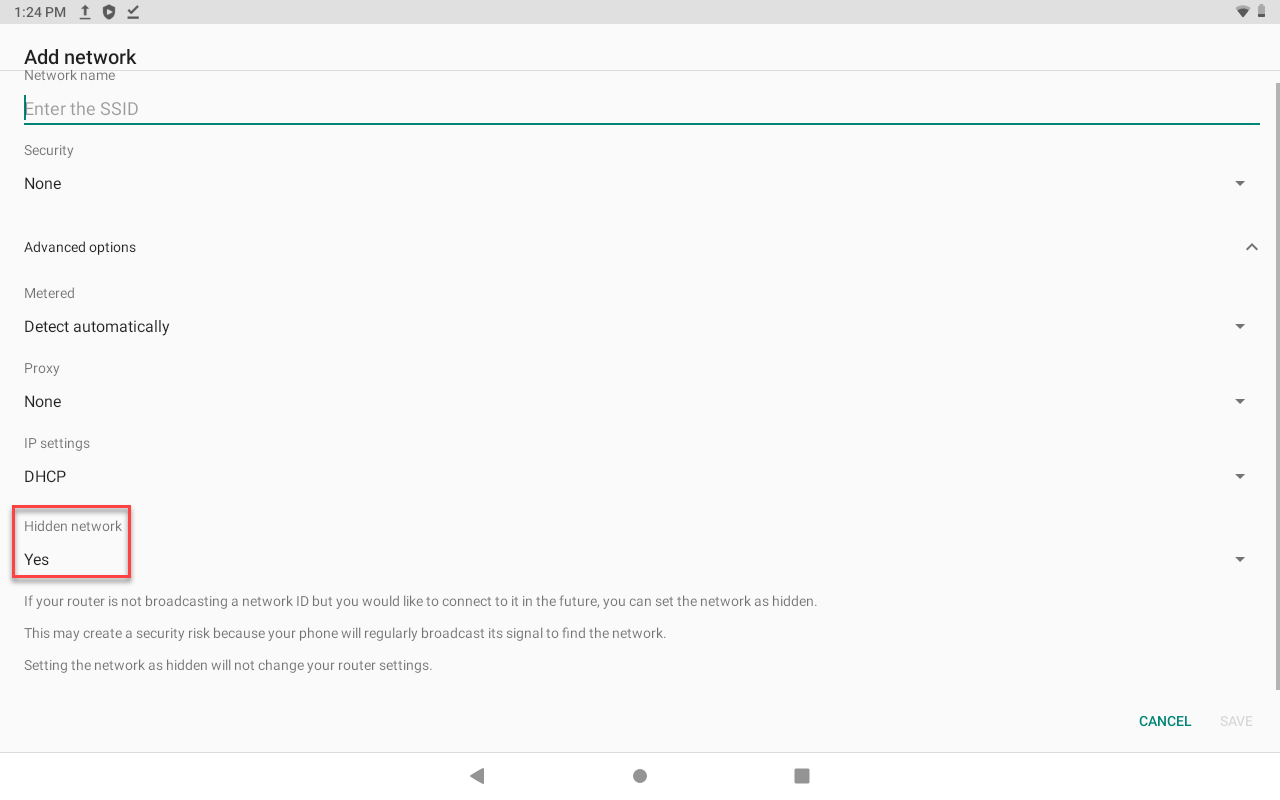
10. Tap Hidden network and change to Yes. Tap SAVE.
7. Move device closer to Wi-Fi router.
8. Try a different network or personal hotspot to complete download.
9. Clear app storage.
Clear Data on the DateCodeGenie® App
Clearing data removes all data from the app and requires redownloading the data from your portal. Clearing app data is completed on the device and can resolve a variety of issues.
WARNINGS
- DO NOT uninstall the app. Uninstalling the app will remove it from the device and will need to be reinstalled by making a repair call. See Contact & Support
- Clearing data will permanently remove all ad-hoc items added to the app. See What Does the Red Triangle and Circle on Menu Buttons Mean?
Before clearing app data, you must have:
- Wi-Fi or ethernet connection on the device See How to Connect the Device to Wi-FI or How to Connect the Device to Ethernet
- Username
- Password
- UDID See What is a UDID Number and Where Can I Find It?
NOTE
These steps are for DateCodeGenie devices with integrated printers devices only. For mobile app users, refer to your tablet's manufacturer information for tablet setup assistance.
Steps:
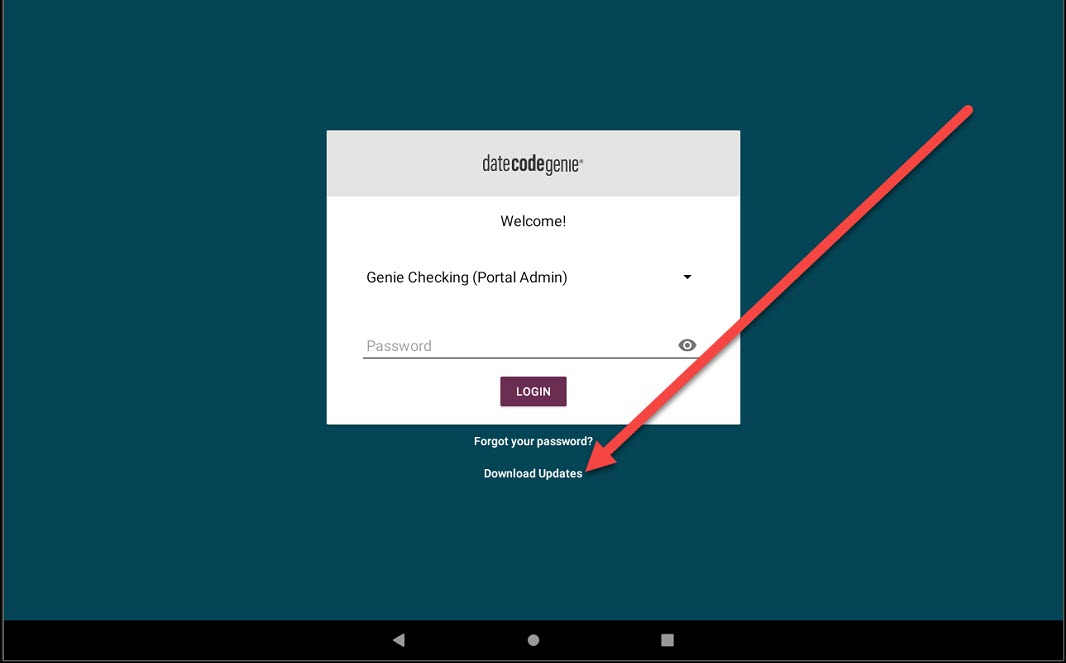
1. Tap Download Updates from the app login screen or in the app to upload Print History and Product Control Tracking data to the portal. See How to Download Updates on the App.
2. Tap the Home Button (circle icon).

3. Tap Settings.

4. Tap Apps & Notifications or Apps.
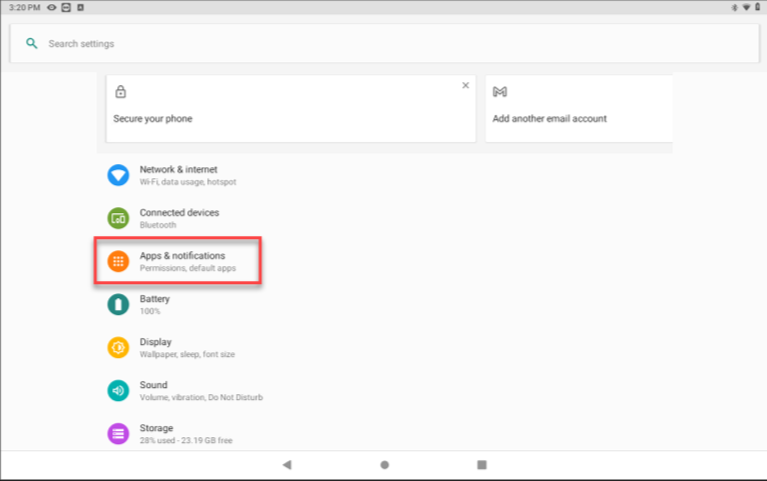
5. Tap the Date Code Genie app.
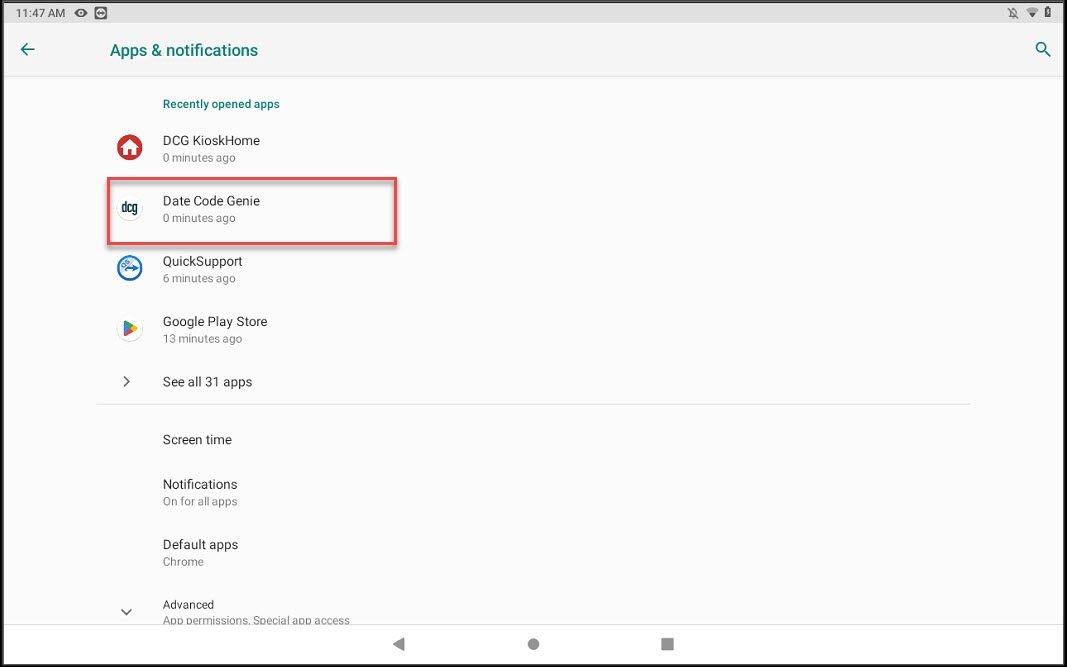
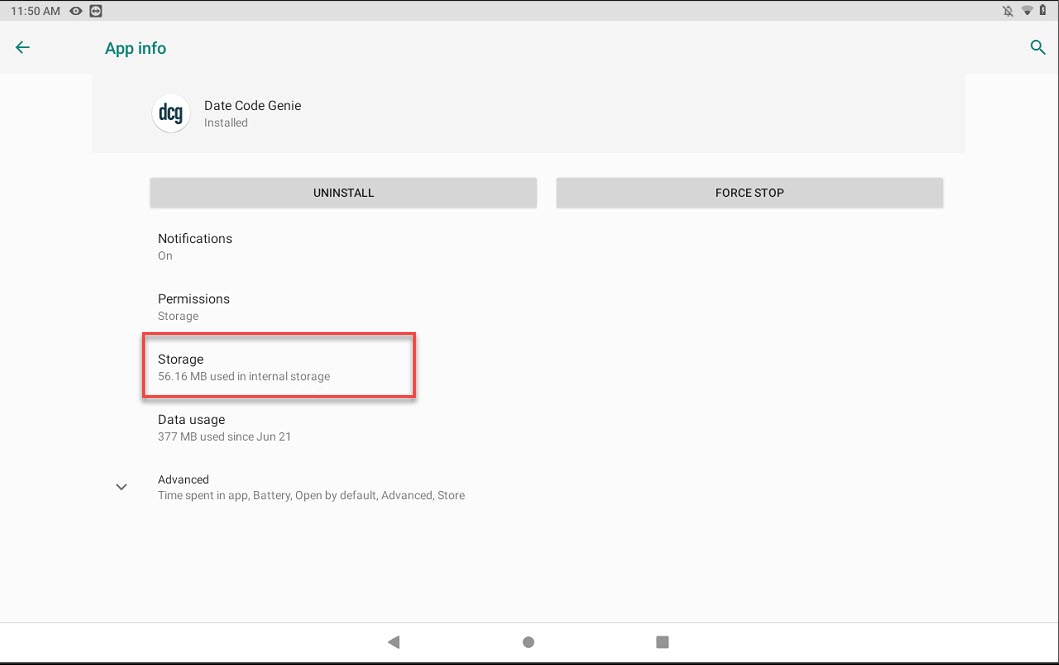
6. Tap Storage.
WARNING
DO NOT uninstall the app. If uninstalled, reinstall by contacting Technical Support. See Contact & Support
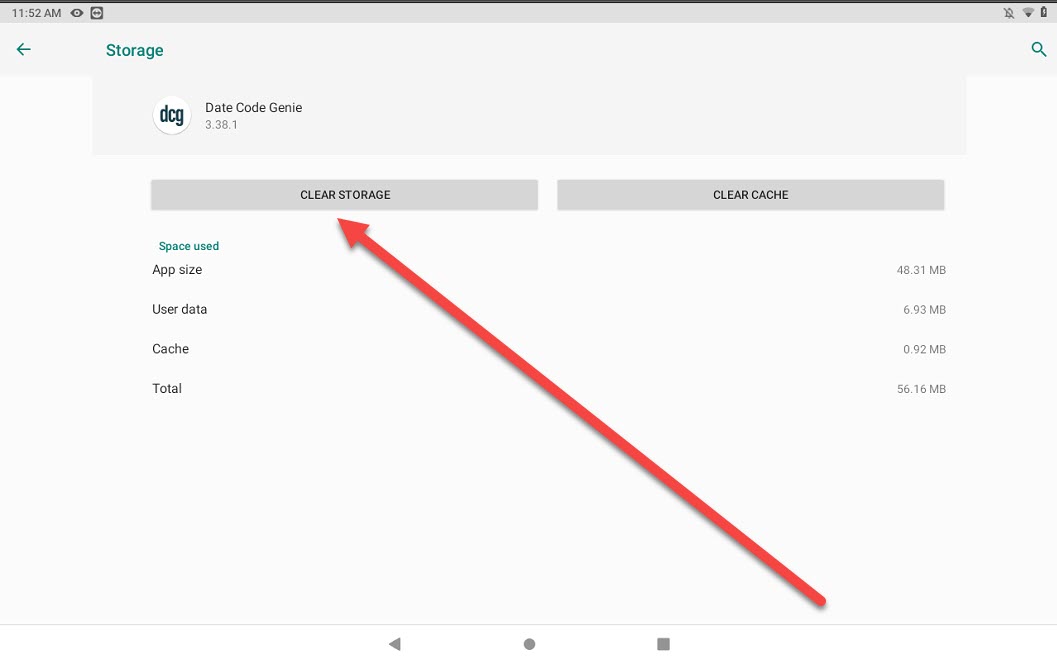
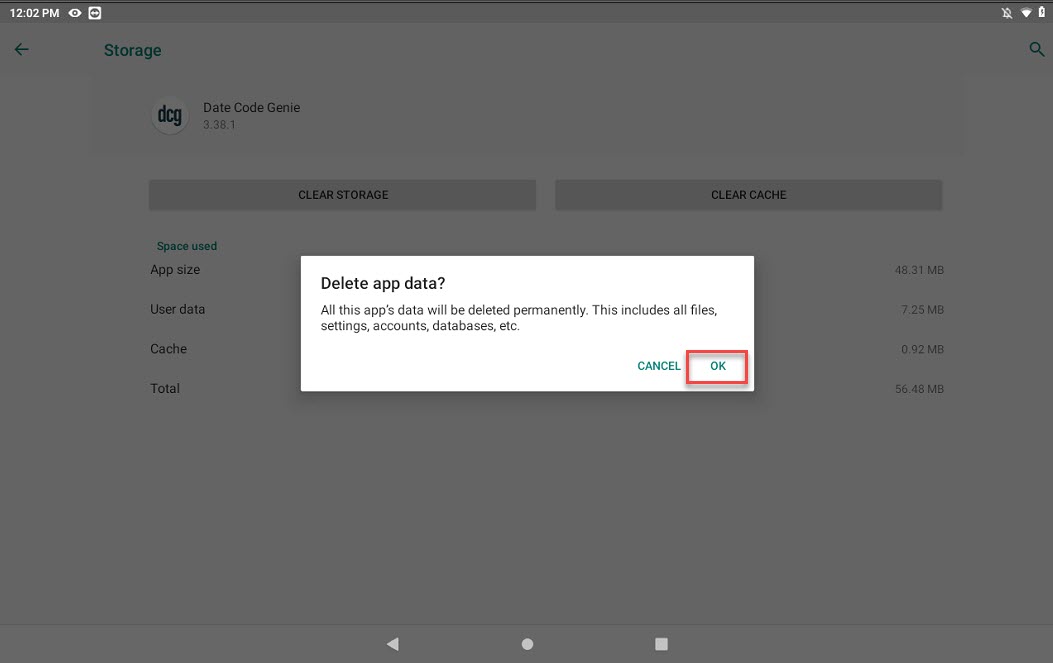
7. Tap the CLEAR STORAGE or CLEAR DATA button.
8. Tap OK from pop-up.
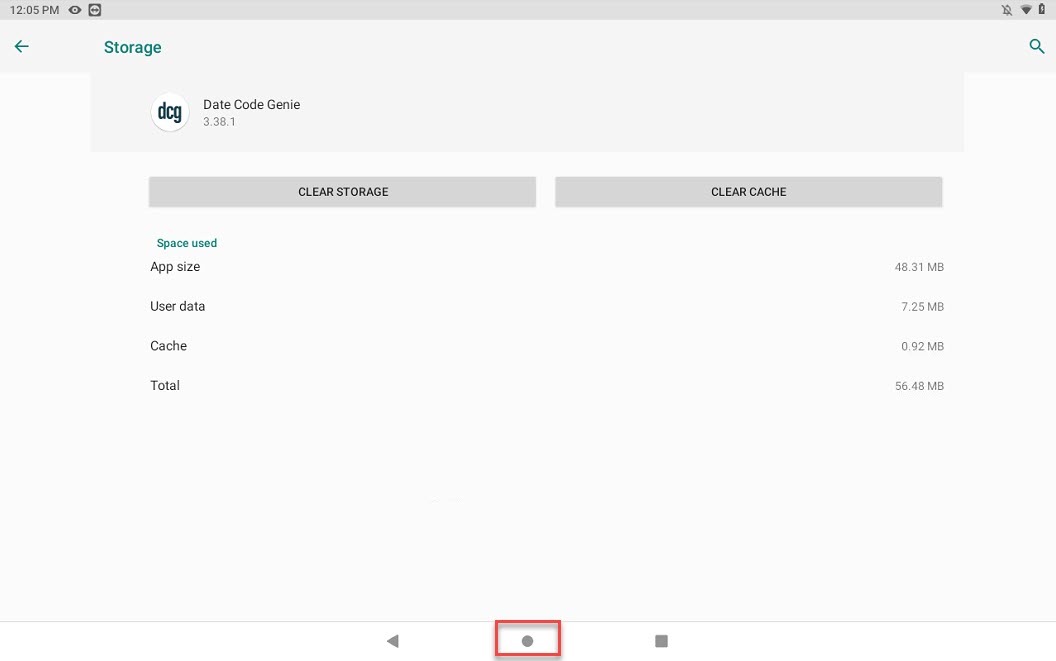
9. Tap the Home Button (circle icon) to return to the tablet home screen.
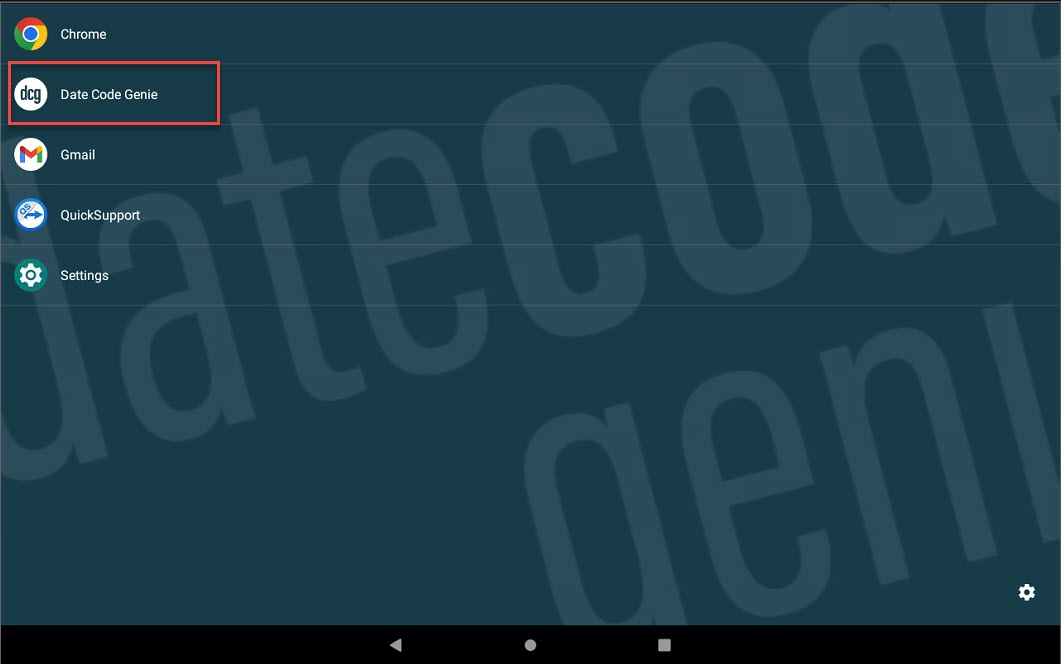
10. Tap the DateCodeGenie app to open.
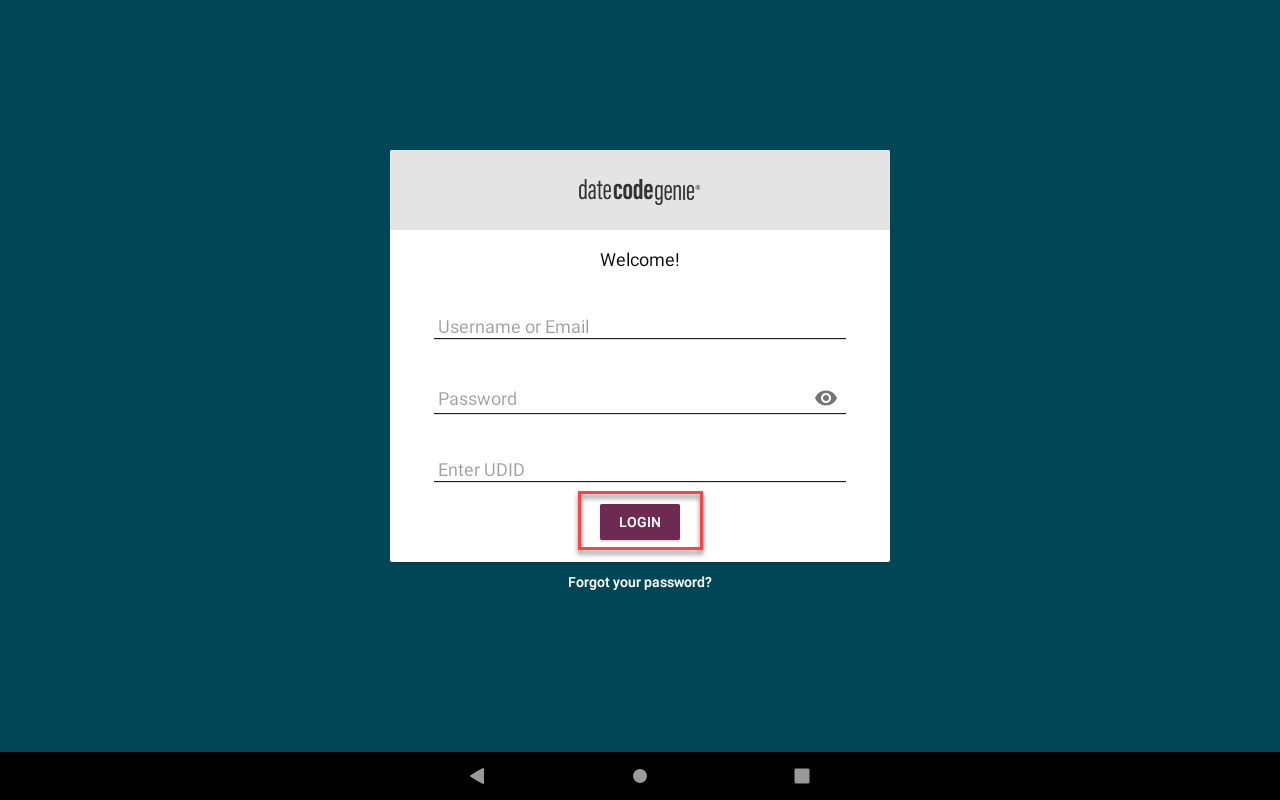
11. Type in the username, password and UDID and tap the LOGIN button.
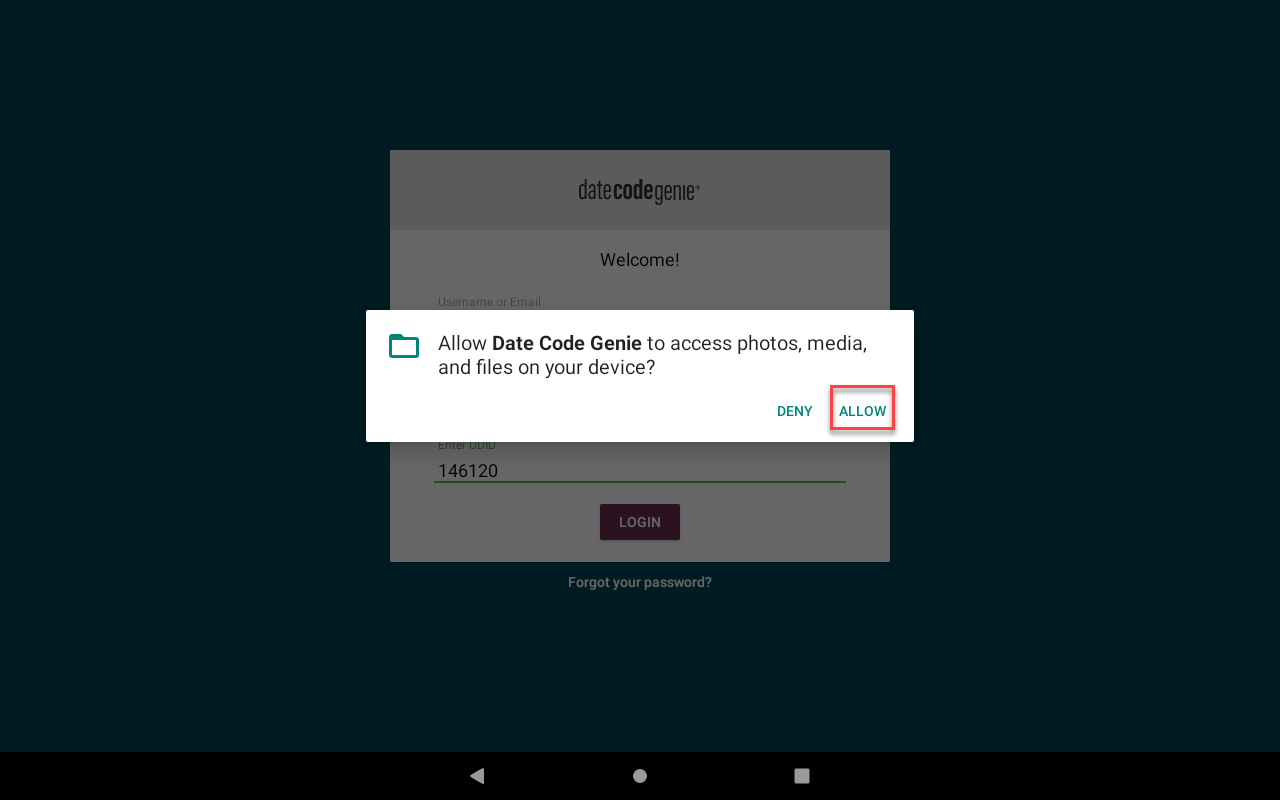
12. Tap Allow from the pop-up.
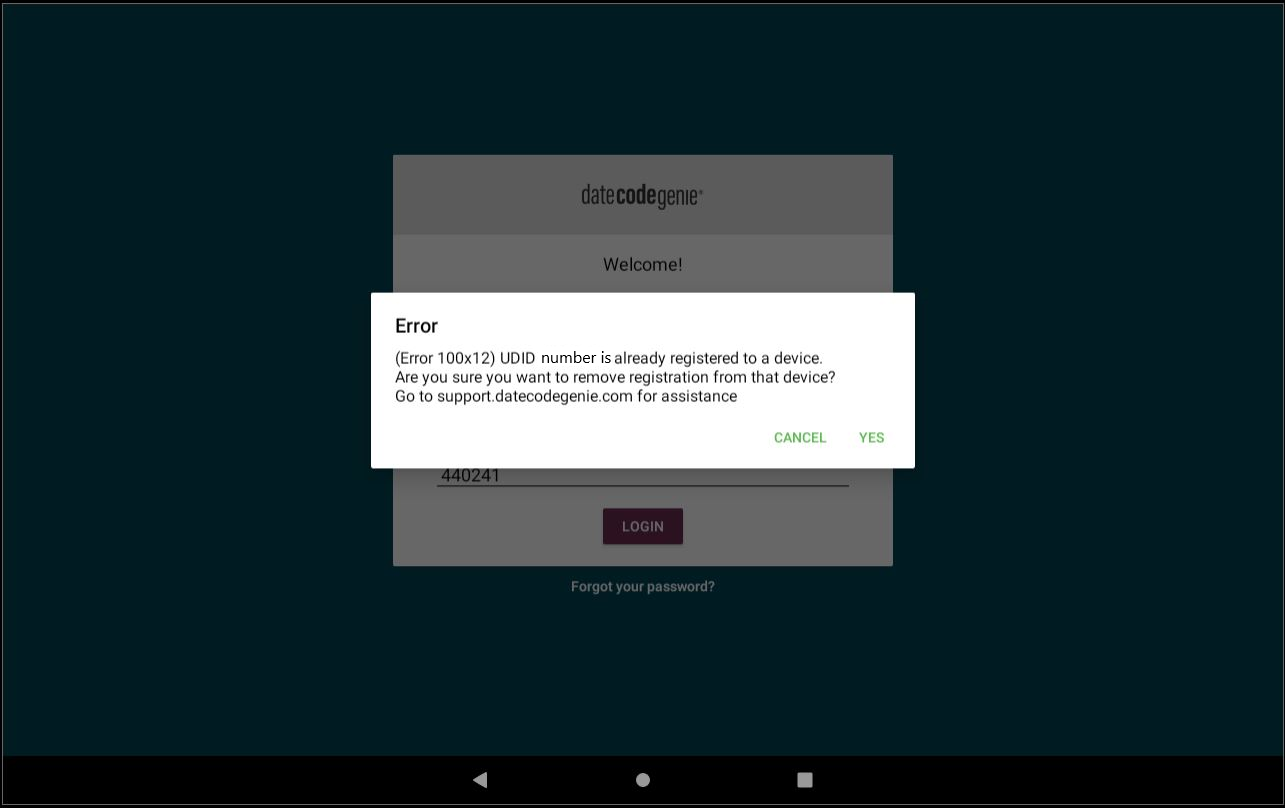
13. (Error 100x12) UDID Number Entered is Already Registered may appear. Verify UDID is correct, and if so, tap Yes.
14. Confirm the app is working correctly by printing a label.
Frozen Tablet
Tablet screen is frozen or stuck and not responding to touch after tapping several buttons including home button on the screen with the stylus and finger.
Steps:
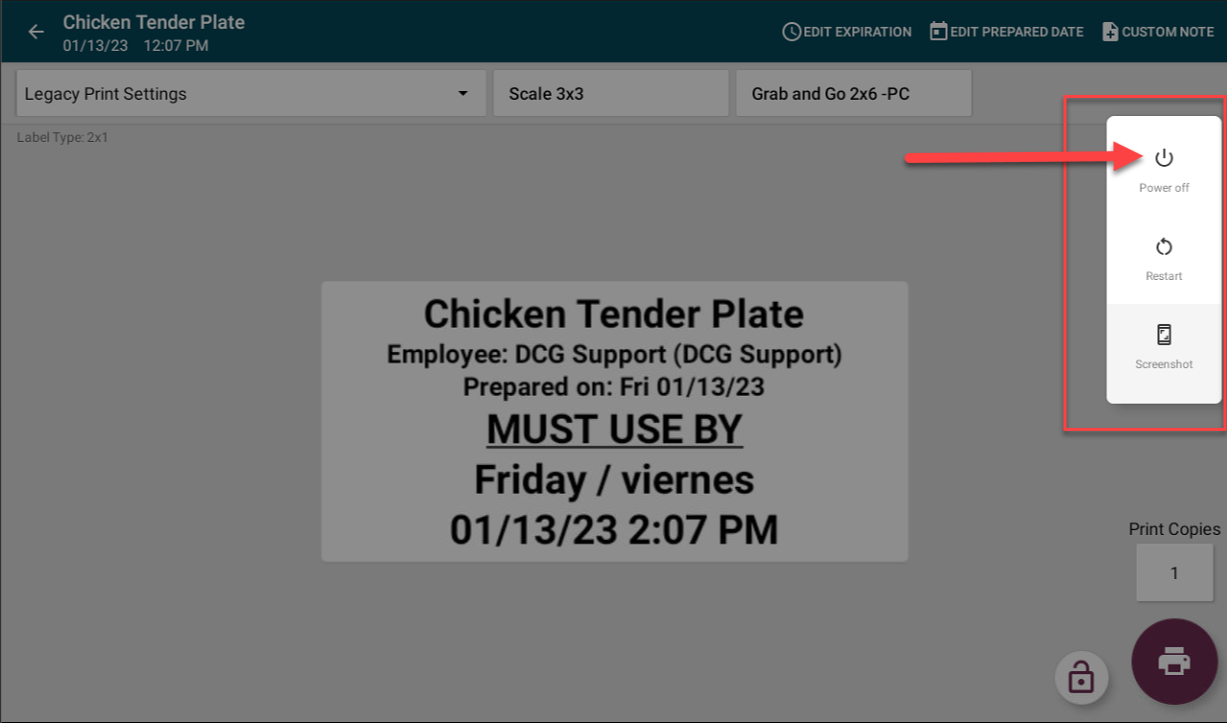
1. Press and hold the tablet power button releasing when options popup displays on right side of screen and tap Power Off button.
TIPS & TRICKS
If options popup does not display, press and hold the tablet power button continuously until screen is black. Tablet may restart automatically.
2. Press and hold tablet power button releasing when DateCodeGenie® image displays on screen.

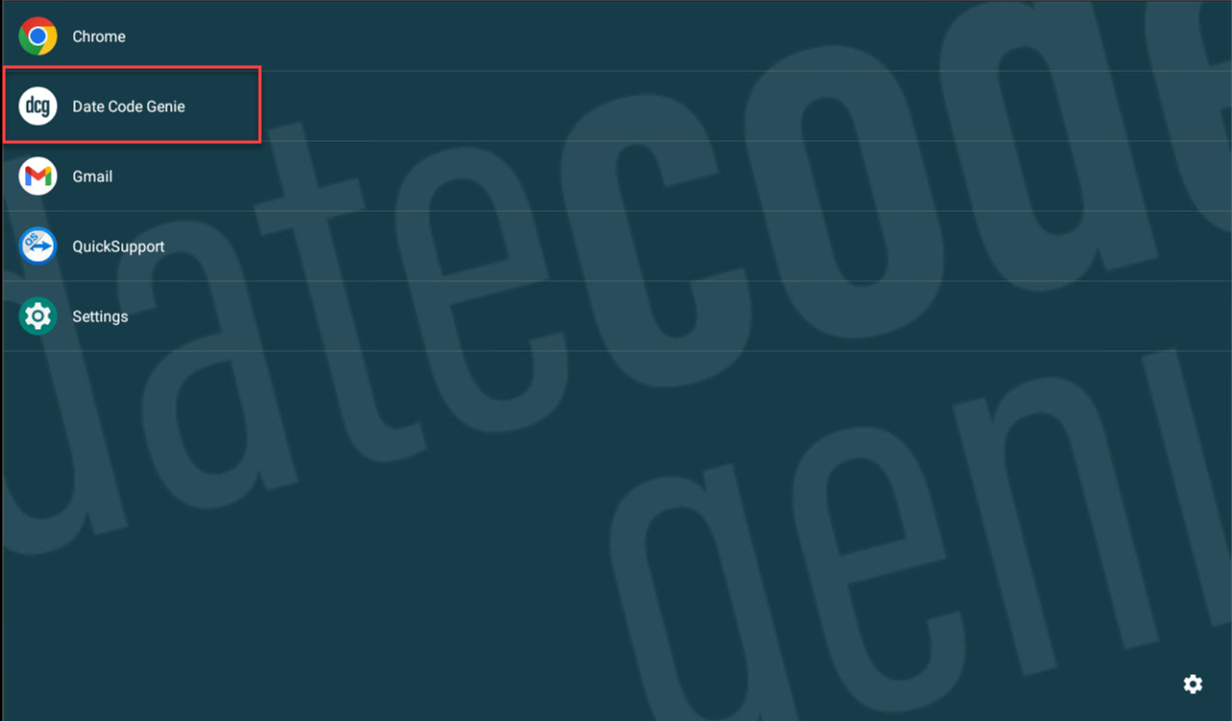
3. Tap the Date Code Genie app on the home screen to log in.
4. If the issue is not corrected, the tablet touch screen may have failed. See Tablet Touch Screen is Unresponsive for additional troubleshooting.
1. Close out of the DateCodeGenie app.
For closing apps, see your tablet manufacturer's information.
2. Check internet connection.
For managing internet connection, see your tablet manufacturer's information.
